Authorization
This document explains how your organization can securely manage access to the platform and data using three key Access Management Areas:
• Studio Access – Controls who can access and operate within the Data Services Designer environment.
• Access Context – Controls access to artifacts such as tables, scripts, semantic views, and dashboards.
• Catalog Access – Controls access of underlying data structures such as catalogs, schemas, and tables.
These components work together to ensure that users only see and access the data and dashboards relevant to their role.
1. Studio Access
1.1 Purpose
Studio Access defines who is allowed to enter the Data Services Designer environment and what level of control they have once inside. It acts as the first layer of access control, ensuring that only authorized users can log in to the platform.
Within Studio Access, users are assigned specific roles that determine their permissions. These roles govern what actions a user can perform. Different roles are typically aligned with different responsibilities, ensuring that users only have access to the functions relevant to their job.
1.2 Roles and Capabilities
The table below outlines each role and the capabilities assigned to it.
| Capabilities | User Role | Admin Role | Security Admin Role |
|---|---|---|---|
| View dashboards | ✅ | ✅ | ✅ |
| View Data Sync jobs, destinations, and schedules | ✅ | ✅ | ✅ |
| Create, update, and delete Data Sync jobs, destinations, and schedules | ❌ | ✅ | ✅ |
| Assign users/groups and manage Studio Access roles | ❌ | ❌ | ✅ |
| Assign users/groups and manage Access Context | ❌ | ❌ | ✅ |
| Assign users/groups and manage Catalog Access | ❌ | ❌ | ✅ |
1.3 How to Assign Studio Access
Step 1: Navigate to Authorization → Studio Access.
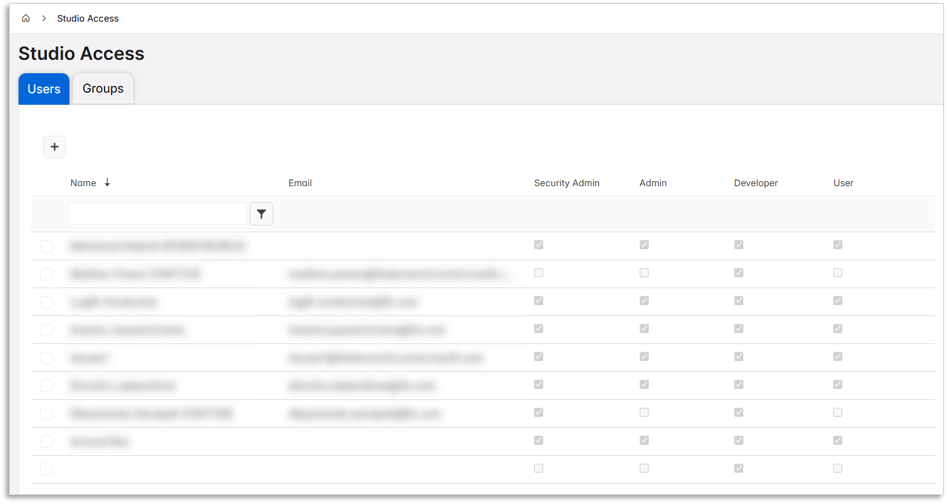
Step 2: Click on the Add icon to add a new user or group. This will lead to the New User/Group stepper.
Step 3: Choose the appropriate role based on each role's capabilities.
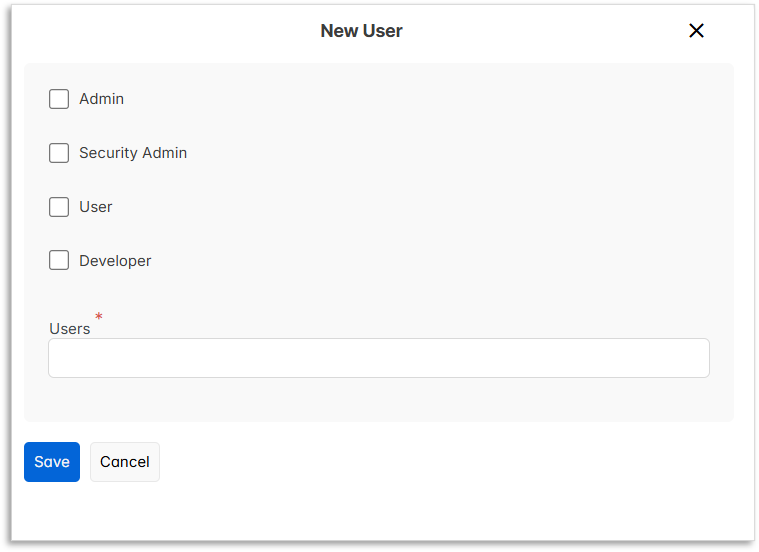
Step 4: Select the new user or new group you want to provide access to the Data Services Designer environment.
Step 5: Save the configuration.
2. Access Context
2.1 Purpose
Access Context defines and controls what supporting data assets a user can access at runtime within the platform. It acts as a security and governance layer that determines visibility and accessibility of underlying artifacts such as dashboards, views, tables, and schemas.
When a user interacts with the system, whether viewing a dashboard, querying data, or accessing a dataset; the Access Context ensures that only the artifacts permitted for that user are available. This helps maintain data security, enforce role-based access, and prevent unauthorized exposure of sensitive information.
Access Contexts are preconfigured and aligned with the specific Data Products your organization is entitled to. Each Data Product comes with its own set of predefined data structures and access rules, and the Access Context reflects these configurations. As a result, users automatically gain access to the relevant data artifacts associated with the Data Products they are entitled to use.
2.2 How to Assign Users/Groups to an Access Context
Step 1: Navigate to Authorization → Access Context.
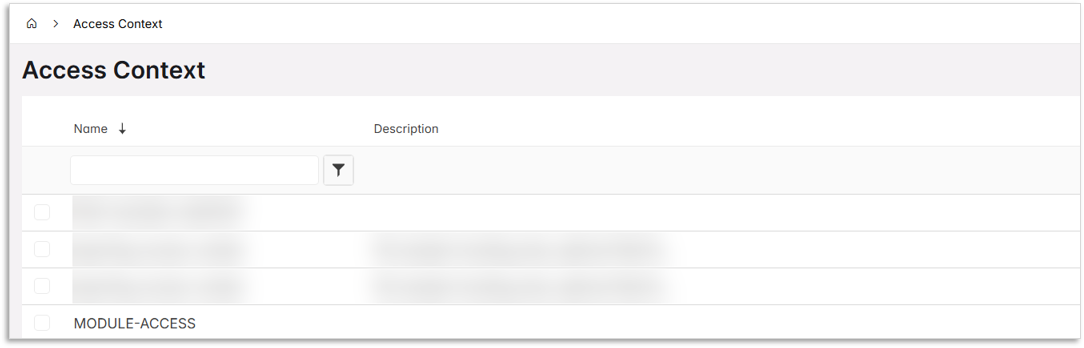
Step 2: Select the relevant Access Context and review associated artifacts (read-only).
Step 3: Add users or groups.
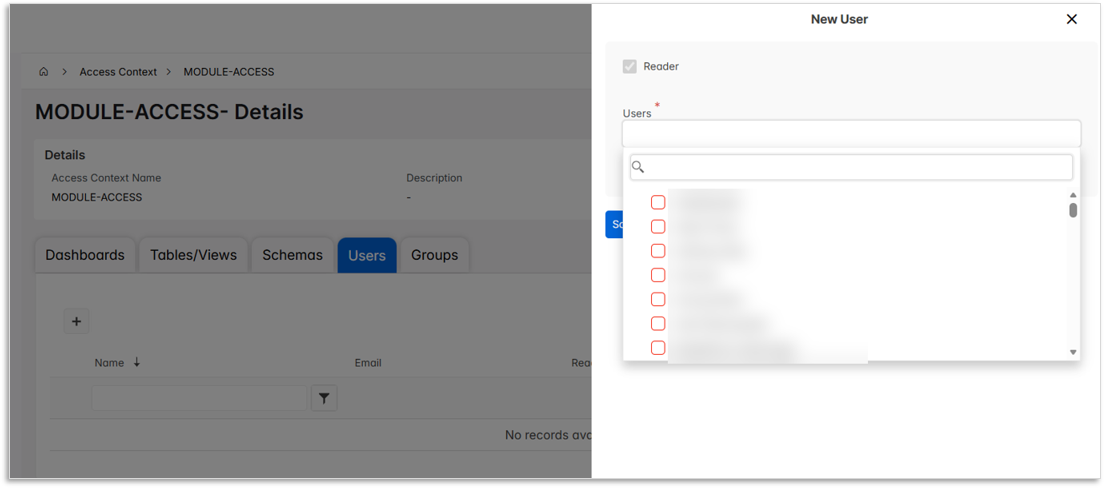
Step 4: Once the artifacts are reviewed and users or groups are added, save the changes.
Note
You cannot add or remove any artifacts from an Access Context as they are preconfigured and aligned with the specific Data Products.
3. Catalog Access
3.1 Purpose
Catalog Access provides the foundational layer of data access within the platform, determining whether a user can see and interact with core data structures such as catalogs, schemas, tables, and views.
It acts as a prerequisite for any form of data interaction. Without Catalog Access, users cannot access or query underlying data, even if they have permissions in other areas such as Studio Access or Access Context. In other words, it establishes the baseline visibility required before any higher-level permissions can take effect.
3.2 How to Assign Users/Groups to a Catalog Access
Step 1: Navigate to Authorization → Catalog Access.
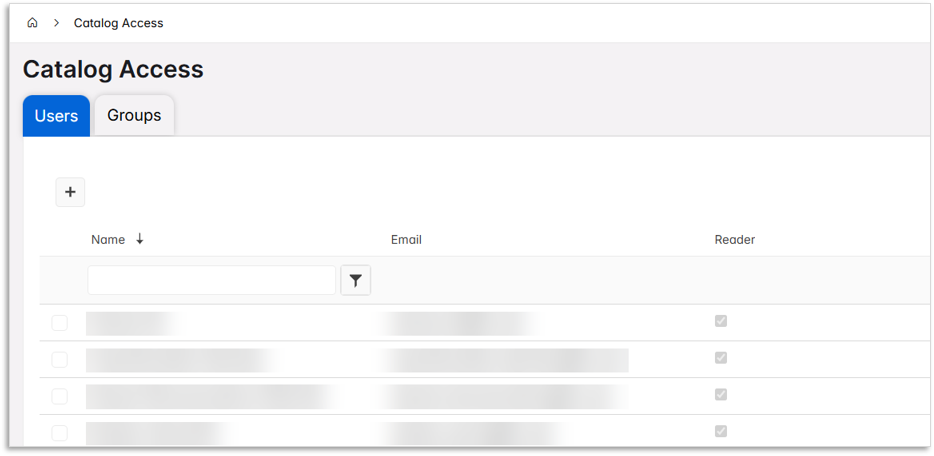
Step 2: Click on the Add icon to add a new user or group. This will lead to the New User/Group stepper.
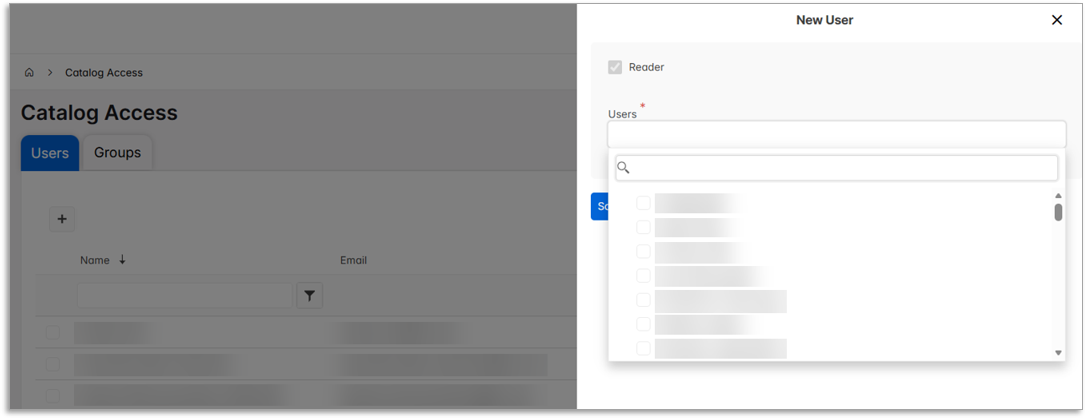
Step 3: Save the configuration.
4. How the Components Work Together
To successfully access a dashboard embedded in IFS Cloud, a user must have the required permissions across multiple access layers:
- Access Context – Grants visibility to the dashboard
- Catalog Access – Enables access to the underlying data powering the dashboard
All required permissions must be correctly configured; otherwise, the dashboard may not load or display data as expected.
5. Governance Recommendations
• Assign the Security Admin role to a small group of trusted users. Ensure that at least one user is always designated with the Security Admin role.
• Prefer group-based access over individual assignments.
• Review access periodically.
• Follow the principle of least privilege.
• Verify all three access layers when troubleshooting access issues.