Configuring a Data Sync Job
This page walks you through the step-by-step process of creating and managing a sync job associated with the Data Sync solution.
Note
Only users with the necessary security privileges can create sync jobs.
For more information on role-based security privileges, visit: Authorization
Step 1: Create a Destination
A Destination is your organization’s own data lake environment. At present, the Data Sync solution supports the following data lake environments:
- Amazon Simple Storage Service - AWS S3
- Azure Data Lake Storage - ADLS Gen2
- Google Cloud Storage - GCP-GCS
How to Create a Destination
Navigate to the Data Sync page → Destination Tab.
Click Add to create a new destination.
In the Destination Details stepper, provide:
- Destination Name
- Description
- Destination Type:
- Azure - ADLS
- AWS - S3
- GCP-GCS
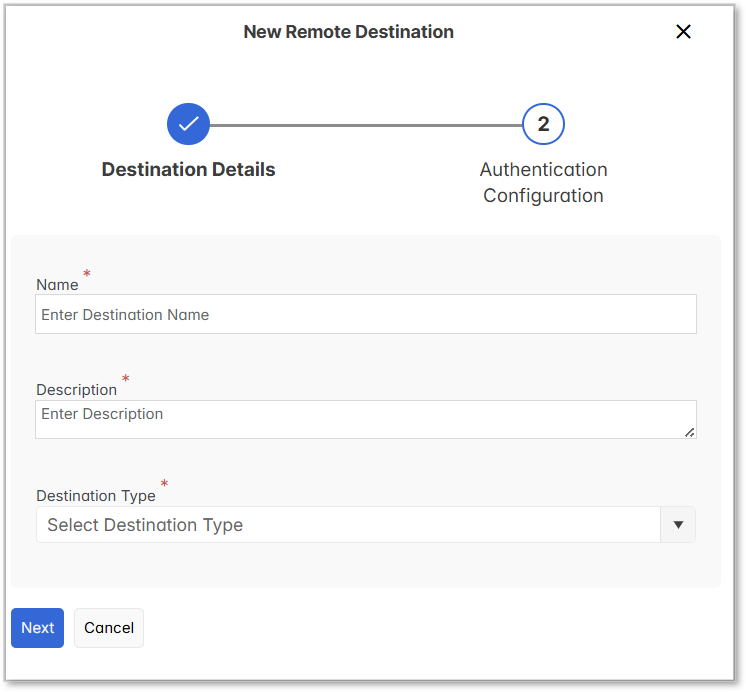
In the Authentication Configuration stepper, provide the following authentication fields depending on the destination type.
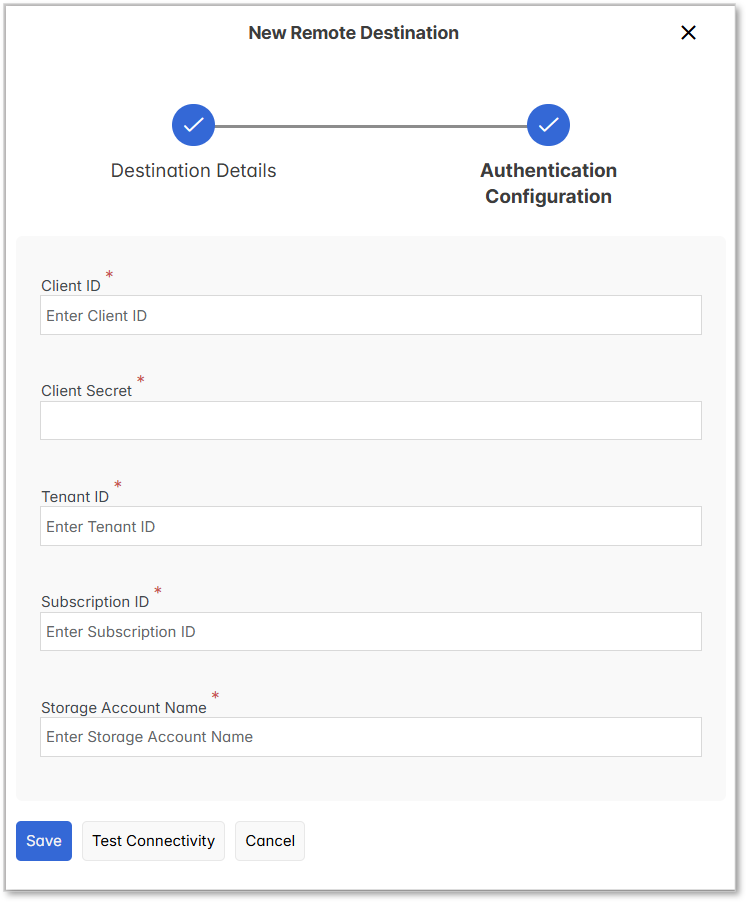
Fill in the following details if the destination type is Azure - ADLS:
- Client ID – Identifies the application used to access the data lake.
- Client Secret – Authentication secret associated with the Client ID.
- Tenant ID – Azure AD tenant identifier.
- Subscription ID – Azure subscription tied to the storage account.
- Storage Account Name – Target storage account where data will be synced.
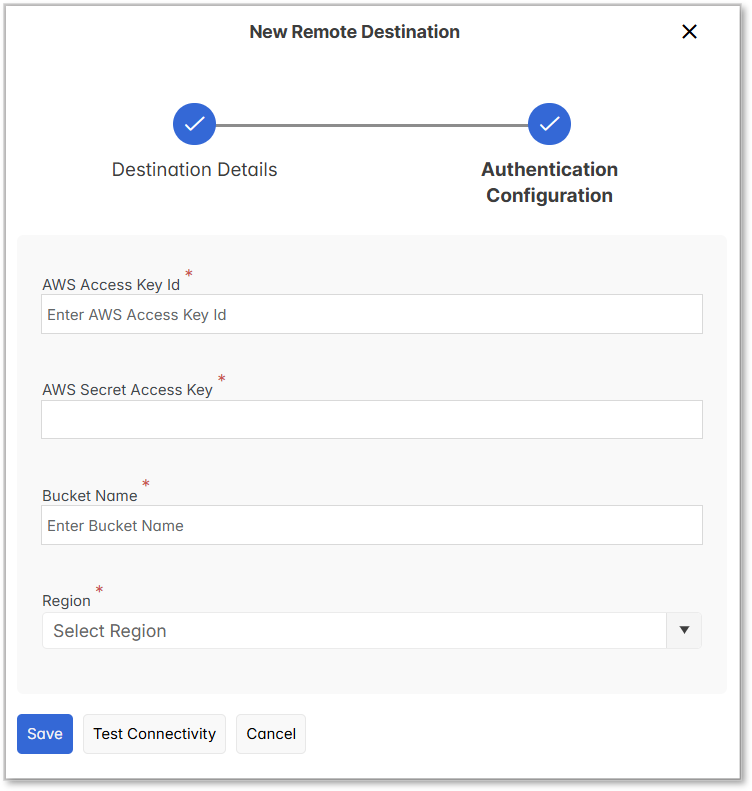
Fill in the following details if the destination type is AWS - S3:
- AWS Access Key ID – The unique identifier associated with your AWS account credentials.
- AWS Secret Access Key – The confidential key paired with the Access Key ID.
- Bucket Name – The name of the target Amazon S3 bucket where the synchronized data will be stored. The bucket must already exist in your AWS account.
- Region – The AWS geographical region where the S3 bucket is hosted (e.g., us-east-1, eu-west-1). The selected region must match the region in which the bucket is created.
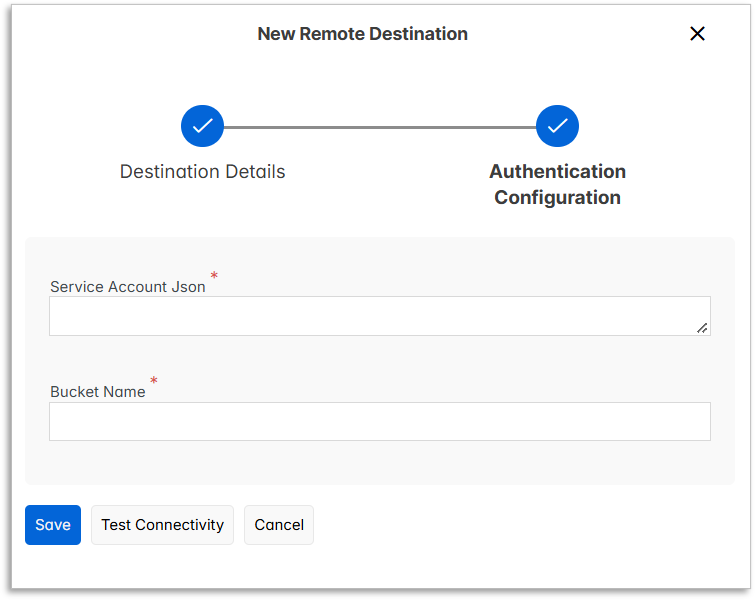
Fill in the following details if the destination type is GCP-GCS:
- Service Account Json-The name of the service account used to authenticate and authorise access to the GCP Cloud Storage destination.
- Bucket Name-The name of the bucket where the data will be stored.
We recommend verifying the destination connectivity before saving the configuration.
Click Test Connectivity to validate the connection. This action checks whether the destination is reachable and confirms that the provided configuration details are correct.
A message confirms whether the connectivity test succeeded or failed.
Finally, click Save to complete destination setup.
Step 2: Create a Schedule
Schedules define when a sync job should run.
How to Create a Schedule
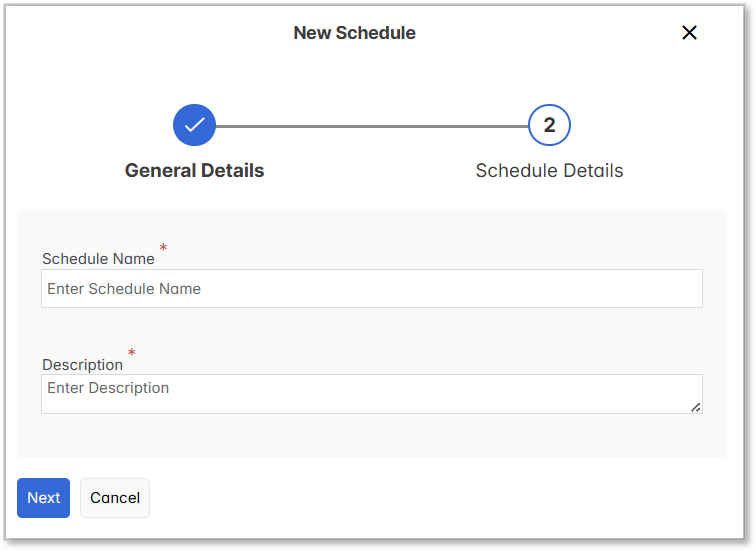
Navigate to the Schedules tab under the Data Sync page.
In the General Details stepper, provide:
- Schedule Name
- Description
In the Schedule Details stepper, select the time interval to define execution timing.
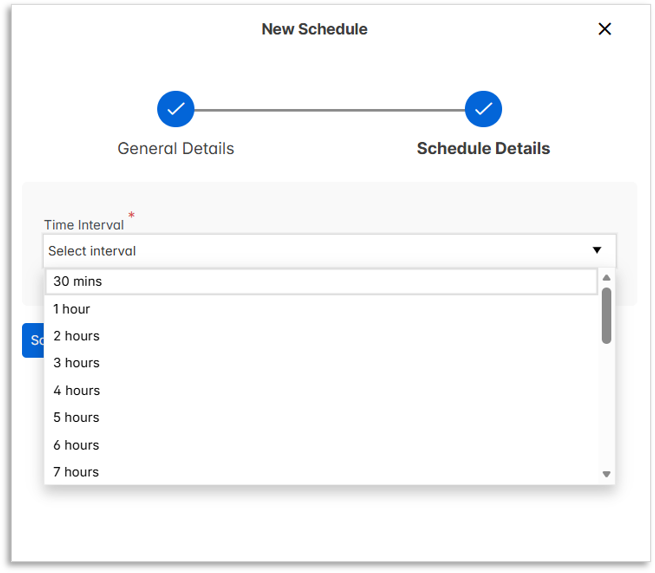
Click Save Configuration to complete the schedule setup.
Step 3: Create a Data Sync Job
A sync job ties together the source, destination, and schedule.
How to Create a Sync Job
Navigate to the Job Definitions tab under the Data Sync page and click the Add button.
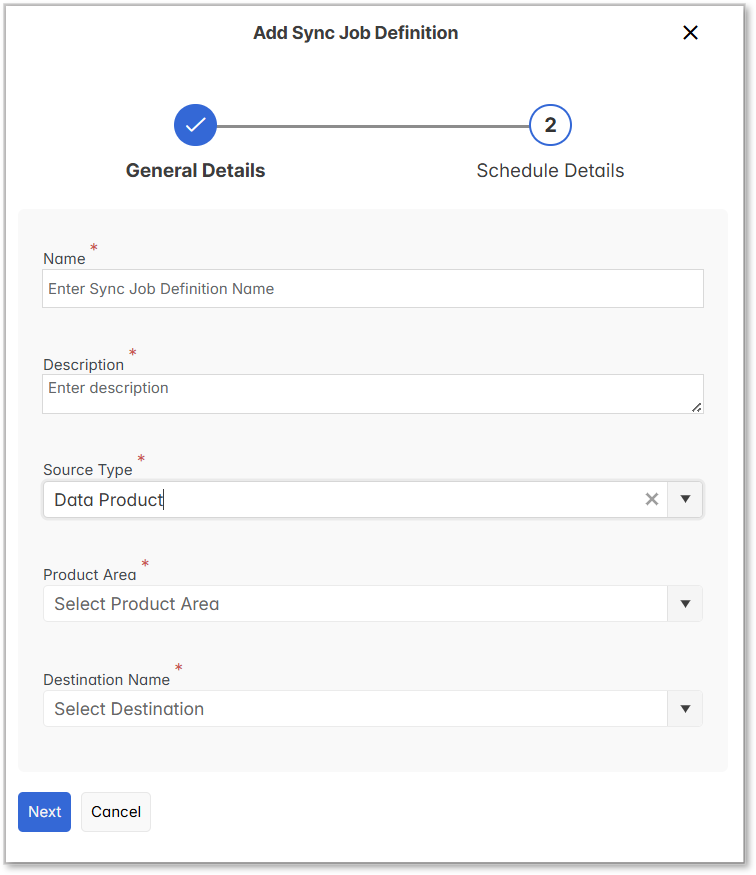
In the General Details stepper, provide:
- Sync Job Definition Name
- Description
- Select a Source Type:
- Data Product – Syncs all tables linked to the selected Data Products.
- Tables – Allows selecting specific tables within the Data Products, as well as tables you have enabled for data streaming in IFS Cloud.
- Data Lake Folder – Syncs files and documents in a selected Data Lake folder.
- Select a Destination created in Step 1.
In the Schedule Details stepper, select a Schedule created in Step 2.
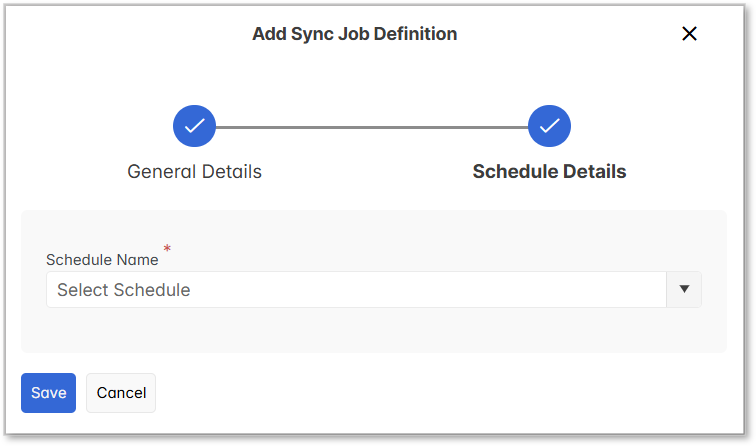
Click Save to create the sync job.
Once saved, the job runs according to the defined schedule.
Sync Logs
The Sync Logs section provides insights into past job executions. Below are the log items and what they indicate:
- Sync Job ID – A unique identifier assigned to each execution instance.
- Job Definition – The name of the sync job configuration used during execution.
- Start Time – The exact timestamp when the job execution began.
- Duration – Total time taken to complete the sync process.
- Destination – Indicates the data lake environment to which the data was transferred.
- Data Transferred – The amount of data that was synchronized during the execution.
- Created By – The user who originally created the sync job.
- Message – A descriptive message indicating job progress or completion details. Useful for troubleshooting.
- Last Run Status – Overall result of the execution:
- Success – Job completed without issues.
- Failed – Job encountered errors.
- In Progress – Job is currently running.