Order Report
Introduction
The Order Report feature enables you to generate Operational Reports and IFS Business Reports based on available report templates. Depending on your privileges within the system, you can either create a report template yourself or have someone with the appropriate access privilege create it for you. Once created, the template can be published in IFS Cloud, allowing you to generate a report according to the created template.
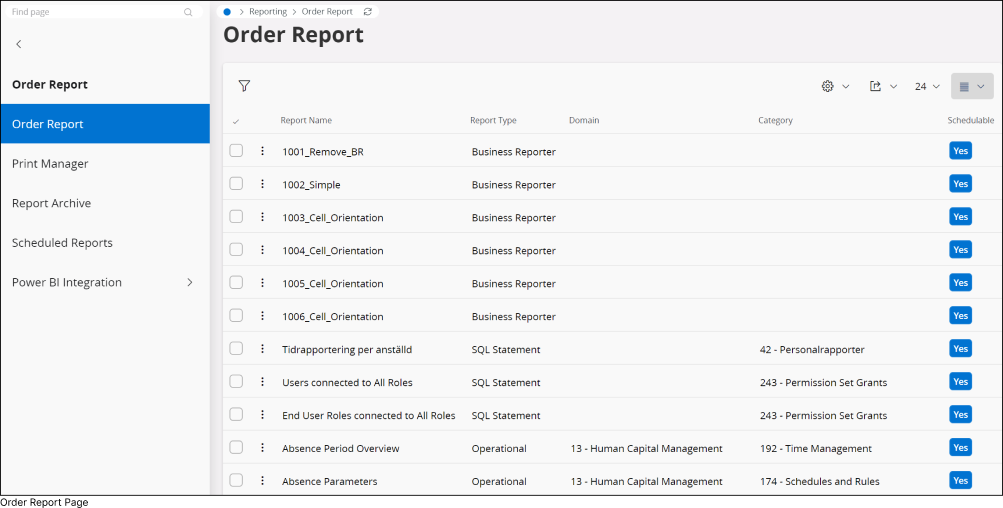
To order a report go to Reporting > Order Report Page in IFS Cloud Web using Navigator Menu.
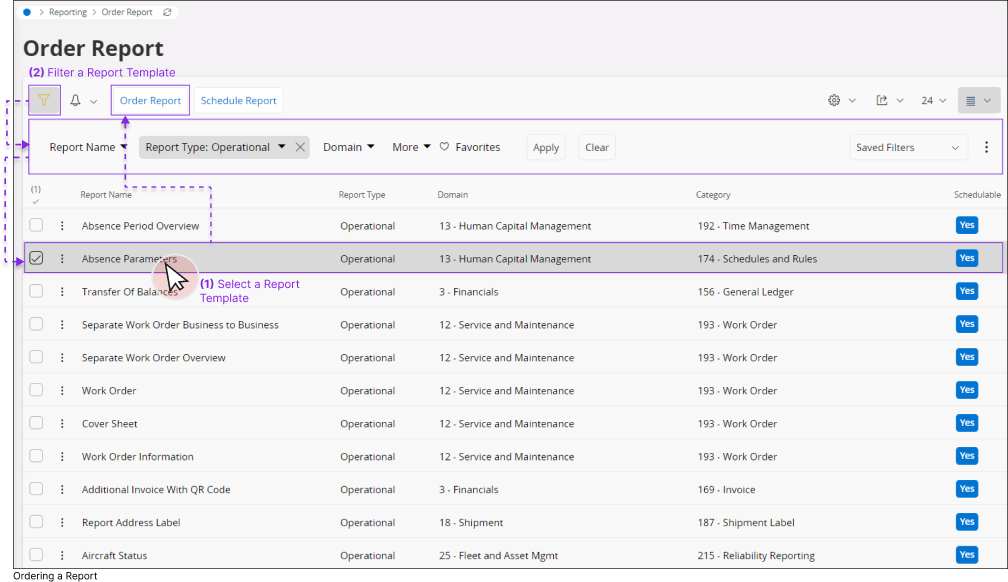
Ordering a Report
Once you are in the Order Report page:
- Select the desired report template from the list (1)
or
- Utilize the filter option to refine your search for the desired report (2), and then select the desired report template from the list (1).
After selecting a desired report template, you'll have access to the Order Report functionality, enabling you to generate a report.
Order Report Assistance Page
Once you select a desired report template from the list:
- Click the Order Report button to access the Order Report Assistance page and initiate the report creation process.
The Order Report Assistance page offers step-by-step guidance for the report creation process.
Section 1: Parameters
The Parameters section enables you to define all the parameters you wish to have before generating the report. This ensures that the report includes only the data within the defined parameters.
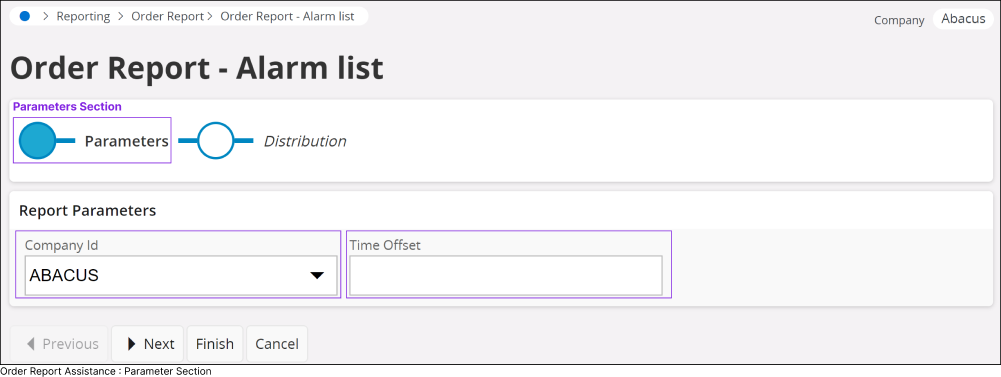
- Report Parameters: Report parameters vary depending on the report type and underlying configuration. Some reports do not require any parameters to generate the report. Fill out the report parameter section with the desired parameter values and proceed to the next section.
Section 2: Distribution
The Distribution section enables you to define which users or user groups should have access to the generated report.
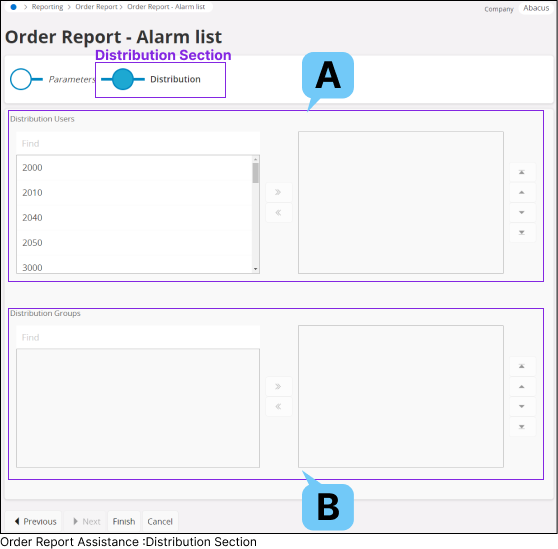
- A : Distribution Users
- Select all users from the left column and transfer their names to the right column to distribute the report to each individual user.
- B : Distribution Groups
- Choose all user groups from the left column and shift the group names to the right column to distribute the report to each user group. Once you finish selecting all the users and user groups, click the finish button to proceed
Order Report : Summary Page
Once you finish selecting all the users and user groups, click the finish button to proceed to Order Report Summary screen.
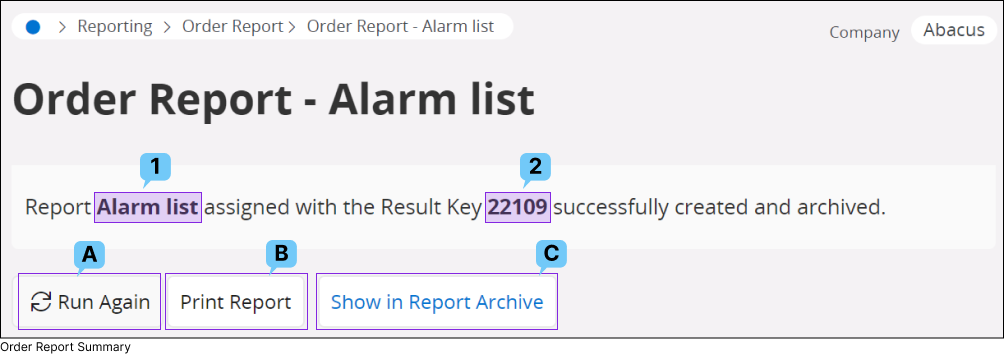
The Order Report Summary message shows a summary of the report order details. It provides information about the report type (1) and the result key (2), which can be used to identify the report you have ordered from the report archive.
In addition, Order Report Summary window consists of following options:
A:Run Again
 |
You can repeat the report ordering process to order the same report again. |
B: Print Report
 |
You can print the report into your desired physical or digital format. |
To learn more, go to: Extracting Information in IFS Cloud Web : Print a Report
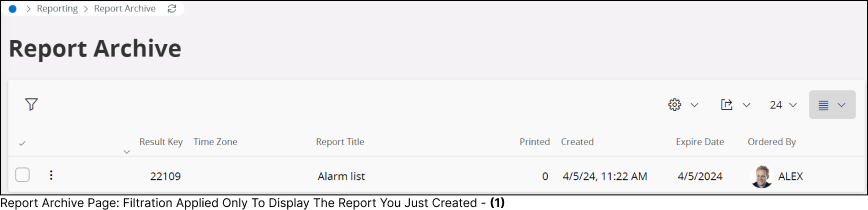
C: Show in Report Archive
 |
Press this button to navigate to the report archive page. Upon arrival, the page will display a filtered report archive table (1) showing only the corresponding row for the selected report you just ordered. |
If you wish to view all reports within the archive, click the Report Archive tile in the navigator menu to return to the page without any applied filters (2).
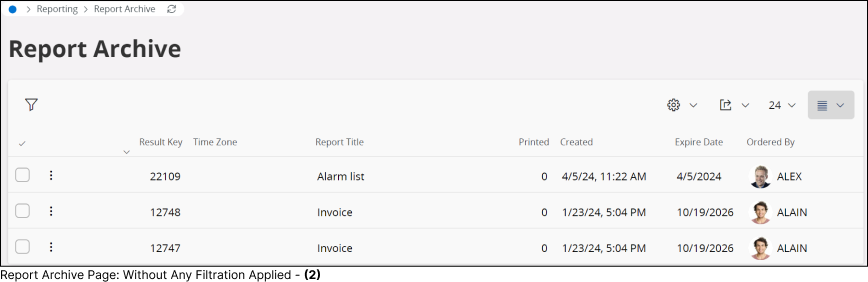
Report Archive Page
The Report Archive page contains a list of all reports ordered by users of IFS Cloud. Upon selecting any row within the report archive, the following options will become visible to you.
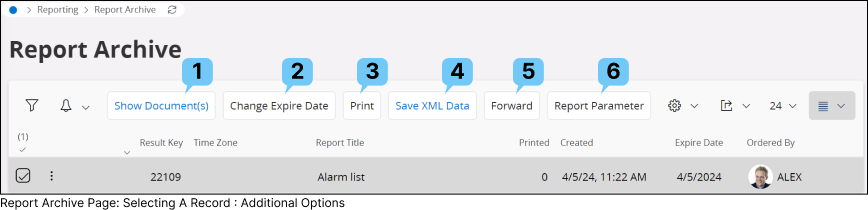
1 : Show Document(s)
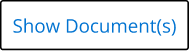 |
Click the Show Document(s)(1) button to access the report you've requested. Please note that the report will only be visible if you have submitted it for printing. If you haven't submitted it for printing, you will receive the following notification. |
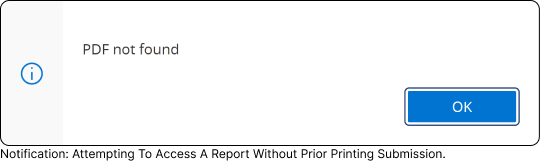
If you have submitted the report for printing, pressing this button will initiate the download of the report to your local repository for viewing.
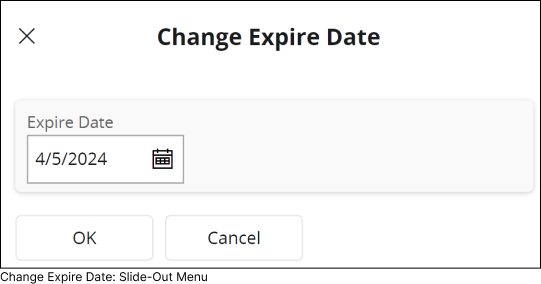
2 : Change Expiry Date
 |
Click the Change Expire Date(2) button to adjust the expiration date of the report. This action will open the Change Expire Date slide-out menu, enabling you to select a new expiration date. |
3 : Print
 |
Click the Print(3) button to print the selected report in your preferred format. This action will open the Report Format and Output slide-out menu, allowing you to specify the print options for the report. |
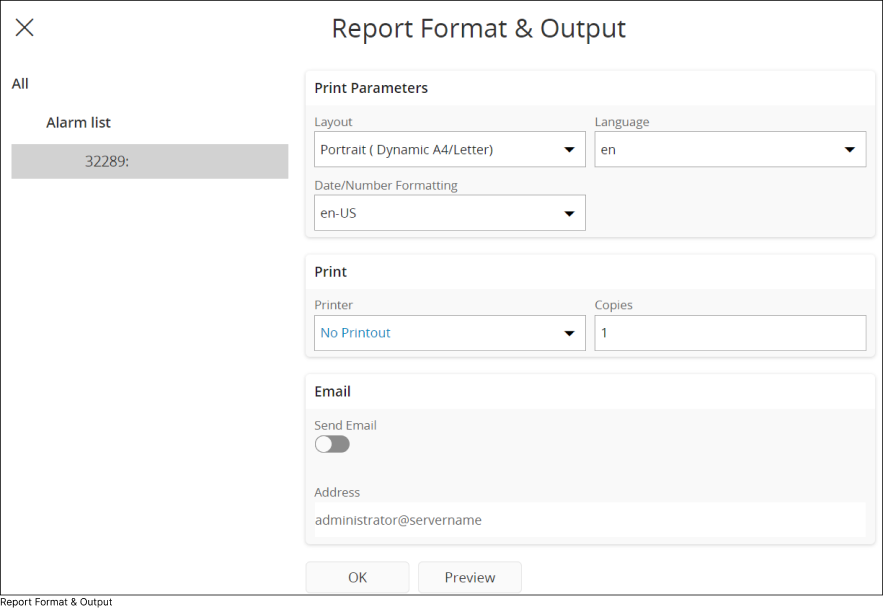
To learn more, go to : Extracting Information in IFS Cloud Web - Print a Report page
4 : Save XML Data
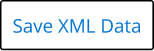 |
Click the Save XML Data(4) button to download the report data in XML format. |
5 : Forward

|
Use this option to forward the report to selected users or user groups. Once you click the Forward(5) button it will open up the Forward Assistance slide out menu. |
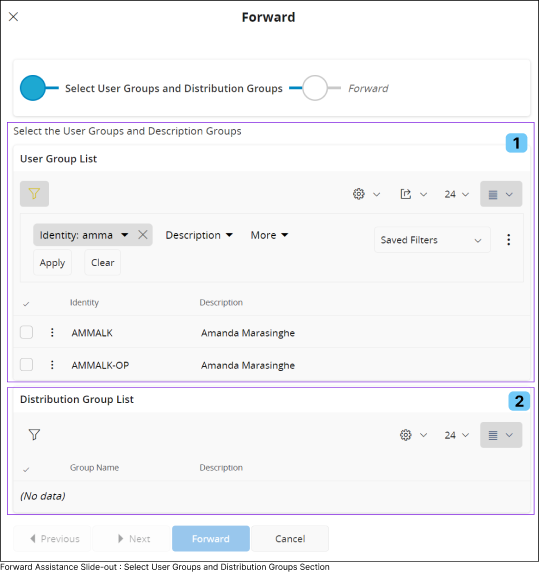
Section 1: Select User Groups and Distribution Groups:
During this initial step, select all the User Groups List(1) and Distribution Group List(2) from the two sections, to whom you intend to forward the report. Additionally, you have the option to filter the users or distribution groups, enabling you to swiftly locate the desired users or groups.
Section 2: Forward Step
During the Forward step, you can complete your selection of users and user groups for report distribution. Utilize the Selected User Group List(1) section to finalize individual users and the Selected Distribution Group List(2) to finalize user groups.
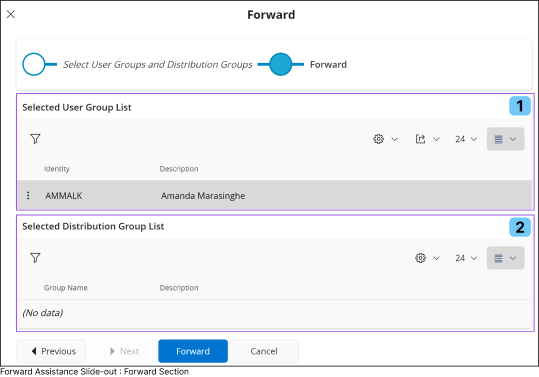

|
Once you finalize all the users and user groups, click the Forward button to distribute the report. |
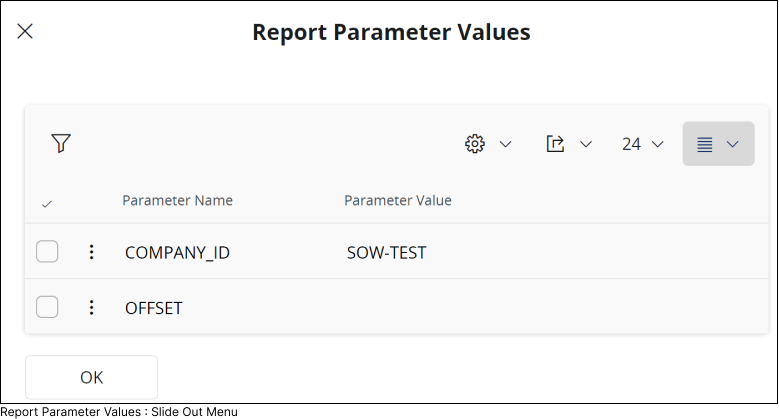
6 : Report Parameter
|
Use this option to view all the applied parameters during Order Report process. This will open up the Report Parameter Values slide out menu which will display all the applied parameters in tabular format. |