IFS Cloud Remote Assistance feature�connects remote experts with technicians or customers to help instantly diagnose and solve issues to increase first-time fix rates and eliminate site visits. Capture expert knowledge for onboarding, training and customer service.
Accessing Remote Assistance in IFS Cloud
If the Remote Assistance feature is enabled in your
IFS Cloud, the corresponding icon will be available in your navigation bar for easy access to the feature.
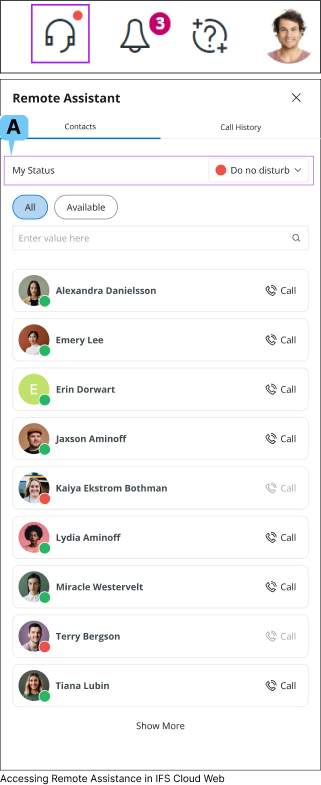
Click the Remote Assistance Icon to open the Remote Assistance Panel
A.
My Status
Select this option to change your Remote Assistance Status for IFS Cloud Web.
Once you update your status, the revised status will be displayed for all users who have access to Remote Assistance.
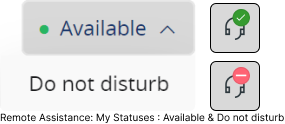
There are two types of statuses under My Status(B) section (Available, Do not disturb). When you change your remote assistance status,
the remote assistance icon displayed on the Navigation Bar will update as shown in the above diagram to reflect your selected status.
If you have your status set as :
Available : Other Remote Assistance users will be able to call you. Do not disturb : Other Remote Assistance users will not be able to call you.
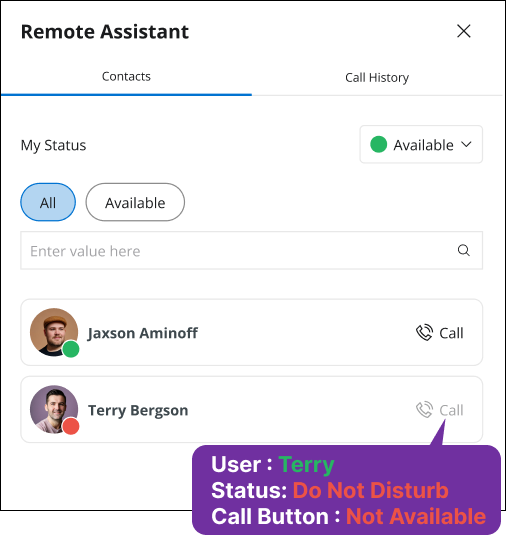
Example: Consider the following Scenario
User : Terry - Changed his status to Do not disturb
User : ALEX - Open his Remote Assistance menu to make a call
In ALEX�s Remote Assistance menu, Terrie's status displayed as Do Not Disturb
User ALEX cannot make a call Terry because the Call button will not be displayed
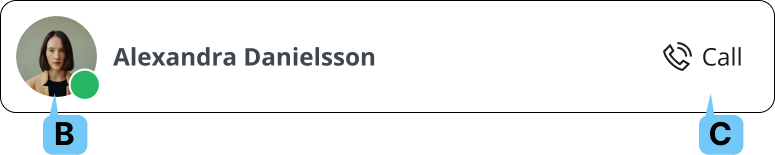
Properties of a Remote Assistance Contact Tile
Contact tiles in Remote Assistant contacts
section has the following features:
B.
Online Status
Online status of the user will be displayed with a green color or red color dot
Green: User is online
Red: User status set to
Do Not Disturb or user is offline
C.
Call
Use this option to call the users in your contact list via Remote Assistant
If you're placing a call using Remote Assistance and wish to cancel it, you can do so by pressing the Cancel button.
If you're receiving a call via Remote Assistance and wish to cancel it, you can do so by pressing the Decline button.
If you're receiving a call via Remote Assistance and wish to answer it, you can do so by pressing the Answer button.
If you choose to cancel the call while it's being placed, the following toast message will appear, and the call will be canceled.
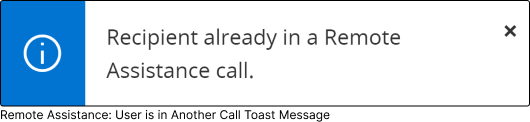
If the user you are trying to contact is in
another call, the following toast message will appear, and the call will be canceled.
If the user you are trying to contact
declined your call, the following toast message will appear, and the call will be canceled.
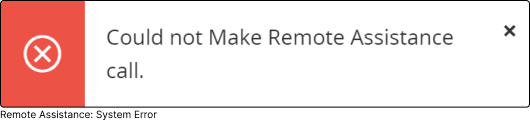
If there�s a
system error which does not allow you to make a Remote Assistance call, the following toast message will appear.
Once your call is accepted, the video and microphones on both ends will be automatically activated, enabling seamless communication between the two parties.
Note: In order for the video and microphone to be automatically activated, you must allow pop-ups for IFS Cloud Web in your browser. If pop-ups are not enabled for IFS Cloud Web, a prompt will appear requesting you to allow pop-ups for the application. Select
Yes to allow IFS Cloud Web to access your microphone and camera.
Call History
Select this option to access your Remote Assistance call history. This log consists of both incoming and out going calls.
To get a detail view of the call history, click the
See All button.
If you want to have a List View of the caller log, select My Calls section from the Navigator Menu
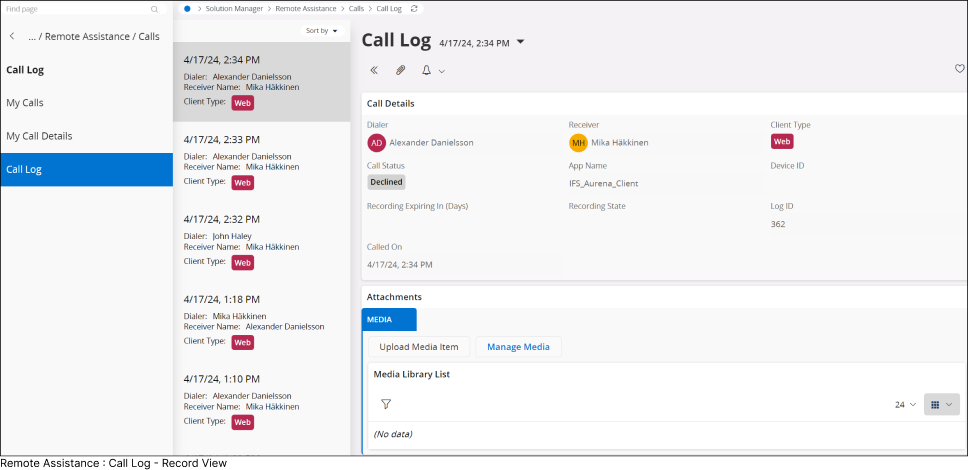
If you want to have a Record View of the caller log, select Call Log section from the Navigator Menu
Call Types
There are two Call Types in IFS Cloud, it can be seen in My Calls section.
Call Status
There are three types of call statuses, call status can be found from Call Status column in My Calls or Call Status field in Call Log section.
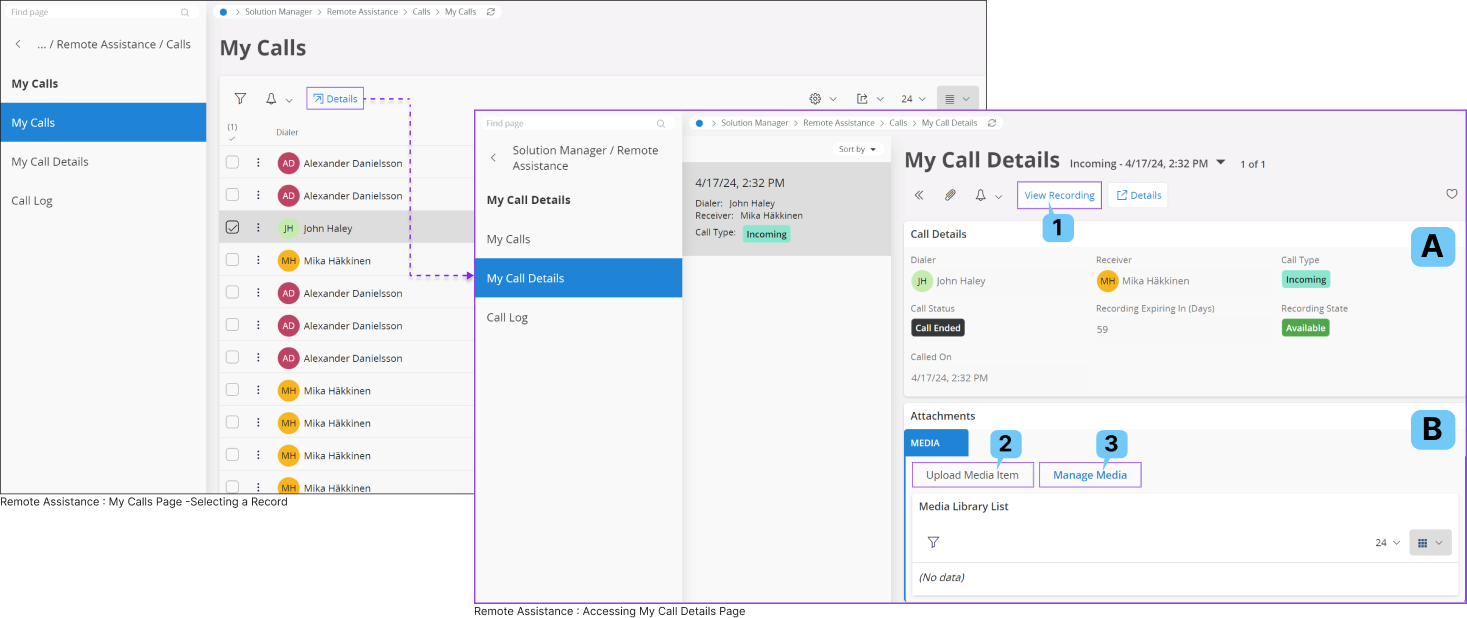
Accessing Call Details from My Calls Section
To access the details page of a call record in the My Calls section, simply select the desired call log row and click on the Details button.
Upon clicking, you will be directed to the My Call Details section of the specific selected call.
A.
Call Details
Call details section consists of all the information related to the call record such as
Caller Name
Receiver Name
Call Type
Call Status etc.
Note: Type of information to be displayed in this section is decided by the application developer.
B.
Attachments
Attachments section consists of all the attachments shared during the call. You can add or manage additional content using option number 2
& 3. All the attachments uploaded to the call will be displayed in
Media Library List section.
1.
View Recordings
Simply click the View Recording button to access the recording of the Remote Assistance call you participated in.
After clicking the View Recording button, a separate window will open, displaying an online video player with Remote Assistance video.
2.
Upload Media Items
To attach new media items related to the Remote Assistance call session, simply click the Upload Media Items button in the Attachments section.
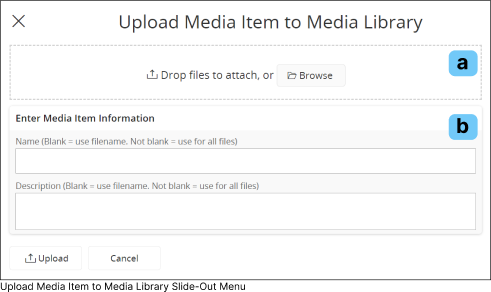
This action will trigger the opening of the Upload Media Item to Media Library slide-out menu, where you can upload various media file formats such as JPG, MPEG, PNG, and more.
Please note: You cannot upload documents or PowerPoint presentations to this section.
a : Upload Section
Easily transfer files from your local machine by either dragging and dropping them or clicking the Browse button to locate the desired file for uploading to this section.
b : Enter Media Information
Use this section to modify the media information you are uploading to the system.
Name : Use this field to add a name to the file that you are uploading to the system.
Leaving this field blank will result in IFS Cloud using the same file name as the uploaded file for saving it within the system.
If you add a name, it will be applied to all the files selected for this upload.
Description : Use this field to add a description to the file that you are uploading to the system.
Leaving this field blank will result in IFS Cloud using the file name as the description.
If you add a description, it will be applied to all the files selected for this upload.
3.
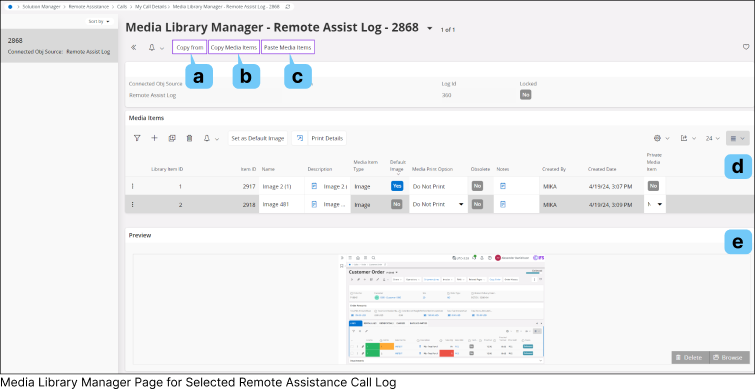
Manage Media
You can conveniently manage all attachments associated with a selected call log by utilizing the Manage Media option.
Clicking this button will direct you to the Media Library Manager page for the selected Remote Assistance Call Log.
a.
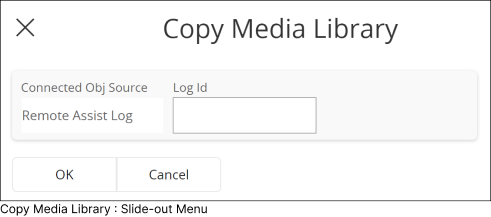
Copy From
You can utilize this option to copy attachments from another call log. Upon clicking this button,
it will open the Copy Media Library slide-out menu, enabling you to choose the desired call log from which to copy the attachments.
b.
Copy Media Items
You can utilize this option to copy attachments from the current call log you are in.
Upon clicking this button, it will copy all the media items and allow you to paste it another call log if needed.
c.
Paste Media Items
You can utilize this option to paste attachments that you have previously copied from another call log into the current call log you are viewing.
d.
Media Items
This section displays all the media items associated with the current call log you are viewing.
e.
Preview
This section offers a preview of the attachments found in the Media Items(d) section.
Clicking on any attachment within the Media Items(d) section will automatically display its preview here.
Features of a Remote Assistance Call
Remote assistance offers a variety of features designed to provide the support you need when
you need to seek assistance from a reomte user. These options are
accessible through the Features tab during a remote assistance call.


.png)