Post Installation
Once the database scripts have been run and the software has been installed there are a number of additional steps required to prepare the system for first time use. These are detailed in this section.
Service Management and Event Logs
All service components selected for install should appear in the 'Services' console after installation is complete. This console can be used to start, stop and restart services, and to change the properties of each service if required.
The console can either be opened directly or accessed via the server management console.
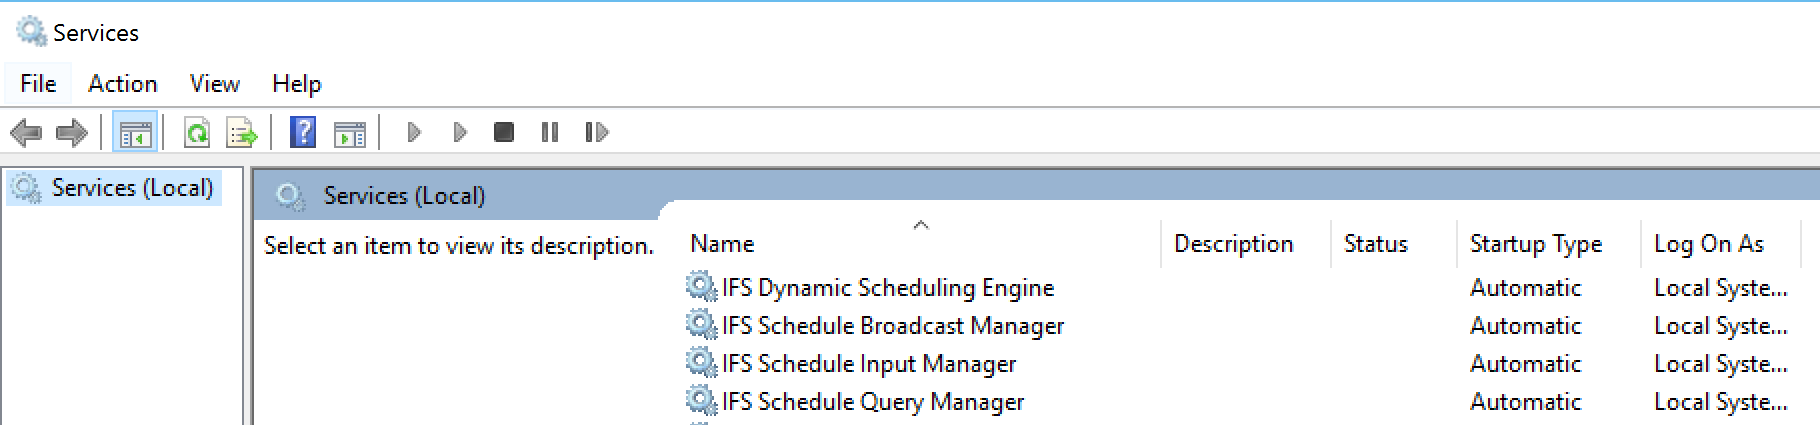
Each component will log events to its own event log, as well as writing them to the system database.
To view these events you can either use the PSO Administration workspace or use the server event viewer.
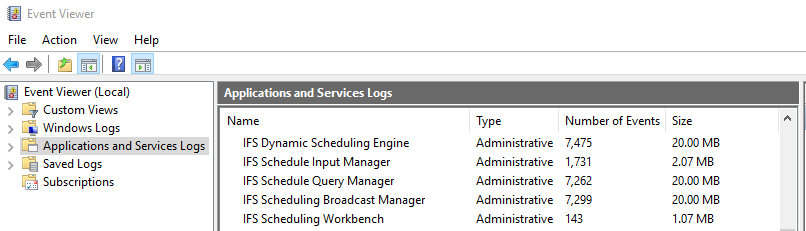
Each component will log an event when it starts, and will also report errors if, for example, it is unable to connect to a database. The services will also log events as necessary to report any actions they are taking throughout the day.
Licence Installation
The license key may be installed in a number of ways:
- The IFS PSO Installer provides the option to install the licence into the Scheduling System Database during the installation process - this is the most straightforward option for installing the licence.
- The xml file can be placed into the IFS PSO input folder (normally C:\IFS\Scheduling\Input) for automatic import into the Scheduling System Database. The Schedule Input Manager (SIM) service must be running in order to process the file.
- For an Azure system the licence file can be sent in via the Scheduling Restful Gateway. See the Interface Guide — RESTful Gateway for further details.
If you wish to send data to an organisation in a multi-tenant system, this can be achieved through options 2 or 3 above, but with the organisation id on the System Input row changed in the xml file. If using the Scheduling Access Tool, the organisation id will be automatically applied to match the account you are connecting with.
The Administration workspace in the Scheduling Workbench can be used to import a licence to a managed organisation. Navigate to Organisation -> Managed Organisations and select the desired organisation. Click 'Administration' and then 'Import Data' under the 'System Data' heading. Ensure that the current organisation is showing the chosen managed organisation.
Note
The 'Import Data' option on the Scheduling Workbench client can also be used to import a previously exported system data file, which may itself contain the required licence information.
If the license key has not been installed correctly the Dynamic Scheduling Engine will fail to start. In this event check the connection string for the service to ensure it is connecting to the correct database and user.
Note
All license information consisting of company name, expiry date and number of resources licensed will be output as part of the header on all plans and produced by the IFS PSO applications.
Note
It is the licensees' responsibility to ensure all required MAC addresses have been registered on the licence key in the event that processing must be switched to standby servers.
Warning
Never install a license key into a live production environment until it has been verified that it works correctly on a user test environment. The application of edited or incorrect keys can result in system failure.
Language Installation
All required messages will automatically be present in the system in the English language (en), provided the appropriate database scripts have been run when creating and updating the system.
Additional message text files are also supplied for other languages. These can be applied to the installation using any of the following methods:
- Use the 'Administration' tab in the workbench to import the system data.
- Use the Scheduling RESTful Gateway to send system data to the Data POST endpoint.
The message text files are all named 'MessageTexts-zz.xml', or 'MessageTexts-zz-zz.xml', where the zz is the language code. For example 'MessageTexts-fr.xml' contains French language message texts. Once you have loaded a language file you will need to re-login to the workbench for the options to be displayed in the language dropdown.
Custom message text files can also be created and imported into the system in the same way.
Setup Files
A number of additional setup files can be found in the 'Setup Files' folder within the release directory. While none of these files are essential, a number of them may be beneficial.
These files can be included either via the installer or by dropping them in the input folder for processing by the Schedule Input Manager.
Note
You can check the Schedule Input Manager event log to ensure that the files have been processed.
- Examples/UKTravelTimeProfileExample.xml: This file contains a default travel time profile to allow for rush hours when scheduling in the UK.
- Admin Monitoring Setup.xml: This contains information used by the admin service when monitoring other applications. Again, the data within this file can be adapted to suit customer requirements.
- Apps 9 Configuration.xml: This will set up the default settings and theme for use with an Apps9 installation.
- Apps 10 Configuration.xml: This will set up the default settings and theme for use with an Apps10 installation.
- ARP Setup.xml: This file contains basic data for use within the ARP.
- ChildOrganisationPermissions.xml: A file that disables permissions for a child organisation. These permissions will be disabled by default for organisations created via the PSO Workbench or the Scheduling Restful Gateway.
- Encryption.xml: contains examples of Encryption_Set and Encryption_Set_Rules entries that can be used to configure encryption in PSO.
- Reset ActiveDirectoryDomain.xml. Resets the parameter "ActiveDirectoryDomain". Further details can be found in the Administration Guide — Using Active Directory.
- Reset OpenIdAuthoroty.xml: Resets the OpenID Connect (OIDC) related parameters. Further details can be found in the Administration Guide — Using OpenID Connect.
- Role configuration template.xml: A template for configuring role-based deployments whereby a VM has a "role" and hosts specific services that pertain to that role. For on-premises deployments, see the section "Configuring an installation with service resiliency" within this guide. For Azure deployments, see the section "Deploying to Azure and PSO VM Roles" within this guide.
- Scheduling Setup.xml: This will set up the default data settings for scheduling. When using the scheduling database, it is recommended that this file is used. The data within the file can also be adapted, if required, to suit individual customer needs.
- Themes.xml. This file contains a number of alternative themes that can be used within the Scheduling Workbench.
- UK well known areas.xml. This file is for use with the WISE to describe the location where a resource has been added.
- Upload certificate to key vault.ps1: A PowerShell script to help getting started with uploading SSL certificates to an Azure Key Vault. This is specific to Azure deployments of PSO. For further details see the section "Setting up a Key Vault for HTTPS" within this guide.
Parameters and Permissions
Any parameter or permission changes should be made via the Scheduling Workbench administration workspace.
It is also possible to import settings from a different system here, using the Import / Export screen.
Be aware that when making parameter changes it will often be necessary to restart any affected components in order for the changes to take effect.
Note
See the Scheduling Administration Guide for details of making these changes.
Verification Files
The Verification Files folder within the release directory contains files that can be used to check that a PSO installation is functioning correctly. The files "Smoke Test.xml" (for on-premises installs) or "Smoke Test - Azure.xml" (for Azure installs) can be used to test that a basic round trip of data through the PSO system is working. Once the DSE has processed the file and produced a plan you should be able to view this schedule on the Scheduling Workbench. For further details please see the section "Testing a Standard Deployment" within this guide.
Using maps
The Scheduling Workbench client includes a number of map-based functions, which require the use of third party map tiles - Please see the Scheduling Administration Guide for further details of the available map sources in the Scheduling Workbench and the corresponding license requirements.
Using Bing maps
Bing license keys can be purchased directly from Microsoft. Go to the link below to generate a Bing license key. An MSDN account will be required to generate a Bing license map key. A full known user licence will be required for each Scheduling Workbench user. For further details please contact your account manager.
http://www.microsoft.com/maps/developers/web.aspx
Bing maps on the Scheduling Workbench can then be enabled by setting two parameters. They can be set via the Scheduling Workbench Administration Workspace.
- iSWBMapType - Set this to BING
- iSWBMapKey - Set this to your Bing maps key
Using real time travels
The DSE can be configured to use real time travel information - please see the Scheduling Administration Guide for further details of how to configure the DSE along with usage guidelines. Using real time travels requires a TomTom routing API key which can be purchased from your account manager. To enable real time travel functionality, set the parameter "RoutingApiKey" to your key - this can be set via the Scheduling Workbench Administration Workspace.
Using remote connections and embedding
We prevent PSO Workbench from appearing in a frame from a remote host server without explicitly allowing the URL of the host on the PSO side. This is done by adding server URLs to the organisation parameter called 'WorkbenchHostURL' in the appropriate organisation. This parameter only needs to cover the server which hosts the calling application, not each client workstation that will be accessing the system. Multiple server URLs can be included separated by spaces, e.g. "https://server1/ http://domain/server2:port/" and "*" wildcards can be used for example "https://mydomain.com/*".
This parameter can be set in the head organisation to whitelist a server for embedding any organisation, but if it is set in the organisation this overrides the head organisation value.