Scheduling - Schedule Assistance
Schedule Assistance
The Schedule Assistance screen enables you to find suitable resources (and shifts) for activities, based on matching skill and region constraints, and within a specified travel time window.
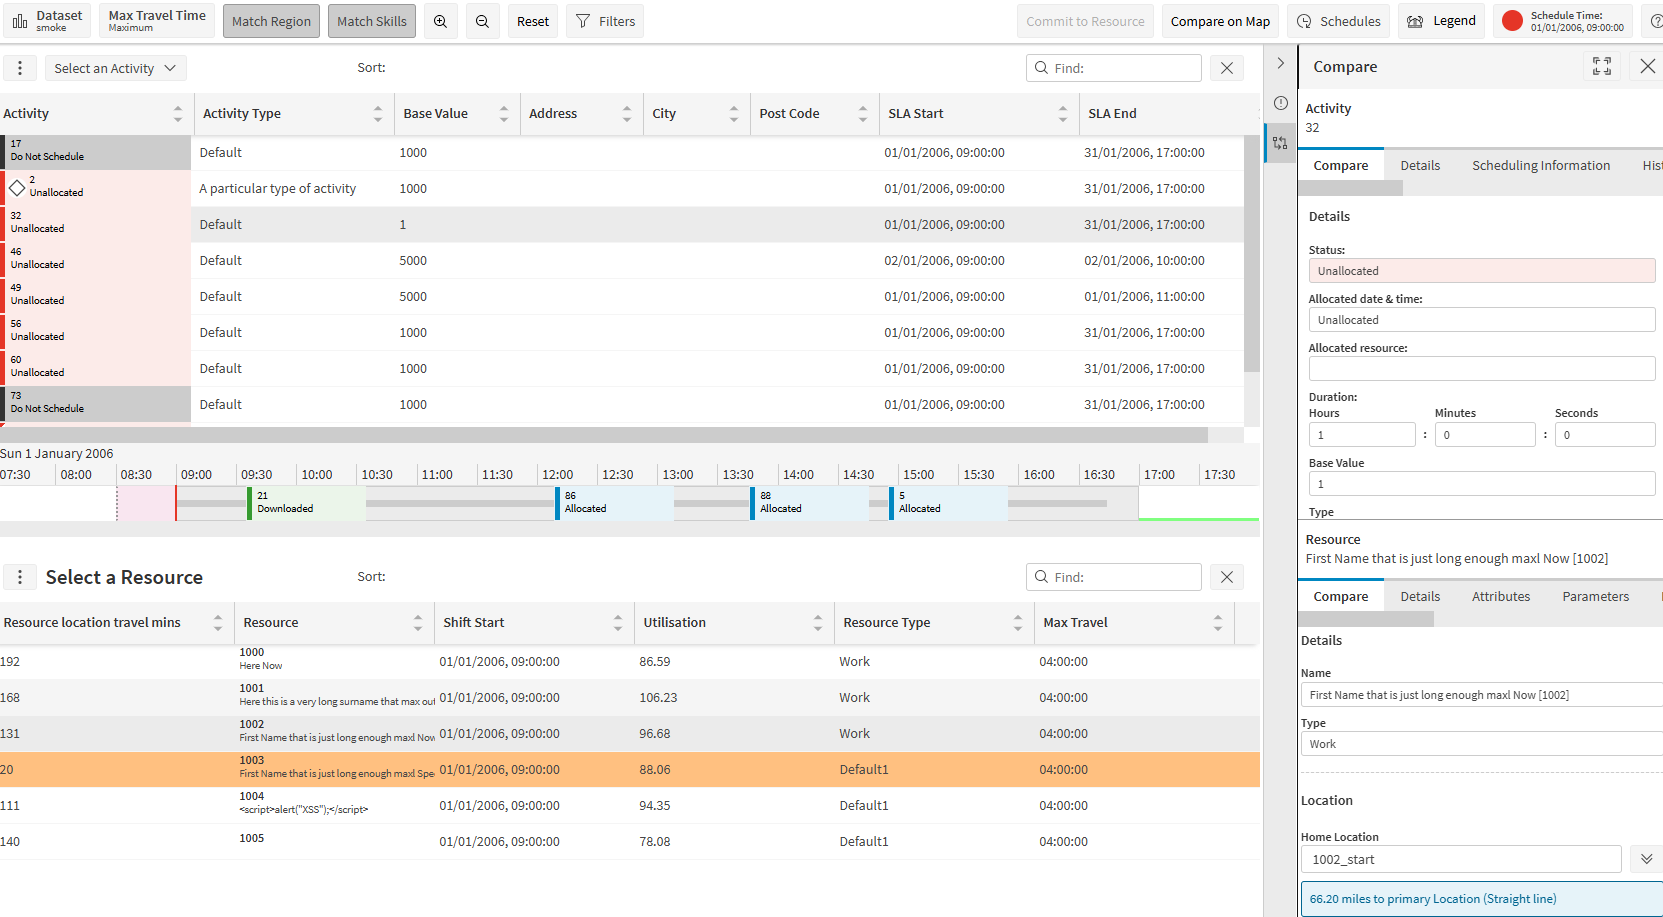
In the default display mode the Schedule Assistance window is divided up into 4 areas:
- List of unallocated activities.
- List of possible resource shifts for the selected activity.
- Gantt row(s) for the selected shift and activity.
- Compare details for the selected activity and resource.
In the top part of the main screen you will see a list of unallocated activities for the dataset being viewed. Selecting any of these activities will update the list of possible resources in the lower part of the main screen. This will show the possible resources that can be scheduled to do the work according to the current set of constraints. By default this will only consider the current shift for each resource.
The user can then select a resource from the lower part of the screen to view compare details for the activity and resource in the right-hand data panel, and the corresponding activity and shift Gantt row.
Adjusting the Selection Criteria
Constraints
There are several options to alter the constraints being applied by the Schedule Assistance function. These can be found in the top menu bar.
- Toggle the 'Match Region' button to switch whether the Schedule Assistance takes into account regions when producing the list of possible resources for each activity.
- Toggle the 'Match Skills' button to switch whether the Schedule Assistance takes into account skills when producing the list of possible resources for each activity.
- Update the 'Max Travel Time' filter to set the maximum amount of travel time the resource is allowed to reach the activities. The 'Maximum' setting will instead apply the maximum travel time for each resource, as set in the input data.
Warning
Committing activities to resources after altering these options may mean that you are breaking scheduling constraints including required skills, regions, maximum travel and SLAs.
Resource and Shift Options
By default, the resources grid will only show the active shift for each resource - i.e. the first shift that is either in progress or starts after the current time.
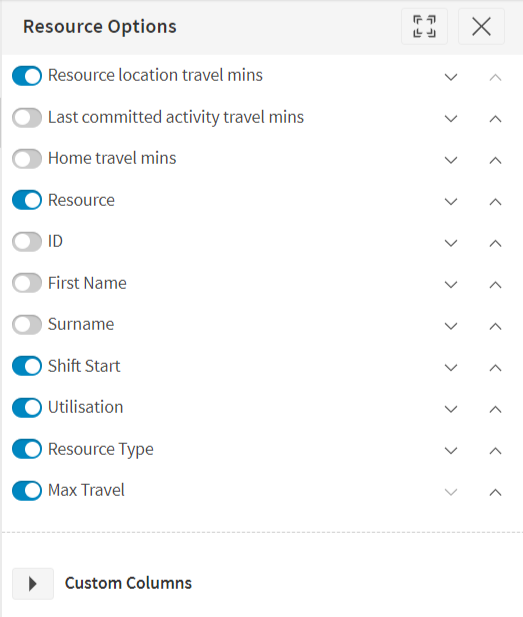
You can refine the list of resources shown via the Resource Options popup. You can open the Resource Options popup by using the options button in the top left corner.
You will then be shown the below popup.
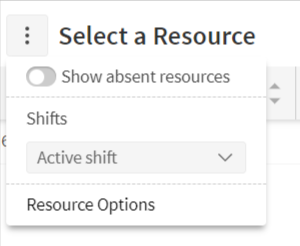
The shifts drop down list changes the display to show either:
- Only the active shift for each resource.
- Any shift which overlaps the SLA of the activity.
- All shifts within the scheduling window.
Note
When any option except the first is selected, you may see multiple rows for the same resource in the resources grid. This is because there are multiple shifts that match the criteria, and a row is shown for each shift.
To include resources who are absent during the shift select the 'Show Absent Resources' toggle. This will filter to include resources that have a private appointment over the entire shift. If part of the shift has no private appointment (even 1 min) the resource will be considered not absent.
Clicking on 'Resource Options' button will open a new panel and will allow you to show or hide columns in the data grid. Note in particular the three columns that relate to the expected travel time for the resource to the activity:
- Travel from resource location (Mins), the time the resource would take to travel to the activity from their current location.
- Travel from last committed activity (Mins), the time the resource would take to travel from the last activity committed to them.
- Travel Home (Mins), the time the resource would take to travel from the activity to their shift start location.
Activity Options
The default display for the Schedule Assistance tab is to find a resource for an unallocated activity. By default this also excludes remote fulfillment (or locationless) activities.
You can refine the list of activities shown via the Activity Options popup. This is accessed by using the options button in the top left corner of the Activity grid.
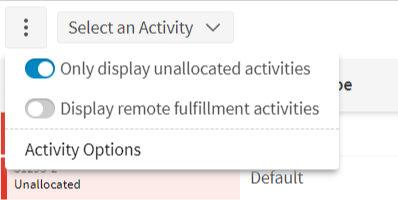
Unchecking the 'Only display unallocated activities' toggle will alter the behaviour to also display activities which have already been allocated, excluding completed and incomplete activities.
Selecting the 'Display remote fulfillment activities' toggle will alter the behaviour to also display remote fulfillment and locationless activities. These are activities where the resource is not required to visit the location in order to carry out the work.
Note
Note that the travel time for remote fulfillment activities will always be displayed as 0. Skill, region and time constraints will still be applied where appropriate. An additional column 'Remote Fulfillment' is also included in the Activity Grid when this option is selected.
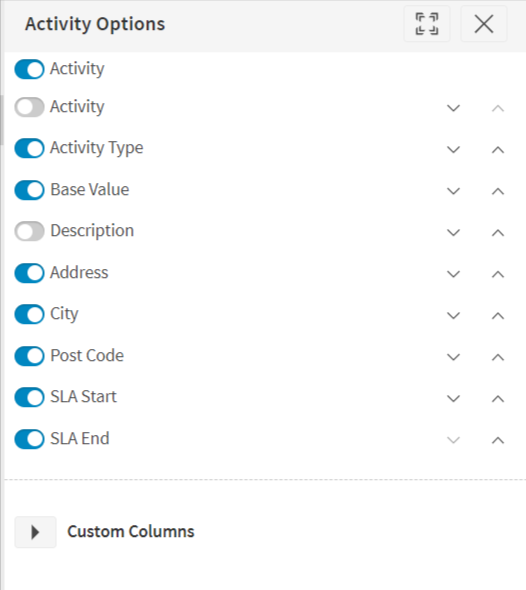
The list of columns to include in the activity grid can also be adjusted by clicking on 'Activity Options' button and it opens a panel in the right side of the screen. Further you can add or delete Custom columns using this panel.
Changing the Display Mode
The drop down list in the top left of the activity grid gives you the option to change the display to a resource first display. In this mode you instead select a resource in order to display activities that could be scheduled to the resource.
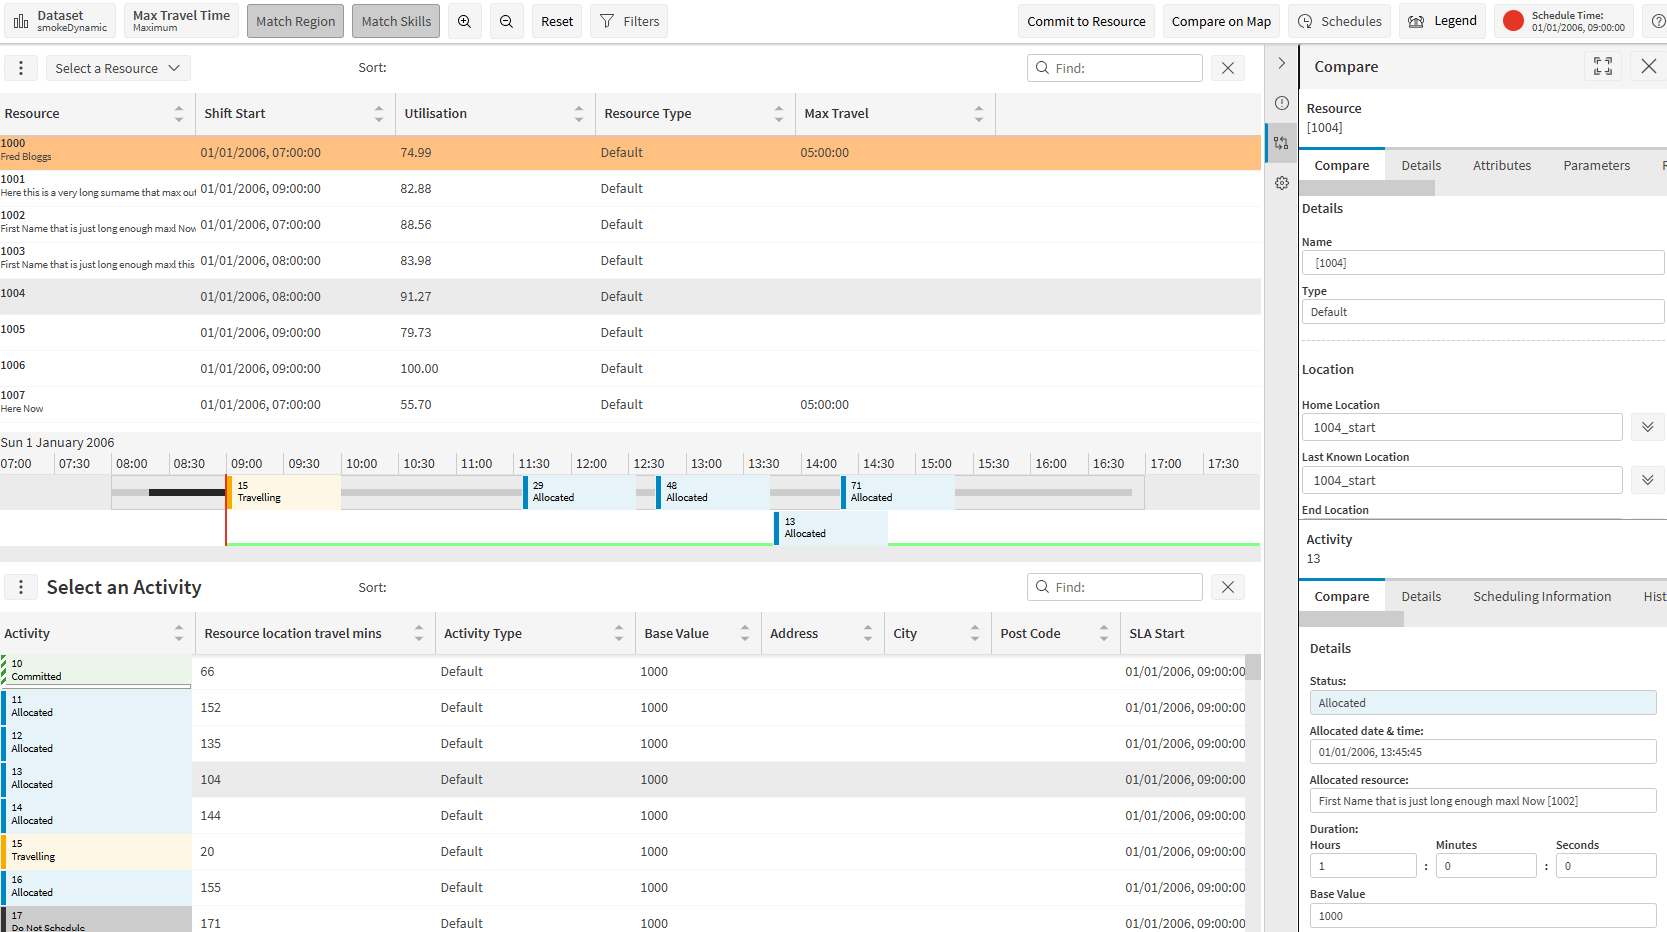
All options described above still apply in this mode. For example, unchecking the 'Only show unallocated activities' option in the activity options panel will mean that allocated activities are included in the list of possible activities.
Filtering
The find function allows for fast searching on the selectable and possible datagrids.

In addition, any main application filters that are enabled will be applied as normal.
You can also use the filter by exception function from the exceptions data panel. Select the exception you wish to filter by on the Exception tab on the right hand panel. Then click the 'Filter' button, and the screen will then be filtered to show the relevant activities by the desired exception.
Committing Activities
If you decide that you would like to manually intervene and commit an activity to a resource, this can be done by clicking the 'Commit To Resource' button in the top menu bar.
This will open the manual changes panel, where you can review and validate the changes that you are making, and then confirm the commit using the 'Apply Changes' button.
Note
You can also make further changes in this panel, for example to fix the time of the activity.
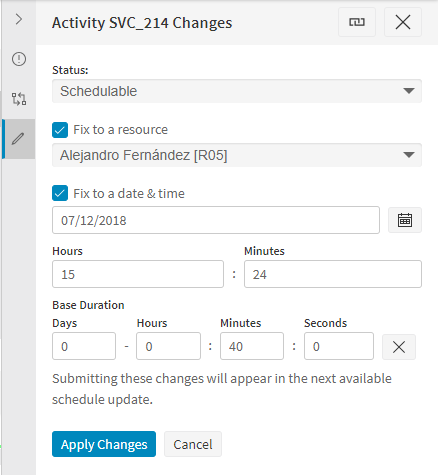
See the Manual Changes section for further details.
After you have committed the activity, its new status and position can be viewed in the Resources and Activities screens.
Drag and Drop
The assistance screen also supports the use of drag and drop when this is enabled. The activity card column (which by default displays first in the activity grid) can be dragged to begin a drag drop operation for this activity. This can then be dropped onto the resource shift Gantt row in the middle of the screen in order to commit the activity in the selected position.
Alternatively, if the activity Gantt row is displayed then this can also be dragged onto the resource shift Gantt row.