Simulation - OSV
What is the OSV?
The Operational Scenario Visualizer (OSV) is a tool designed to show the basic functionality of PSO in an easy to understand manner, allowing for demonstration of PSO capabilities. The OSV provides a means of visualizing the basic concepts and features of PSO.
The OSV is found within the Simulation Workspace in the PSO Workbench.
Why Use the OSV?
The OSV is a means of visualizing the basic PSO concepts and functionalities so that they are understood and appreciated.
The tool allows the user to generate scenarios where they can add activities, resources and constraints on the fly and run the scenario through at an accelerated rate, as a simulation of how the scenario might play out.
Using the OSV for the First Time
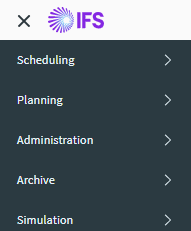
After logging in to the Scheduling Workbench, you will normally be taken back to the screen you were last using. If you were not previously using the OSV, change to the "Simulation" workspace using the workspace selector, and then select the OSV tab to see the OSV page:
If you do not see the "OSV" option in the menu, this is probably because your system is not licensed for the OSV, or your username does not have permissions "SimulationWorkspace" and "SimulationOSV". Ask your system administrator.
Start a New Scenario
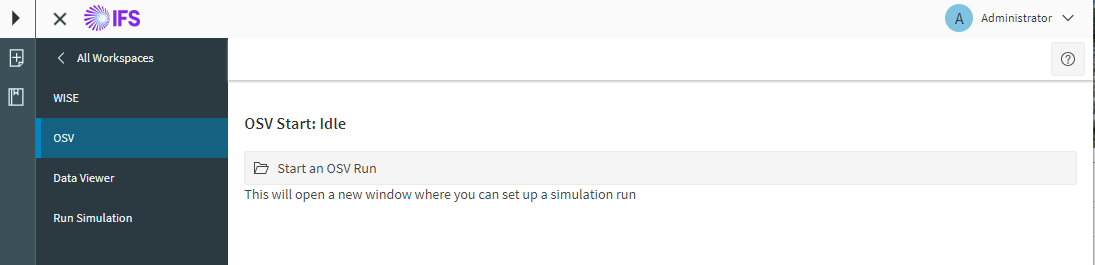
Click on "Start a Simulation run" and it will open a new window to set up the simulation.
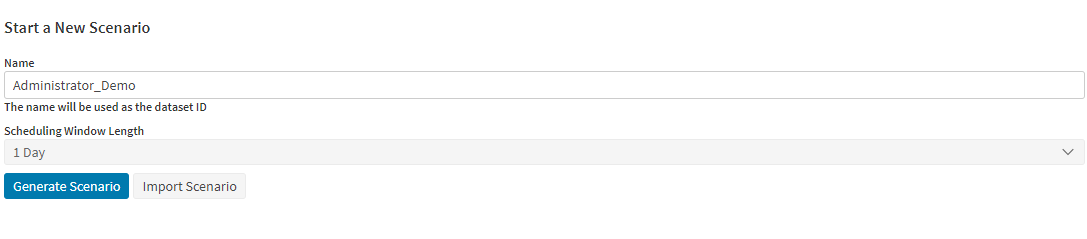
This screen will be used to create a scenario for the demonstration. Simply select a name for the dataset to use for the scenario and scheduling window period, then click "Generate Scenario" to start.
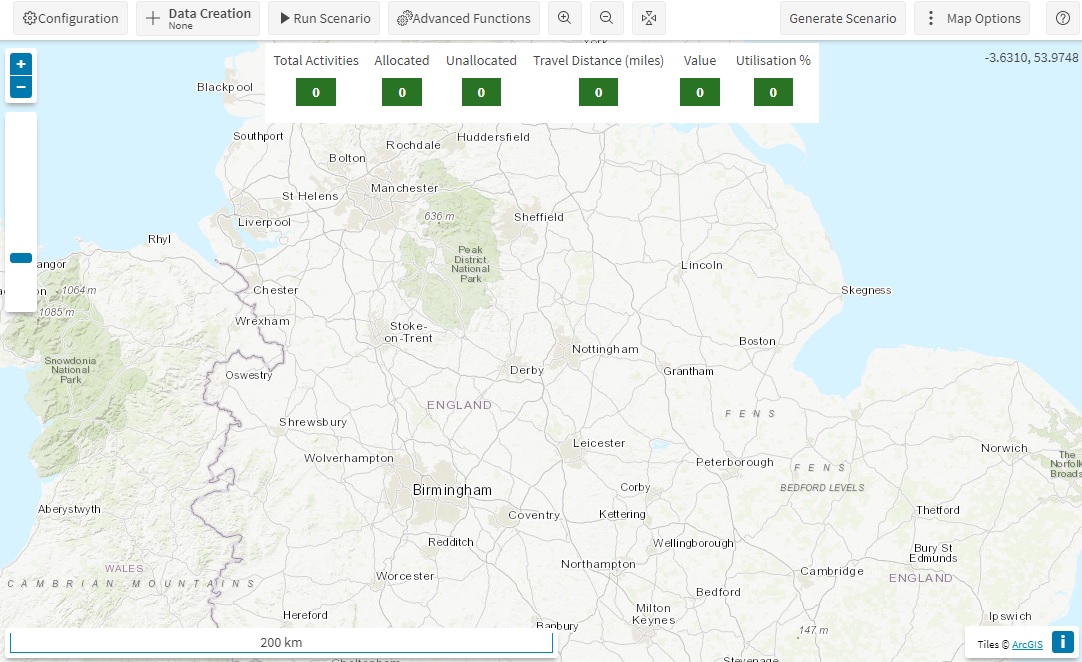
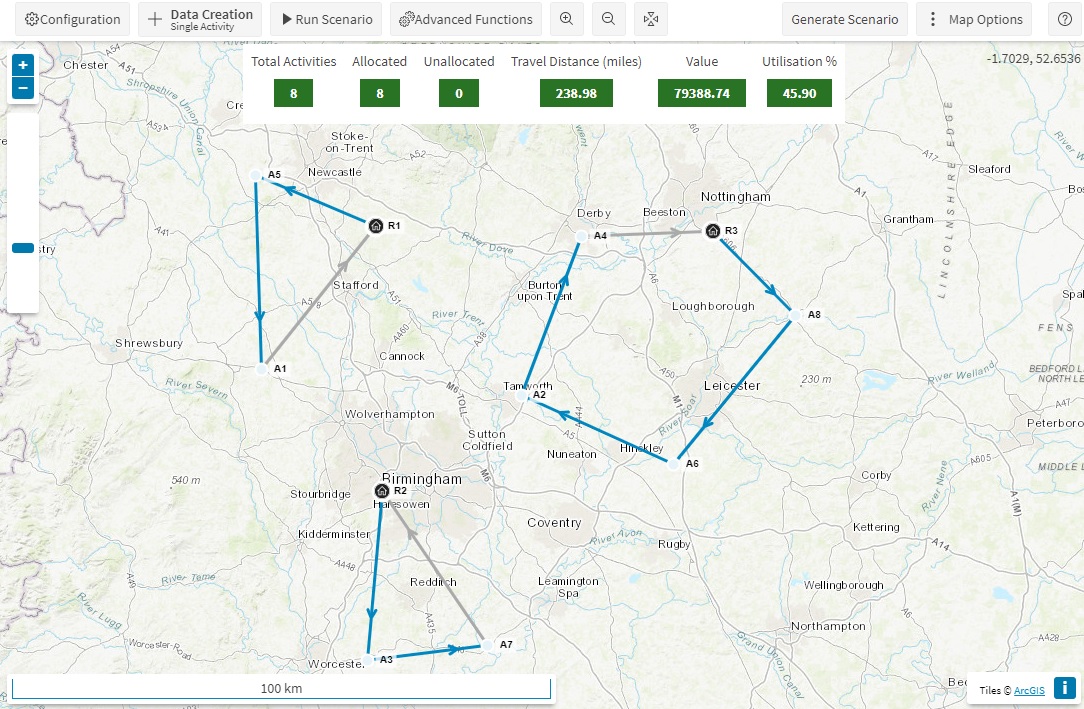
Upon clicking the "Generate Scenario" button, a scenario will be generated, and the map view will be displayed as shown below.
Note
Once a scenario is started, use the 'Reset the Scenario' button in the top menu to return to the start screen and begin a new scenario. This button will set the dataset to paused and will reset all the set parameters to their default values. However, this will not reset the values of the map options since the map options are persisted for all maps across the workbench.
Note
See the Export and Import Scenarios for details of importing a saved scenario.
Configuration Panel
In the Map View, click the "Configuration" button to open the "Configuration" panel.
The "Configuration" panel looks as shown below.
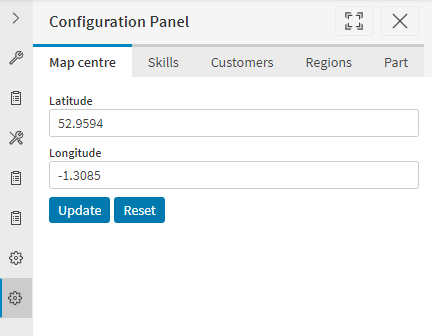
The configuration panel enables the user to set the initial map display and to configure the names used for skills, customers, regions, and part, as shown below.
Map Centre
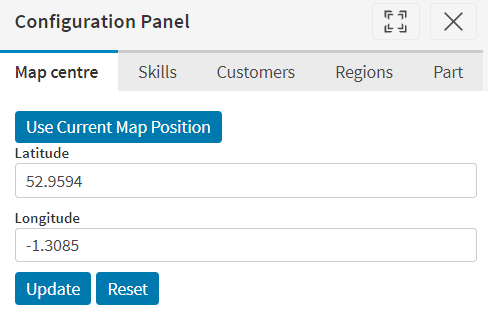
- The map centre has a default "Latitude" and "Longitude" values.
- Changing the values of Latitude and Longitude, and clicking the "Update" button will update the values and the location displayed in the map view.
- The Latitude and Longitude values can be updated manually, or by clicking the 'Use Current Map Position' button. The latter approach will populate the values with the current centre of the map.
- Click the "Reset" button to reset the Latitude and Longitude to default values.
Skills
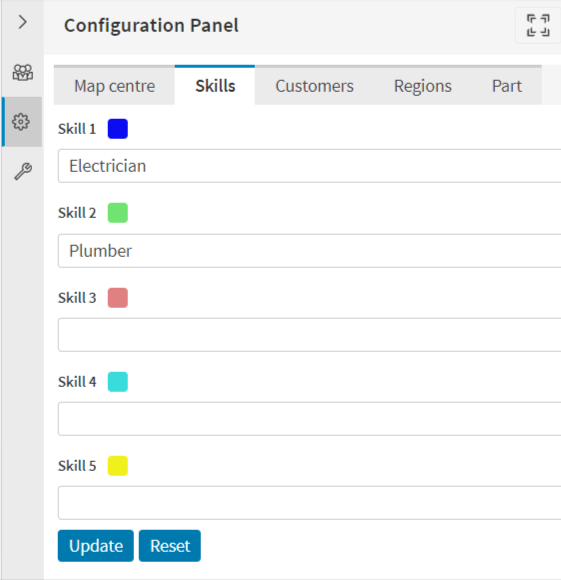
- The user can name up to 5 skills. The first two skills have a default value - "Electrician" and "Plumber" (which can also be modified). Each skill is associated with a unique predefined colour.
- Modify (Add/Remove) the names for the skills and click "Update" button to update the skills configuration.
- Click the "Reset" button to reset the skills to default values.
Customers
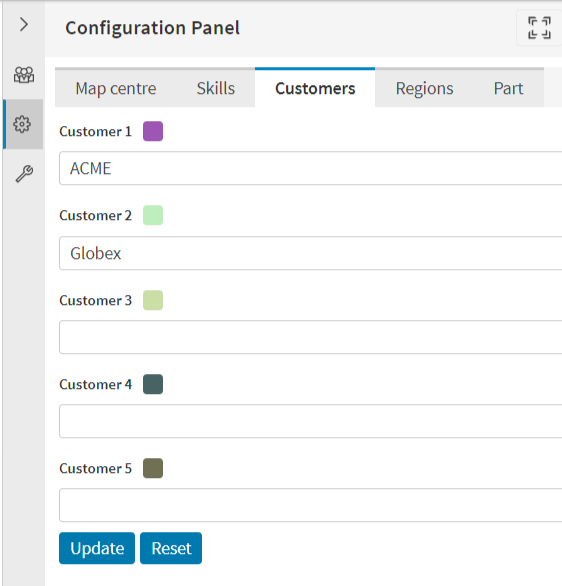
- The user can name up to 5 customers. The first two customers have a default value - "ACME" and "Globex" (which can also be modified). Each customer is associated with a unique predefined colour.
- Modify (Add/Remove) the names for the customers and click "Update" button to update the customers configuration.
- Click the "Reset" button to reset the customers to default values.
Regions
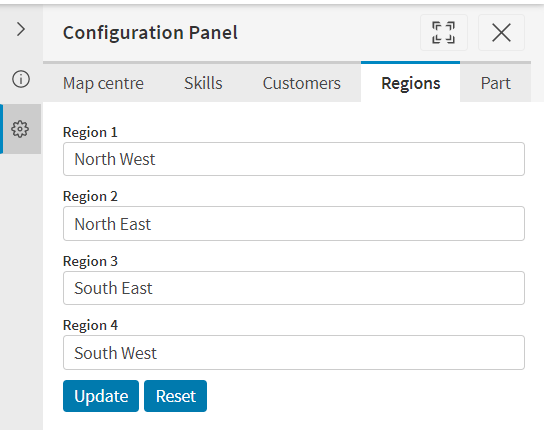
- There are four regions settings with default values as "North West", "North East", "South East", and "South West", each of which are editable.
- Modify (Add/Remove) the names for the regions and click "Update" button to update the regions configuration.
- Click the "Reset" button to reset the regions to default values.
Parts
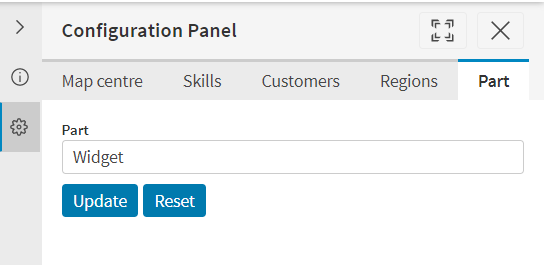
- The user can edit the part label- which has a default value as "Widget".
- Modify (Add/Remove) the name for the part and click "Update" button to update the part configuration.
- Click the "Reset" button to reset the part to default value.
Data Creation
Click the "Data Creation" button in the top panel to select the type of data you wish to create.
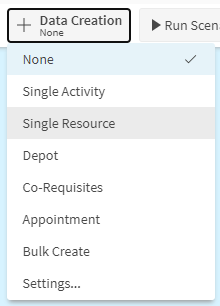
The Data Creation button provides options to create basic activities and resources to produce a schedule. For scenarios where the scheduling window length is a week or longer, shifts will be created for weekdays only. If the scheduling window is less than a week then the shifts will be created for consecutive days including weekends. Once the data (resources and activities) is added, the schedule for the data is displayed on the map.
The supported options are as follows:
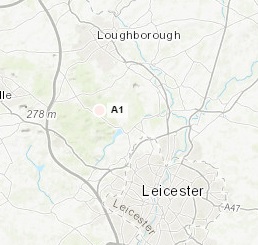
Single Activity
This option enables the user to add/create a single activity on the map. To add an activity, the user can select this option and then left-click on the map in any location where the activity needs to be created.
Single Resource
This option enables the user to add/create a single resource on the map. To add a resource, the user can select this option and then left-click on the map in any location where the resource needs to be created.
Depot
This option enables the user to add/create a single depot on the map. To add a depot, the user can select this option and then left-click on the map in any location where the depot needs to be created.

Co-Requisites
This option enables the user to add/create a pair of co-requisite activities on the map. To add, the user can select this option and then left-click on the map in any location where the activities need to be created. These activity pairs are created with same creation settings, but after creation, the activity details are editable for each activity separately.
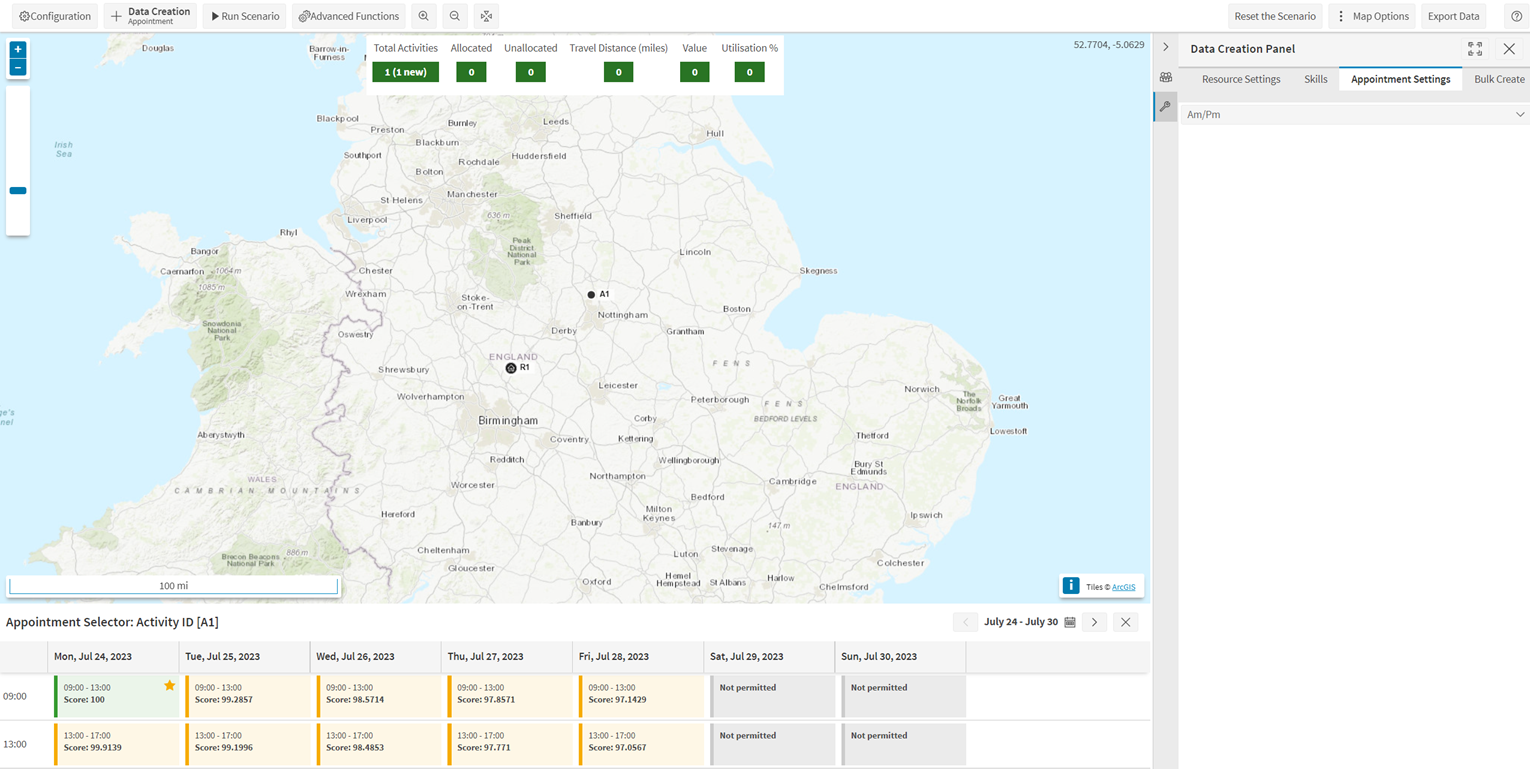
Appointment
This option enables the user to create an activity with time constraint to restrict its schedule, based on the appointment slot being selected from the appointment booking.
When the user clicks on the map with this mode selected, an activity is created on the map and at the same time, a window with appointment selector to select the appointment slot for that activity, is displayed on the bottom half of the page. Appointment slots are shown for the scheduling window period only. The user can then select the appointment slot for that activity. The user can reject the appointment slots by clicking on the close button available at the top right corner of the appointment selector window. This will close the appointment selector window as well as delete the activity.
Note
Ensure you have created at least one resource before creating an Appointment activity.
Bulk Create
This option enables the user to create activities and resources in bulk with each click on the map.
Data Creation Panel
The 'Settings...' option on the data creation button will open the data creation panel, where you can control the basic initial settings for data creation. This panel will also open at an appropriate tab with each of the other selectable options (except Depot which has no settings).
Activity Settings
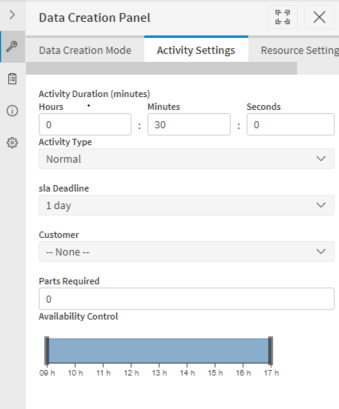
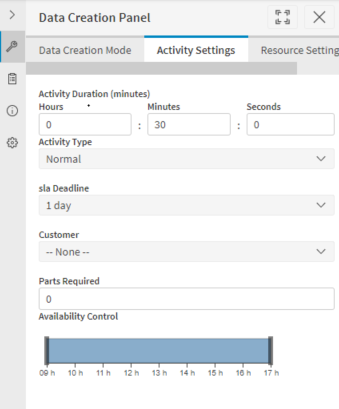
The "Activity Settings" tab is used to configure how activities are created. It provides the following settings:
- Activity Duration. Sets the duration of any newly created activities. Default is 30 minutes.
- Activity Type. A dropdown containing values: "Urgent", "Normal", and "Low". Default is "Normal".
- SLA Deadline. A dropdown with values dependent on the Activity Type selection. Values include: "2 hours", "4 hours", "1 day" and "Whole Schedule".
- Customer. A dropdown containing the values of the customers specified in the Configuration panel, plus "None". Default is "None".
- Parts Required. Specifies the number of parts required to complete the activity. Default is "0" (zero).
- Availability Control. A control to allow the user to select when during the day the activity will be available.
Resource Settings
The "Resource Settings" tab is used to configure how resources are to be created. It provides the following settings:
- Costs
- Travel Cost (per km)
- Working Time Cost (per hour)
- Overtime Cost (per hour)
- Parts Held
- Times
- Allowed Overtime (minutes)
- Commute Time From Home (minutes)
- Commute Time To Home (minutes)
Skills
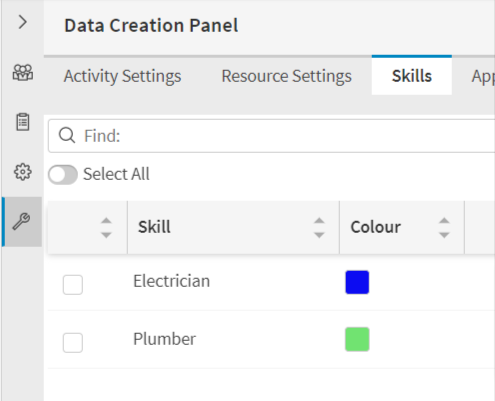
The "Skills" tab enables the user to set the basic skill configuration settings for creating both resources and activities. It provides up to 5 checkboxes with names taken from the values set in the Configuration panel. By default, no skills are selected.
Note the following:
- Each activity and resource can have multiple skills.
- Each skill is associated with a unique colour.
- The skill associated with each activity and resource displayed as a colour around the activity and resource.
- If an activity is associated with more than one skill, then the skill is showed as grey colour around the activity.
- If a resource is associated with more than one skill, then the skills are shown using different colours around the resource.
Appointment Settings
The "Appointment Settings" tab provides a drop-down allowing the user to select the number of slots to use for appointment booking. The choices include:
- Daily
- Am/Pm
- 2-Hourly
- Hourly
Bulk Create Settings
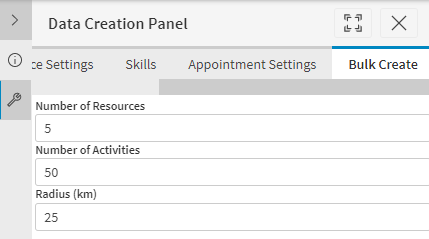
The "Bulk Create" allows you to choose how activities and resources are created in bulk. The options are as follows:
- Number of resources to create (default 5)
- Number of activities to create (default 50)
- Radius - this defines a circle centred where the map is clicked in which activities will be created (default 25km).
Map Options
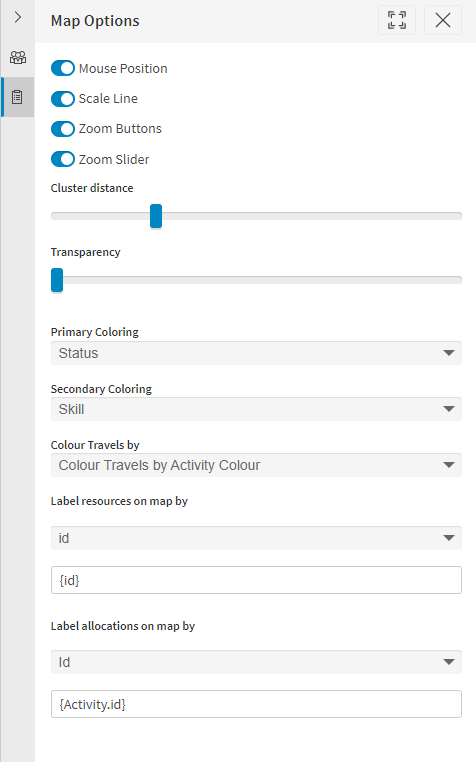
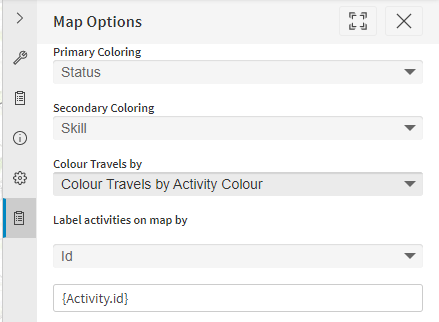
This panel enables the user to configure the map display. Clicking the 'Map Options' button opens the map options data panel. This panel allows the user to set the following options:
- Cluster Distance: Customise and adjust the clustering threshold.
- Transparency: Customise and adjust the visibility of the map.
- Primary Colouring: This dropdown provides options to set the colour for the inner circle of the activities. Options available are 'Status', 'Skill', 'Activity Type' and 'Customer'. Default is 'Status'.
- Secondary Colouring: This dropdown provides options to set the colour for the outer circle of the activities. Options available are same as Primary Colouring, with an additional value 'None' and excludes the primary colouring selected. Default is 'Skill'.
- Colour Travels by: This dropdown provides options to set the colour for the travel paths. Options available are 'Colour Travels by Activity Colour', 'Colour Travels by Activity Status', 'Colour Travels by Day', 'Colour Travels by Route', 'Colour Travels by Resource', 'Colour Travels by Customer' and 'Colour Travels by Skill'.
- Label resources on map by: This dropdown provides options to set the label for the resources on the map. Options available are 'None', 'Id', 'Skill' and 'Custom'.
- Label allocation on map by: This dropdown provides options to set the label for the activities on the map. Options available are 'None', 'Id', 'Activity Type', 'Scheduled Date Time', 'ID', Scheduled Date Time', 'Customer', 'Skill' and 'Custom'.
Note
The activity colour based on Activity Type is as follows:
- Urgent: Red
- Normal: Blue
- Low: Green
Plan Summary

This panel shows the following information fetched from the latest received schedule:
- Total Activities
- Allocated Activities
- Unallocated Activities
- Travel Distance (Km or miles)
- Value
- Utilization %
Run Scenario
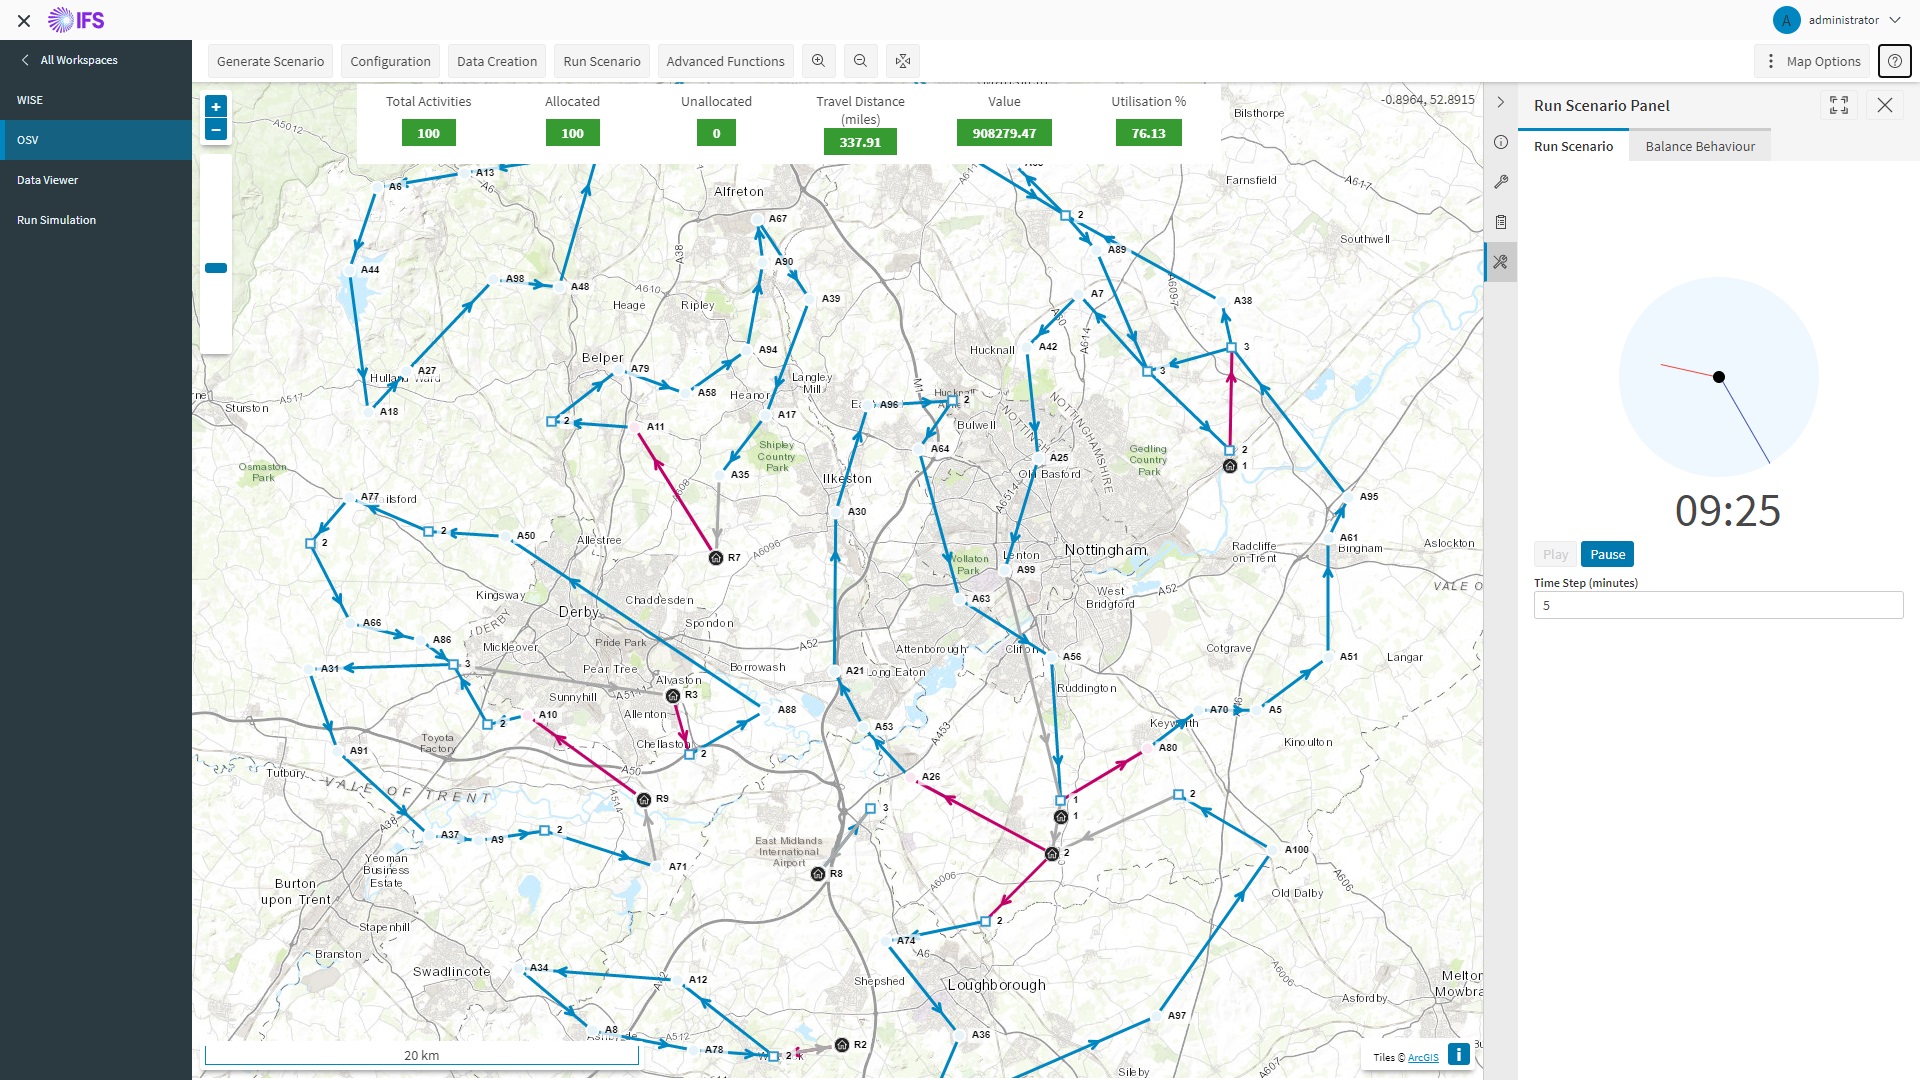
This panel enables the users to run the schedules through a day and visualize the movement of resources on their routes and the status changes in the activities. Upon clicking the "Run Scenario" button in the map view, the panel is displayed with the following options:
- A clock showing the current schedule time.
- A 'play/pause' button to start/stop the scenario.
- Time Step - this is the amount of time that the schedule will move forward by each time it updates when running through the day. Default value is 5 minutes.
- Mode - this determines when the schedule will move forward. This has the choice of either manual or interval.
If the mode is set to 'Manual', then the schedule will only move forward when the 'Next' button is clicked and will move forward by the amount set in the 'Time Step'. The 'Next' button will be disabled until the workbench has handled the schedule update. If the mode is set to 'Interval', then the schedule will move forward automatically at intervals which can be decided by the 'Interval' input. The default is 10 seconds. If the interval is set to a value that is less than the time taken to update then the workbench will wait until the update is complete and immediately move forward again. So setting the interval to 0 will send updates as soon as the schedule is ready. When the 'play' button is clicked, the schedule starts to run through the day showing the movement of the resources on their route and the changing status of the activities
Note
The only status changes that take effect are "Travelling", "on-site", and "Complete".
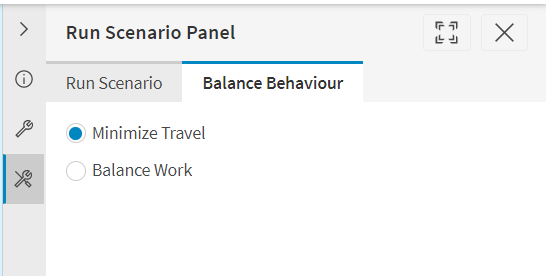
The "Balance Behaviour" tab provides option to toggle between "Balance Work" and "Minimize Travel". This option is used to change the 'In SLA' and 'Out of SLA' start and end proportions, to make them heavily sloped. This makes all activities with 'Normal' priority to be scheduled as early as possible.
Updating Activities
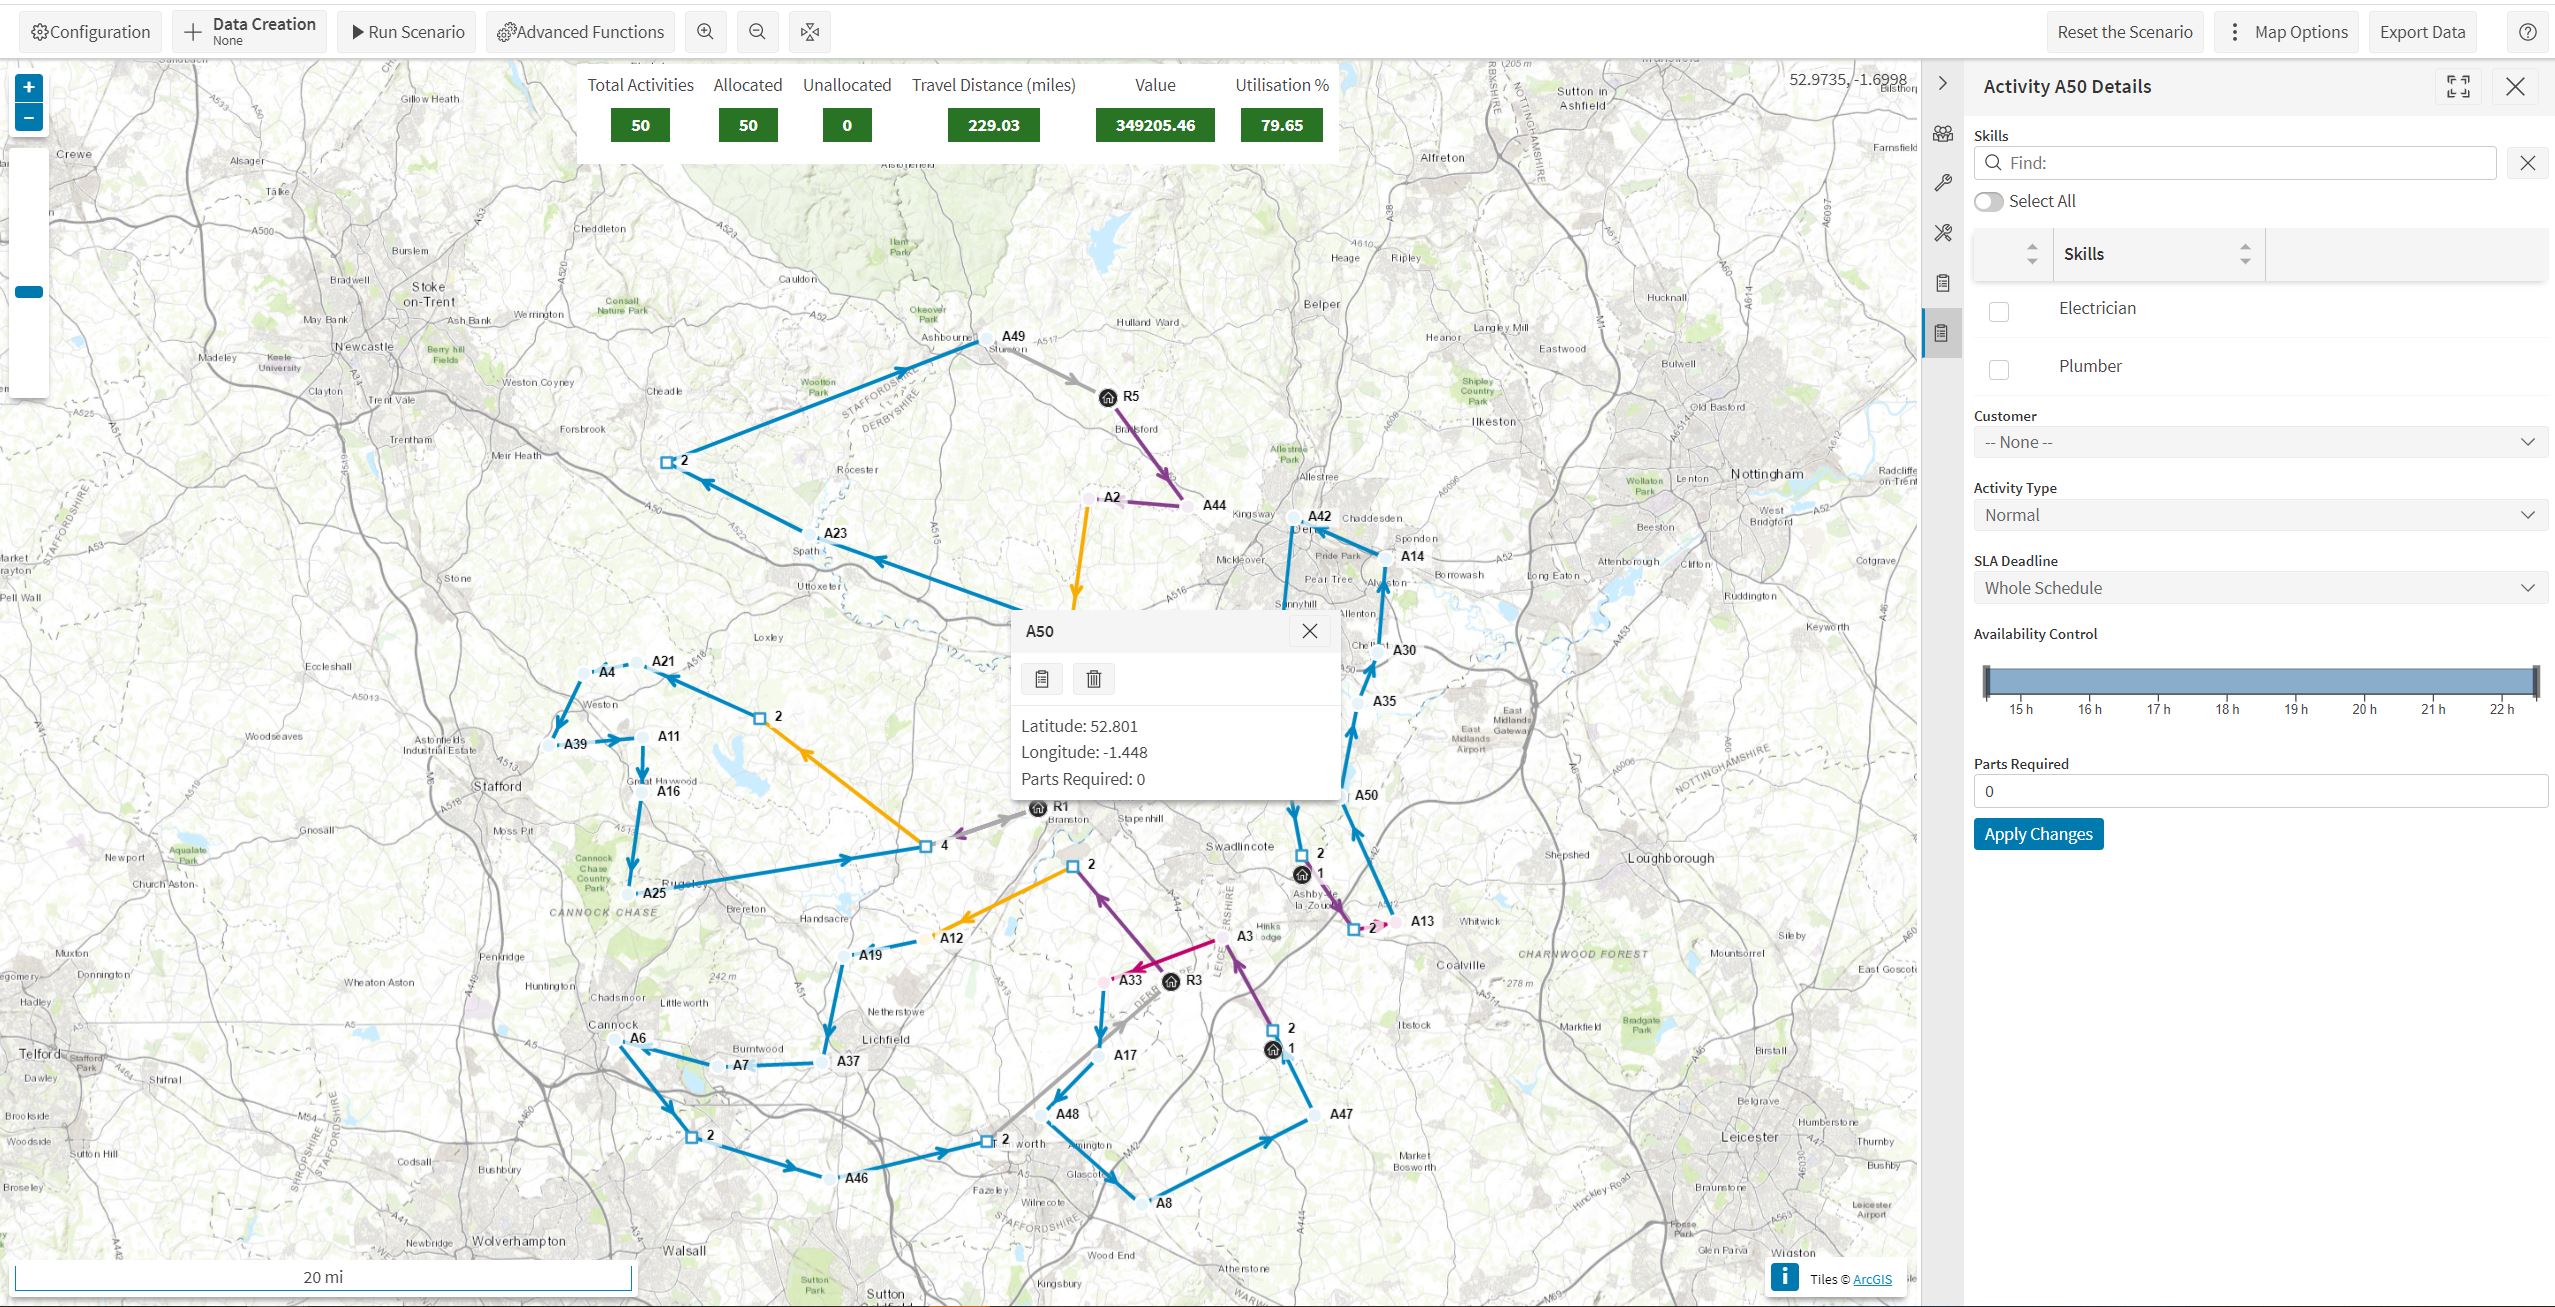
Clicking on an activity on the map, will bring up a context menu for the activity with context menu button for viewing 'Activity Details' as well as some basic information. Selecting the 'Activity Details' button in the context menu, will display a detail panel for the activity. This allows the user to view and change the following:
- Skills
- Customers
- Activity Type
- SLA Deadline
- Availability Control
- Parts Required
Modifying any of these options and clicking on the "Apply Changes" button, will save the changes for the activity.
Updating Resources
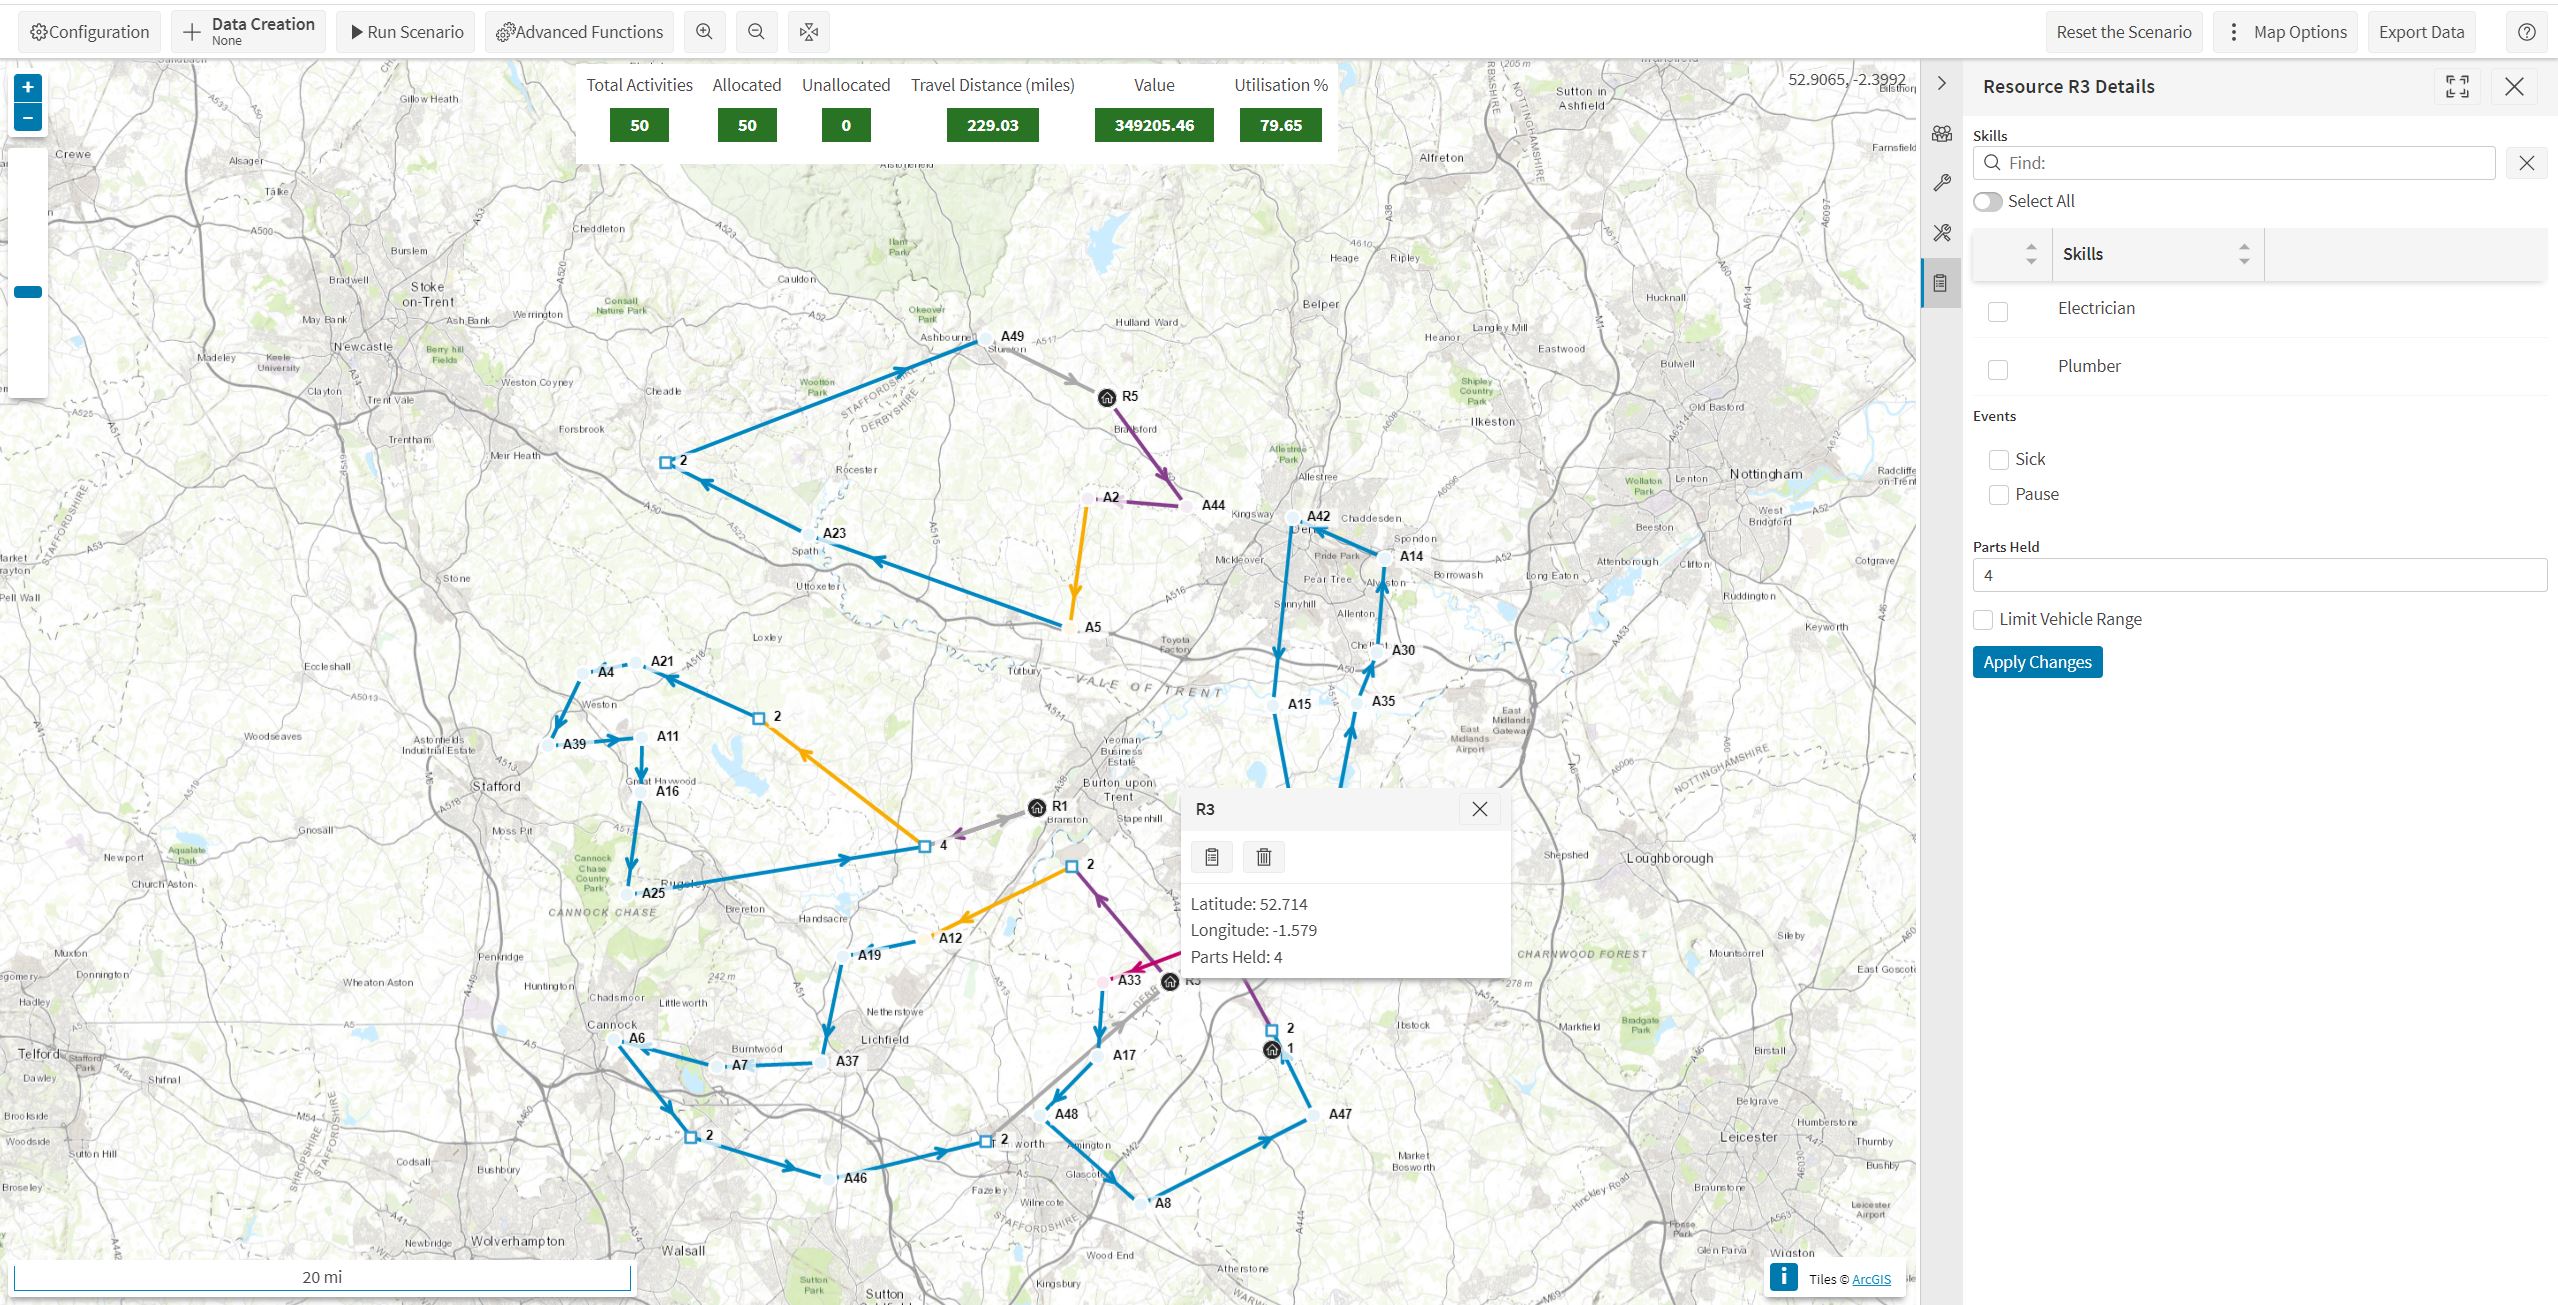
Clicking on a resource on the map, will bring up a context menu for the resource with context menu button for viewing 'Resource Details' as well as some basic information. Selecting the 'Resource Details' button in the context menu, will display a detail panel for the resource. This allows the user to view and change the following:
- Skills
- Events - mark the resource as 'Sick' or 'Paused'
Modifying any of these options and clicking on the "Apply Changes" button, will save the changes for the resource.
If a resource is marked as 'sick' before the simulation starts, the shifts for this resource will be removed. If a resource is marked as sick after the simulation has started, the resource will be logged off and there will be no further updates to the resource. If the resource is currently travelling to an activity, this activity will be set back to 'Schedulable'. If the resource is on site at an activity, the activity will be marked as 'Incomplete'.
If a resource is marked as 'paused', then no updates will be made to the activities allocated to the resource while the simulation is running. This can be used for example to simulate a resource overrunning on an activity.
Deleting Resources or Activities

Clicking on a resource or an activity on the map will bring up a context menu containing a button for delete. If the scenario is running, this button is not available. After successfully deleting a resource or an activity, the map is reloaded with the updated schedule.
Advanced Function - Regions
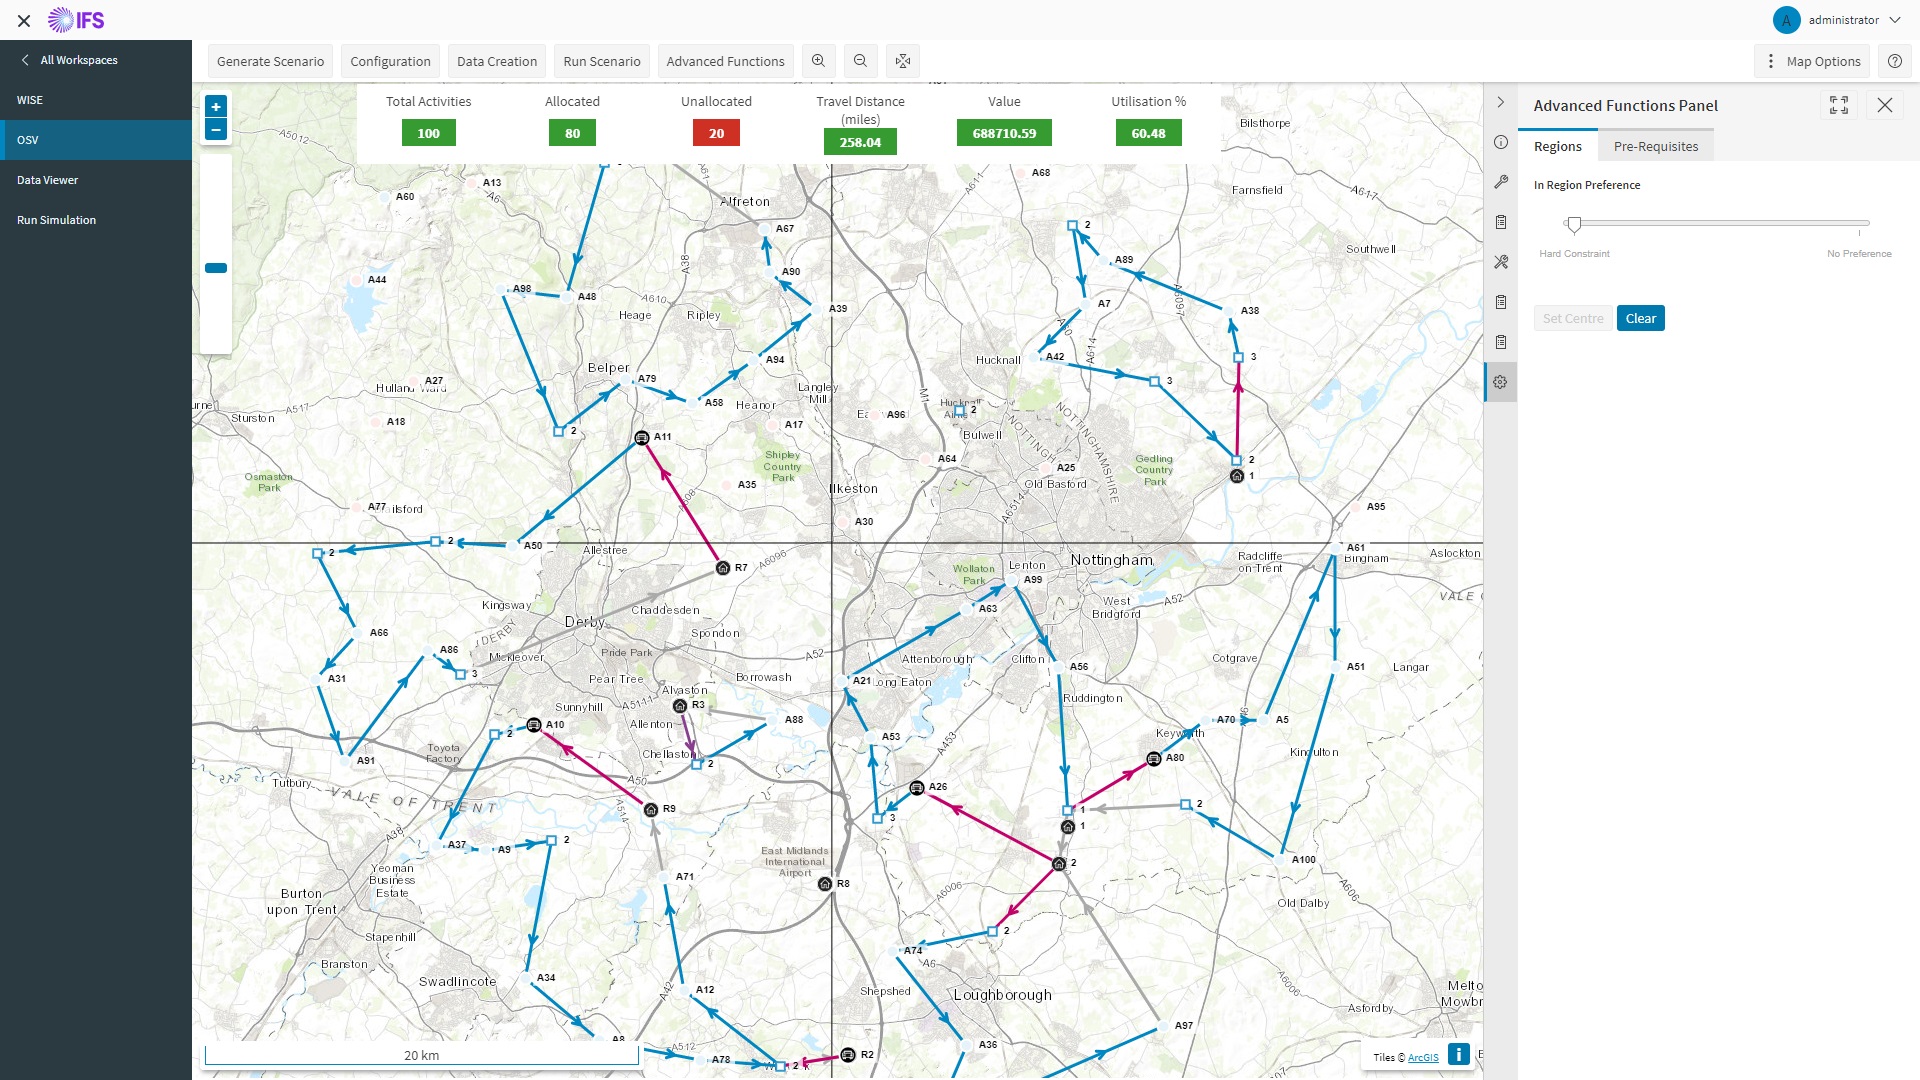
Clicking on the "Advanced Functions" button opens the panel for configuring "Regions", and "Pre-Requisites".
Regions can be defined on the map as quadrants with the center in the middle of the current map display. The creation of activities and resources associates them with the region in which they are geographically located. The panel provides following options:
- A slider to set the 'Hard Constraint' or 'No Preference'.
- A button to create regions and set the centre for the regions. The centre point will be the centre of the current map display.
- A button to clear the regions.
The regional boundaries are shown on the map as a single vertical and horizontal line each going through the centre-point. The thickness of the boundary lines varies along with the out-of-region multiplier value varying between 0 (Hard Constraint) and 1 (No Preference).
Note
By default, the regions are hard (Hard Constraint), and may be softened (No Preference). The region names are configured via the 'Configuration' data panel.
Advanced Function - Pre-requisites
This option enables the user to link activities together as a chain of pre-requisites. This option consists of the following:
- A drop-down to select the first activity in the chain.
- A drop-down to select the next activity in the chain.
- A '+' button which when clicked will add a third drop-down (and potentially a fourth, fifth etc).
- An "All or Nothing" checkbox.
- A "Same Resource" checkbox.
- A "Link Activities" button which will create links between the selected activities.
- A textbox (with label 'Existing Links') showing the links that have already been created.
Export and Import Scenarios
It is possible to save a generated scenario for future re-use.
To save a scenario at any point, click the export button in the top menu.

This will save the following:
- All added resources and activities, with associated location, skills, etc.
- The current data creation settings.
- The current configuration settings (map centre, skills names, etc.).
Note
Please note that if the simulation is already running using the 'Run Scenario' panel, then the current 'state' of resources and activities (travelling, completed etc.) will not be saved.
A saved scenario can be imported when starting a new scenario. The 'Reset the Scenario' button can be used to return to this screen.
Select the dataset name (this does not need to match the original version), and then click the 'Import Scenario' button.
This will give the option of whether or not to import the configuration from the exported scenario. Note that configuration settings are saved across scenarios, so any changes will also apply to future scenarios. This can however be edited and/or reset later via the 'Configuration Settings' panel.
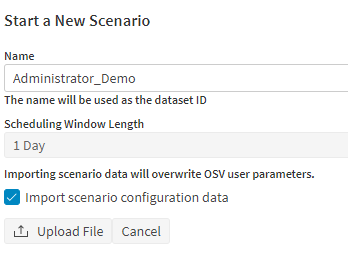
Click the 'Upload File' option to select the file to import.