The Scheduling Workspace
The Scheduling workspace allows users to view and interact with the plans produced by the Dynamic Scheduling Engine.
Note
For general details about workspaces and navigation see the Getting Started section.
The Scheduling Toolbar
The views in the Scheduling Workspace all share a number of toolbar options.
Datasets
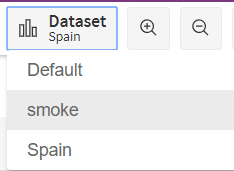
The active dataset is shown in the top left of the screen (on the far left of the toolbar menu). To switch to a different dataset, click on the active dataset to bring up the list of available datasets.
Help
The help icon appears on the far right of the menu. Click the icon to bring up context specific help for the page you are currently viewing. By default the online help is available in English language only.
Note
It is also possible to view the on-line help in German, although this feature is currently in Beta. To enable this option, the parameter 'UseTranslatedHelpIfAvailable' should be set to True, and the selected user language must also be German.

Schedule Time
Next to the help icon is the Schedule Time control. This will display the time of the latest plan produced by the Dynamic Scheduling Engine, along with a traffic light.
Note
The traffic light will be colour-coded depending on when a plan update was last received. If this was within the expected time-frame, the traffic light will appear green, but if a longer than expected delay has occurred, the traffic light will show first orange and then red.
Note
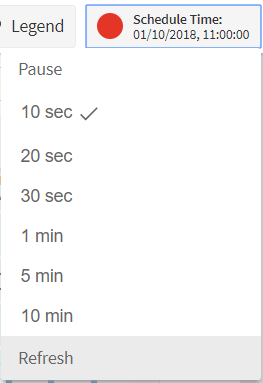
The schedule will be automatically updated on a timed basis. Clicking on the Schedule Time control will bring up a menu where the user can choose to pause the schedule (i.e. prevent further automatic updates), adjust the frequency of automatic checks, and/or manually refresh the schedule. When viewing a static, historical or saved schedule these options will not be available.
Viewing in a different timezone
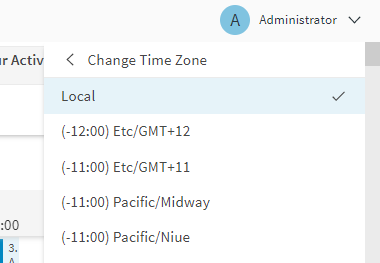
All times in the scheduling workbench are shown in a single timezone. This is normally the timezone selected in your browser, but you can select a different timezone in the menu at the top of the screen.
When the schedule is being displayed in a different timezone, the current display timezone is shown in the traffic-light.
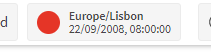
A resource can have a specific home timezone. If the resource has a timezone, but you are currently viewing the schedule in a different timezone, the resource will be labelled to show the home timezone.
You also have the option of displaying the resource timezone in a column in the resource page.
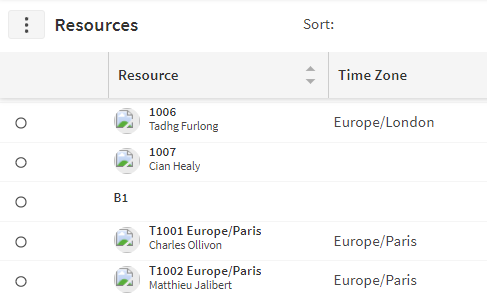
The timezone is only shown on the resource label if the resource has a specific timezone, and the current timezone is different. In this picture the schedule is being viewed in London time, In the picture below 3 resources have a specific timezone listed in the timezone column. Only the last two have the timezone highlighted in their label because their timezone is different to the current timezone view.
Note
Note that the behaviour for displaying the resource timezones may be changed by your administrator.
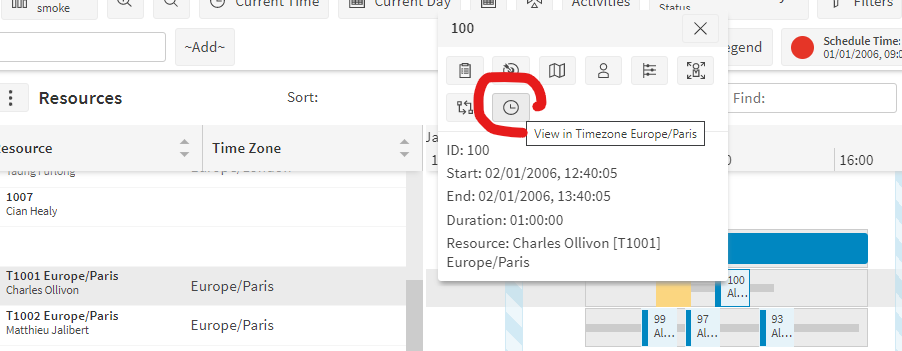
When resources or their activities are clicked on, a menu appears. If the resource has a different home timezone to the current timezone, a button is available to switch to the timezone of the resource.
The Schedules Viewer
The 'Schedules' button in the toolbar will open a side panel from where the user can view historical schedules, save the current schedule and view existing saved schedules.
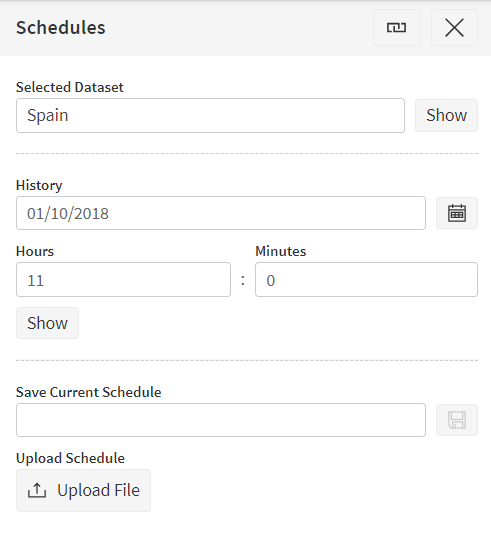
The top part of the panel show the current live dataset. The 'Show' button can be used to return to viewing the live data for this dataset.
Viewing Historical Schedules
To view a schedule from earlier in the current day, or from a previous day, simply specify the date and time of the schedule you want to view in history, and select 'Show'.
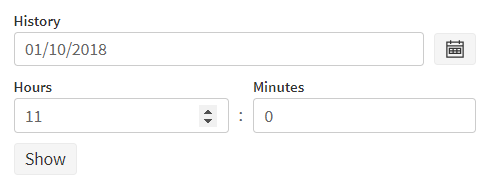
The Scheduling Workbench will display the last schedule produced at or before the selected time.
Note
Please note that schedules will be cleared out after a period of time, so it may not be possible to view a schedule for the date specified. The schedule archive can be used to save and view schedules for a longer period of time, and to automatically save snapshots of the schedule on a regular basis. Please see the Schedule Archive User Guide for further details.
Saving the Current Schedule
To save the current schedule, type a description for the schedule in the box at the bottom of the viewer and click 'Save'.

Viewing Saved Schedules
Once a schedule is saved it will appear in a list at the bottom of the Schedules panel.
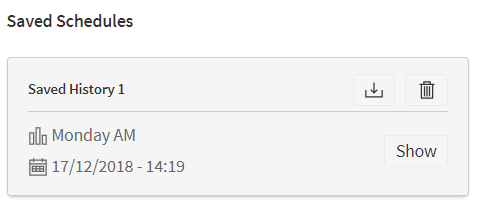
Click 'Show' to display a saved schedule. When viewing a saved or historical schedule the Datasets control will update to notify the user of this.
Saved schedules can also be deleted by clicking on the bin icon.
Finally, saved files can also be uploaded and/ or downloaded, provided the user has appropriate permissions. To download a schedule click the download icon for the saved schedule you wish to download. To upload click the Upload File button and select the file you wish to upload.
Filtering Activities and Resources
The Scheduling Workbench allows you to create filters to limit which resources and activities are visible on the workbench. These filters can also be shared with other users, and between datasets. You can also create new filters using an existing filter as a template.
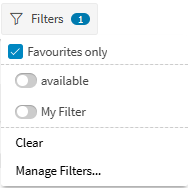
The 'Filters' button in the toolbar is used to select which filters are currently applied.
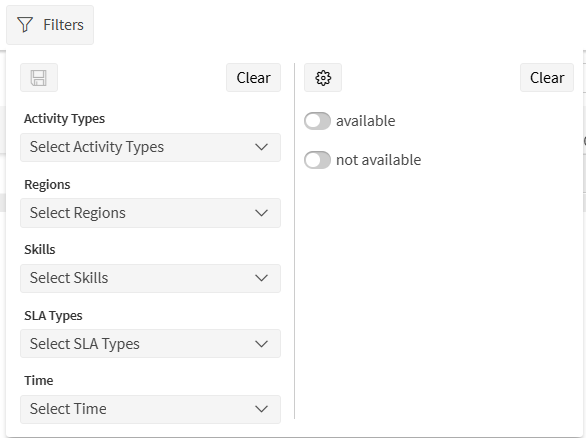
Multiple filters can be applied at the same time, in which case all restrictions will be applied. For example, if two filters are applied, one to show only region 'North' and one to show only today, the result will be that only resources in region 'North' will be shown, and only their routes for today.
The filters button also has options to clear all filters and to manage filters (i.e. create and edit user filters).
Fast Filters
Fast filters provide a quick way to narrow the view by activity type, group, region, resource type, skill, SLA type, or time without creating or managing a saved filter. They are useful for temporary, ad-hoc filtering while you work.
The fast filter control appears alongside the filters described above. Click the 'Filters' button to open a dropdown where you can select the criteria you want to apply. You can combine several criteria at once; for example, you might select one or more regions, activity types, and a time range. The schedule updates as you change your selections.
The fast filter dropdown lets you filter by:
- Activity types — show only activities of the selected types
- Groups — restrict to resources and activities in the selected groups
- Regions — restrict to the selected regions
- Resource types — show only resources of the selected types
- Skills — show only resources with the selected skills and activities that require them
- SLA types — restrict by the selected SLA types
- Time — limit the view to a time range (relative to the schedule or an absolute date range)
Use the clear option on the left side of the dropdown to remove all fast filter selections. Fast filters can be used on their own or together with one or more saved filters; when both are applied, all restrictions are combined.
Saving a fast filter
If you want to keep the current fast filter criteria for later use, you can save them as a named filter. In the filter dropdown, click Save. A new filter is created with the same activity types, groups, regions, resource types, skills, SLA types, and time range you have selected. The filter is given a default name (and a number in brackets if a filter with that name already exists). After saving, the filter detail panel opens so you can rename the filter, edit it, or share it like any other filter.
The Save button is only available when at least one filter criterion is applied (for example, one or more regions, activity types, or a time range). Once saved, the filter appears in your filter list and can be applied from the Filters button like any other saved filter.
Fast filters will be persisted per user for the current dataset. If a user changes dataset then the options in the fast filter will be cleared and will not be retrievable. If a user wants to keep the configuration they should save the fast filter before switching dataset.
Managing Filters
Click the 'Manage Filters...' option to open the Filters panel on the right hand side of the screen.
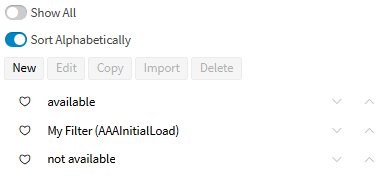
From here you can create a completely new filter, create a filter based on a template, or edit an existing filter.
Create a New Filter
To create a new filter click the 'New' button, and enter the name of your filter. You can optionally select an existing filter to base your new filter on from the Template drop down list.
You can also choose whether the filter should be shared across datasets here. Note that some filtering options are not available when a filter is shared between datasets, such as region based filtering. You can also update this option after the filter has been created on the filter 'Sharing' tab.
Once you are happy with these options click the 'Create Filter' button.
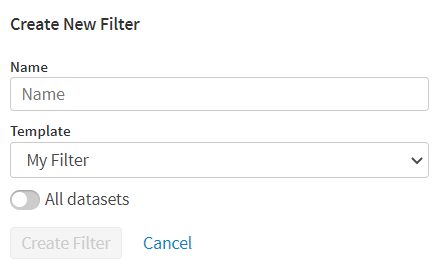
This will open a new filter editing panel consistent of several tabs, these include: Resource, Activities, Groups, Regions, Skills, Time and Sharing. See details below for each tab.
Once you have set up the options as desired, click the 'Apply' button at the top of the panel to apply the filter and save the changes. You can also delete the filter if you no longer require it using the bin icon.
Note
Please note that Groups, Regions, Time and Skills based filters are all applied on the server side, whereas Resource and Activity filters are only applied client side. The server side filters have the advantage of reducing the traffic between the server and client, so it is advised to use these filters where possible.
Editing a Filter
To edit an existing filter simply click on the name of the filter to open the same filter editing panel.
Once you have set up the options as desired, click the 'Apply' button at the top of the panel to apply the filter and save the changes. You can also delete the filter if you no longer require it using the bin icon.
Filter Resources and Activities
Activities and Resources can each be filtered using either Basic or Advanced filtering.
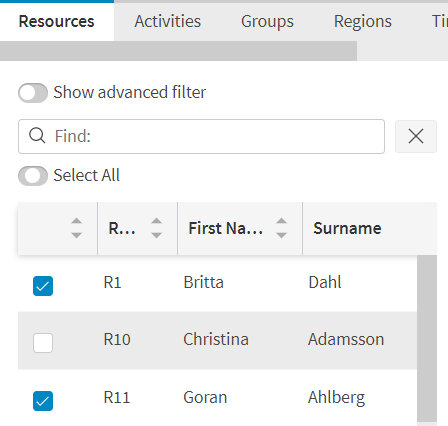
To add a basic filter on resources, switch off the 'Show Advanced' option, and then simply toggle the resources you wish to view. The 'Select All' option can be used to quickly select all or no resources.
Likewise, to add a basic filter on activities, select the activities you wish to include using the toggle option.
To add an advanced filter on resources, check the box and then select whether the resources should match all or any of the rules defined. This is effectively the same as applying an AND or an OR expression on the rules that you define.
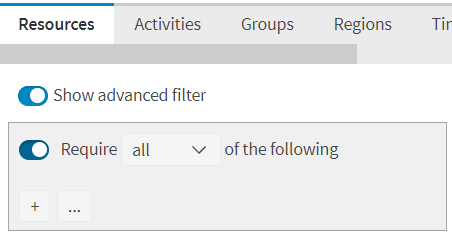
To add a new rule click the '+' button. You can specify the field to filter on by typing directly into the dialog box which will display pre defined fields to choose from. The format is of the format Table.field (e.g. Resources.memo). If the field is not valid to be filtered on the dialog box will be highlighted in red.
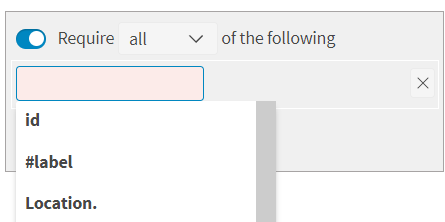
Select an attribute (e.g. ID); a new drop down list appears to the right containing a list of compare functions
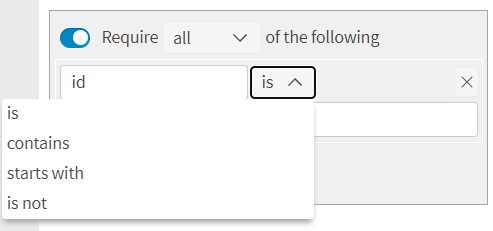
Select the desired function and then finally complete the rule by entering a value into the text box on the right:
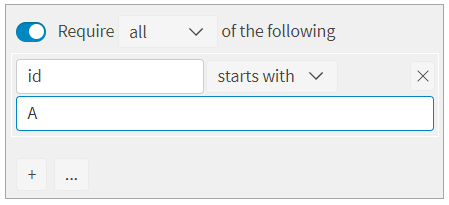
If you just want to create a simple filter with only one rule all you need to do now is click 'Apply' and close the filters panel. However if you want to create more complex filters you need to use the '+' and '...' buttons to add new rules.
To add a new rule click the '+' button. These will be displayed as shown below:
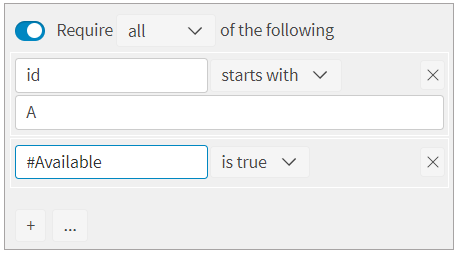
Depending on your selection at the top of the tab either all or any of these rules will be applied.
To add a new sub rule to an existing rule click the '...' button. This will be displayed as shown below:
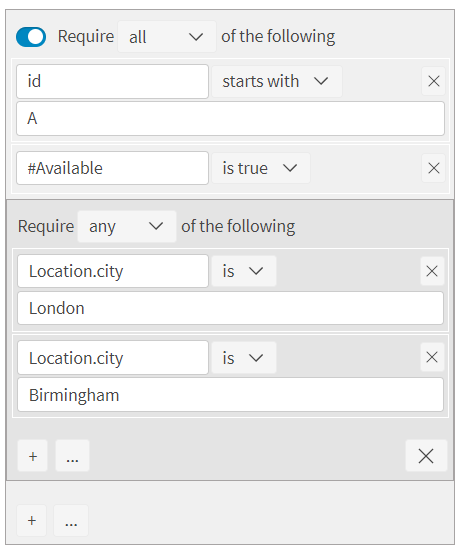
The example shown requires the resource ID to start with A, the resource to be available, and the resource city to be either London or Birmingham.
Filters for activities follow the same pattern as that described for Resources but with different fields.
Note
To remove a rule click the 'x' button on the right hand side.
Filter Groups
The Scheduling System allows both users and data to be linked to groups. Groups can be defined on Activity, Activity Type, Resource and Resource Type.
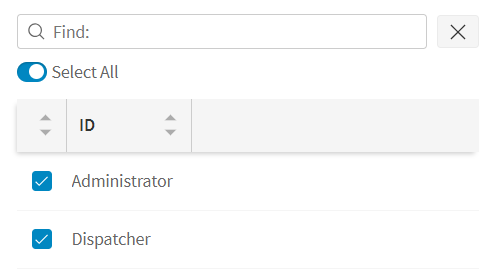
Users are only able to view resources and activities for groups that they belong to, so when using groups users may find the schedule is already filtered without the need to set filters up explicitly.
However, if a user is in multiple groups then they can use the Groups tab to restrict which groups they are shown at any one time, out of the groups they belong to.
Filter Regions
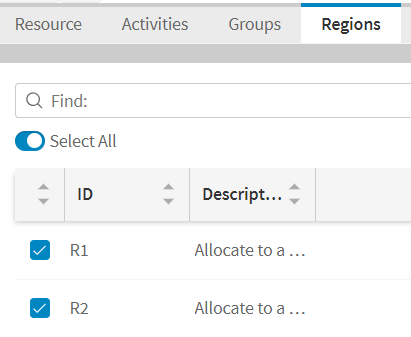
This allows the user to filter based on any regions that have been set up in the data. Only those resources and activities which are in the selected region(s) will be displayed:
Note
Note that not all activities displayed will necessarily belong to the region(s) selected. They may be allocated to a resource which is in the selected region(s).
Note
Note that this filter is applied when retrieving data from the server. Thus for large datasets, there can be a significant performance gain from applying a region based filter to the data.
Filter Skills
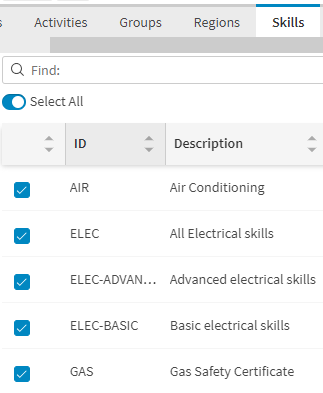
This allows the user to filter based on any skills that have been set up in the data. Only those resources that have a selected skill and activities that require a selected skill will be displayed:
Note
Resources will be included in the filter if they have a parent skill of any of the selected skills. Similarly, activities will be included if they have a child skill of any of the selected skills.
Note
Note that not all activities displayed will necessarily have the skill(s) selected. They may be allocated to a resource which has the skill(s) selected.
Note
Note that this filter is applied when retrieving data from the server. Thus for large datasets, there can be a significant performance gain from applying a skill based filter to the data.
Time
This allows you to filter the data shown to a specified time period. It is possible to restrict either the earliest time shown, or the latest, or both.
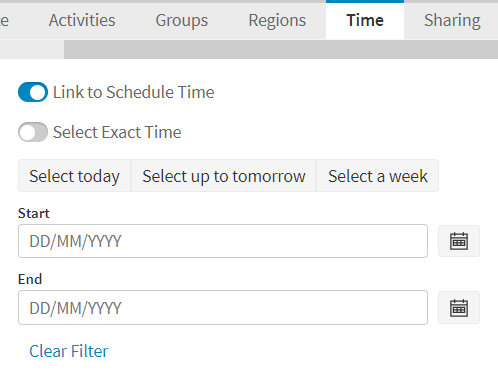
When a time based filter has been applied, the resource and activity Gantt will both be restricted to based on the filter dates. The data shown will include only data within the selected period, and the Gantt itself will only allow the user to scroll within the filter times.
There are quick options to create a filter for today only, today and tomorrow or the first week of the schedule.
By default the filter will be linked to the current schedule day. This means that a filter showing the current day only will always show the first day of the schedule, regardless of what day that is.
If you wish instead to show an absolute date range, toggle the 'Link to Schedule Time' button to switch this link off.
Finally, it is also possible to link the filter to the exact schedule time, using the 'Select Exact Time' toggle. For example, if the current schedule time is 11am on 1st October, then the filter shown below will always show 2 hours in the past and 12 hours in the future:
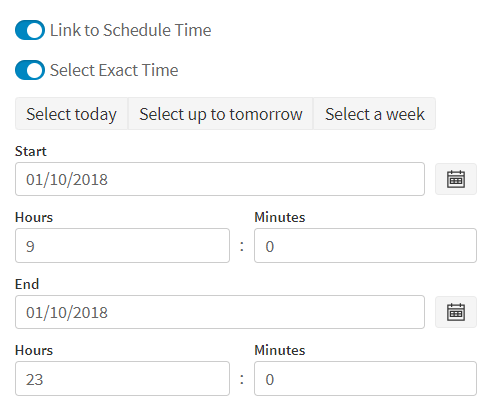
To remove a time filter, use the 'Clear Filter' button at the bottom of the panel.
Note
Note that this filter is applied when retrieving data from the server. Thus for large datasets scheduling over many days, there can be a significant performance gain from applying a time based filter to the data.
Filter Sharing
This tab allows the user to share their filter with other users, or between datasets.
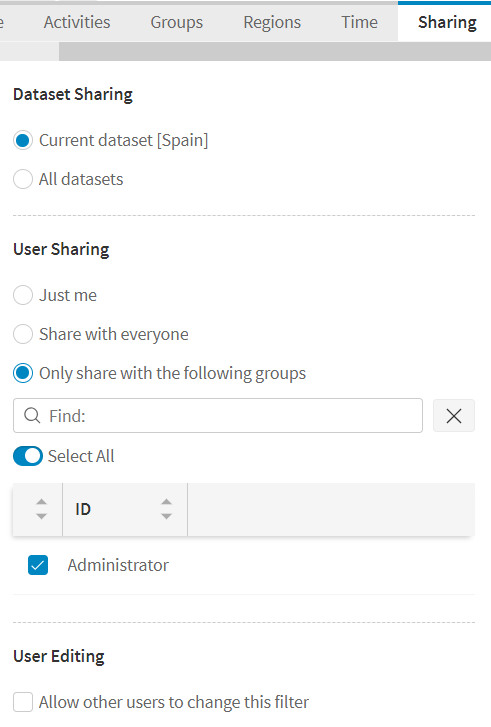
To share the filter between datasets simply toggle the 'Share between datasets' option.
Warning
It is not possible to share filters between datasets if the filter contains either basic resource or activity based filters, region based filters or skill based filters. Filters that used advanced resource or activity filtering, and/or groups and time based filtering can be shared.
You can also choose to share your filter with other users, either those in selected groups or with all users. If you do choose to share your filter you can also choose whether to allow other users to edit the filter using the checkbox.
Copying and Importing Filters
If you wish to either import a filter set up by another user, or copy a filter from another dataset, go to the filter manage panel and click the 'Show All' button. The list of filters will now include all filters that have been set up in any dataset, and/or by another user.
To import a filter, click on the filter to select it, and the 'Import' button should show as enabled. Simply click this button and the filter will now be included in the current user's list of filters.
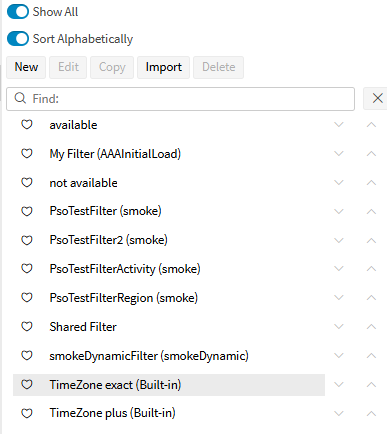
To copy a filter from another dataset, select the filter and click the 'Copy' button. This will open the new filter screen with the selected filter set as the template. When copying a filter from another dataset, the software will determine which selected regions, resources and activities are still applicable, and remove any that aren't.
Sorting Filters
In the filter manage panel, there is the option to either sort alphabetically or with a custom sort order. By default the filters are sorted alphabetically, this can be changed by using the 'Sort Alphabetically' toggle. When the toggle is turned off the sorting options will be enabled for each row in the filters list.
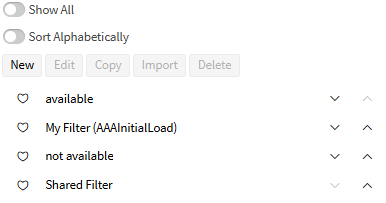
By clicking on either the arrow up and down options for any row the order of the filters will be updated. Clicking the arrow down on a row will switch its position with the filter directly below it. Likewise, clicking the arrow up on a row will switch its position with the filter directly above it. There is also the option to drag and drop filters into their desired position.
Any sorting that is applied on filters will be persisted for the user across sessions and clients. This order will also persist if the 'Sort Alphabetically' is toggle on and then off.
Favourite Filters
Favourite filters is a feature that allows users to mark frequently used filters as favourites for quick access. Favourite filters are stored per dataset and per user, making it easy to organize and quickly apply commonly used filter configurations. In the filter manage panel, an icon at the beginning of each filter row shows whether a filter is a favourite. If the heart icon is empty then the filter is not a favourite and if it is solid it is a favourite. Clicking this icon changes the state.
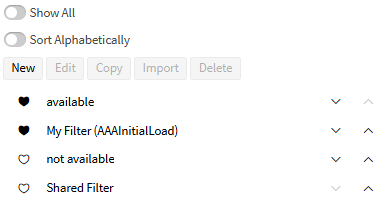
A filters favourite state can also be edited in the filter details panel on the top right of the panel. This again used an empty or solid heart icon to show the current state.
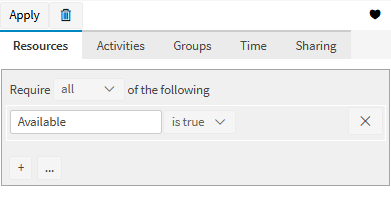
In the filters dropdown, you can display only the current favourite filters by selecting the checkbox 'Favourites only'.