Install Oracle Database 19c Enterprise Edition Software
Install Oracle Database 19c
The following describes how to install Oracle Database 19c
Enterprise Edition software on a server using MS Windows.
- Download Oracle Database 19c distribution to the database server.
- Create a new $ORACLE_HOME directory for Oracle 19c
(c:\app\Administrator\product\19.3.0\dbhome_1).
- Unpack the Oracle 19c distribution in the new $ORACLE_HOME directory.
- Start Oracle Universal Installer as Adminitrator by running Setup.exe,
found in the directory
where you have extracted the software distribution.
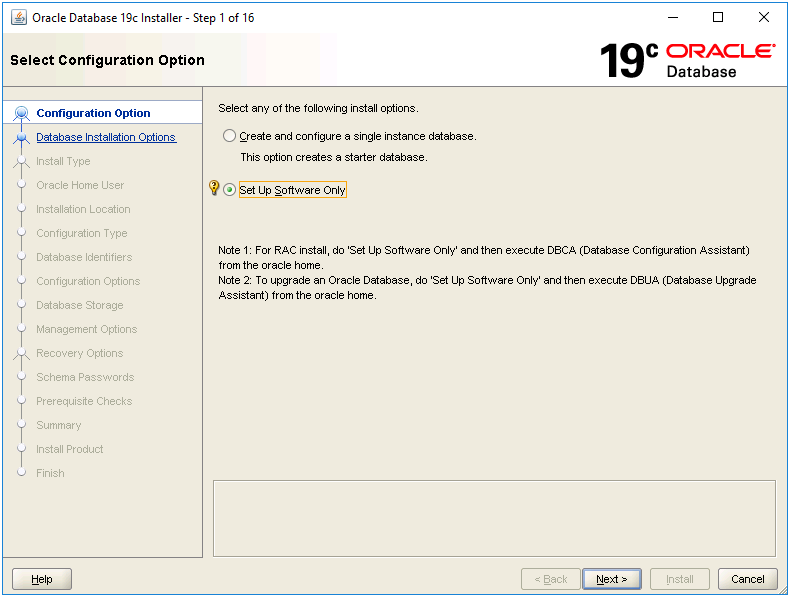
- Step 1 – Configuration Options. Select to Set Up Software Only and press Next.
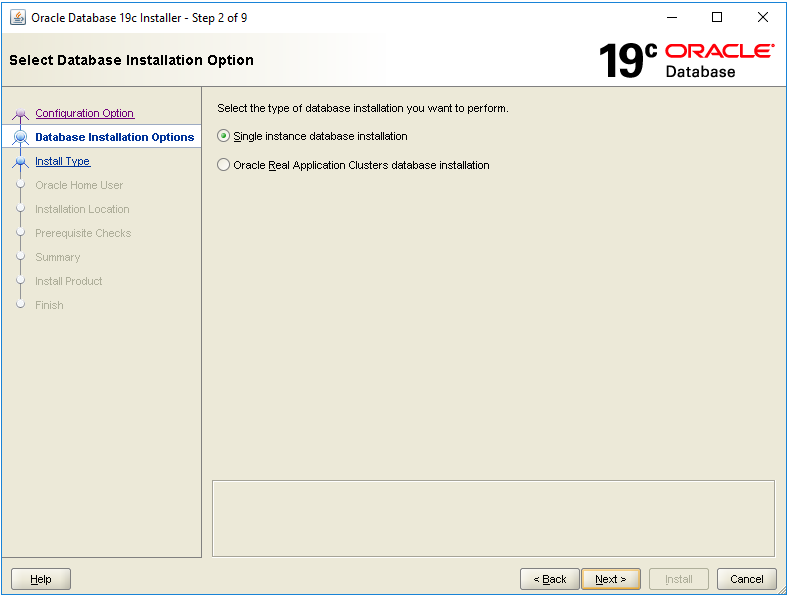
- Step 2 – Database Installation Options. Select the type of
database installation you want to perform, then press Next.
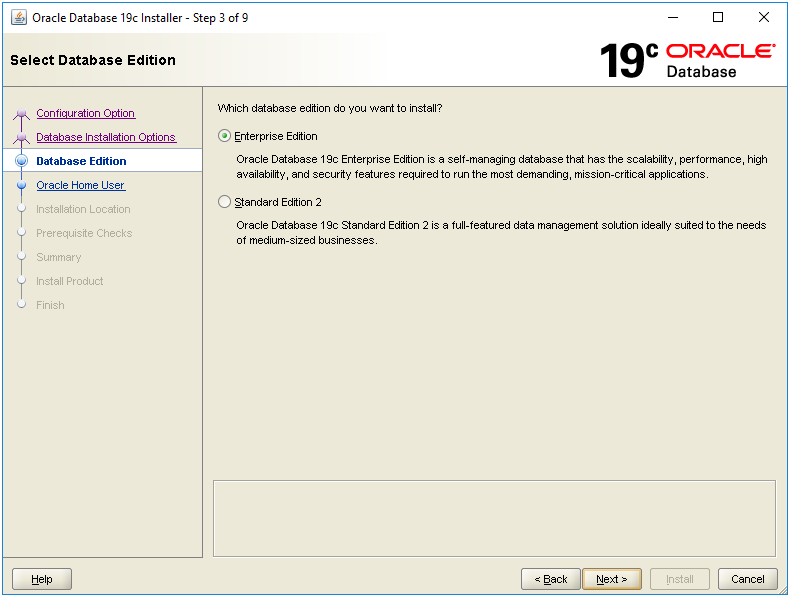
- Step 3 – Database Edition. Select which database edition you want
to install (the one you are licensed for), then press Next.
IFS Applications is
certified for both Standard Edition 2 and Enterprise Edition.
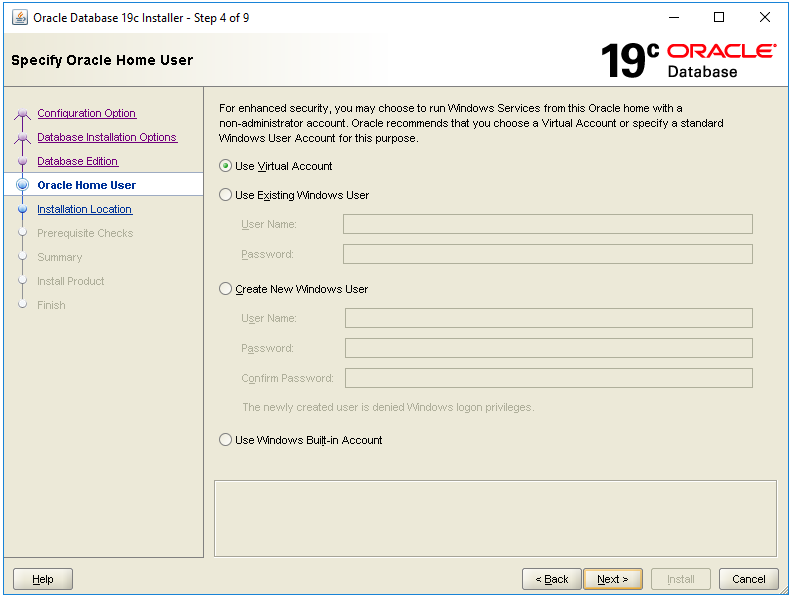
- Step 4 – Oracle Home User. Choose which Windows User Account to
use, then press Next.
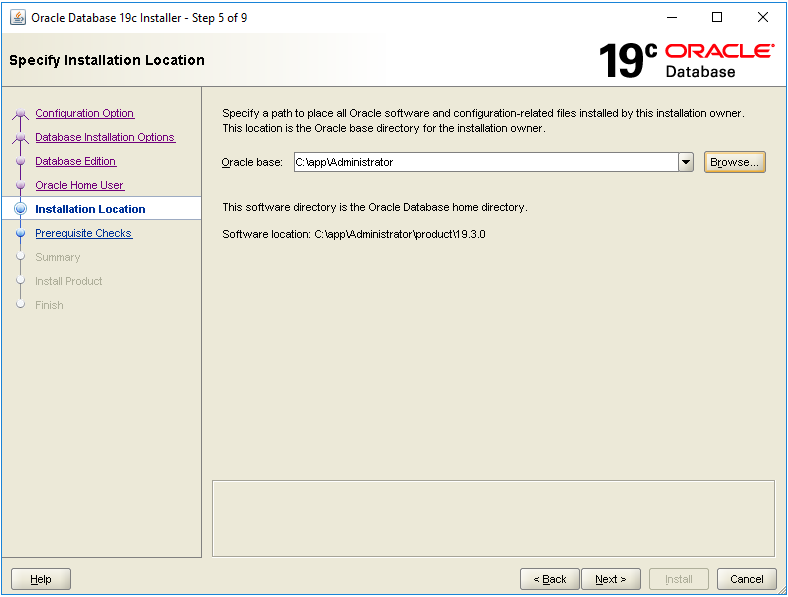
- Step 5 – Installation Location. Specify the path to $ORACLE_BASE, then press Next.
- Step 6 – Prerequisite Checks. The installer performs
prerequisite checks to verify that the target environment meets minimal
installation and configuration requirements.
Verify the result, take care of
any warnings and, when all
checks succeeded, press Next.
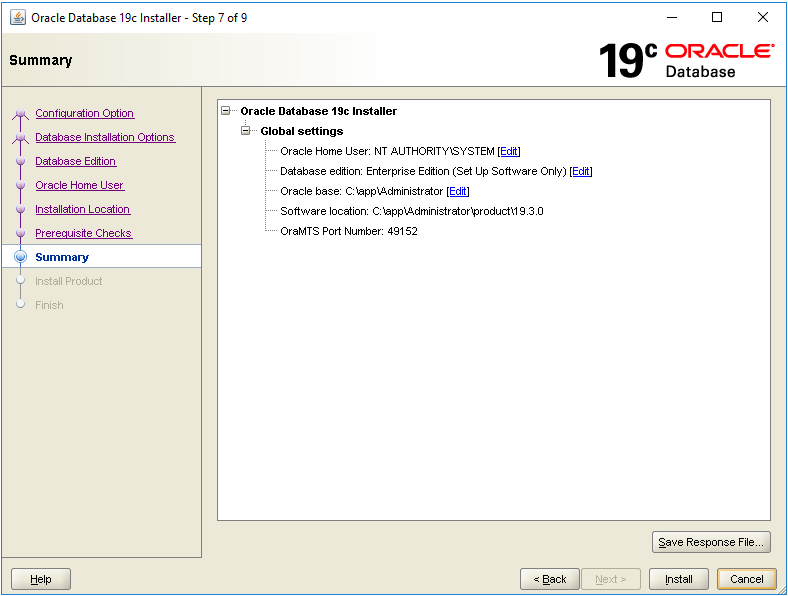
- Step 7 – Summary. Verify the summary page, then press Install.
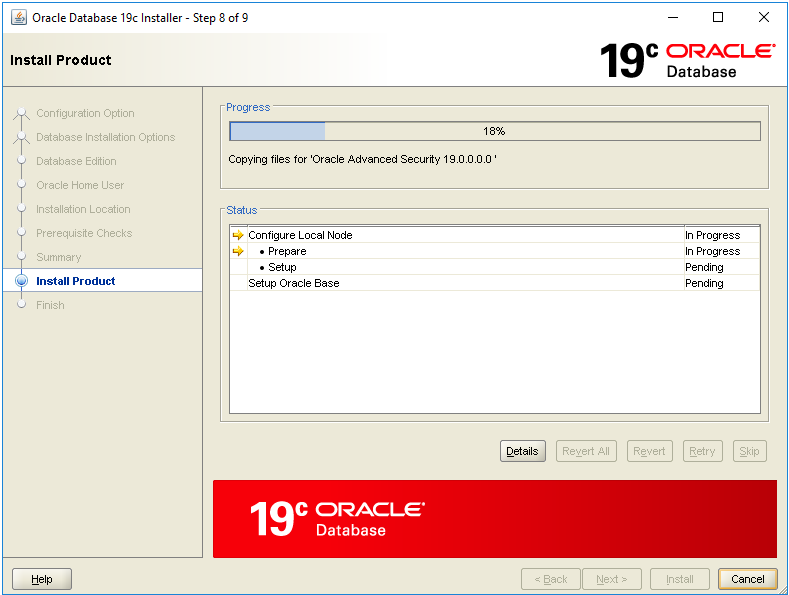
- Step 8 – Install Product. Installation starts.
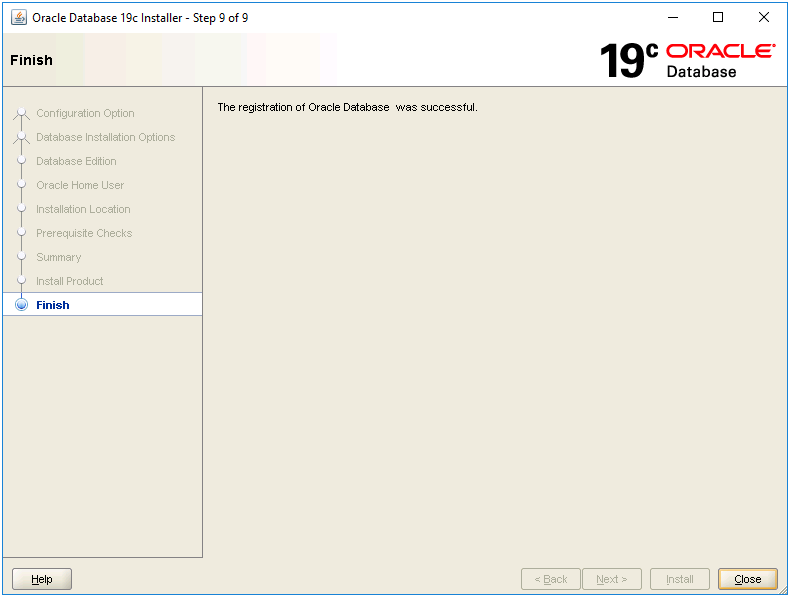
- Step 9 – Finish
 |
No special verification is needed. |
 |
Contact Oracle support if you have problems. |