IFS Connect Transformer for SEPA XML
The purpose with this page is to provide a step-by-step guide how to install
a XSL transformer related to the SEPA payments. SEPA or Single Euro Payment Area,
is an initiative for the European financial infrastructure and IFS Financials can
produce Euro payments in a core specific IFS SEPA format. Using XSL transformers,
enables an easy way to transfer the core SEPA XML to a country/customer specific
XML layout.
How to set up necessary routing addresses and routing rules in IFS Connect for
the SEPA transformers is also covered.
IFS Connect is providing a number of transport connectors, when sending and receiving
files, like e.g. FTP,
Mail, Http and
SMS. This guideline will however only describe how to output the result
to a XML-file on a file system using the Connector Sender
FILE_SENDER. For more information on transport
connectors available in
IFS Connect.
Creating the XSL transformers is preferably performed by using a third party
tool.
Use this page when you know how to create, install and configure XSL transformers
based on the core SEPA XML layout.
Contents
- Open Solution Manager
- Navigate to Integration /
IFS Connect
/
Setup IFS Connect
- Expand the folder Transformers
- Mark one of the transformers and select Duplicate
in the menu bar.
- Rename the transformer and add proper descriptions in the description fields.
- Select Transformer type XSL.
- Select Load to choose the created transformer
file.
- Select the file and press Open
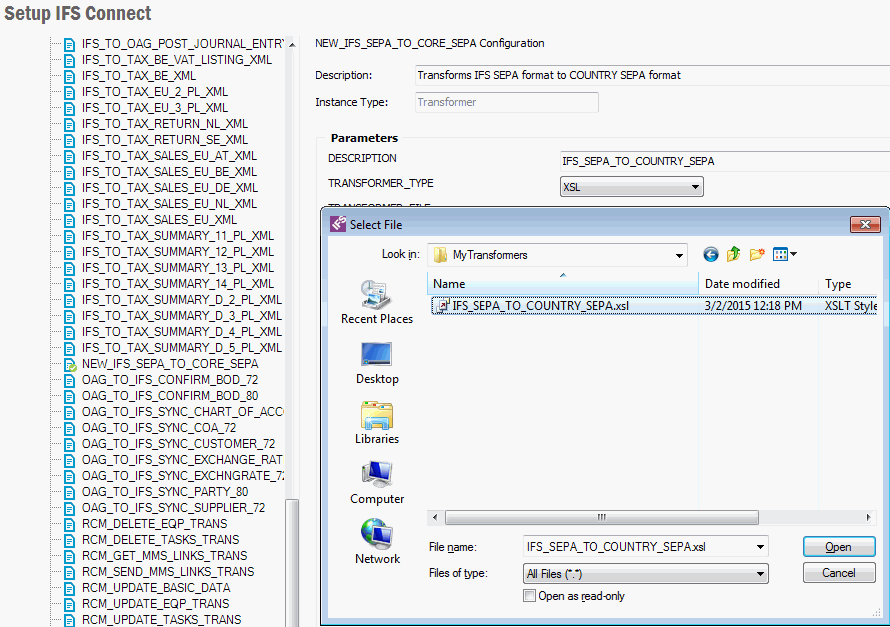
- Press the Save icon in the menu bar
- Navigate to Integration /
IFS Connect
/
Routing Addresses
- Select Create New in the menu bar
- In Destination Type field, select
File.
- Select the previously created Transformer file as
Transformer1
- Type a suitable file address in the File Sender
field.
One example of file address is,
%FILE_OUT%/%MESSAGE_FUNCTION%_COUNTRY_transformed_%GUID%.xml
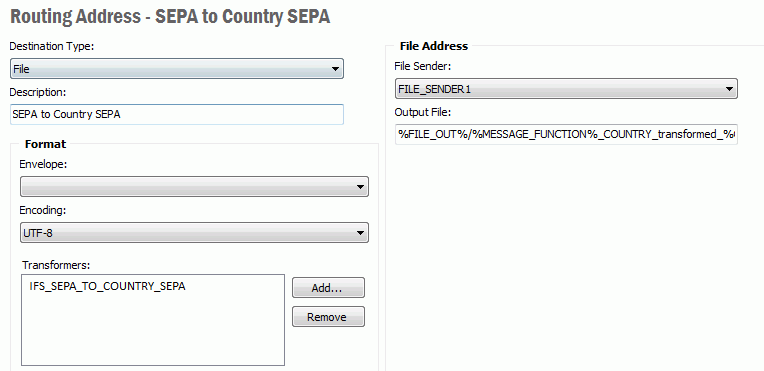
- Save the Routing Address
- Navigate to Integration /
IFS Connect
/
Routing Rules and select the
Outbound tab.
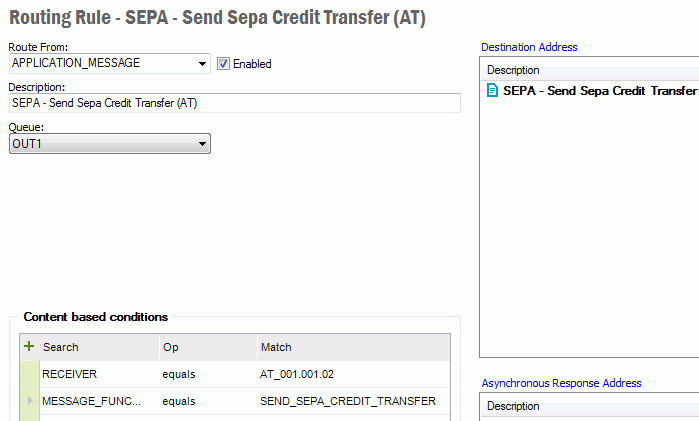
- Select Create New in the menu bar
- Select APPLICATION_MESSAGE to route from
and ensure the checkbox Enabled is selected
- Enter a proper description in the Description
field.
- Select the OUT1 queue
- RMB in the Content based conditions, choose
Edit - New
- Select MESSAGE_FUNCTION as
Search Criteria (Search),
equals as Operand
(Op) and SEND_SEPA_CREDIT_TRANSFER as
Matching Criteria (Match)
- RMB and choose Edit - New again.
- Select RECEIVER as
Search Criteria and
equals as Operand
- As Matching Criteria select the XML layout
code specified in the column File Template
(pay_format_xml_file_templ_tab) in Format Specific Info per
Institute window for the SEPA Payment Format (IFS Financials)
- Select Destination Address and choose the
previously created Destination Address in the
dialog box.
- Press OK
- If you have selected several addresses you have to set which of them to
be the main address by pressing RMB on one of them and select
Set as Main Address
- Select Save in the menu bar
If there is a need for storing the XML-files on several different destinations,
then several File Sender can be used.
If e.g. there is need to separate the files based on company and/or payment institute,
for Send Sepa Credit Transfer messages, use the
search criteria SENDER in the content based conditions
section of routing rules. The value of SENDER is
for this message defined as <COMPANY>,<PAYMENT_INSTITUTE_ID>.
In this example we will place all SEPA CORE XML files from one company in a separate
folder and all files from another company in a different folder.
- Navigate to Integration /
IFS Connect
/
Setup IFS Connect
- Expand the folder Connector Senders
- RMB and click on FILE_SENDER1 and select
the menu choice Duplicate
- Rename the file sender to, for example, FILE_SENDER_COMPANY01
and enter a suitable description in the Description
field
- In the parameter field OUT_DIRECTORY, define
the destination folder where to store all files for the first company.
Note: If WRITE_MODE in the file sender configuration
is set to CREATE_NEW, files will not be overwritten
but a GUID will be added to the file name if the file already exists
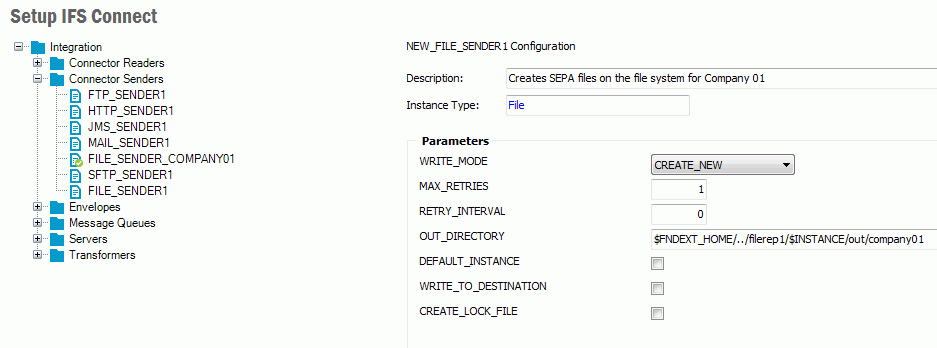
- Save the configuration
- Press the Duplicate button in the menu
bar, rename the duplicated file sender to, for example
FILE_SENDER_COMPANY02 and enter a suitable
description in the Description field
- In the parameter field OUT_DIRECTORY, define
the destination folder where to store all files for the second company.
- Save the configuration
- Navigate to Integration /
IFS Connect
/
Routing Addresses and select
Create New in the menu bar
- In
Destination Type field select
File
- Enter a proper description and select transformer
IFS_SEPA_TO_CORE_SEPA in the
Transformer1 field
- In the File Sender field, select the previously
created FILE_SENDER_COMPANY01
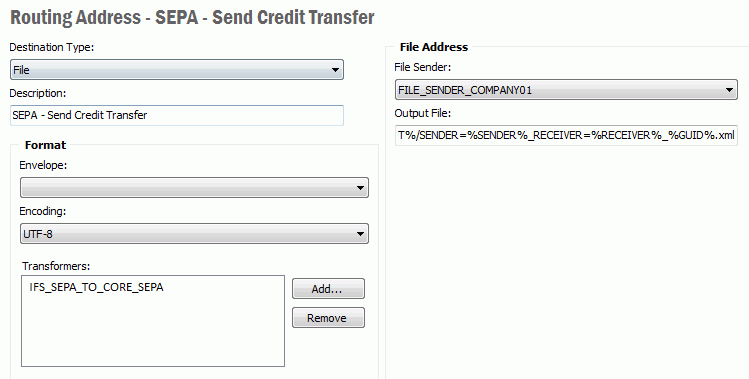
- In the field Output File define how the
created files will be named. In IFS Connect there are a number of predefined
keywords you can use when defining the name,
| Keyword |
Description |
| %FILE_OUT% |
The output directory defined in the parameter
OUT_DIRECTORY in the file sender configuration |
| %GUID% |
A key generated to uniquely identify every file created |
| %MESSAGE_FUNCTION% |
Name of the BizApi, in this case SEND_SEPA_CREDIT_TRANSFER |
| %SENDER% |
The sender of the message, in this case it’s defined to <COMPANY>,<PAYMENT_INSTITUTE_ID> |
| %RECEIVER% |
The receiver of the message, in this case it’s defined to the value
of the file template used. In this example the value is
CORE |
| %SEQ_NO% |
The Application Message Id in the IFS Connect framework |
| %TIMESTAMP% |
A timestamp that shows when the message is sent |
- In this example we will use the following keywords in the
Output File field,
%FILE_OUT%/SENDER=%SENDER%_RECEIVER=%RECEIVER%_%GUID%.xml.
The definition leads to the following filename,
SENDER=01,BANK_RECEIVER=CORE_f70635c0-078f-11dd-09d8-ee9346728d5d.xml
- After naming the output file, save the routing address and navigate to
Integration /
IFS Connect
/
Routing Rules. Choose the
Outbound tab and select
Create New in the menu bar
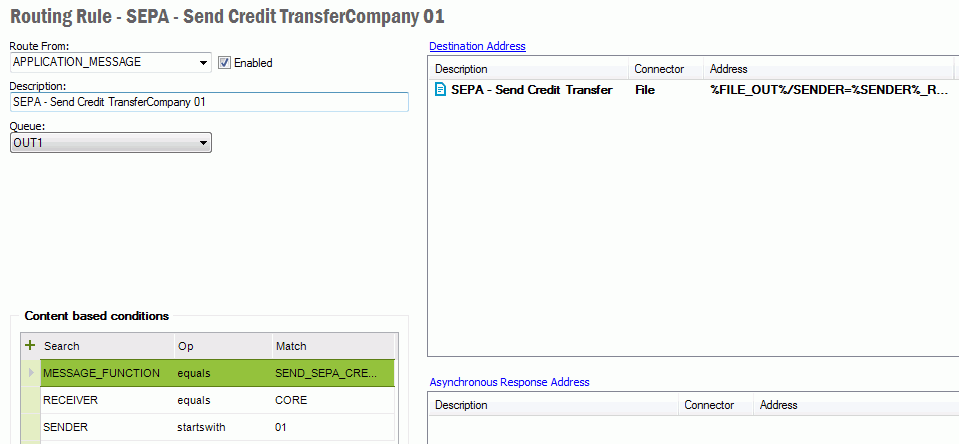
- Route from APPLICATION_MESSAGE, enter a
description and select OUT1 as queue
- As content based conditions select
MESSAGE_FUNCTION equals SEND_SEPA_CREDIT_TRANSFER
RECEIVER equals CORE
SENDER startswith 01
- Press Destination Address and select the
previously created routing address
- Save the routing rule and repeat the steps
10 – 19 above for the second company where you instead use the file sender
FILE_SENDER_COMPANY02 in the routing address
and 02 as matching criteria for SENDER in the
routing rule
The value of the search criteria SENDER is for
the Send Sepa Credit Transfer message defined as <COMPANY>,<PAYMENT_INSTITUTE_ID>.
If you want to route on payment institute you can for example (if the company is
01 and the payment institute id is
BANK) set the condition to,
SENDER equals 01,BANK
or
SENDER endswith BANK