The navigator is a hierarchical structure of entries which normally performs a navigation request to a specific page, task, report etc. Navigator entries are separated per component and located in a file named navigator-functional.xml in <component>\source\<component>\client folder.
The navigator structure and items should comply with the IFS EE Navigator Standards. To read more about the navigator see Navigator. For reference, please see Navigator Reference
The Navigator Editor is an editing tool which assists in creating the navigator tree structure. This guide describes how the Navigator Editor works.
The navigator editor is named Ifs.Fnd.NavigatorEditor.exe and placed in the DevelopFiles folder.
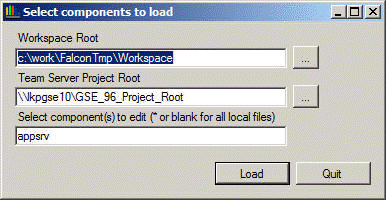
You can start it in several ways:
Figure 1: Start Dialog
Parameters
Note: If any duplicates are found during the load process, you will be presented with these options.
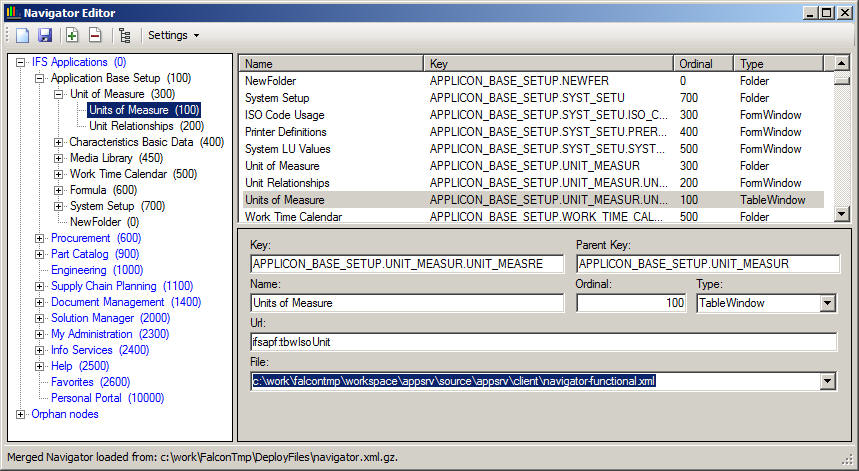
Figure 2: Navigator Editor - Screen layout.
The navigator editor consist of one screen divided in five parts.
In the toolbar you can do the following (from left to right)
When creating a new navigator file, you need to name it. If the client folder for the entered component doesn't exist the application can create it.
.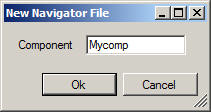
Figure 3: New Navigator File Dialog.
All modified files will be saved and you will be prompted with a list of the files that were saved.
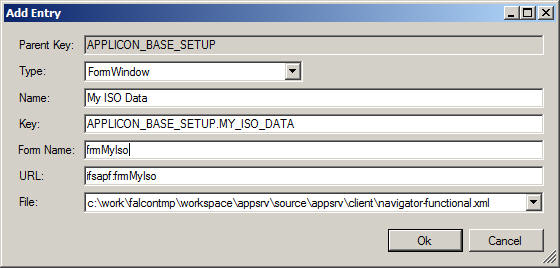
To be able to add new entries you need to have at least one editable navigator file. When you create the entry, you select in which navigator file the entry should be stored in. Make sure the structure follows the IFS EE Navigator Standards. You can use any available folder entry as parent even if that entry isn't stored in the same file. If you do not have access to the parent definition the entry will be shown under the Orphan nodes node in the navigator tree.
Follow these steps to add an entry:
Note: Once the Key or URL have been manually edited they will not be generated by changing other properties.
Figure 4: Entry added by entering Name: "My ISO Data" and Form Name: "frmMyIso".
Note: You can also add an entry by dragging a form from Visual Studio solution explorer and drop it at the correct place in the navigator.
You can only delete entries that are declared in a file that isn't read only. You can only delete leaf nodes, so if a folder with nodes should be deleted the leaves must be deleted first.
All <component>\source\<component>\client\navigator-functional.xml files that are found in the workspace will be copied to the DeployFiles folder. Since all files share the same name, each file will be renamed so it includes the component name. Ex: The navigator file for the appsrv component will be renamed to navigator-appsrv_client_functional.xml.
Here you can set up how the tree and list are synchronized, default is both ways.
The navigator editor can be run in two modes, Edit (with GUI) and Build. If you start the application without parameters, Edit will be default.
Ex: Ifs.Fnd.NavigatorEditor.exe action=Build, this will deploy
all navigator files to DeployFiles (see Deploy).
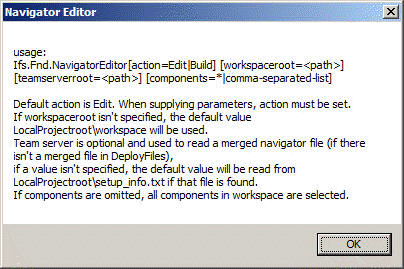
Figure 5: Message if you start with parameters and haven't specified action.
Each navigator entry must have a unique key. If an entry is found that has the same key as an already loaded entry, this dialog is shown.
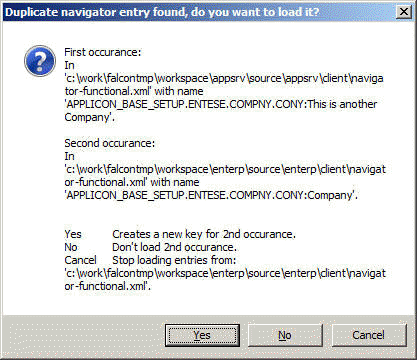
Figure 6: Duplicate navigator entry.
If you select Yes, the second occurrence will get a new generated key starting with __DUP. Such an entry can easily be found by sorting on the key in list view. It might be so that the second one is the correct entry, the files are loaded in the order they are found in the file structure.
If you select No, this particular entry will not be loaded, but if there is another duplicate in the currently loading file you will get another question.
If you select Cancel, no more entries from the currently loading file will be loaded.