Scheduling a Delivery in the LEC Environment Studio
Overview
This guide provides step-by-step instructions for scheduling a delivery in the Environment Studio within the Lifecycle Experience Center (LEC). Scheduling a delivery allows you to plan and automate the installation of software delivery packages to your target environments, ensuring minimal disruption to business operations.
Key Requirements and Compatibility:
- Only delivery packages created for 25R2 and later releases are supported for scheduling directly within LEC.
- Deliveries from releases 25R1 or prior must be scheduled through the IFS Service Center.
- Users currently on a release 25R1 or prior can upgrade to 25R2 or later using this LEC delivery scheduling feature.
- A delivery package contains updates, features, and fixes for IFS Cloud, ensuring your environment remains current and secure.
- Ensure you have Environment Studio Admin permission to work in the LEC Environment Studio. The Customer Admin of your organization must grant Environment Studio Admin permission via Admin Studio.
Navigation
Accessing the Delivery Scheduling Tool
To begin, log in to your Lifecycle Experience Center (LEC) account.
From the LEC Home Page, navigate to Environment Studio in the left main sidebar.
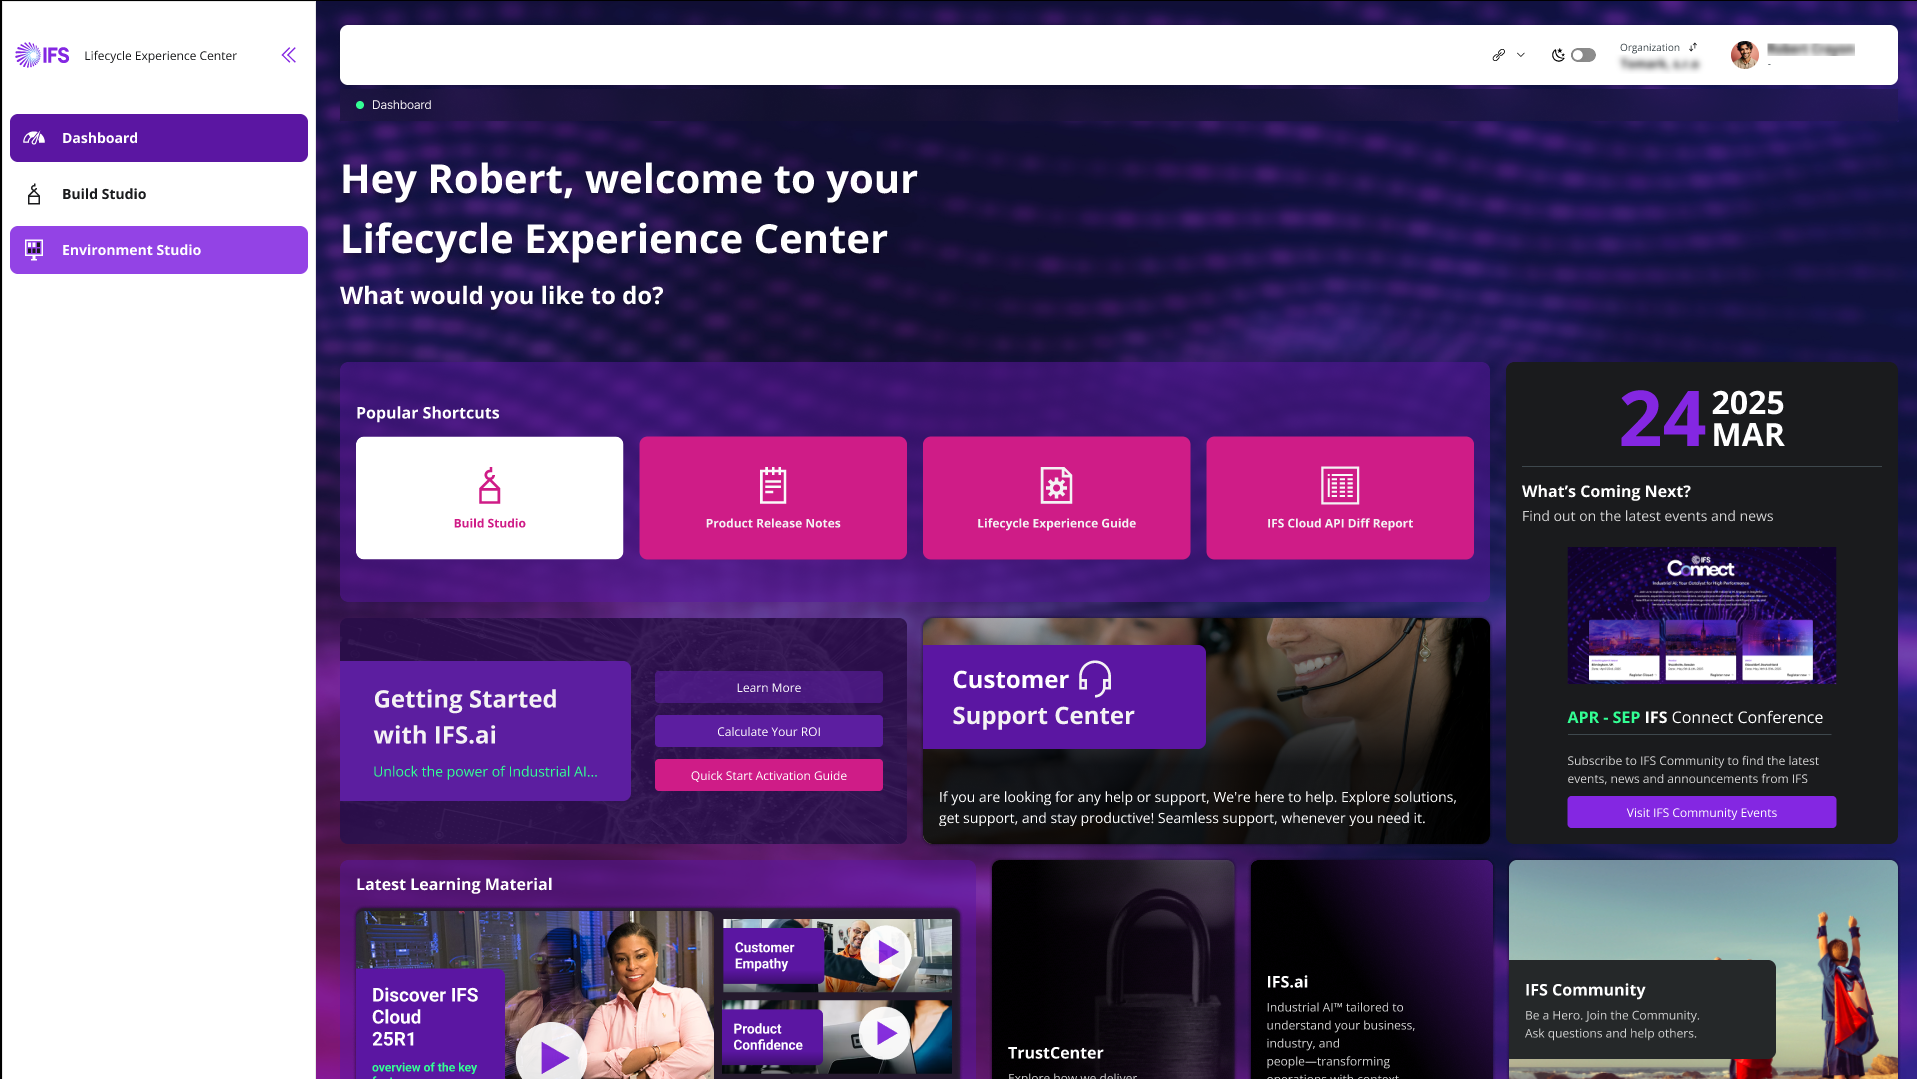
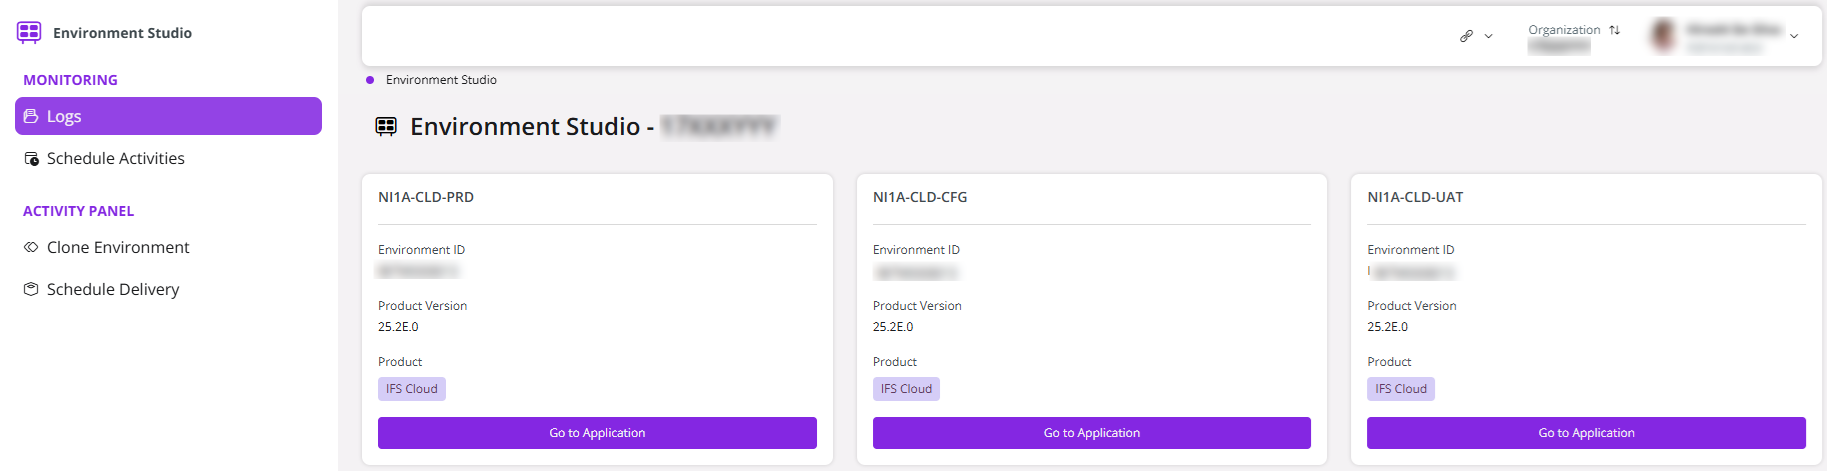
Figure 1 - LEC Home Dashboard Then, select Schedule Delivery under Activity Panel to launch the scheduling wizard.
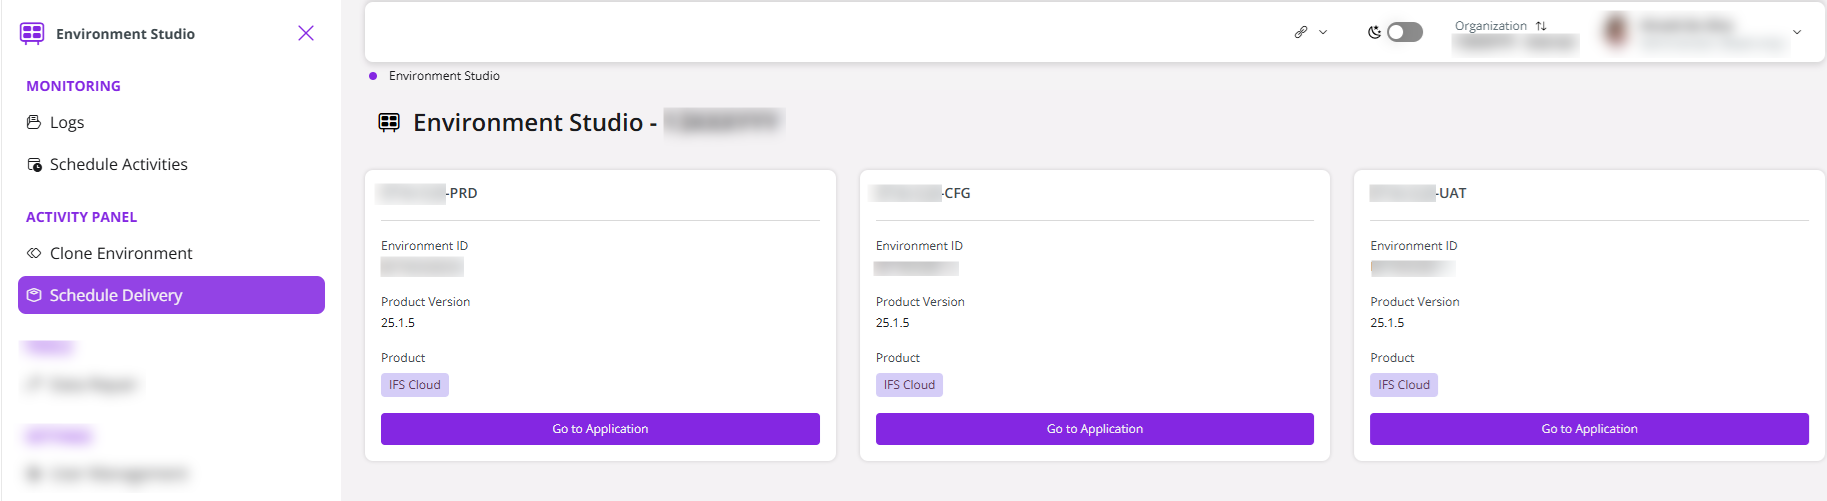
Figure 2 - Environment Studio Landing Page
Selecting the Environment
The Select Environment page displays a list of all environments associated with your LEC account
- Choose the target environment where you want to install the delivery package.
Click Next to proceed.
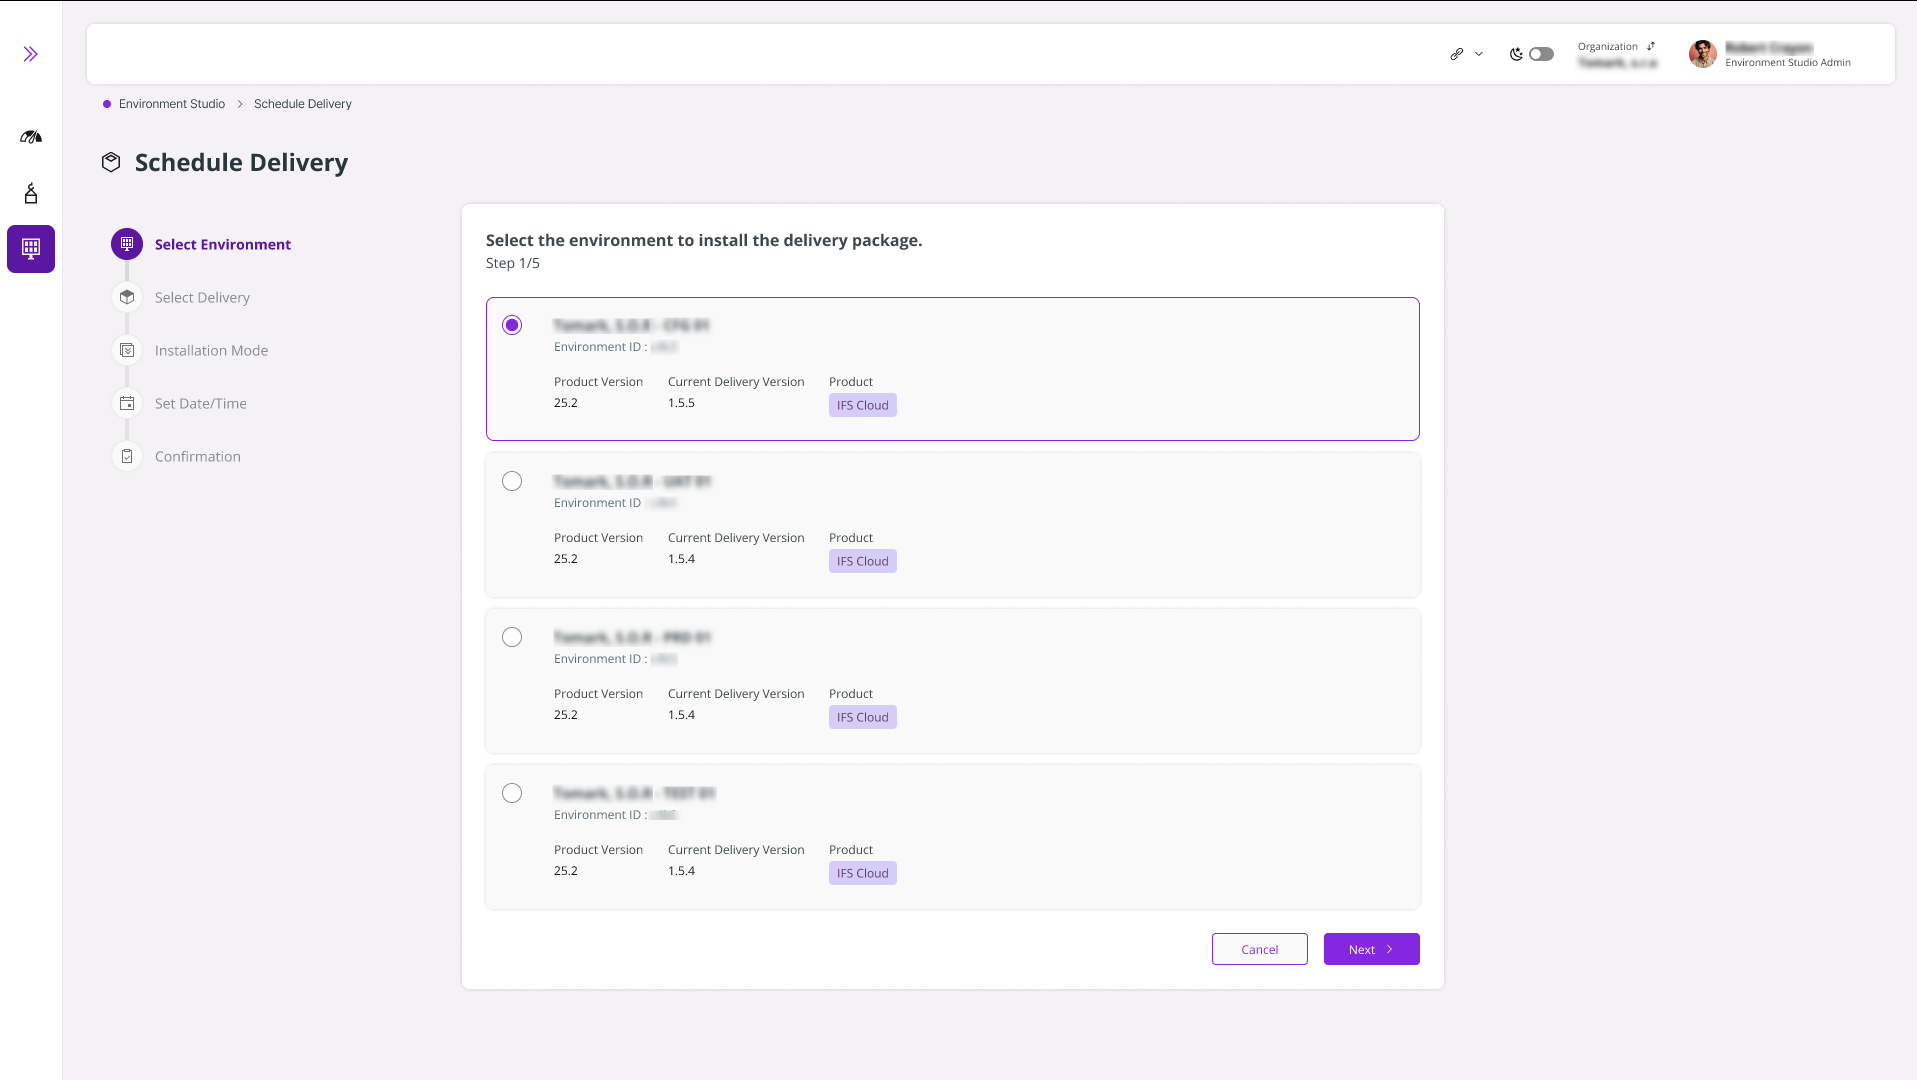
Figure 3 - Environment Studio Landing Page
Choosing a Delivery Package
The Select Delivery page lists all available delivery packages compatible with your chosen environment.
- Browse the list and select the desired delivery package.
Click Next to continue.
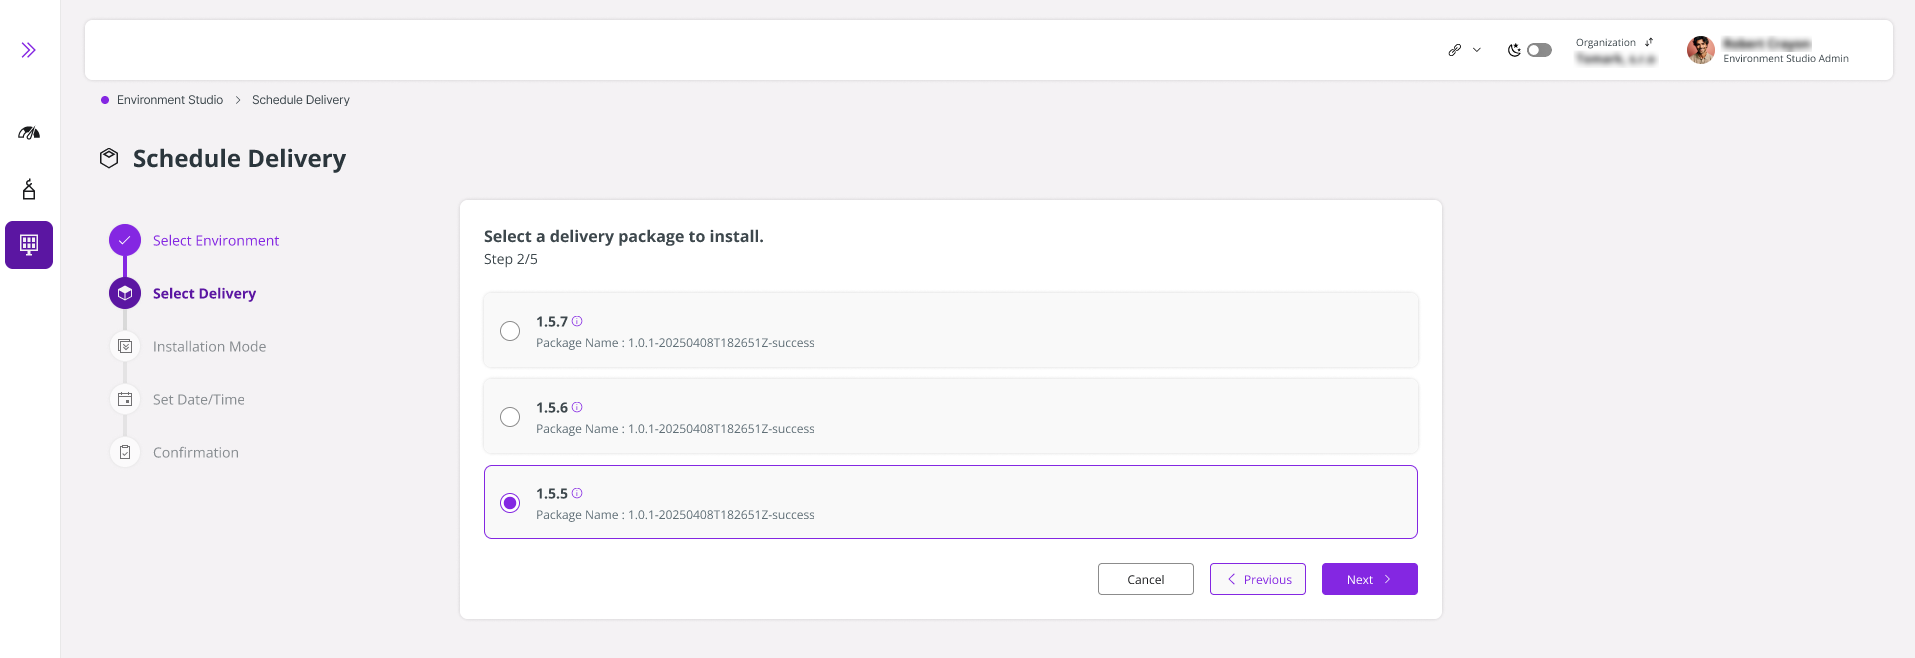
Figure 4 - Selecting a delivery package
Installation Mode Selection
After selecting your environment and delivery package, choose the Installation Mode. This determines how the delivery is applied and impacts environment availability during installation. Two options are available: Online or Offline.
- Online mode uses Delivery Continuity to apply updates with minimal downtime. This functionality is currently being introduced through a controlled rollout. Please contact IFS for guidance before activation.
- Offline mode requires the environment to be fully unavailable during the entire delivery window.
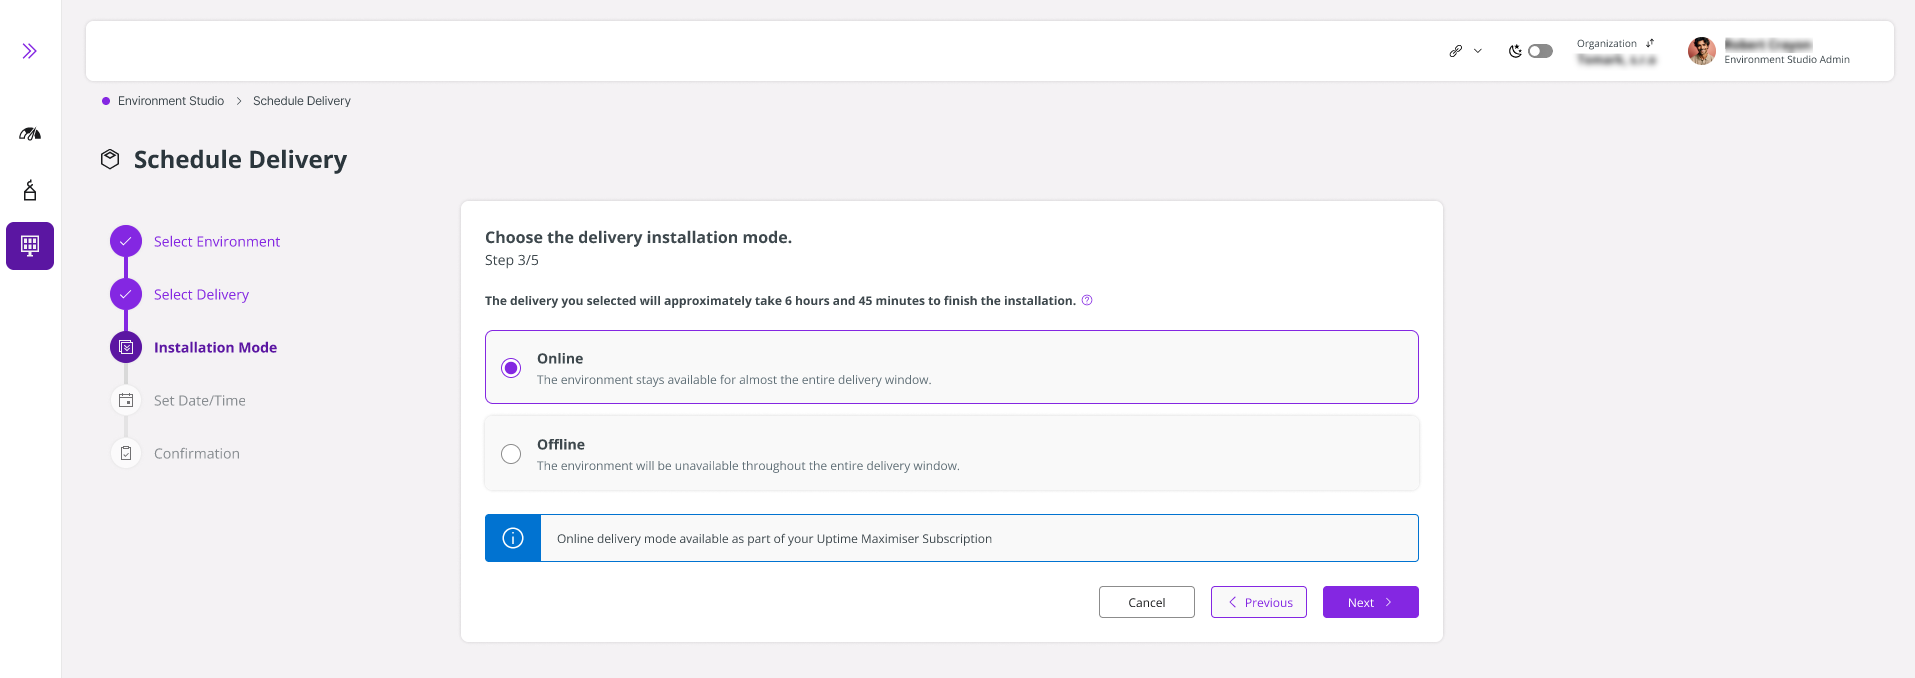
Online Mode
- This feature becomes available only when your delivery package supports Online mode and you have enabled IFS Delivery Continuity either during or before the creation of the package.
- With this feature enabled, your environment remains accessible and functional throughout most of the delivery window, minimizing downtime and improving continuity during updates or maintenance.
- If your environment was upgraded from version 25R1 or earlier, the first delivery will automatically run in Offline mode before Online mode can be used for subsequent deliveries.
|
 |
|:--:|
|Figure 5 - Selecting Online mode|
|
|:--:|
|Figure 5 - Selecting Online mode|
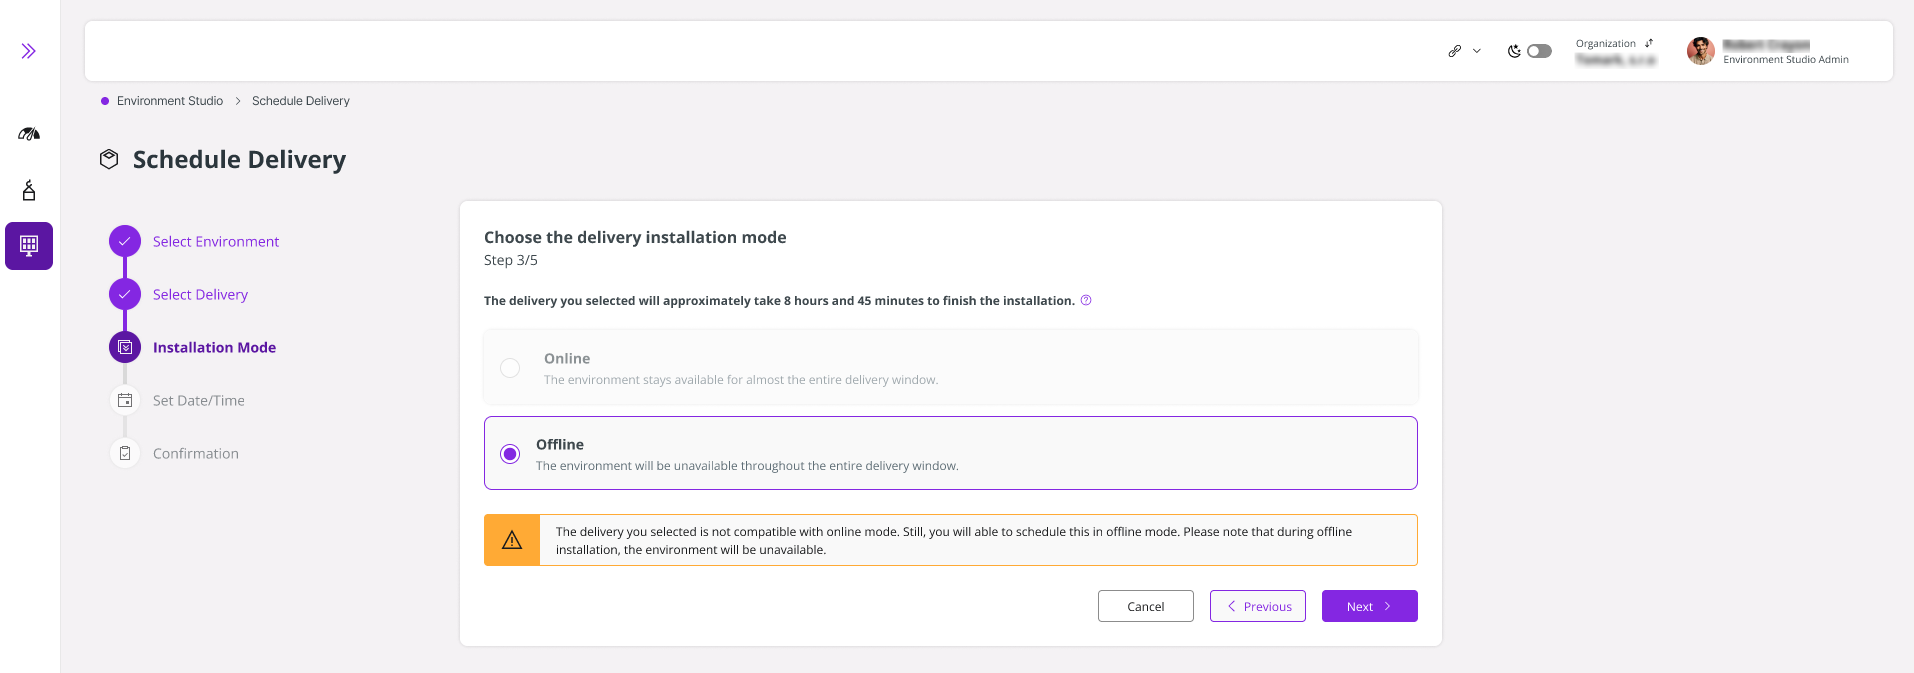
Offline Mode
- This option is applied by default when the delivery package is not compatible with Online mode. In such cases, the system automatically selects this mode to ensure the delivery process can continue smoothly. For example, if the client has obtained 25R2 via Release Update Studio and scheduled the delivery to Use Place, which includes the release update delivery, the system will automatically select Offline mode by default in that scenario.
 |
|---|
| Figure 6 - Automatically select Offline mode |
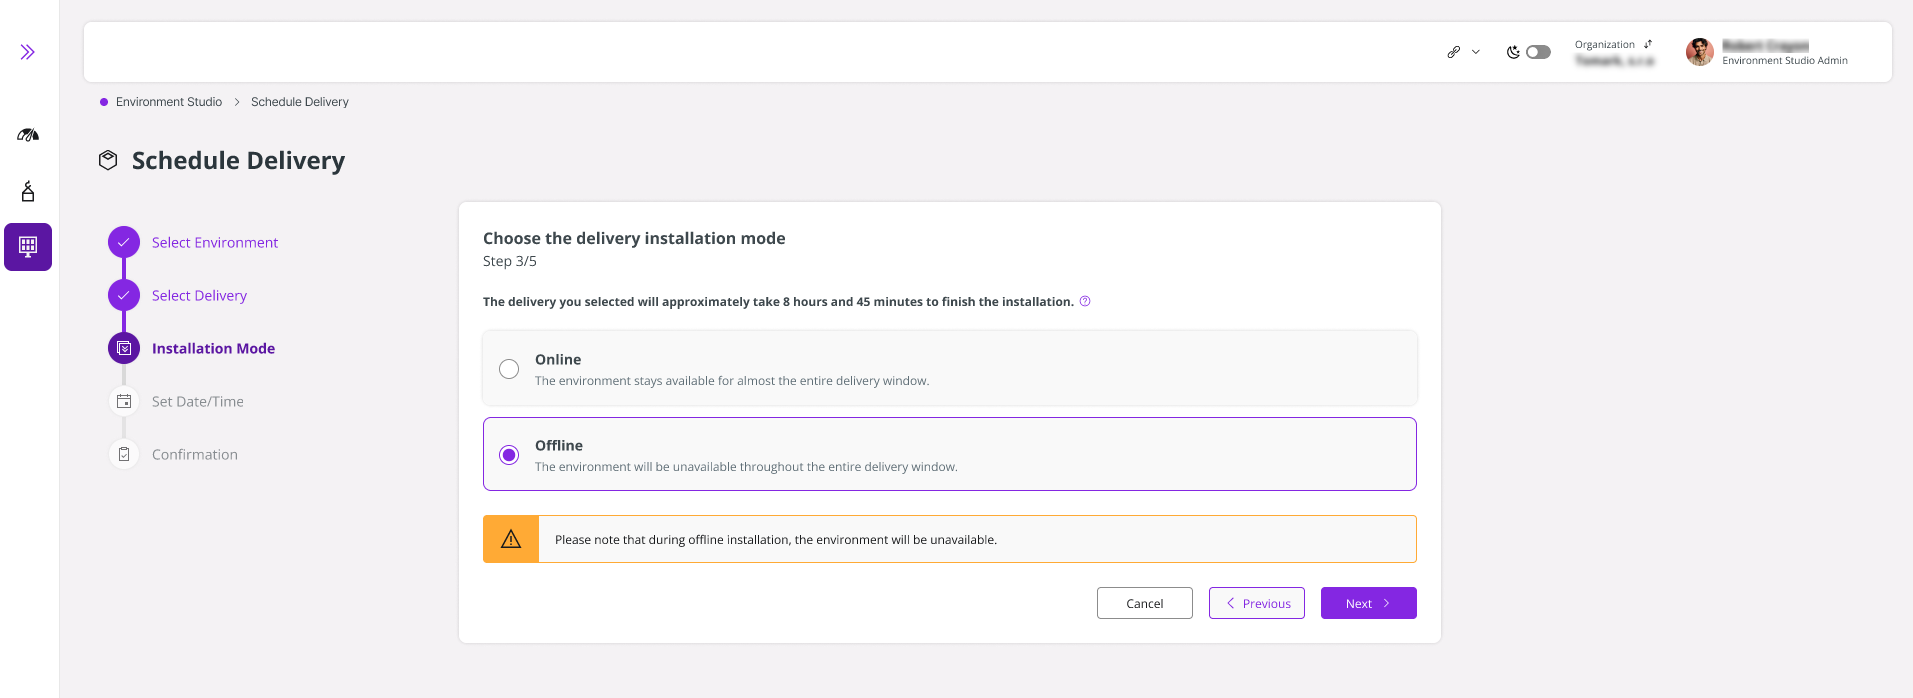
- Users also have the flexibility to manually choose this mode, even if Online mode is available. This allows greater control based on specific operational needs or preferences.
 |
|---|
| Figure 7 - Manually selecting Offline mode |
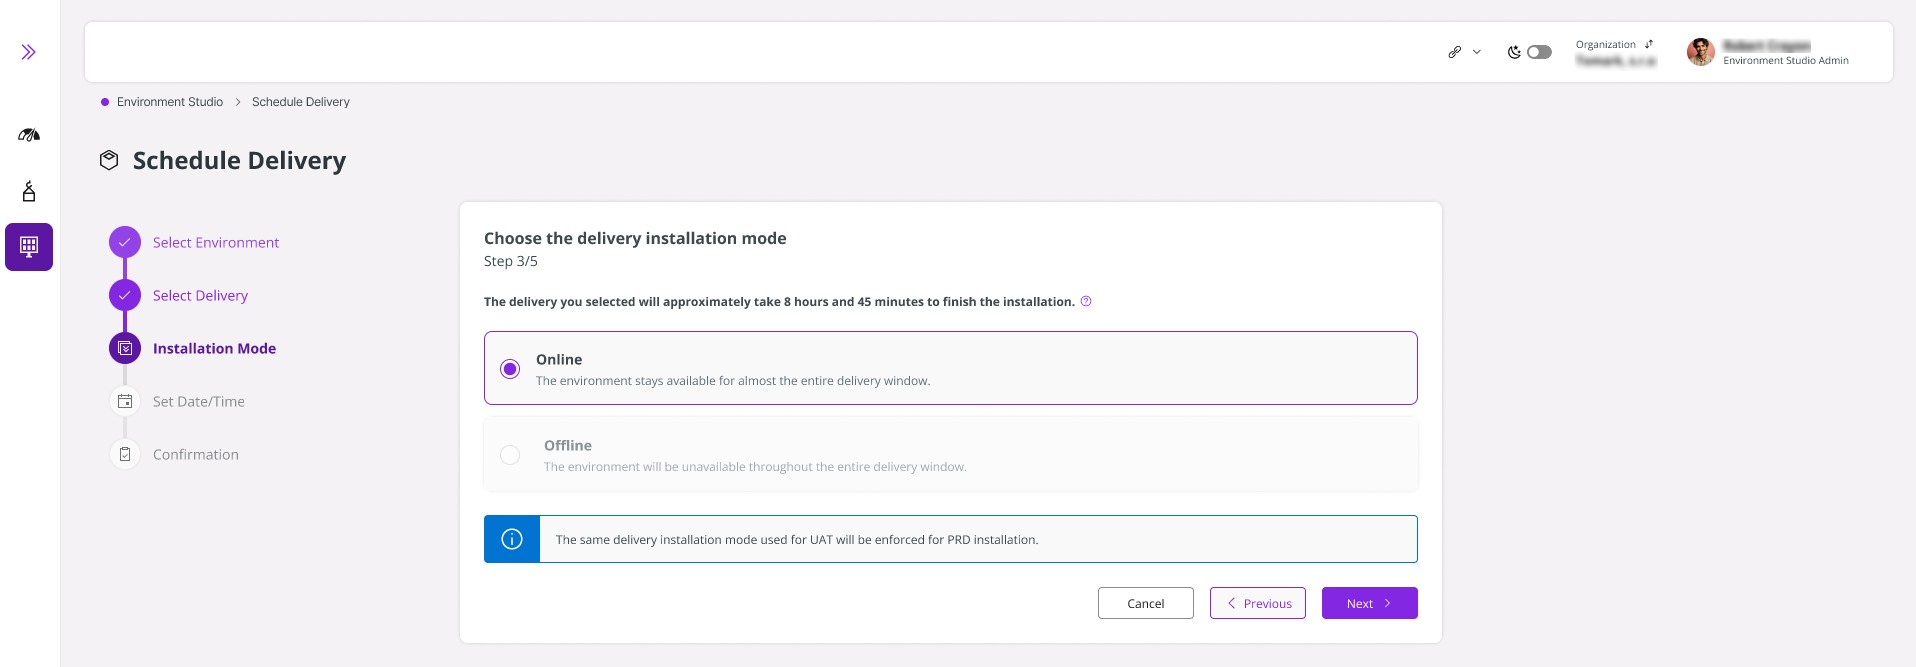
Scheduling for Use Place PROD Environment (Production)
- This section applies only when scheduling a delivery for Production (PROD) environments. If you are scheduling deliveries for UAT or CFG, you can proceed as usual and ignore this section.
- Once the delivery has been successfully implemented in a non-production environment (UAT or CFG), the LEC will automatically apply the same installation mode used in UAT when deploying to the Production environment.
 |
|---|
| Figure 8 - System enforces the same delivery installation mode used for UAT |
Setting the Delivery Date and Time
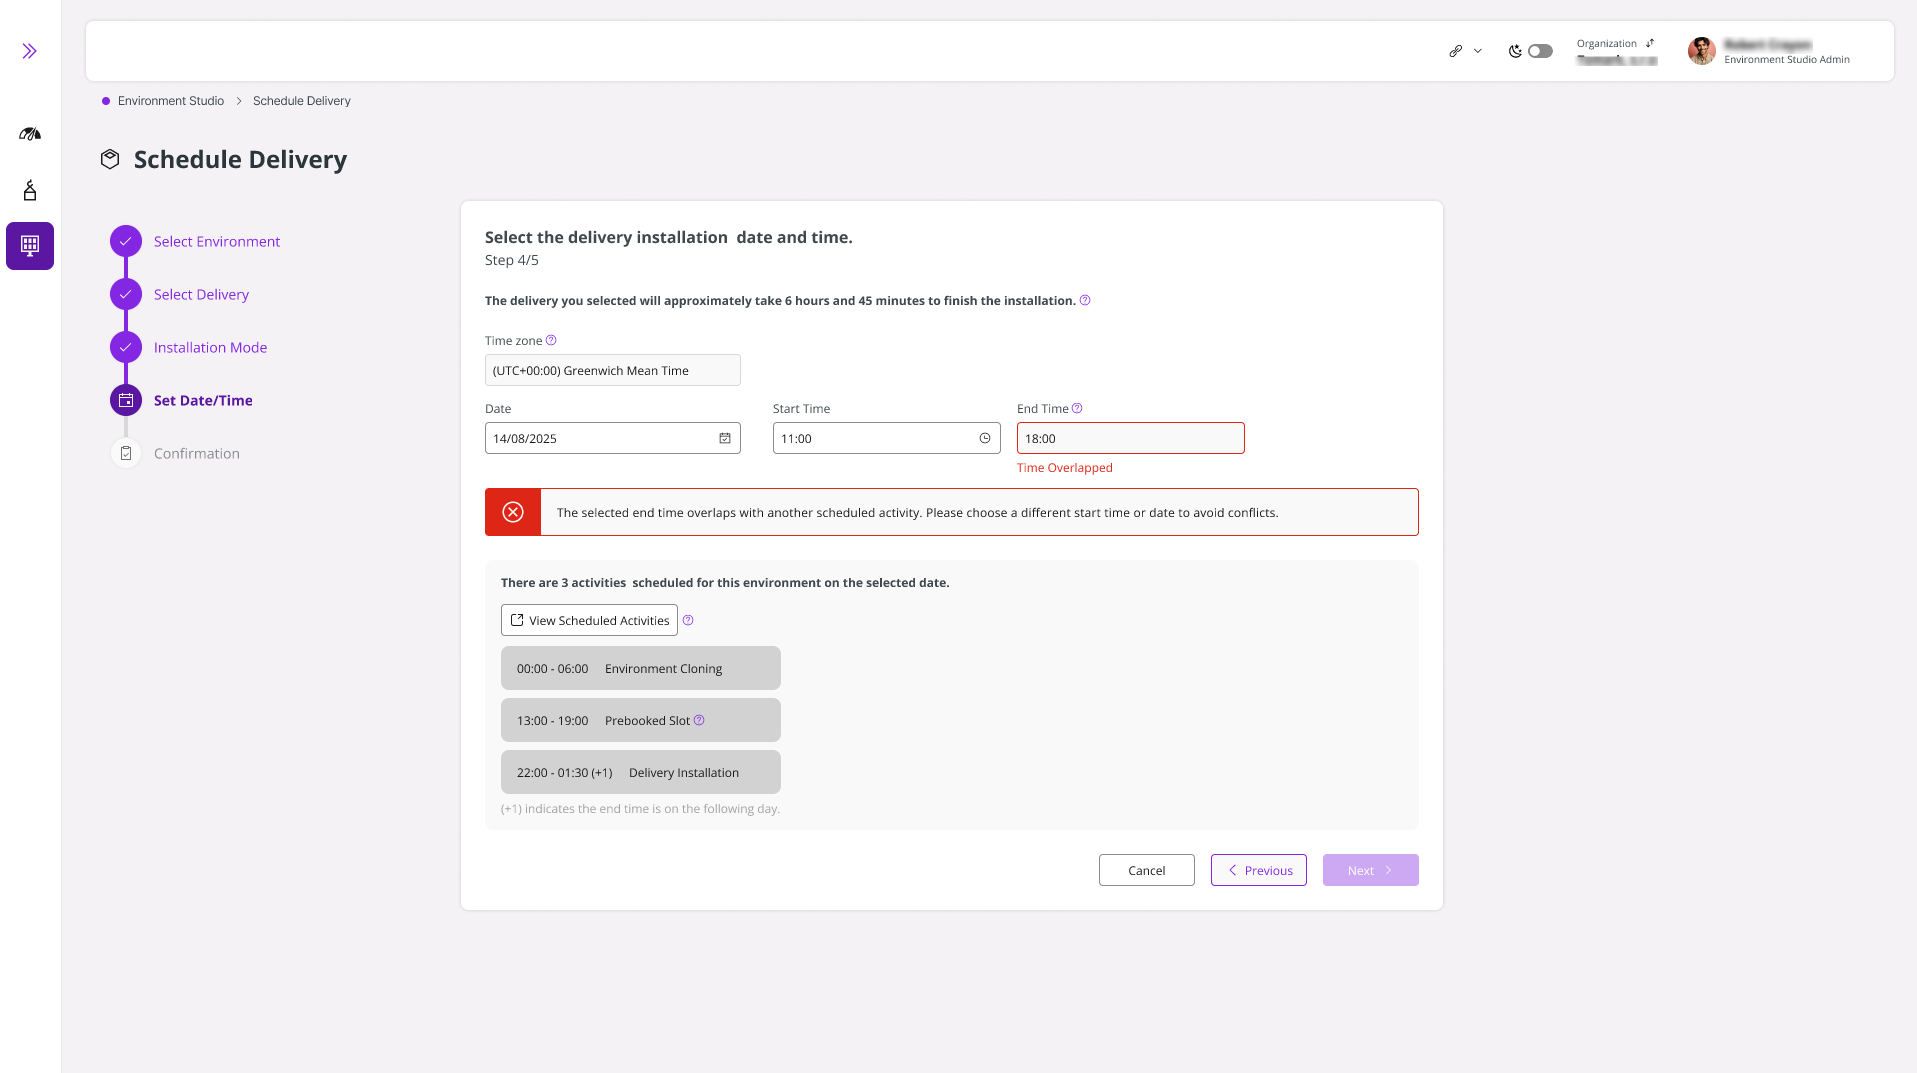
The Set Date/Time panel is a smart scheduling interface that helps you book your delivery installation during optimal windows, avoiding conflicts with other environment activities. LEC uses conflict detection to ensure your scheduled delivery doesn't interfere with ongoing operations, maintaining system stability and minimizing unplanned downtime.
- Time Zone: Select your preferred time zone from the dropdown list to ensure accurate scheduling across global teams.
- Date Picker: Click the calendar icon to choose the installation date.
- Start Time: Define the start time for the delivery installation. Time is available in 30-minute intervals. Only available time slots are shown, based on all activities scheduled for the target environment on the selected day. The selected time slot must be continuous, from the Start Time to the End Time with no other overlapping activities during the selected slot.
- End Time: Automatically fetched considering the start time and the approximate installation time stated in the Set Date/Time panel.
- Note: Once a time slot has been confirmed, it cannot be altered. If a change to the scheduled time is required, the existing delivery must first be cancelled, after which a new delivery can be rescheduled for the desired time slot.
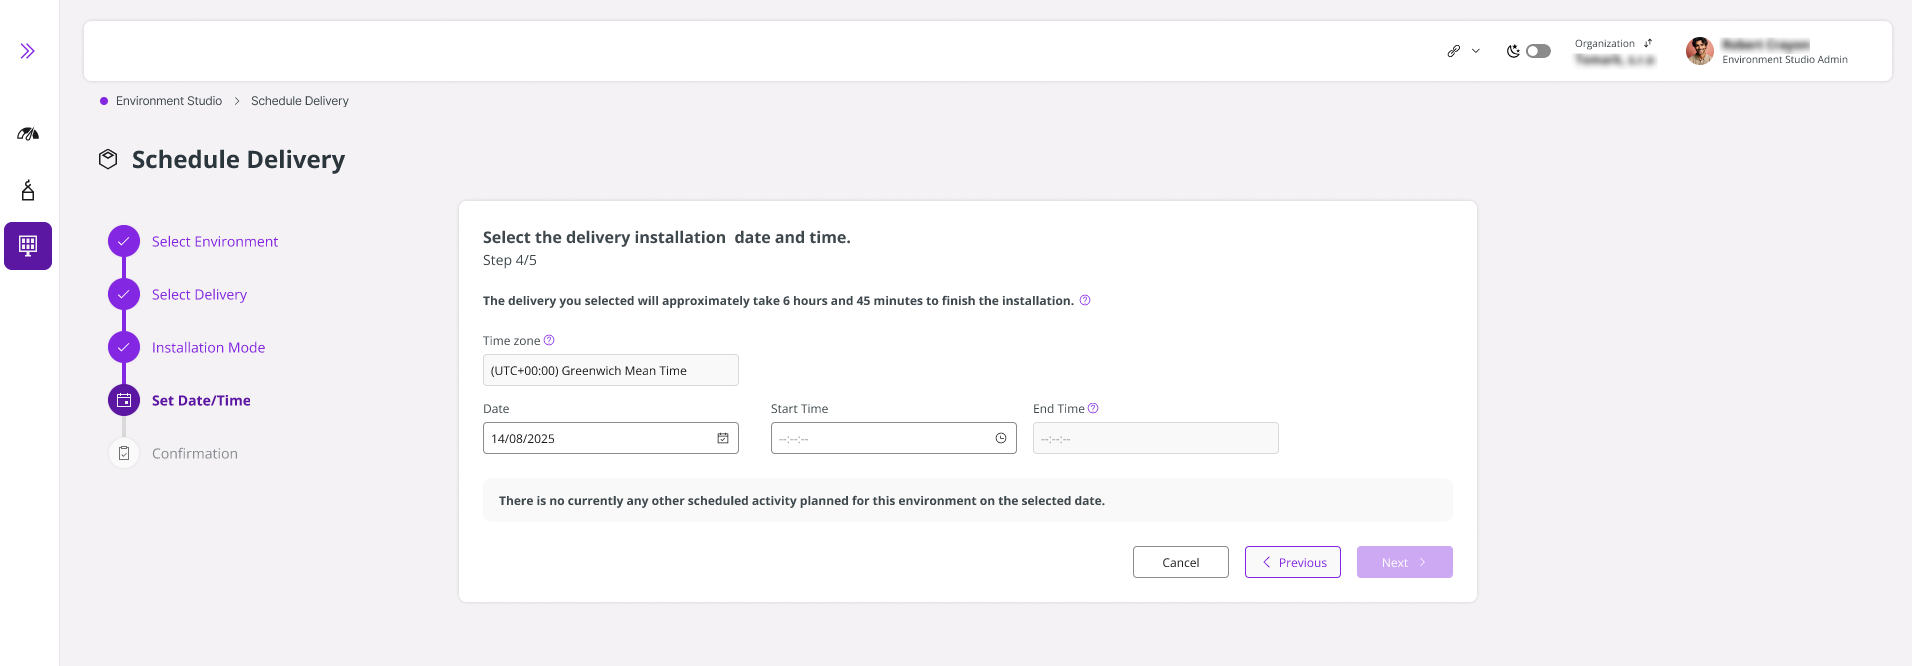 |
|---|
| Figure 9 - Setting the date and time |
- If there are any delivery scheduling or environment cloning activities scheduled on the selected date, the panel would display them. If more information is required regarding the scheduled activities click View Scheduled Activities option.
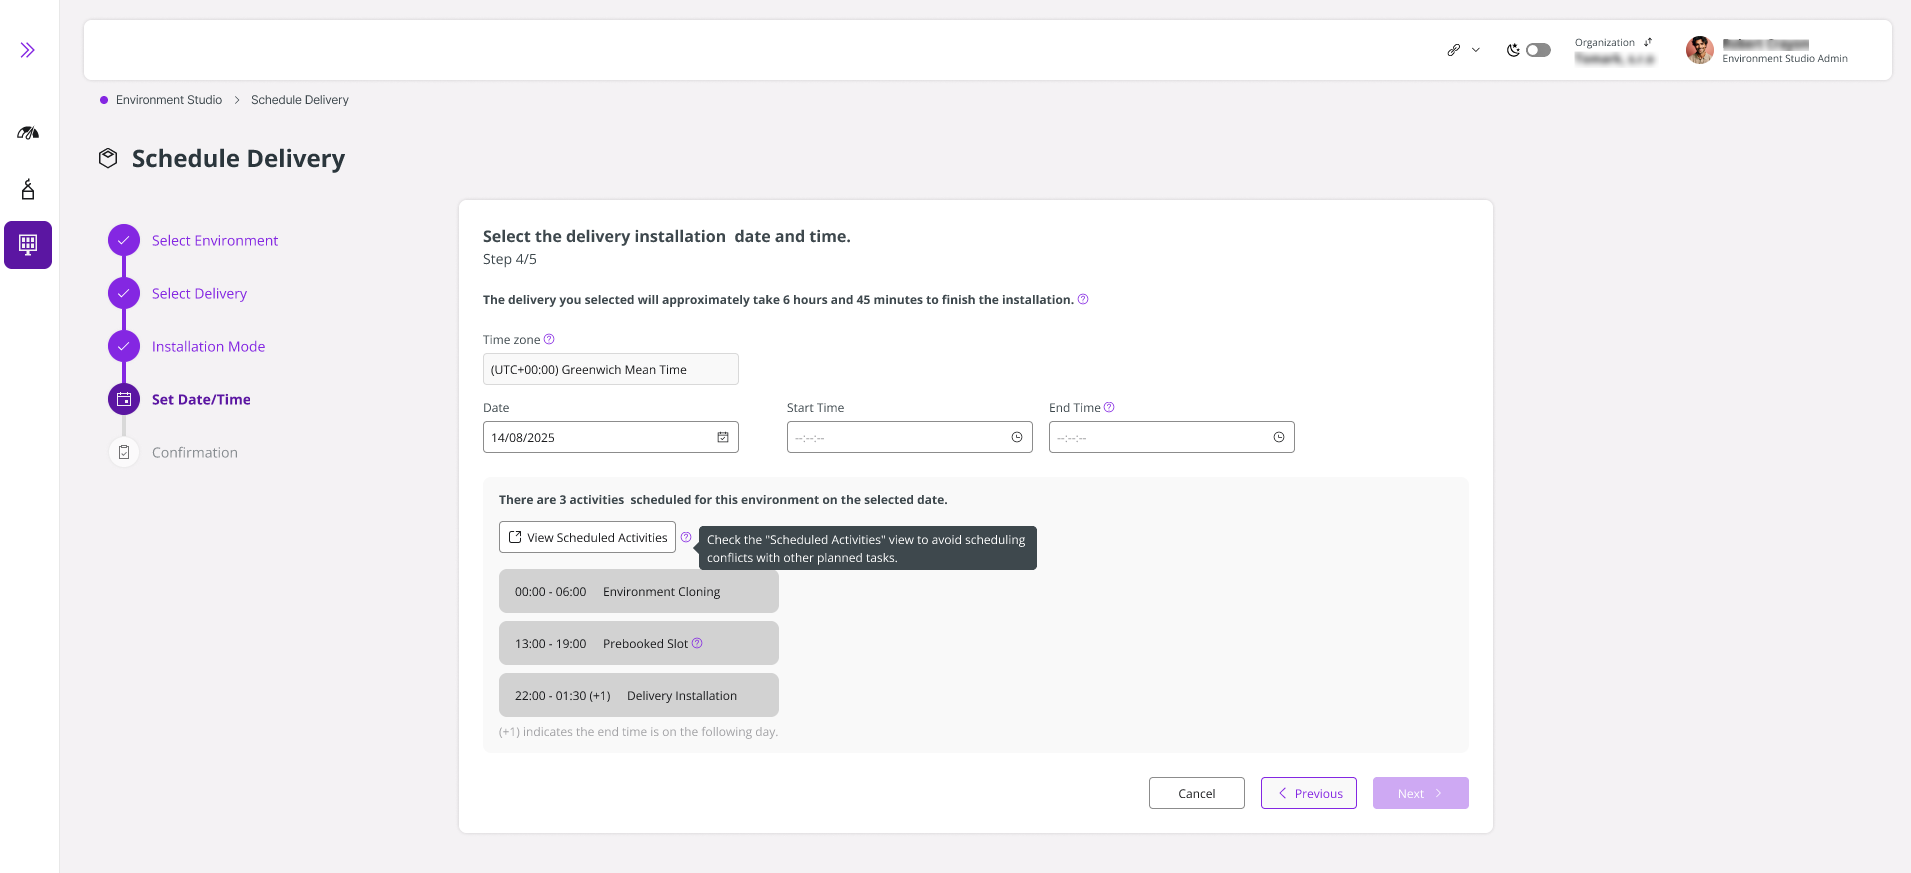 |
|---|
| Figure 10 - Activities already scheduled, therefore displaying schedules activities |
- If no free slots are available, the panel prompts the user to select a different date.
- Note: Some activities may start on the previous day and extend past midnight into the selected day.
Selecting the Time
You can adjust the Start Time at any point during scheduling; even after initially selecting a slot to find the perfect window.
Set time from the Start Time dropdown.
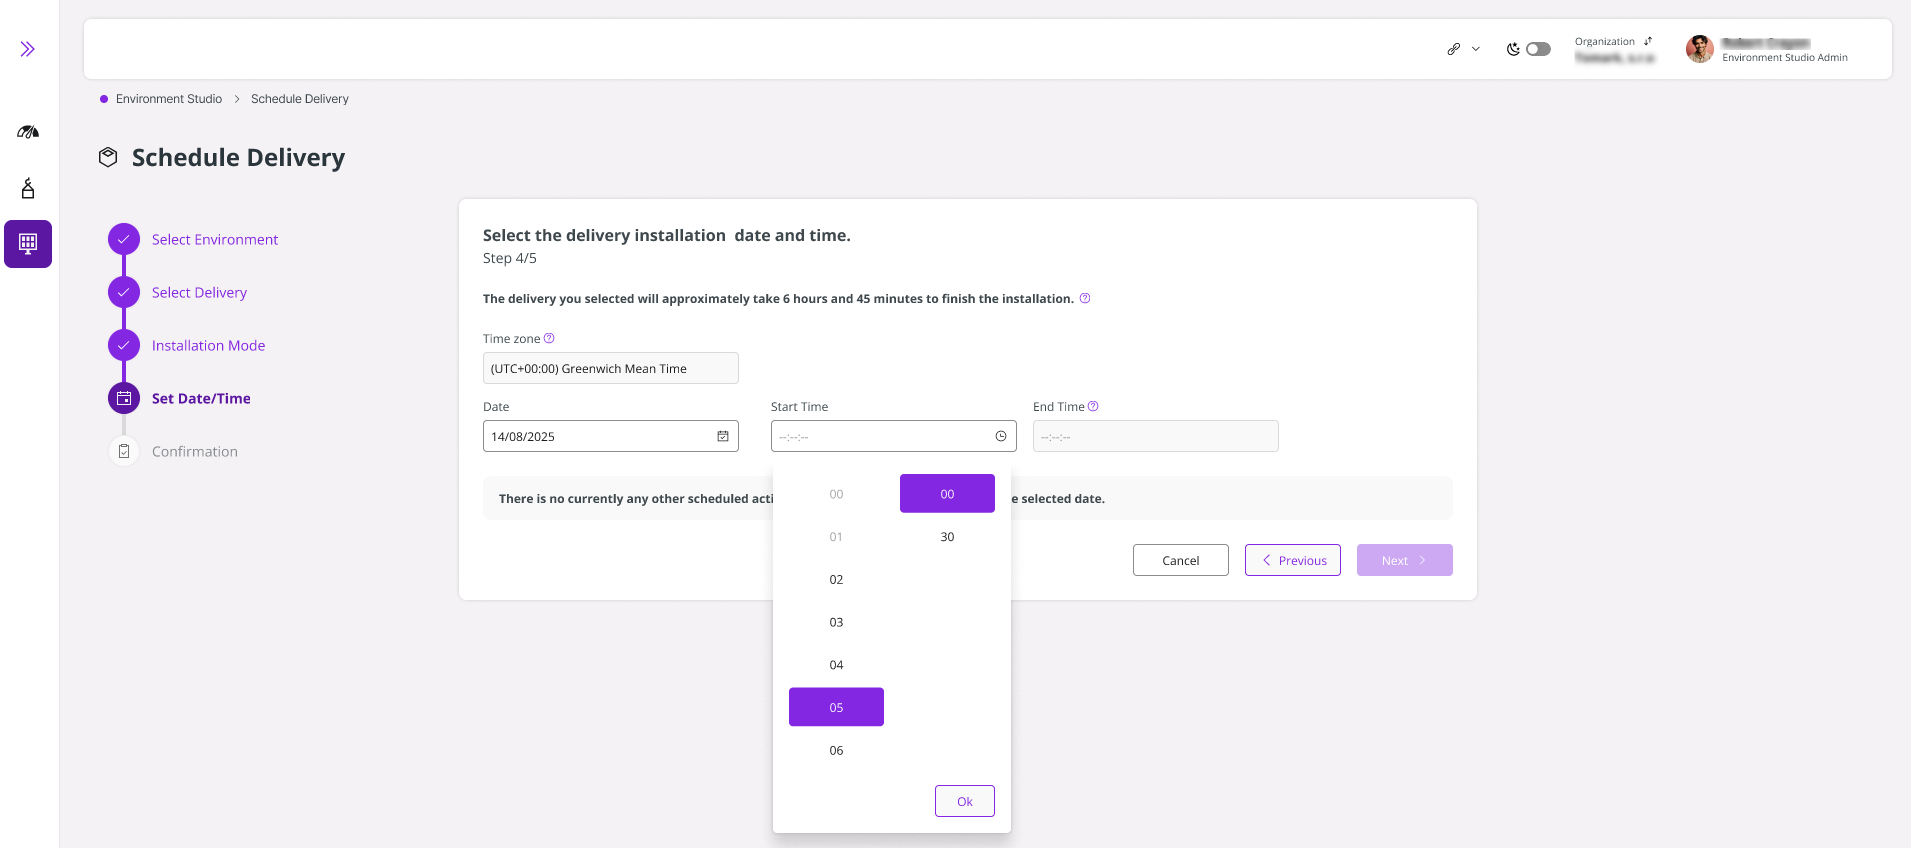 |
|---|
| Figure 11 - Start time drop down option |
Select a slot outside the prebooked windows (e.g., 06:00 - 13:00).
Below the dropdown, a color-coded timeline graph provides an at-a-glance view of your environment's schedule:
Green: Fully Available - Book any slot
- Red: Unavailable (Booked) - Cannot schedule
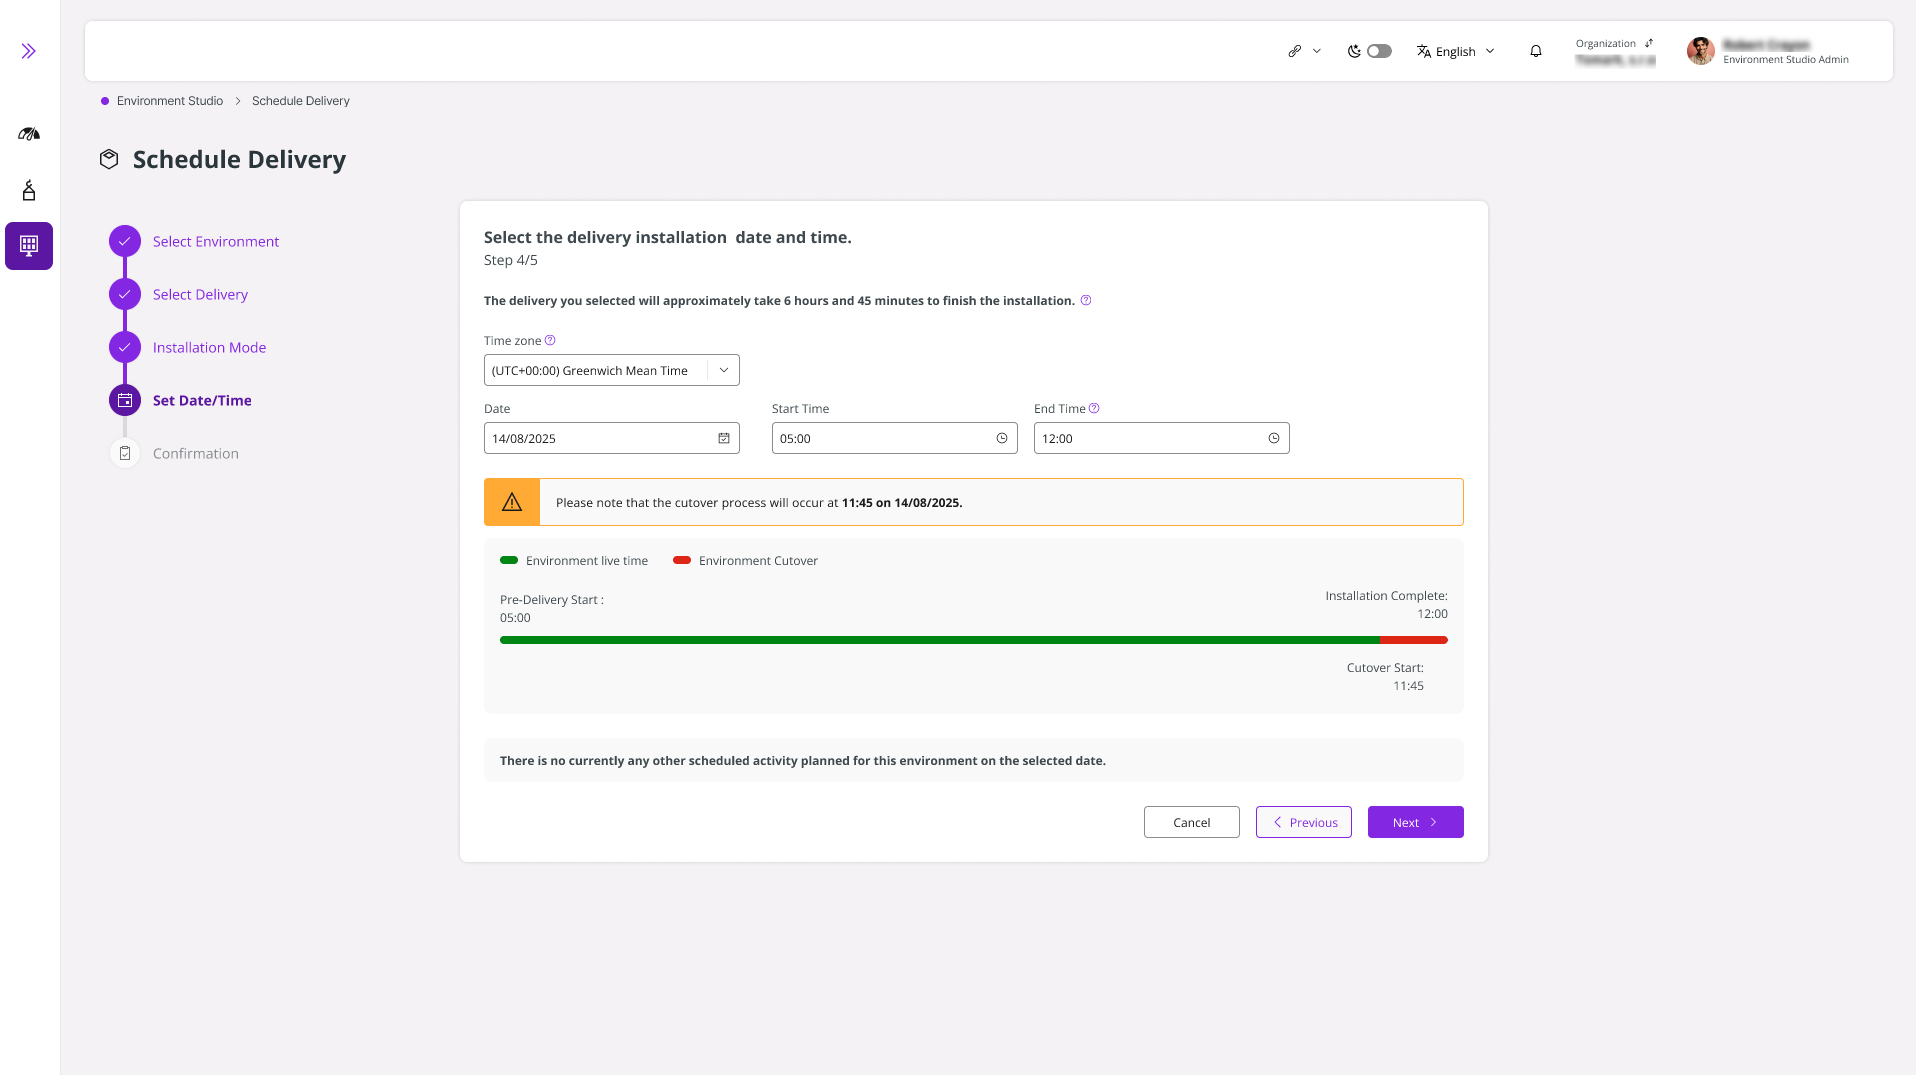 |
|---|
| Figure 12 - Timeline Graph |
- If you select a slot that overlaps another activity, LEC immediately alerts you. It is recommended to select another slot.
 |
|---|
| Figure 13 - Insufficient time due to overlap |
Confirmation
Confirmation of Success
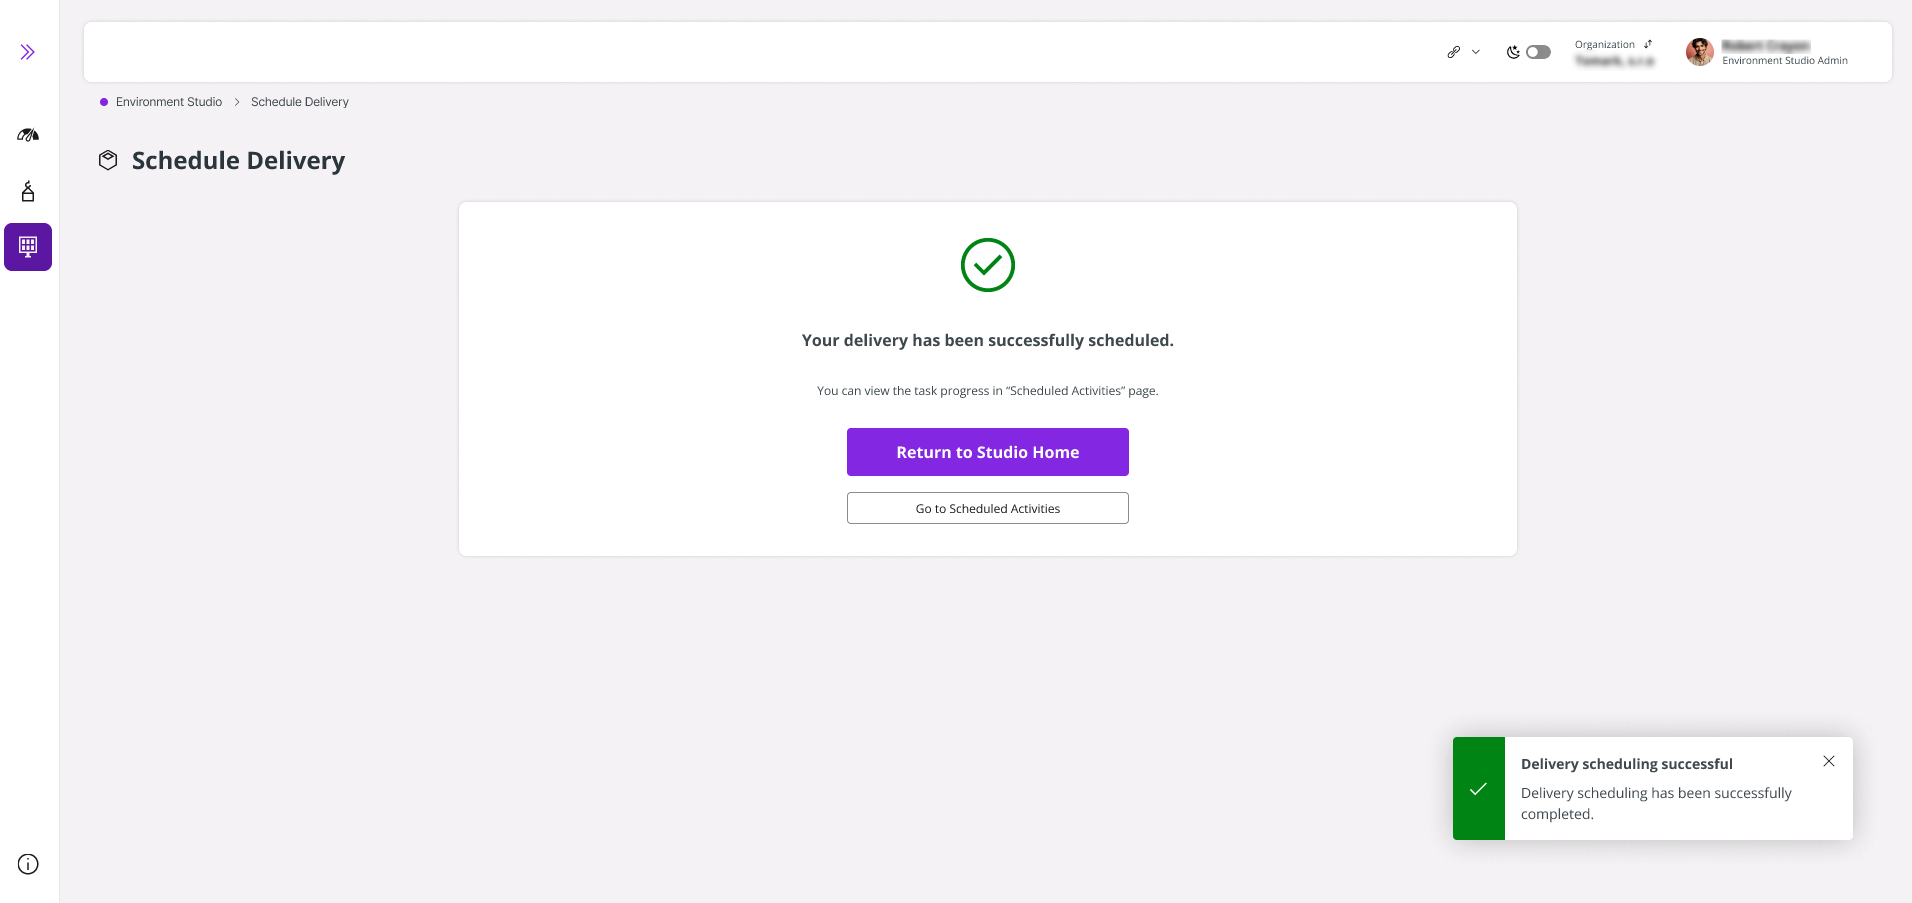
When your delivery is successfully scheduled, a success TOAST will popup.
 |
|---|
| Figure 14 - Successfully scheduled delivery activity |
Confirmation of Failure
If the scheduling process fails, please try again. If the issue persists, contact IFS Support.
 |
|---|
| Figure 15 - Delivery Scheduling not successful |
Logs
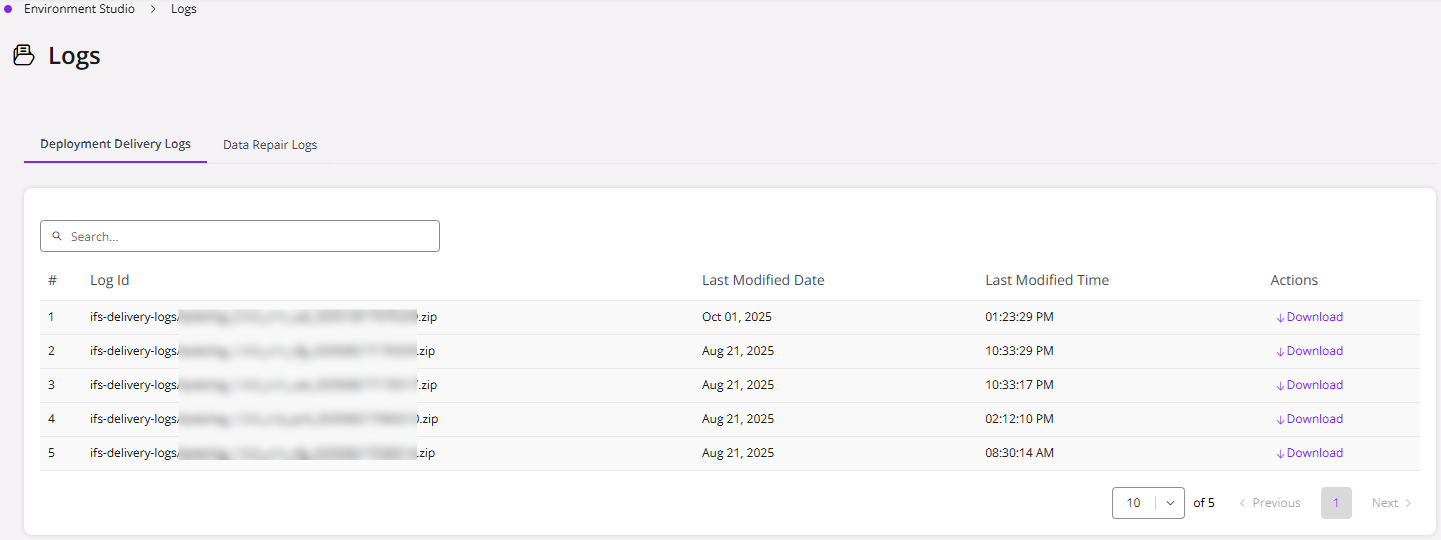
Click Logs under Monitoring to view and download the environment Deployment Delivery Logs.
 |
|---|
| Figure 16 - Logs in Environment Studio |
 |
|---|
| Figure 17 - Deployment Delivery Logs |