Updating PSO Standalone Application
Starting with release 25R2, the Lifecycle Experience Center (LEC) enables Planning, Scheduling, and Optimization (PSO) customers to upgrade their PSO Standalone application through the Environment Studio. To schedule an upgrade, customers must ensure that all their environments are available in PSO Standalone and that they log into the Environment Studio on version 25R2 or above. Only the Environment Studio Admin is authorized to perform PSO Standalone upgrades through LEC.
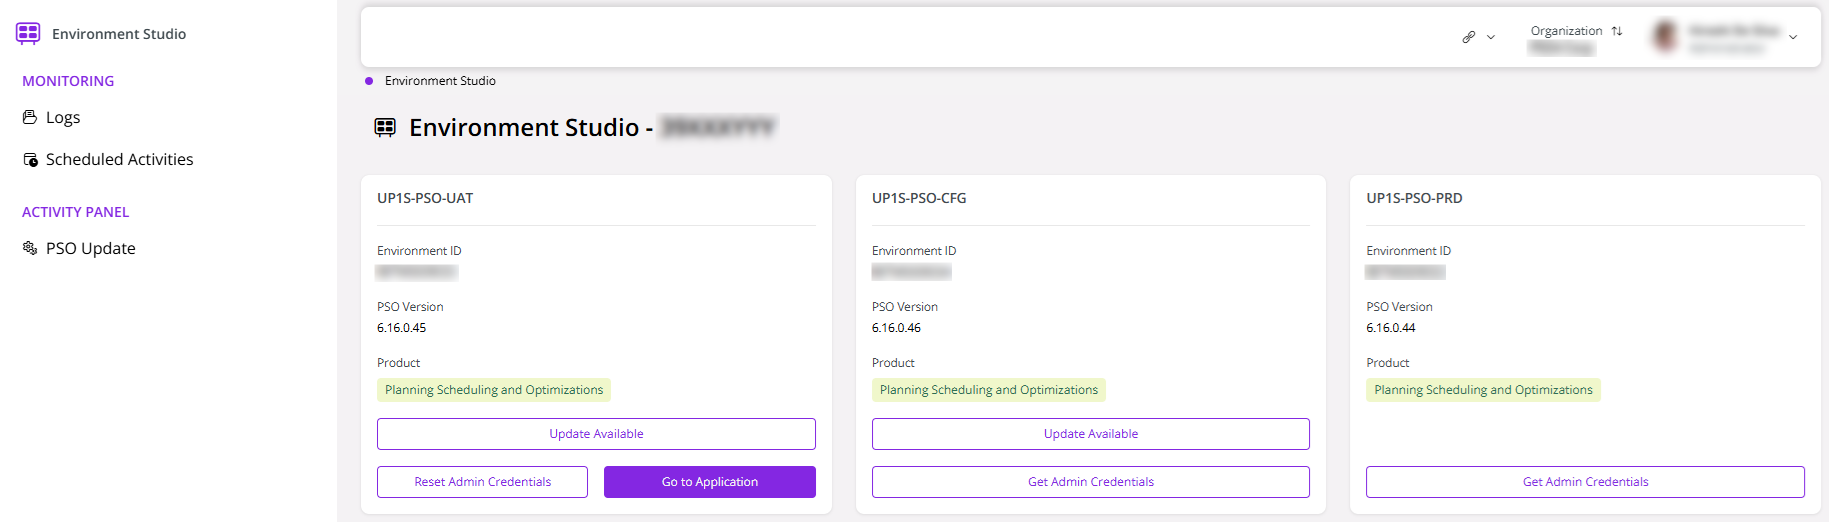
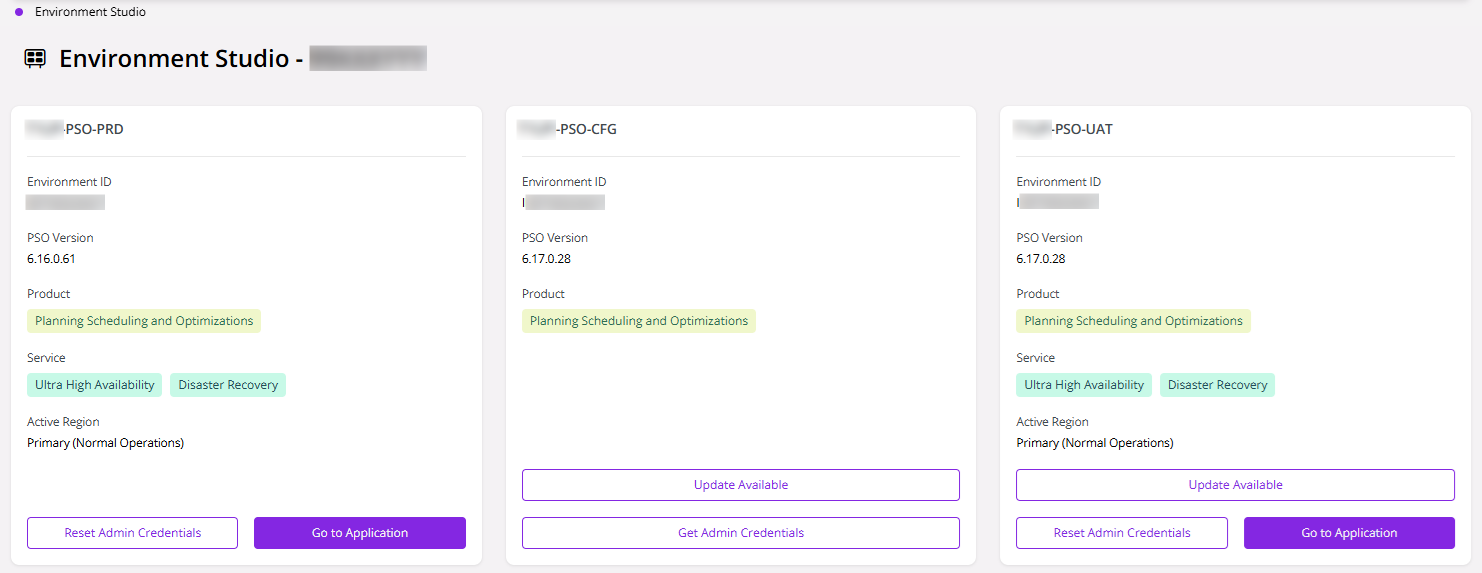
- To take a PSO update, log in to the Lifecycle Experience Center (LEC) and navigate to Environment Studio. The PSO customer sees all their environments of PSO Standalone after logging into Environment Studio.
 |
|---|
| Figure 1 - LEC Dashboard |
- To access a PSO environment, click Go to Application. If this is your first time logging in, click Get Admin Credentials to retrieve your login details. If you forget your credentials during a later login, simply click Reset Admin Credentials to generate new ones.
 |
|---|
| Figure 2 - Login credentials for the PSO application |
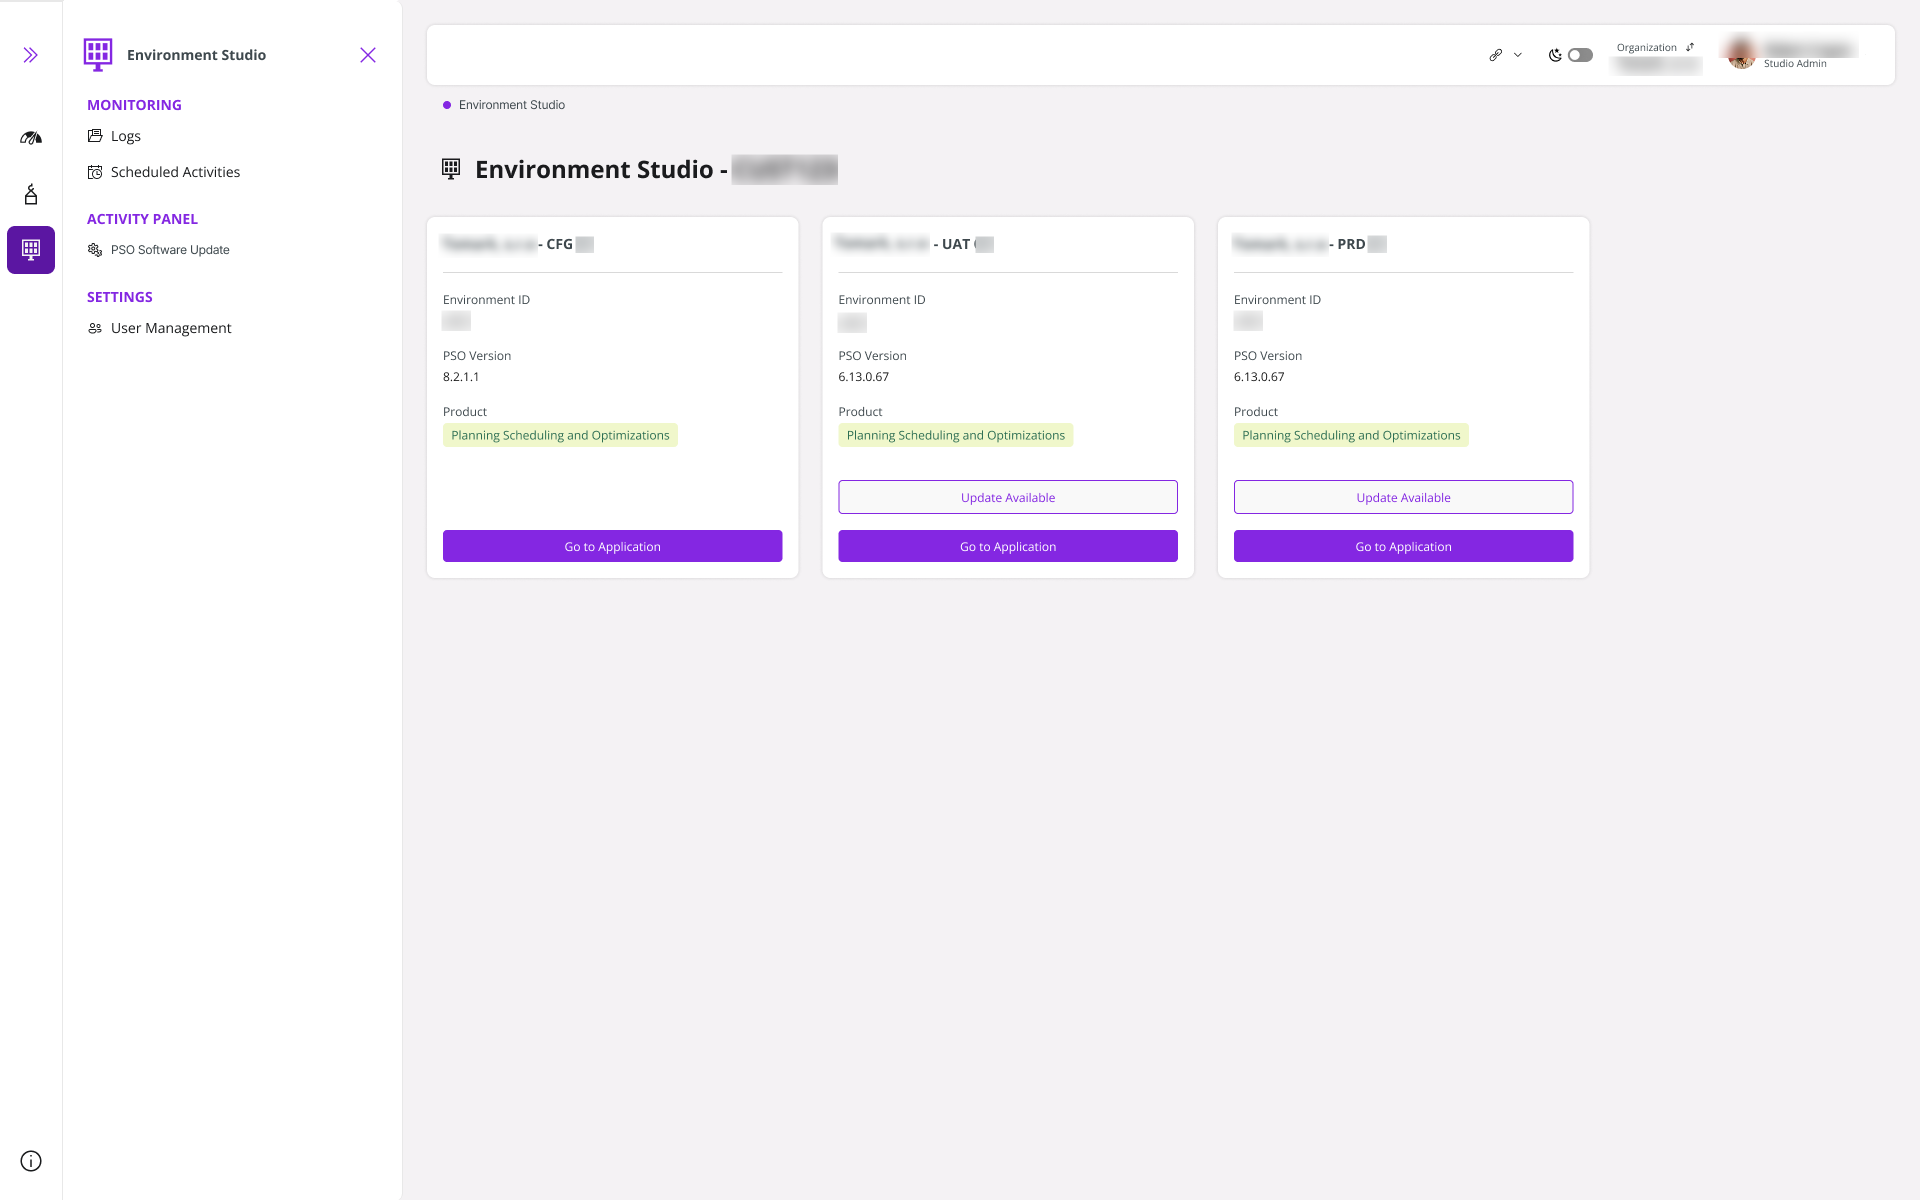
- Click Update Available on the environment card if an upgrade is released.
 |
|---|
| Figure 3 - Select the PSO update |
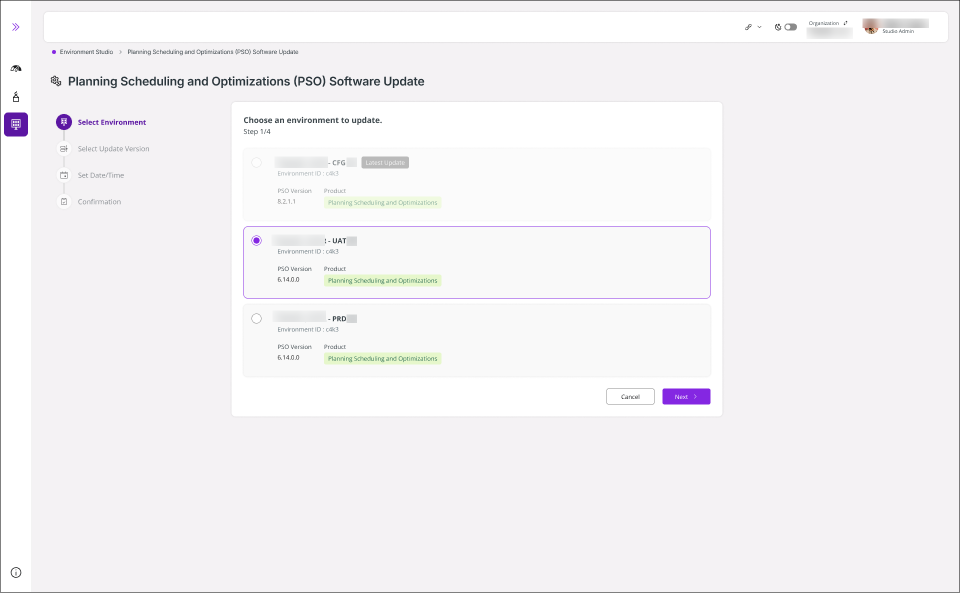
- You have to begin by selecting the environment first.
 |
|---|
| Figure 4 - Environment Studio with PSO environements |
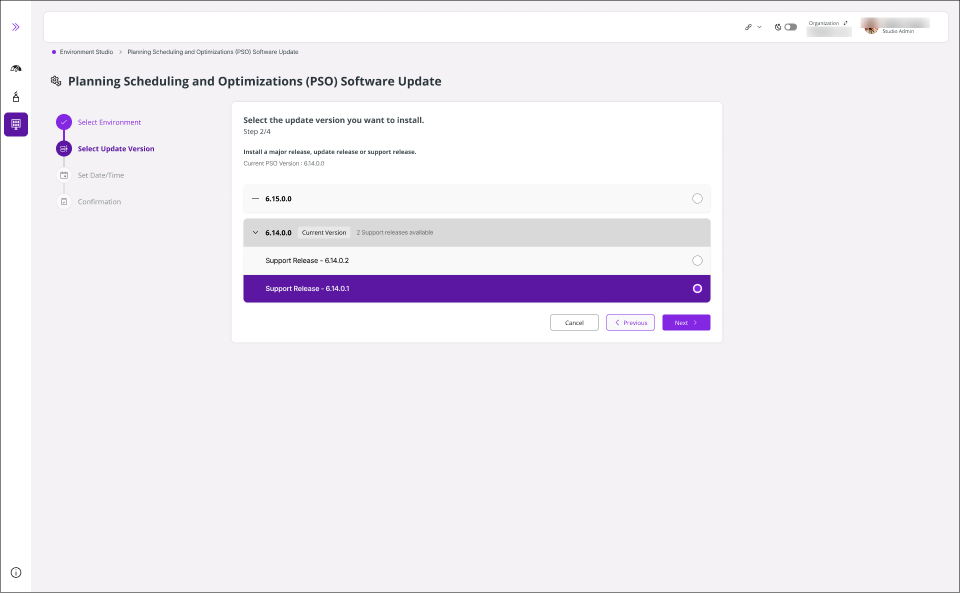
- Then you are navigated to the Planning Scheduling and Optimization Software Update Page, where you have to begin by selecting the PSO upgrade version.
 |
|---|
| Figure 5 - Select the PSO update version |
- Next, select the version type (Major, Update, or Support). Then, click Next.
 |
|---|
| Figure 6 - Select the PSO version |
- Set the date and time for the upgrade, and the user will be notified of an estimated installation duration.
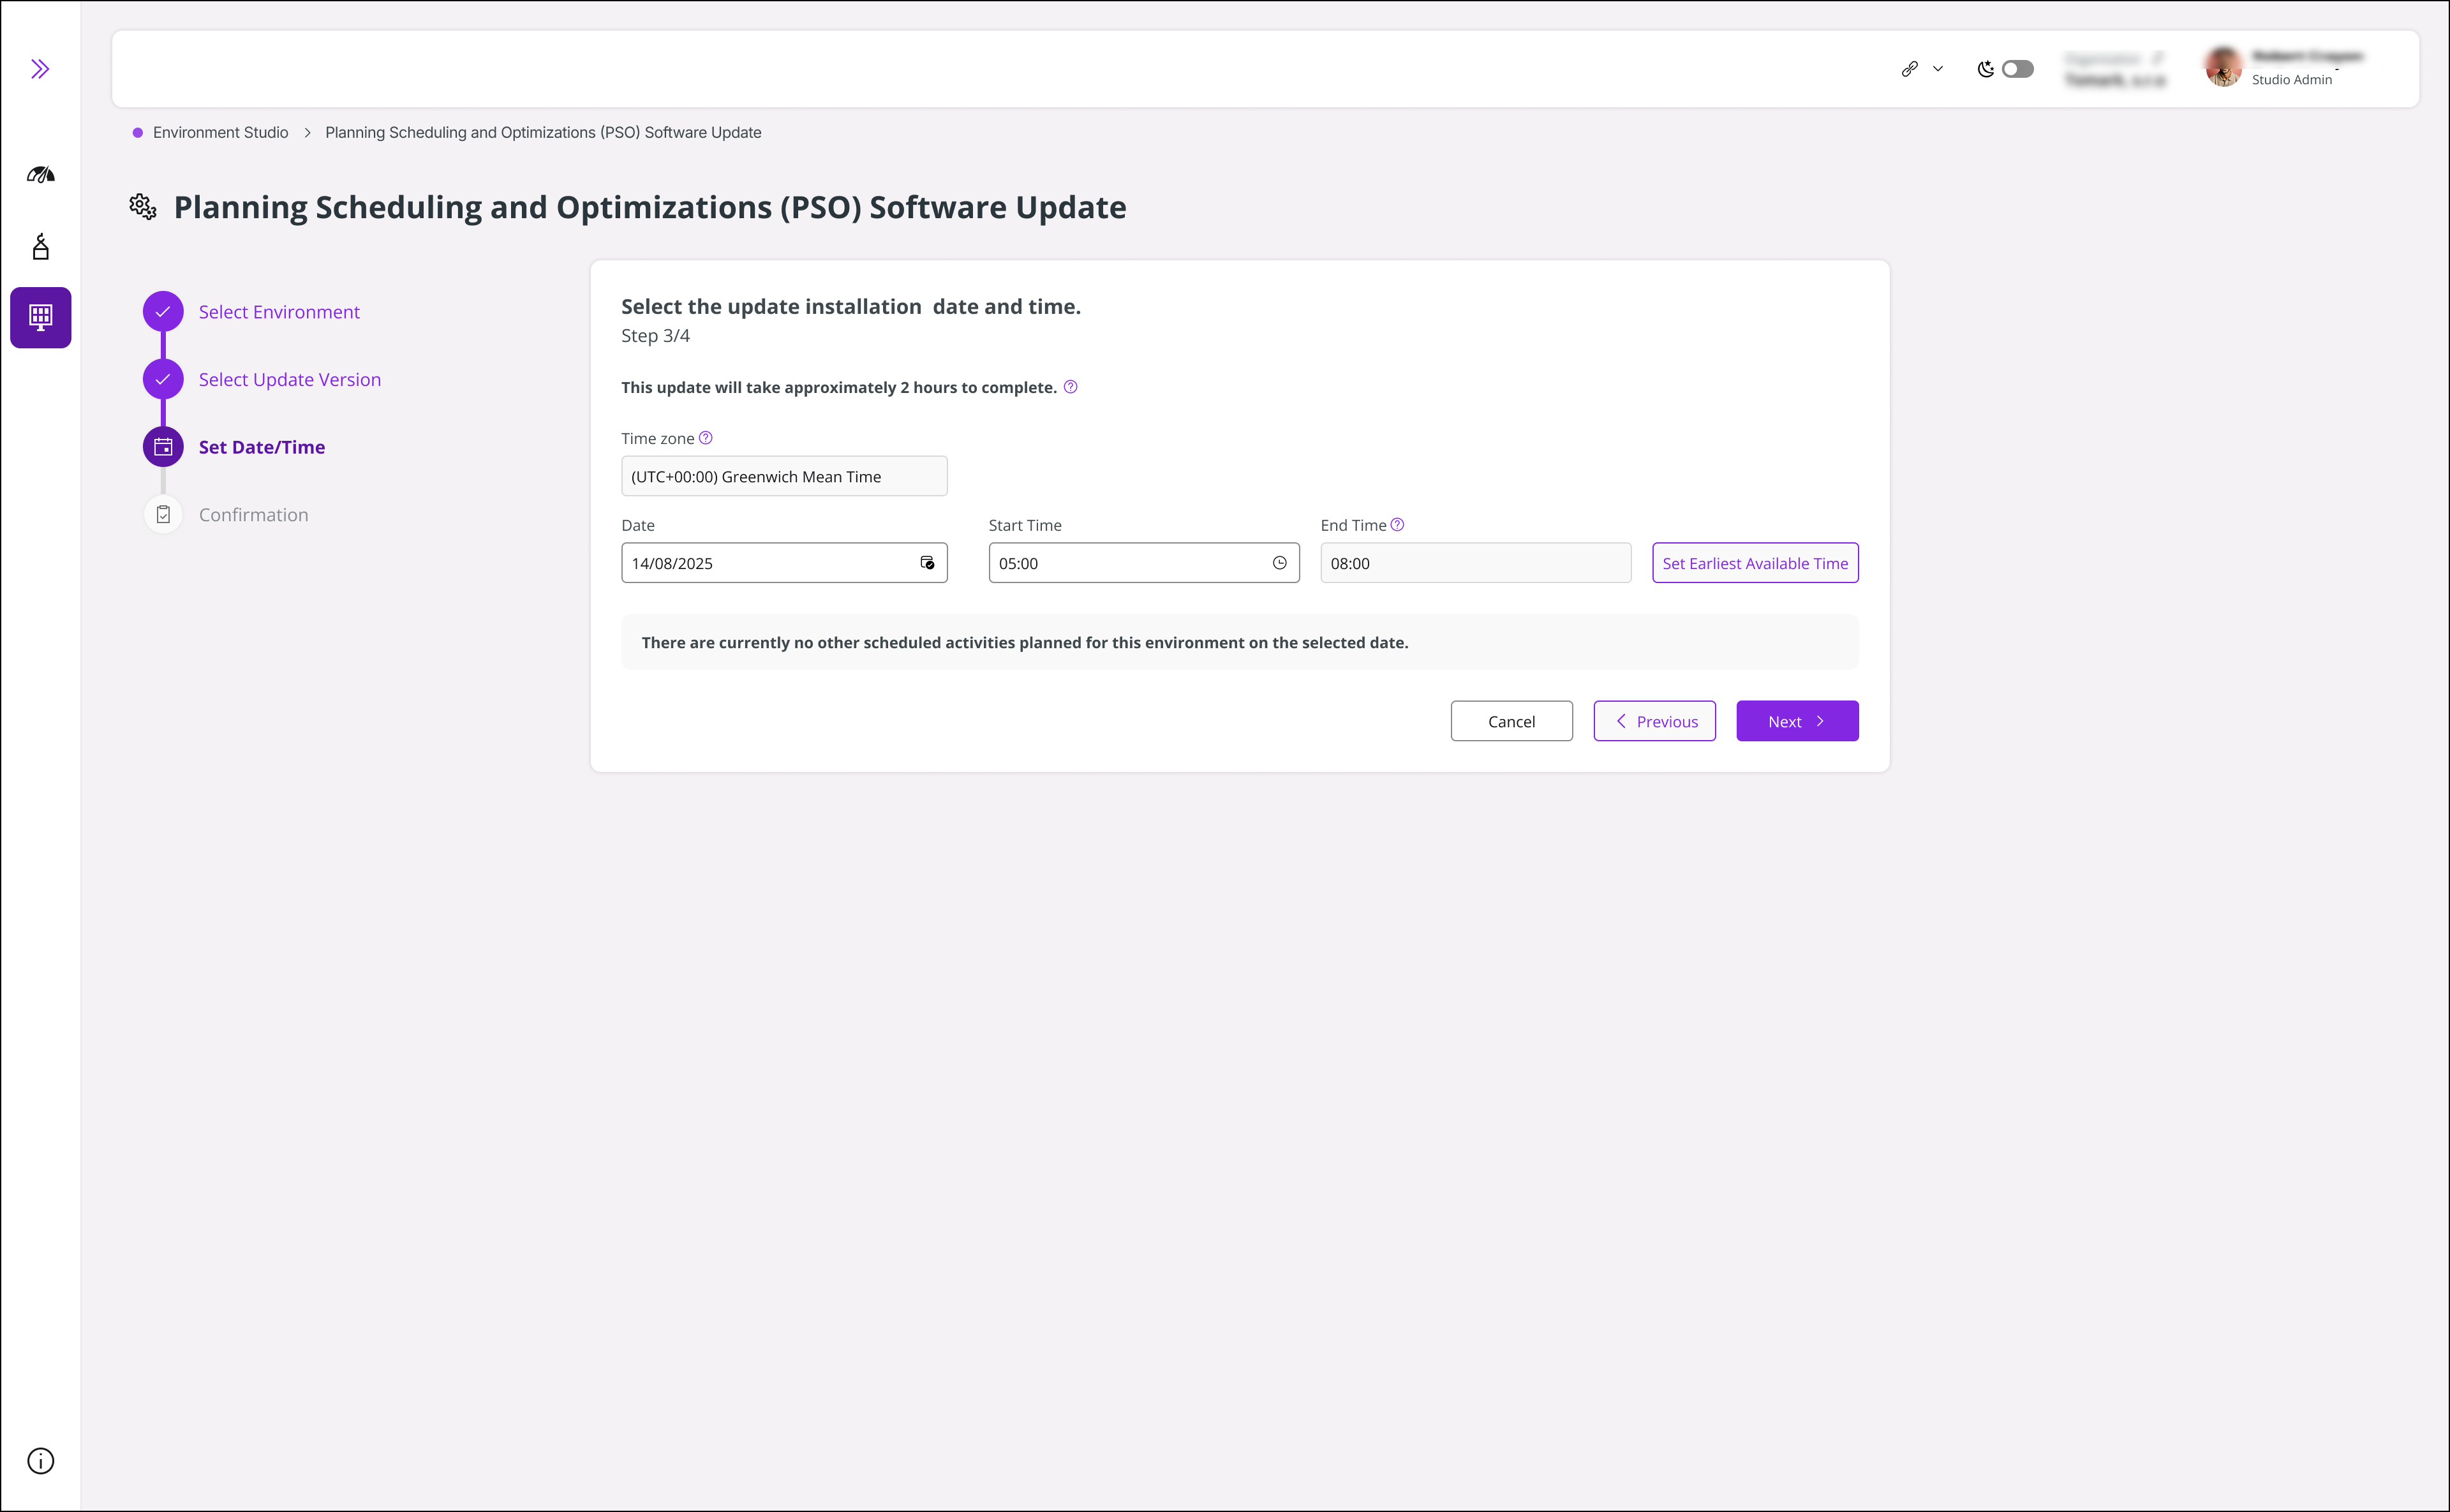 |
|---|
| Figure 7 - Select the date and time for the installation |
The Set Date/Time panel is a smart scheduling interface that helps you book your upgrade installation during optimal windows, avoiding conflicts with other environmental activities. LEC uses conflict detection to ensure your scheduled upgrade doesn't interfere with ongoing operations, maintain system stability, and minimize unplanned downtime.
Time Zone: Select your preferred time zone from the dropdown list to ensure accurate scheduling across global teams. Usually, the time zone is selected by default.
Date Picker: Click the calendar icon to choose the installation date.
Start Time: Define the start time for the upgrade installation. Time is available in 30-minute intervals. Only available time slots are shown, based on all activities scheduled for the target environment on the selected day. The selected time slot must be continuous, from the Start Time to the End Time with no other overlapping activities during the selected slot.
End Time: Automatically fetched considering the start time and the approximate installation time stated in the Set Date/Time panel.
Set Earliest Available Time: Upon clicking Set Earliest Available Time, the system will search for the next available slot. If no slot is found today, it will continue checking for the next earliest date up to 30 days. If no slot becomes available within this period, you will be prompted to select a slot manually.
NOTE: Once a time slot has been confirmed, it cannot be altered. If a change to the scheduled time is required, the existing upgrade installation must first be cancelled, after which a new upgrade can be rescheduled for the desired time slot.
Once the date and time are set, click Next.
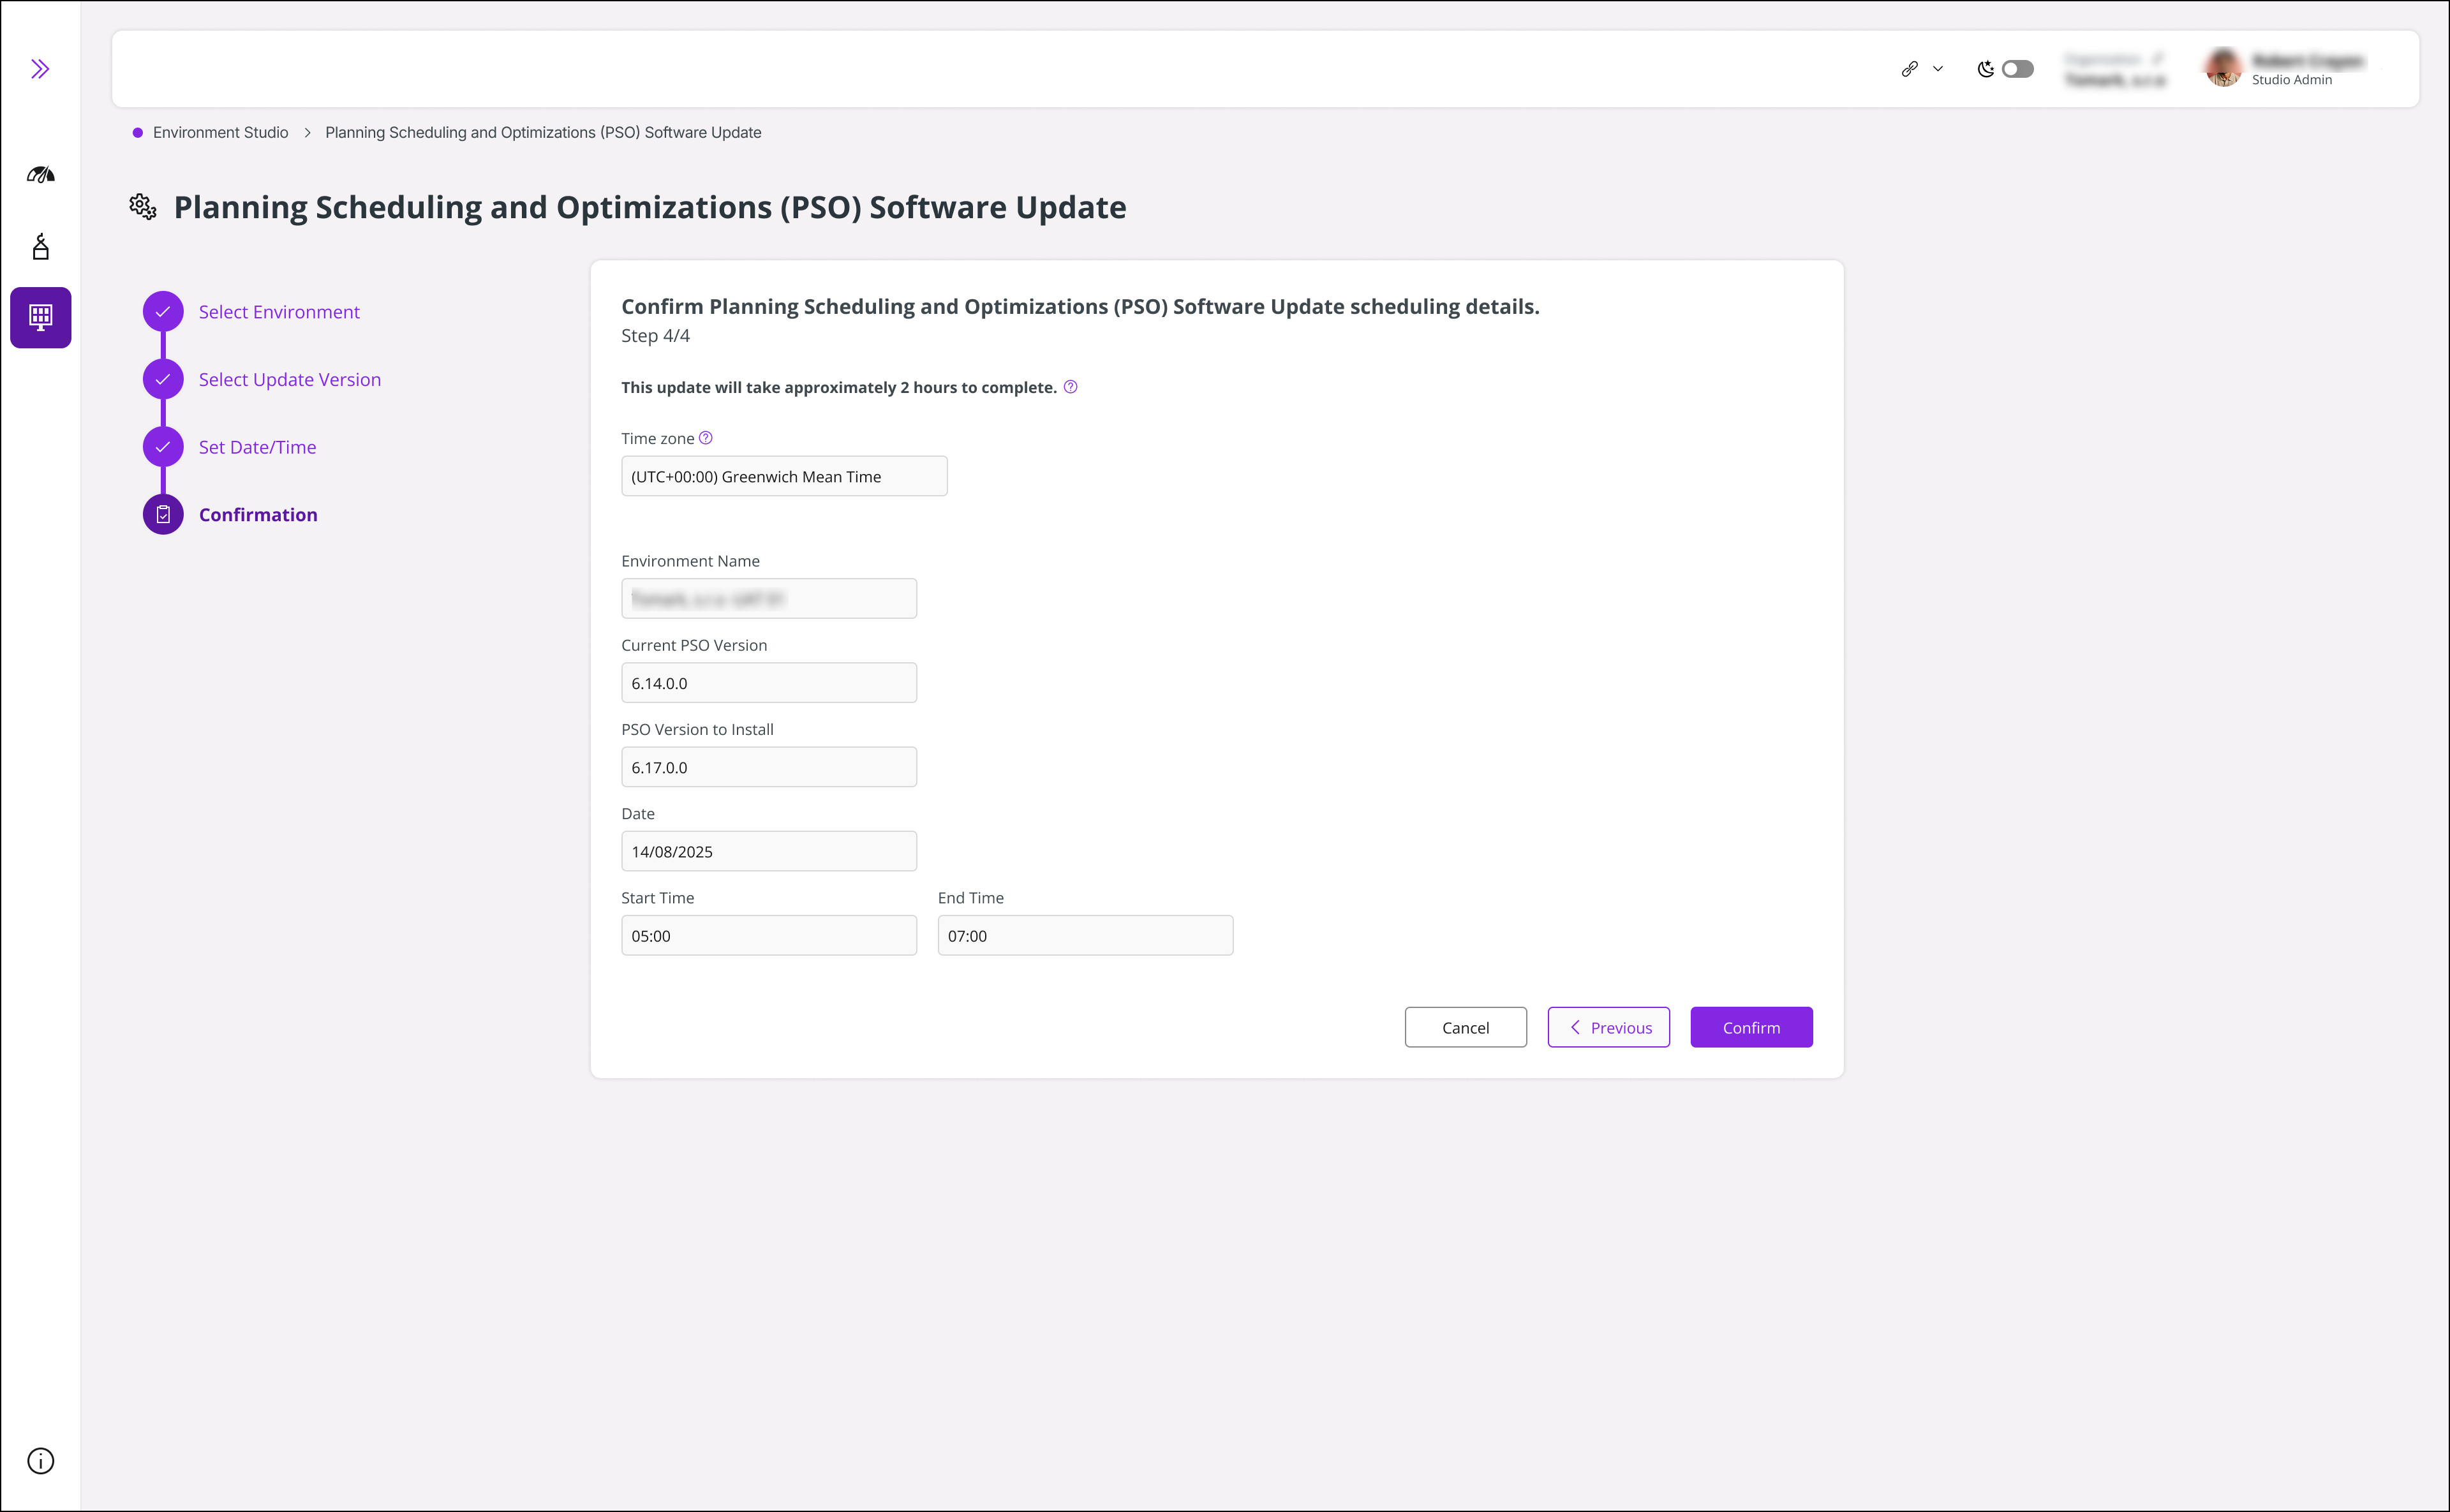
The next step is confirmation. Review the details provided for the installation. Ensure everything is correct, then click Confirm to proceed.
 |
|---|
| Figure 8 - Confirm the installation details |
Scheduling for Production Environment
Prior to scheduling the PSO upgrade installation for the Production (PROD) environment, please ensure that comprehensive testing has been successfully completed in the User Acceptance Testing (UAT) environment.
Please note that the PSO version you have taken to the UAT is taken to the PROD environment, meaning the same build that underwent UAT validation is currently live in production.
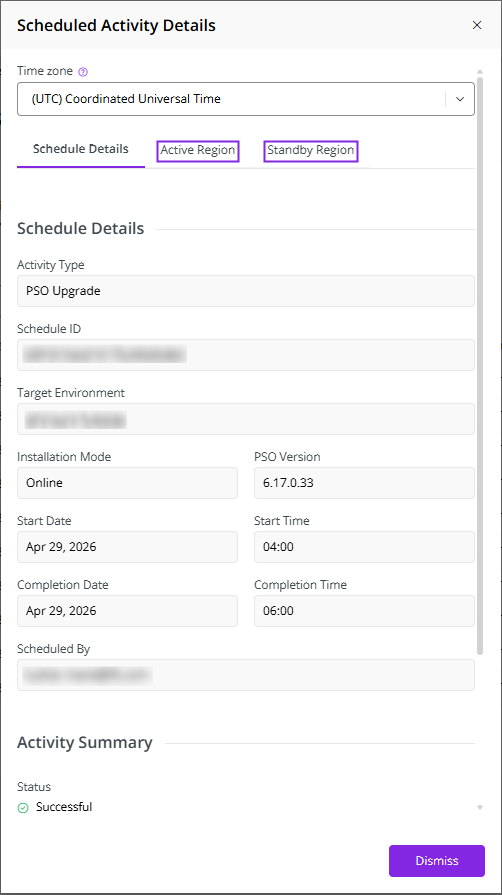
The scheduled PSO upgrades can be checked in the Scheduled Activities table under Monitoring in the left sidebar.
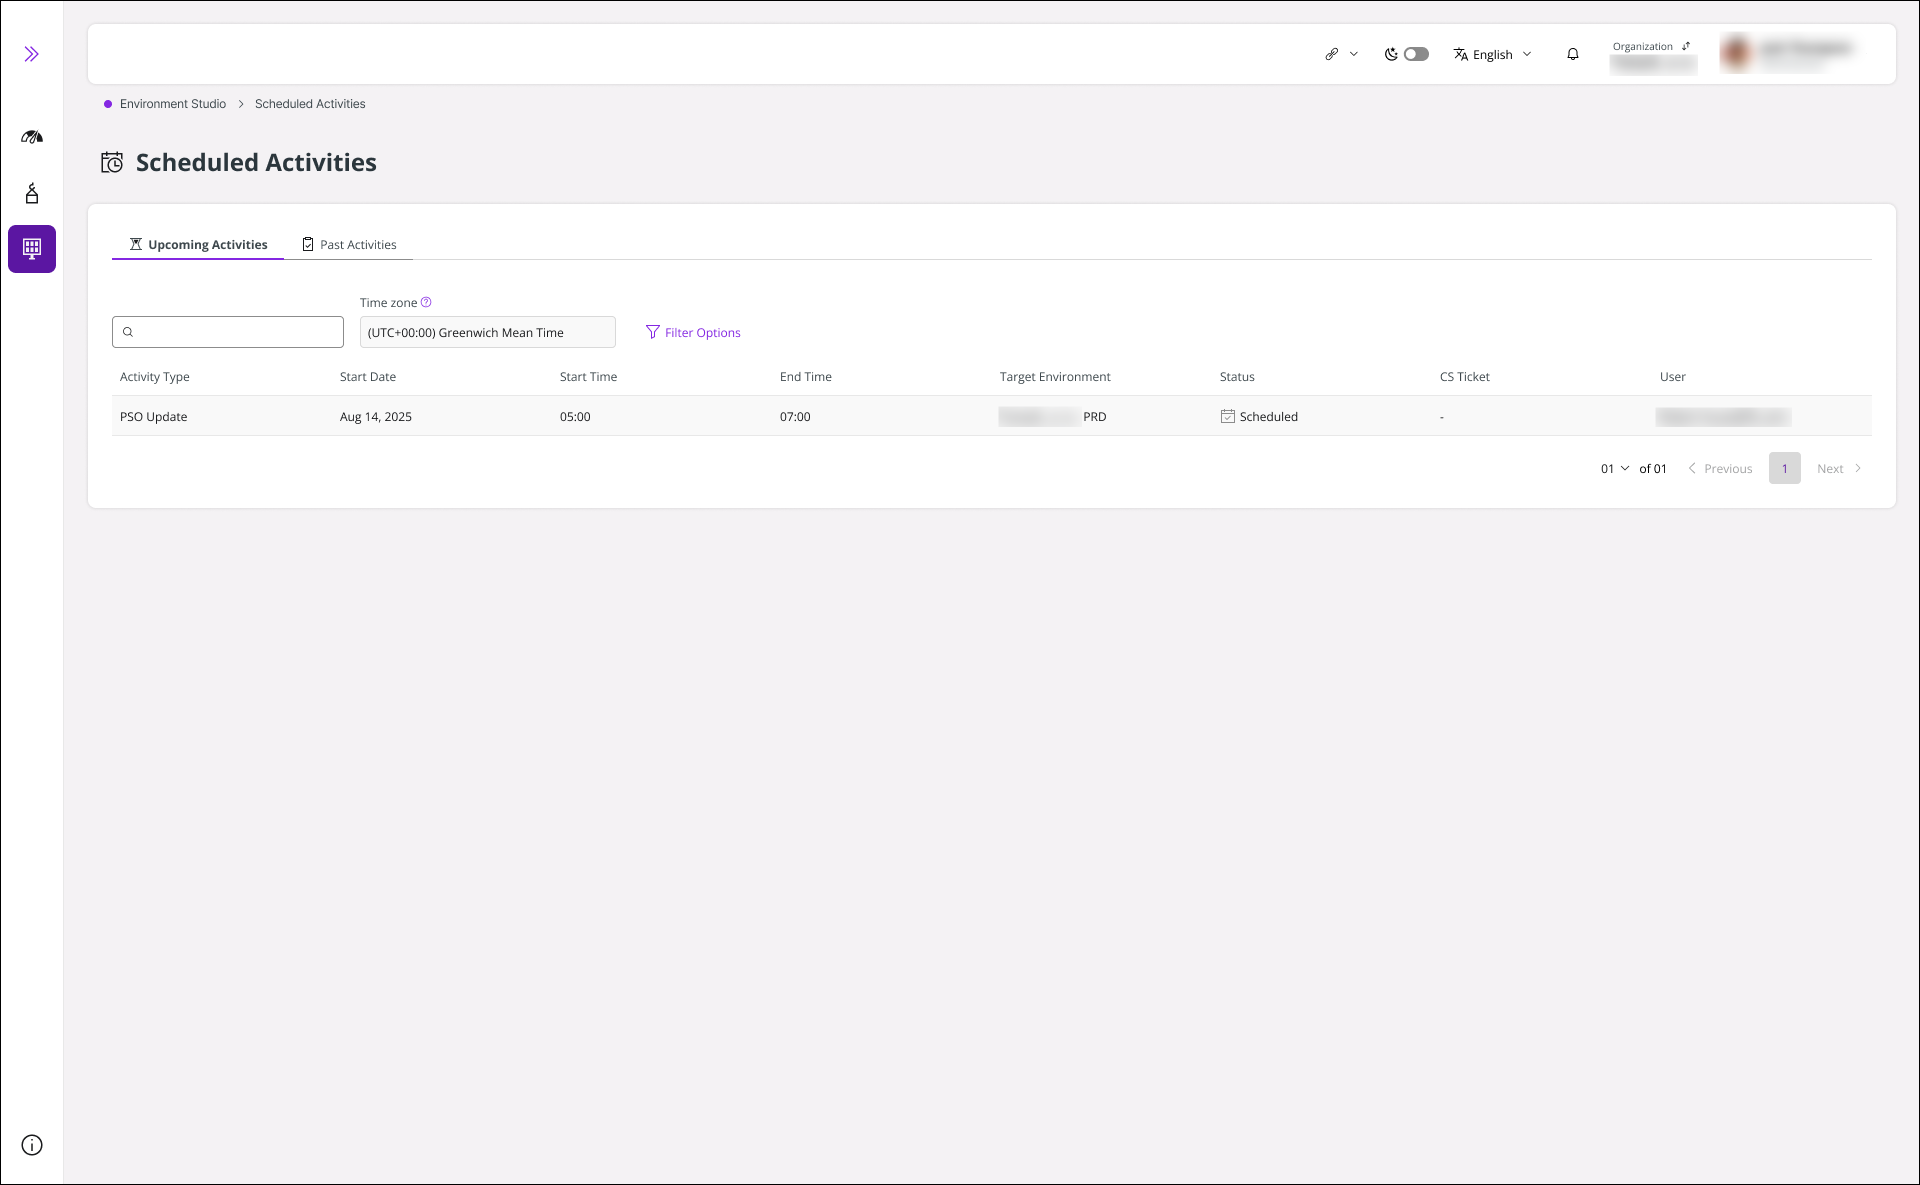 |
|---|
| Figure 9 - Check scheduled activity for the PSO update |
UHA Subscribed Environments
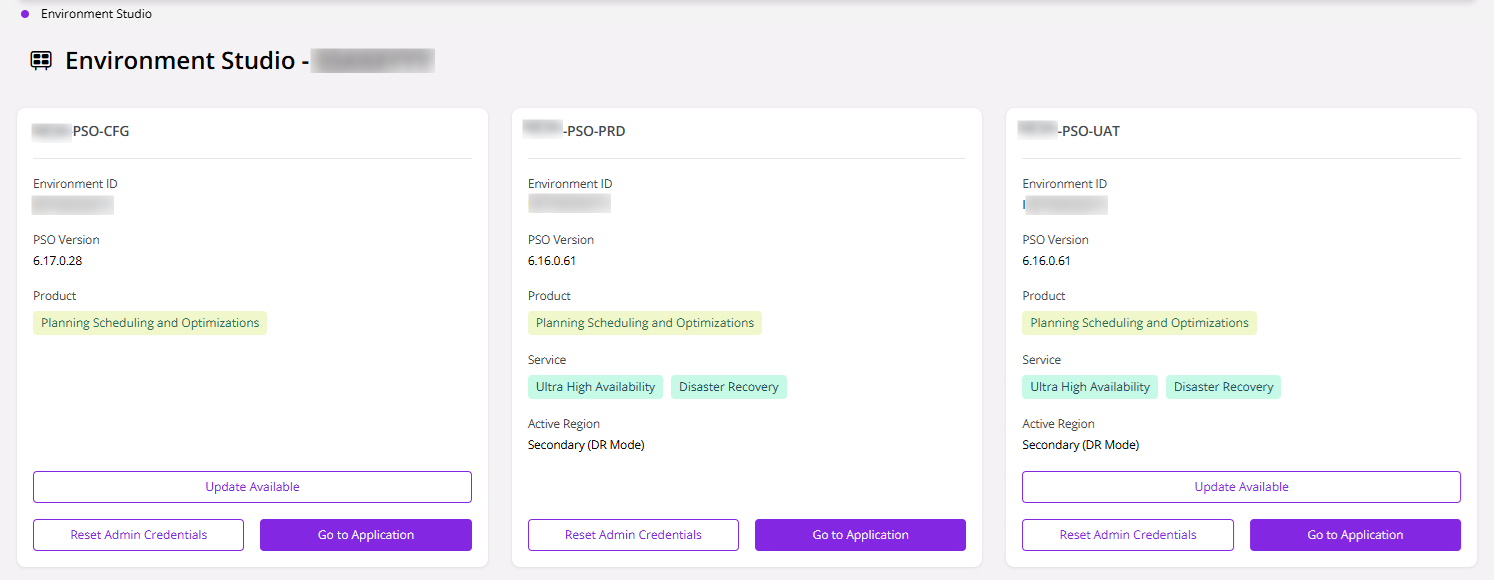
If PSO Ultra High Availability (UHA) is provisioned for your Standalone Application environment, Disaster Recovery Mode is enabled with two regions: a primary region and a secondary region. The environment cards display labels that indicate the UHA services and identify the active region, as shown below.
 |
|---|
| Figure 10 - The environment is in primary region: normal operations |
In the event that the primary region becomes unavailable, the secondary region is promoted to the primary region, indicating that Disaster Recovery has been activated. Whenever the primary region becomes unavailable, please contact the IFS Support Team to activate the Disaster Recovery Mode.
 |
|---|
| Figure 11 - The environment is in secondary region: disaster recovery mode activated |
Furthermore, once you click on an activity from the Scheduled Activities table, you can see that it displays two tabs, representing the Active Region and the Standby region, where you can check updates for each region. Please note that the environments subscribed to for UHA are PRD and UAT only. Due to the inclusion of two regions in Ultra High Availability (UHA) environments, the application update procedure will require an additional two hours. After Disaster Recovery Mode is activated, subsequent updates will follow the standard update duration.
 |
|---|
| Figure 12 - Scheduled Activities Details View |