Identity Providers
Overview
The Identity Providers feature in the User Management Centre enables the systematic configuration and management of Identity Providers to support Single Sign-On (SSO) across various applications. Furthermore, it allows for the setup of SCIM and User Provisioning protocols, providing administrators with centralized control over user accounts and authentication mechanisms.
Attention
Identity Providers (IdPs) are services that authenticate users and manage their identities, then issue assertions/tokens to applications so users can sign in securely, often with Single Sign-On (SSO).
IFS supports OpenID Connect (OIDC) and OAuth 2.0 APIs, which are protocols commonly used for secure authentication and authorization in modern applications.
The following prerequisites are essential to proceed:
- An Identity Provider that supports OpenID Connect (OIDC) along with an administrator account.
- An authentication application configured with a Client ID, Client Secret, and a metadata document.
- An application configured for System for Cross-domain Identity Management (SCIM) according to the specifications of your identity provider.
Configuring Identity Providers
Configuring user management with Identity Providers is a 3 Step Process.
First Navigate to user management center for your Service instance. As a first-time configuration you will see the below page:

Click on Add New Identity Provider to configure an Identity Provider, User provisioning, and Group Mappings.
Step 1: Configure a New Provider
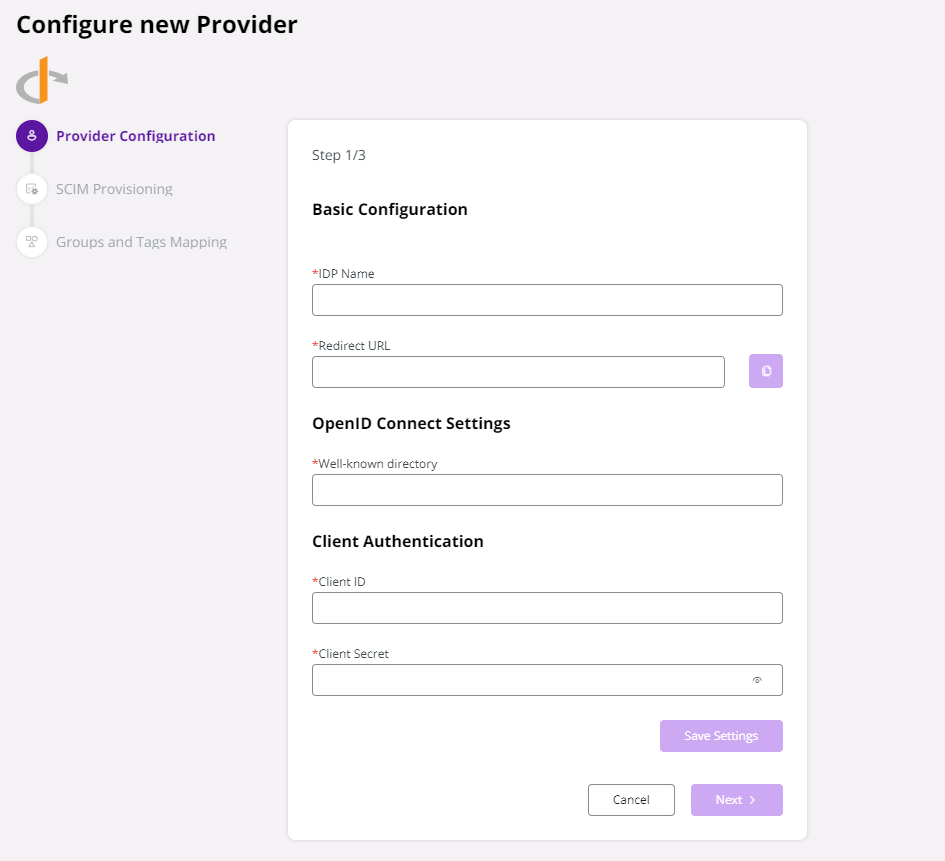
Required fields:
| Field | Description | Actions |
|---|---|---|
| IdP Name | Provide a suitable name for your Identity Provider. This will show in the login page as well. | |
| Redirect URL | Once you provide the IdP Name, the redirect URL will be generated as per the given name. The spaces and special characters in the IdP Name will be converted to underscores. ( _ ) | Copy the generated Redirect URL to your IdP authentication application. |
| Well-known directory | The Identity Provider’s OIDC configuration in machine-readable JSON format. AKA - OpenID Connect (OIDC) metadata endpoint, Discovery endpoint. | Locate the Well-known URL from your IdP authentication application and copy it into this field. |
| Client ID | The client ID of IdP authentication application | Locate the Client ID in your IdP authentication application and copy it here. |
| Client Secret | The client Secret of IdP authentication application | Generate a new client secret for your authentication application and copy it. Ensure you have alerts set for its expiration, as an expired secret will prevent users from logging in. |
After completing all required fields, the Save Settings button will be enabled.
Save your changes and proceed to the next step.
Step 2: SCIM Provisioning
Prepare a SCIM Application as guided by your Identity Provider. Prepare the User groups and assign those to your IdP SCIM Application.
Note : For easy management and authorization, always provision user groups & members. Avoid provisioning individual users.
Copy the generated values and test configuration or start provisioning:
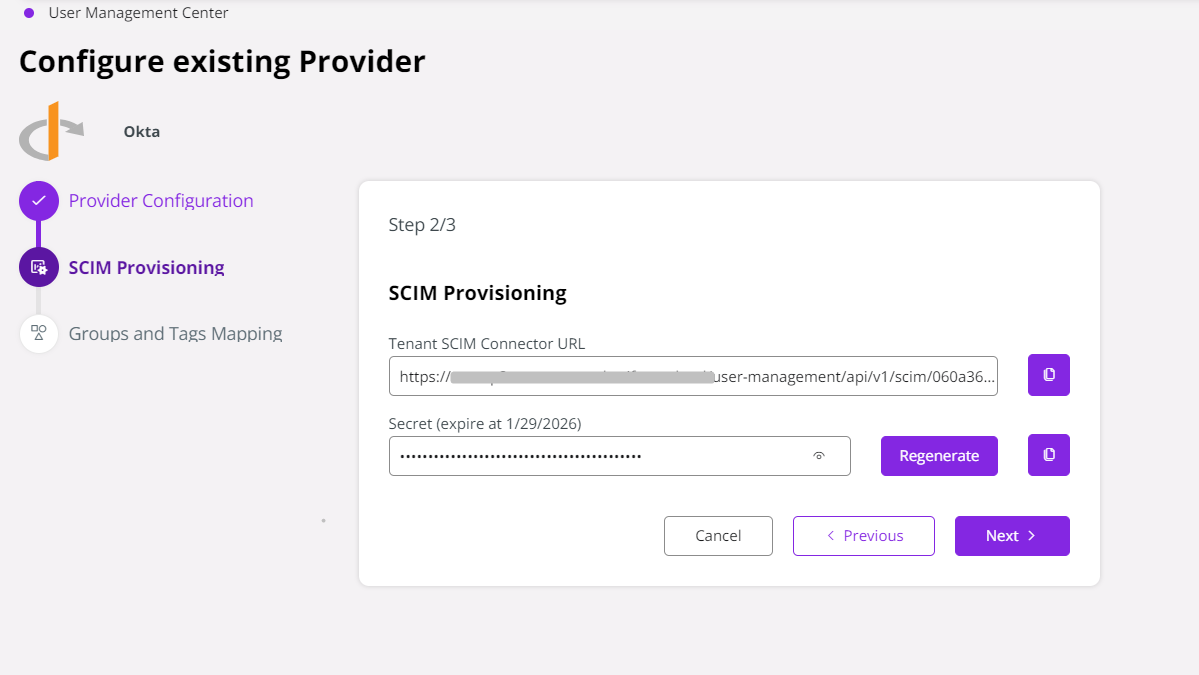
| Field | Description |
|---|---|
| Tenant SCIM Connector URL | Generated URL for SCIM Configuration |
| Secret | Generated Secret with Expiry date. You may generate new secrets as needed. Keep notification for the expiry date to avoid service disruptions. |
Step 3: Groups and Tags Mapping
If the SCIM configuration is completed successfully, the provisioned Groups will appear here. Map these Groups to Tags to assign each User Group to the relevant role.
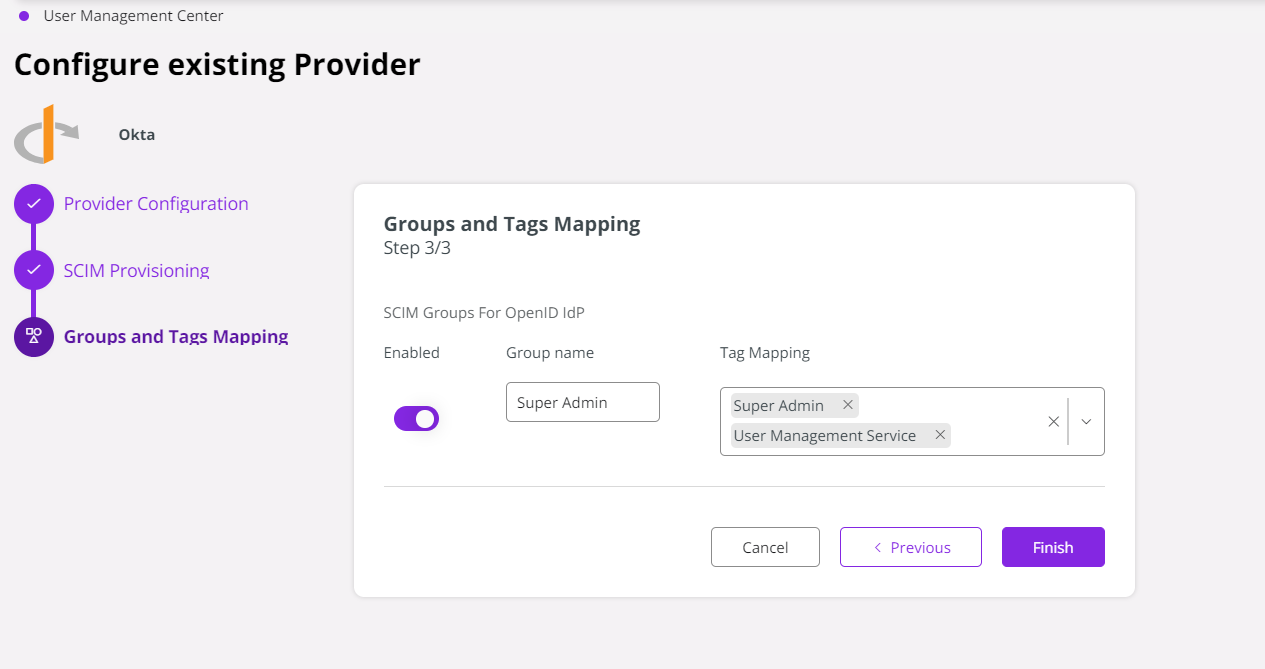
Finally, click Finish.
Your configured Identity Providers will now appear on the Identity Providers page.
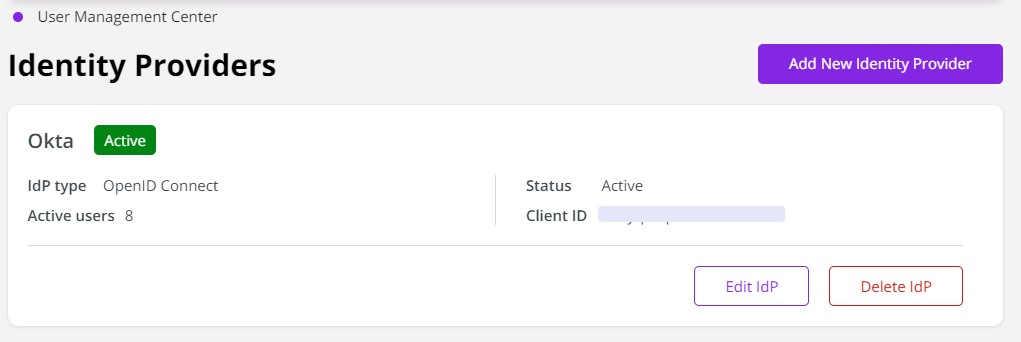
- You may configure multiple Identity Providers using the Add New Identity Provider option as needed.
- Use the Edit IdP button to manage the configuration, groups and tags.
- Use the Delete IdP button to remove an Identity Provider.
Note: Deleting an IdP will prevent all users provisioned through that configuration from logging in.