Provisioning Environments via Environment Studio
Overview
Environment Studio provides the flexibility to provision environments at a time of your choosing rather than relying on automatic provisioning schedules. For any additional environments you have purchased, the provisioning process starts only when you explicitly initiate it.
While the CFG environment is created automatically, UAT, PRD, and other purchased additional environments, such as TST and TRN, can be provisioned on demand.
Prerequisites
The Environment Studio Administrator privilege is required to provision environments in LEC Environment Studio.
Your entitlement for the new environment must already be reflected in your account. When you purchase an additional environment, LEC syncs this entitlement automatically, so it should appear in Environment Studio. If an environment you have purchased is not showing up as available to provision, contact IFS support before proceeding.
Provisioning an Environment
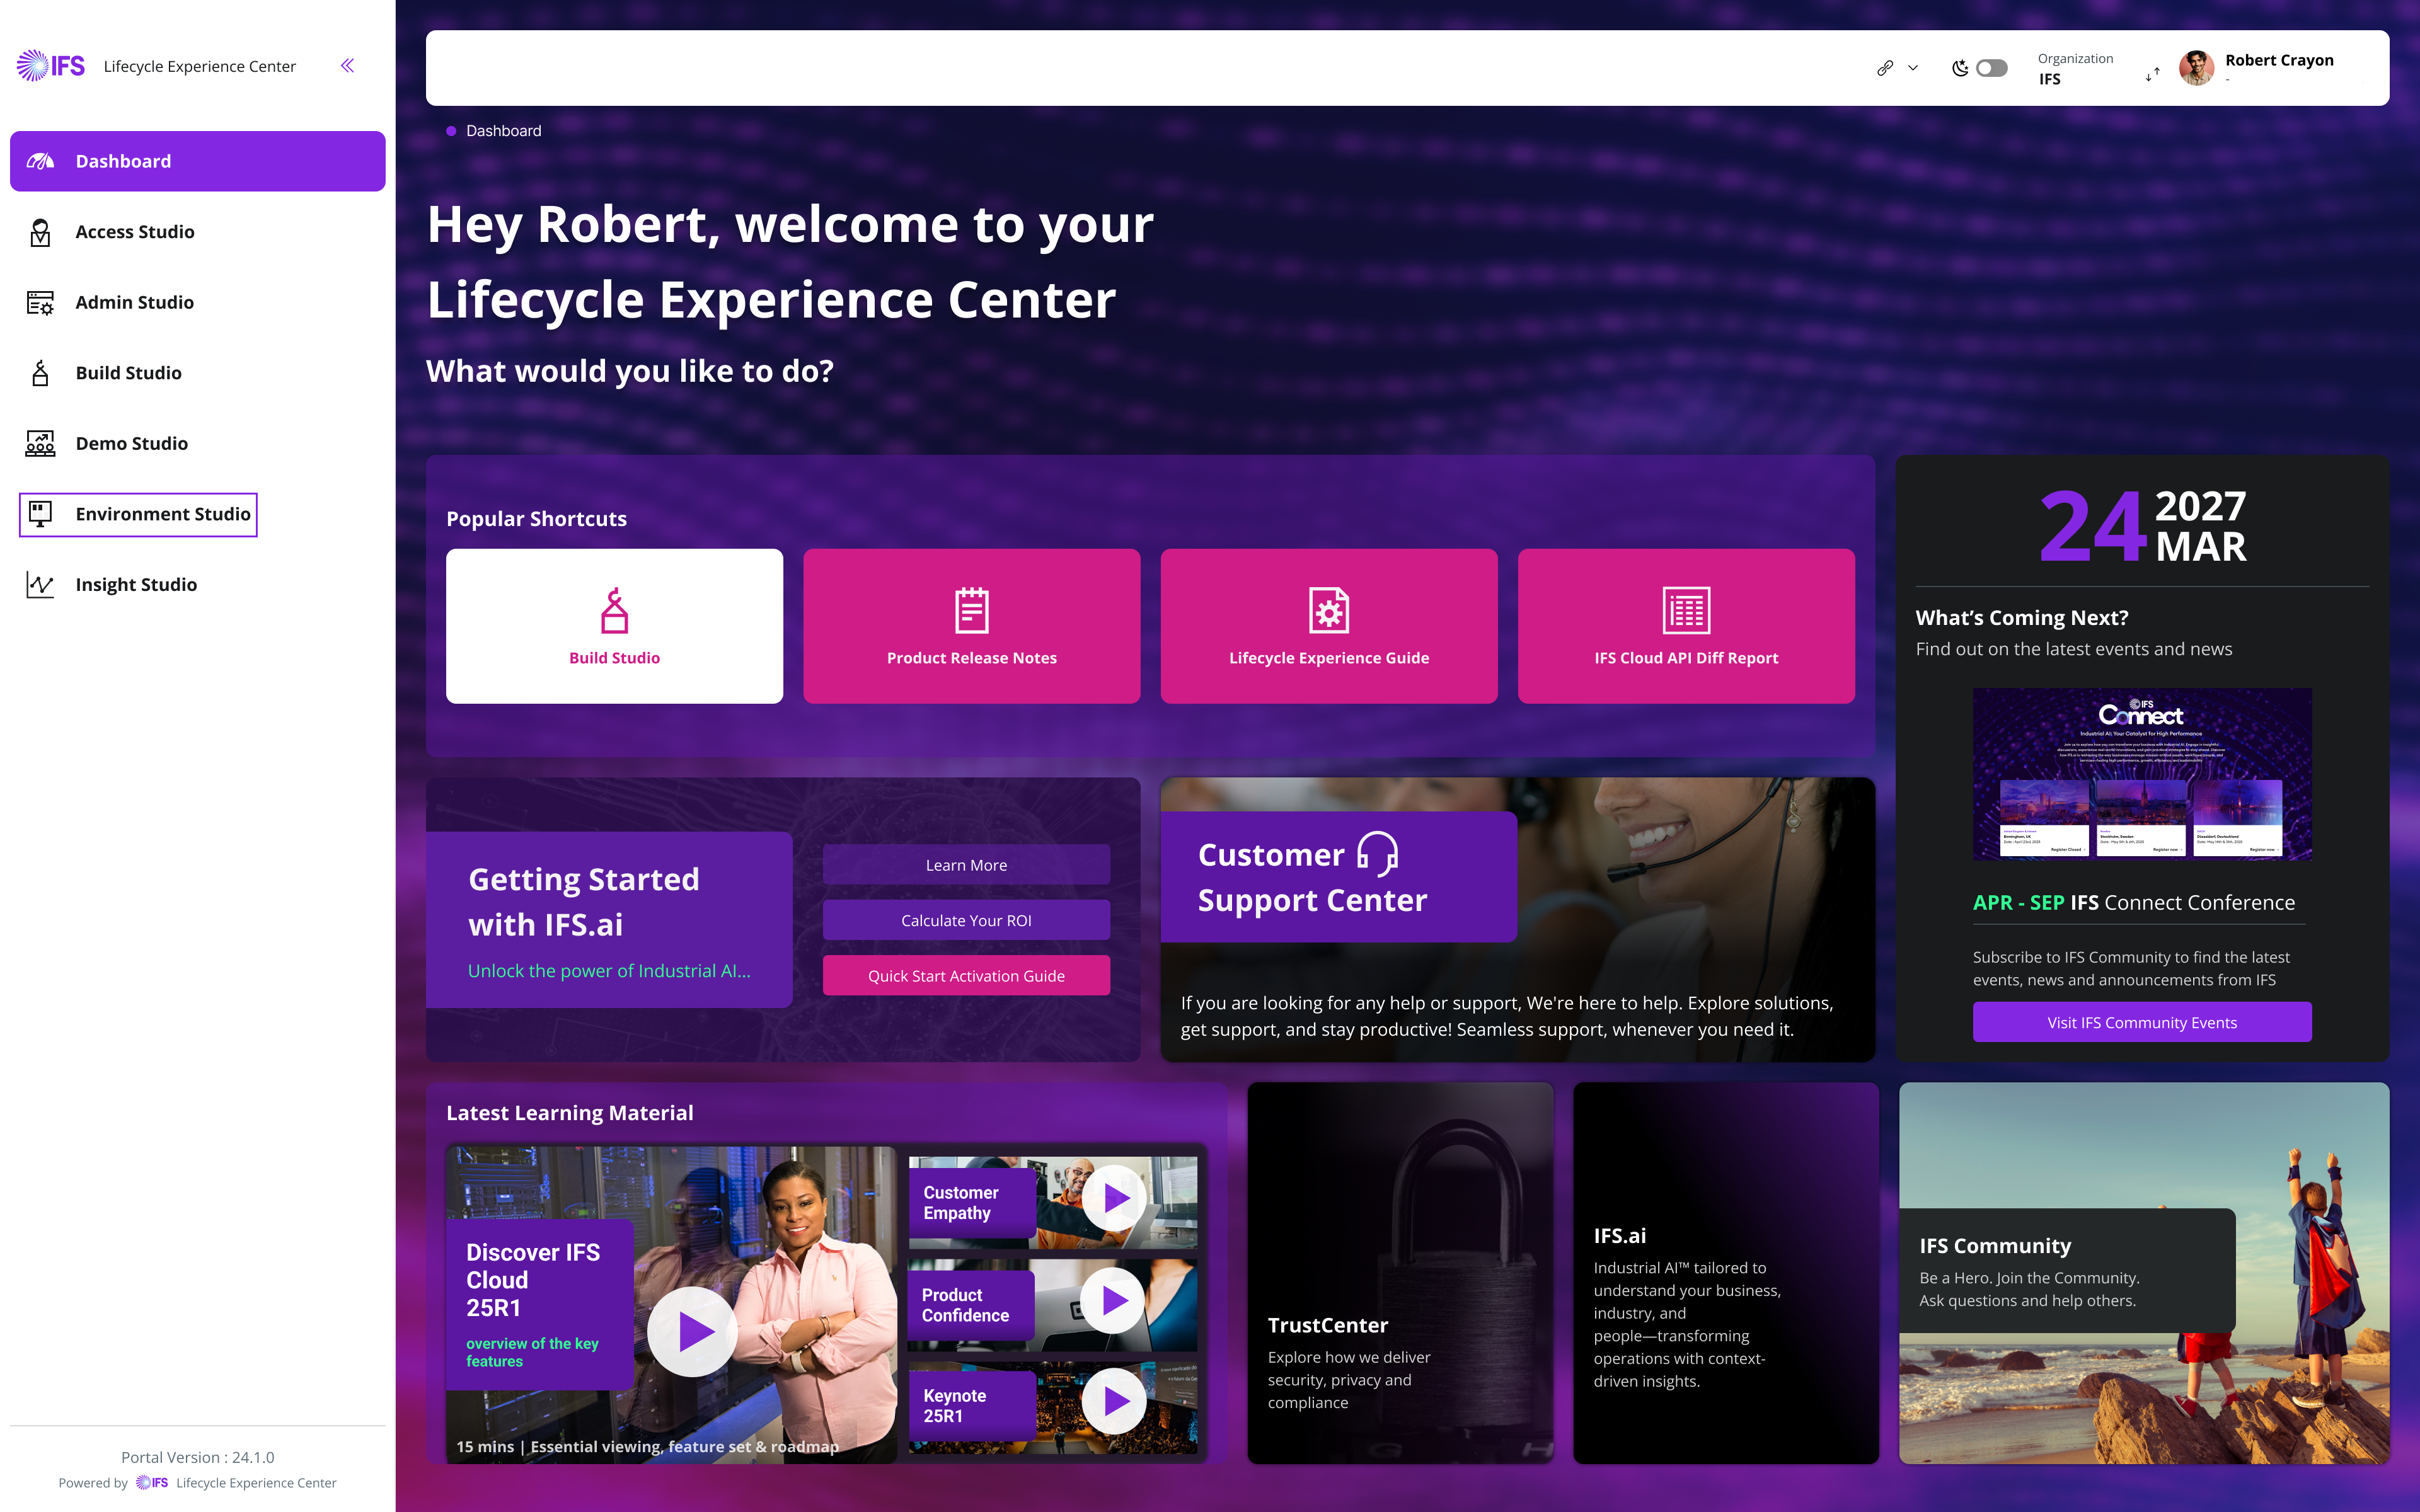
- Log into Lifecycle Experience Center (LEC) and click Environment Studio.
 |
|---|
| Figure 1 - LEC Home Dashboard |
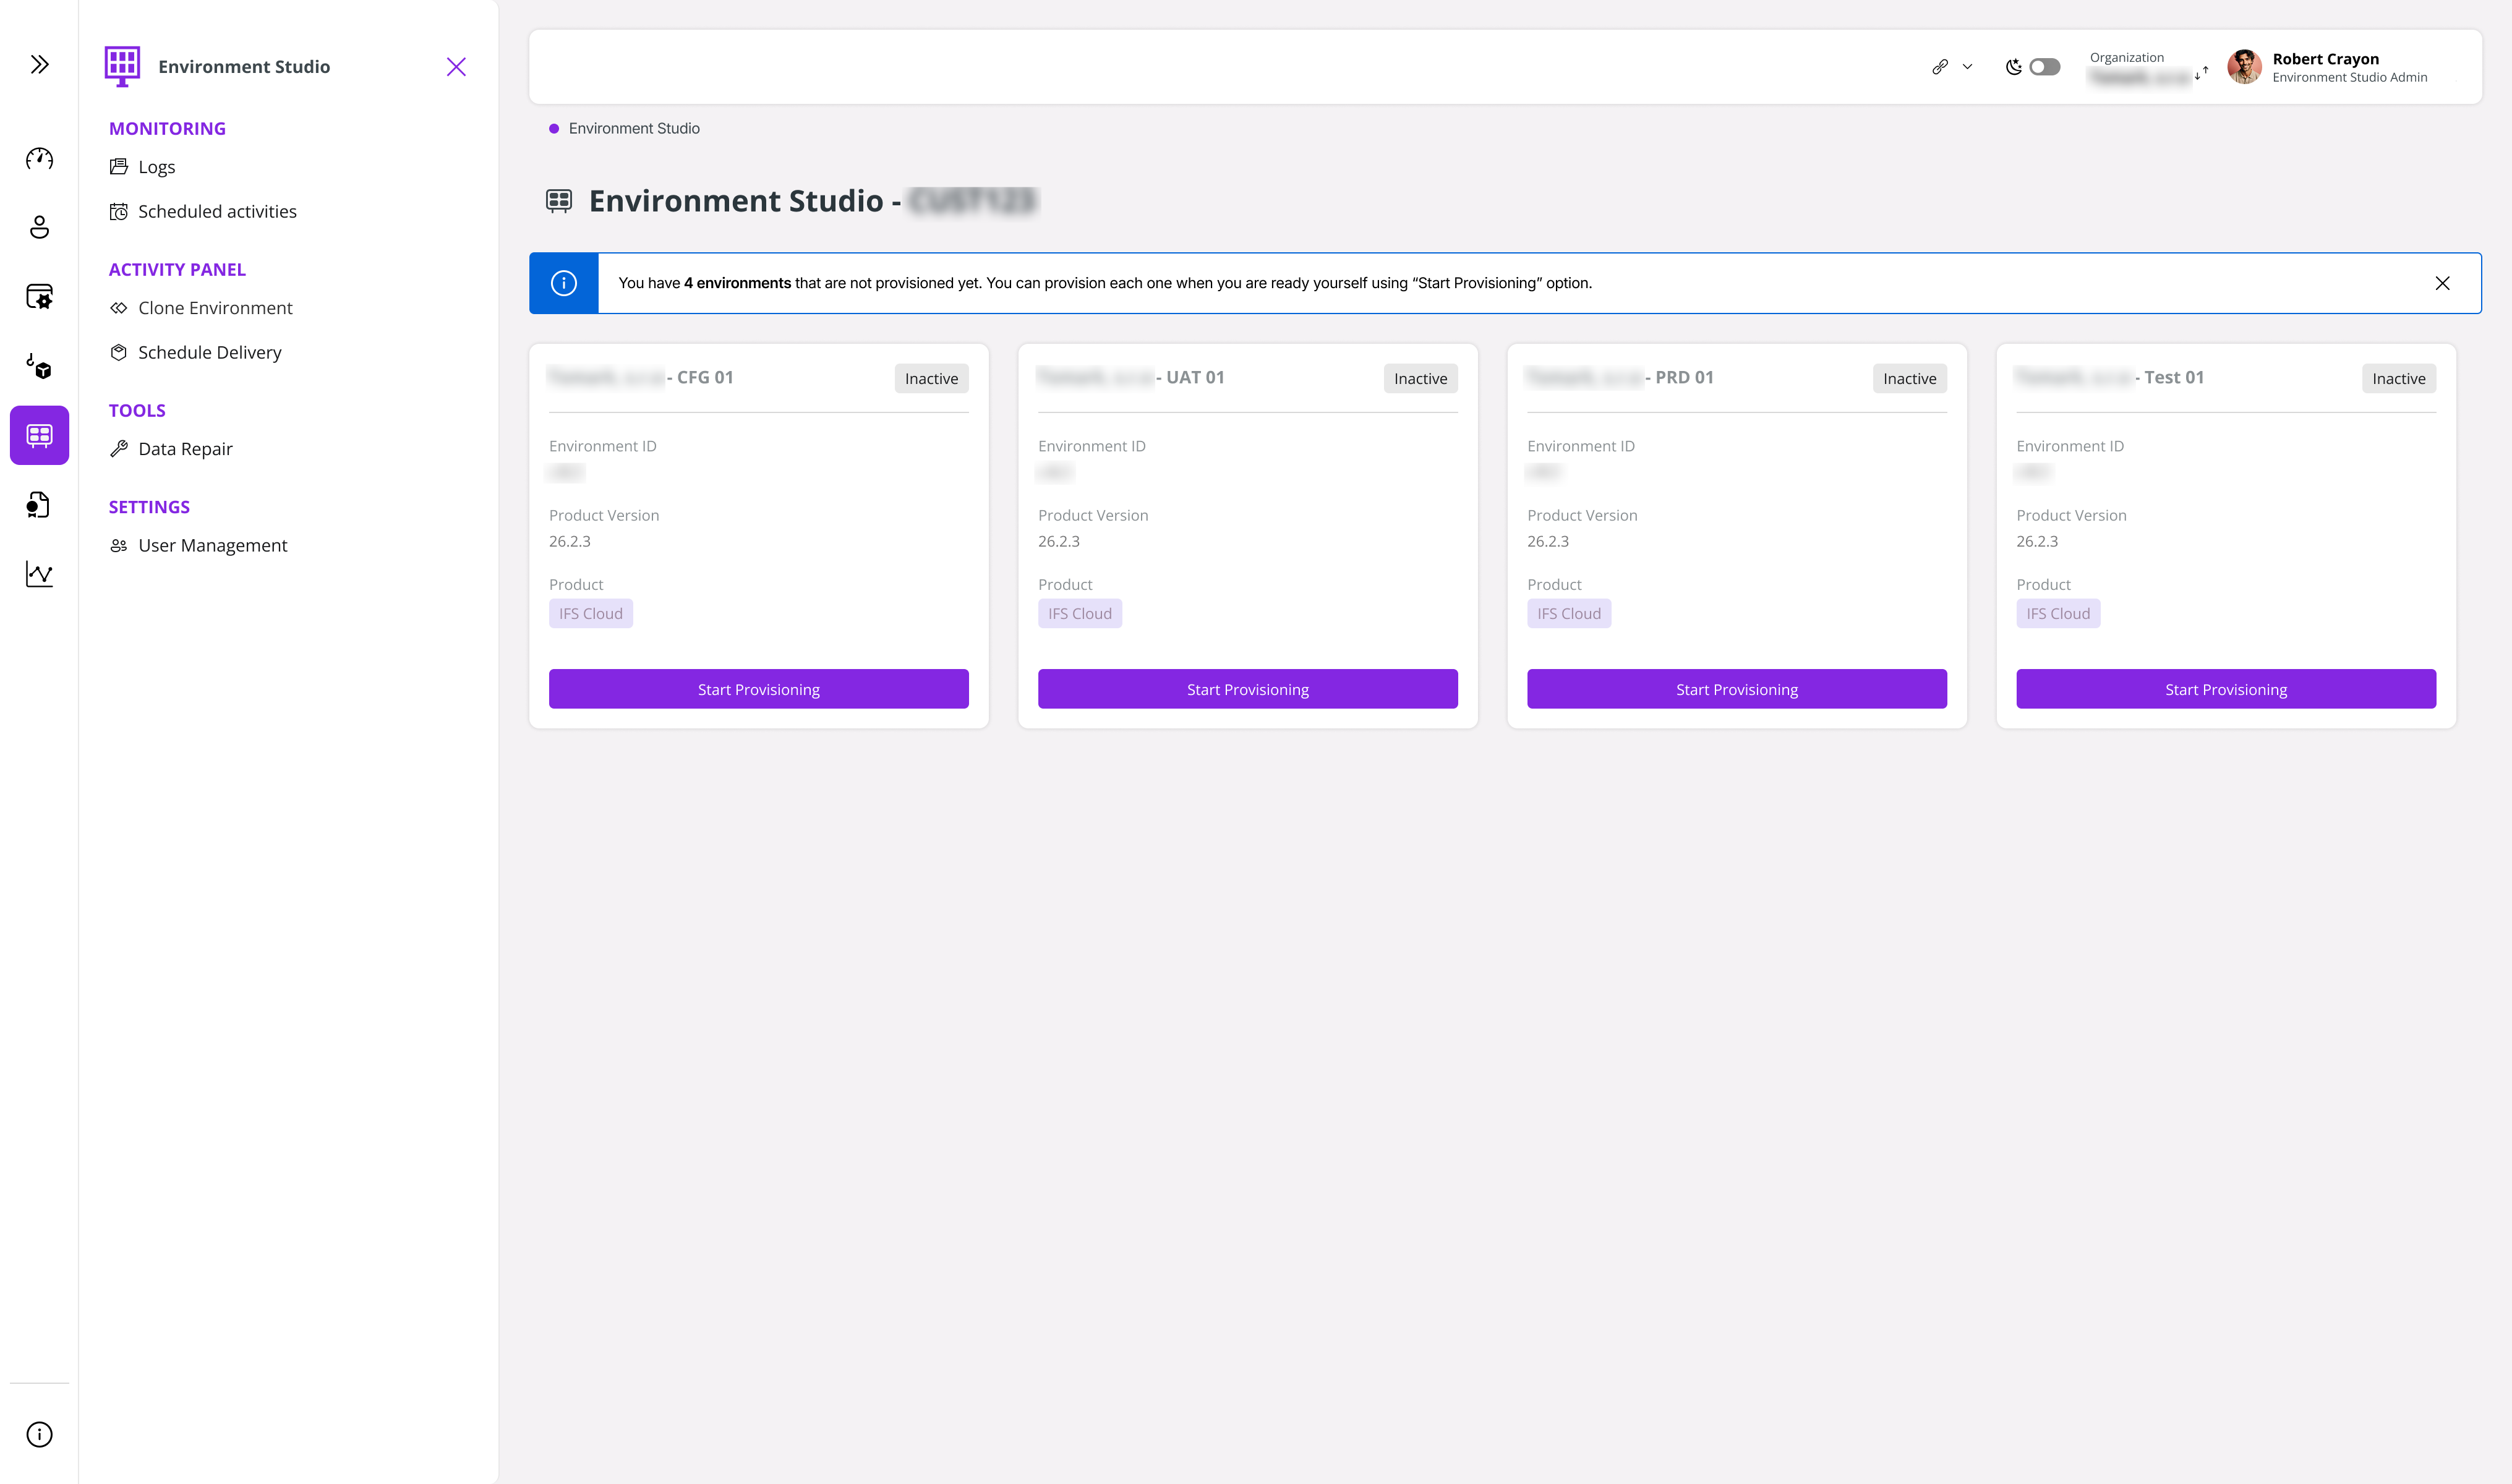
- In Environment Studio, the environments provisioned to you are displayed. To begin provisioning, select the required environment and click Start Provisioning.
 |
|---|
| Figure 2 - Environment Studio with Provisioned Environments |
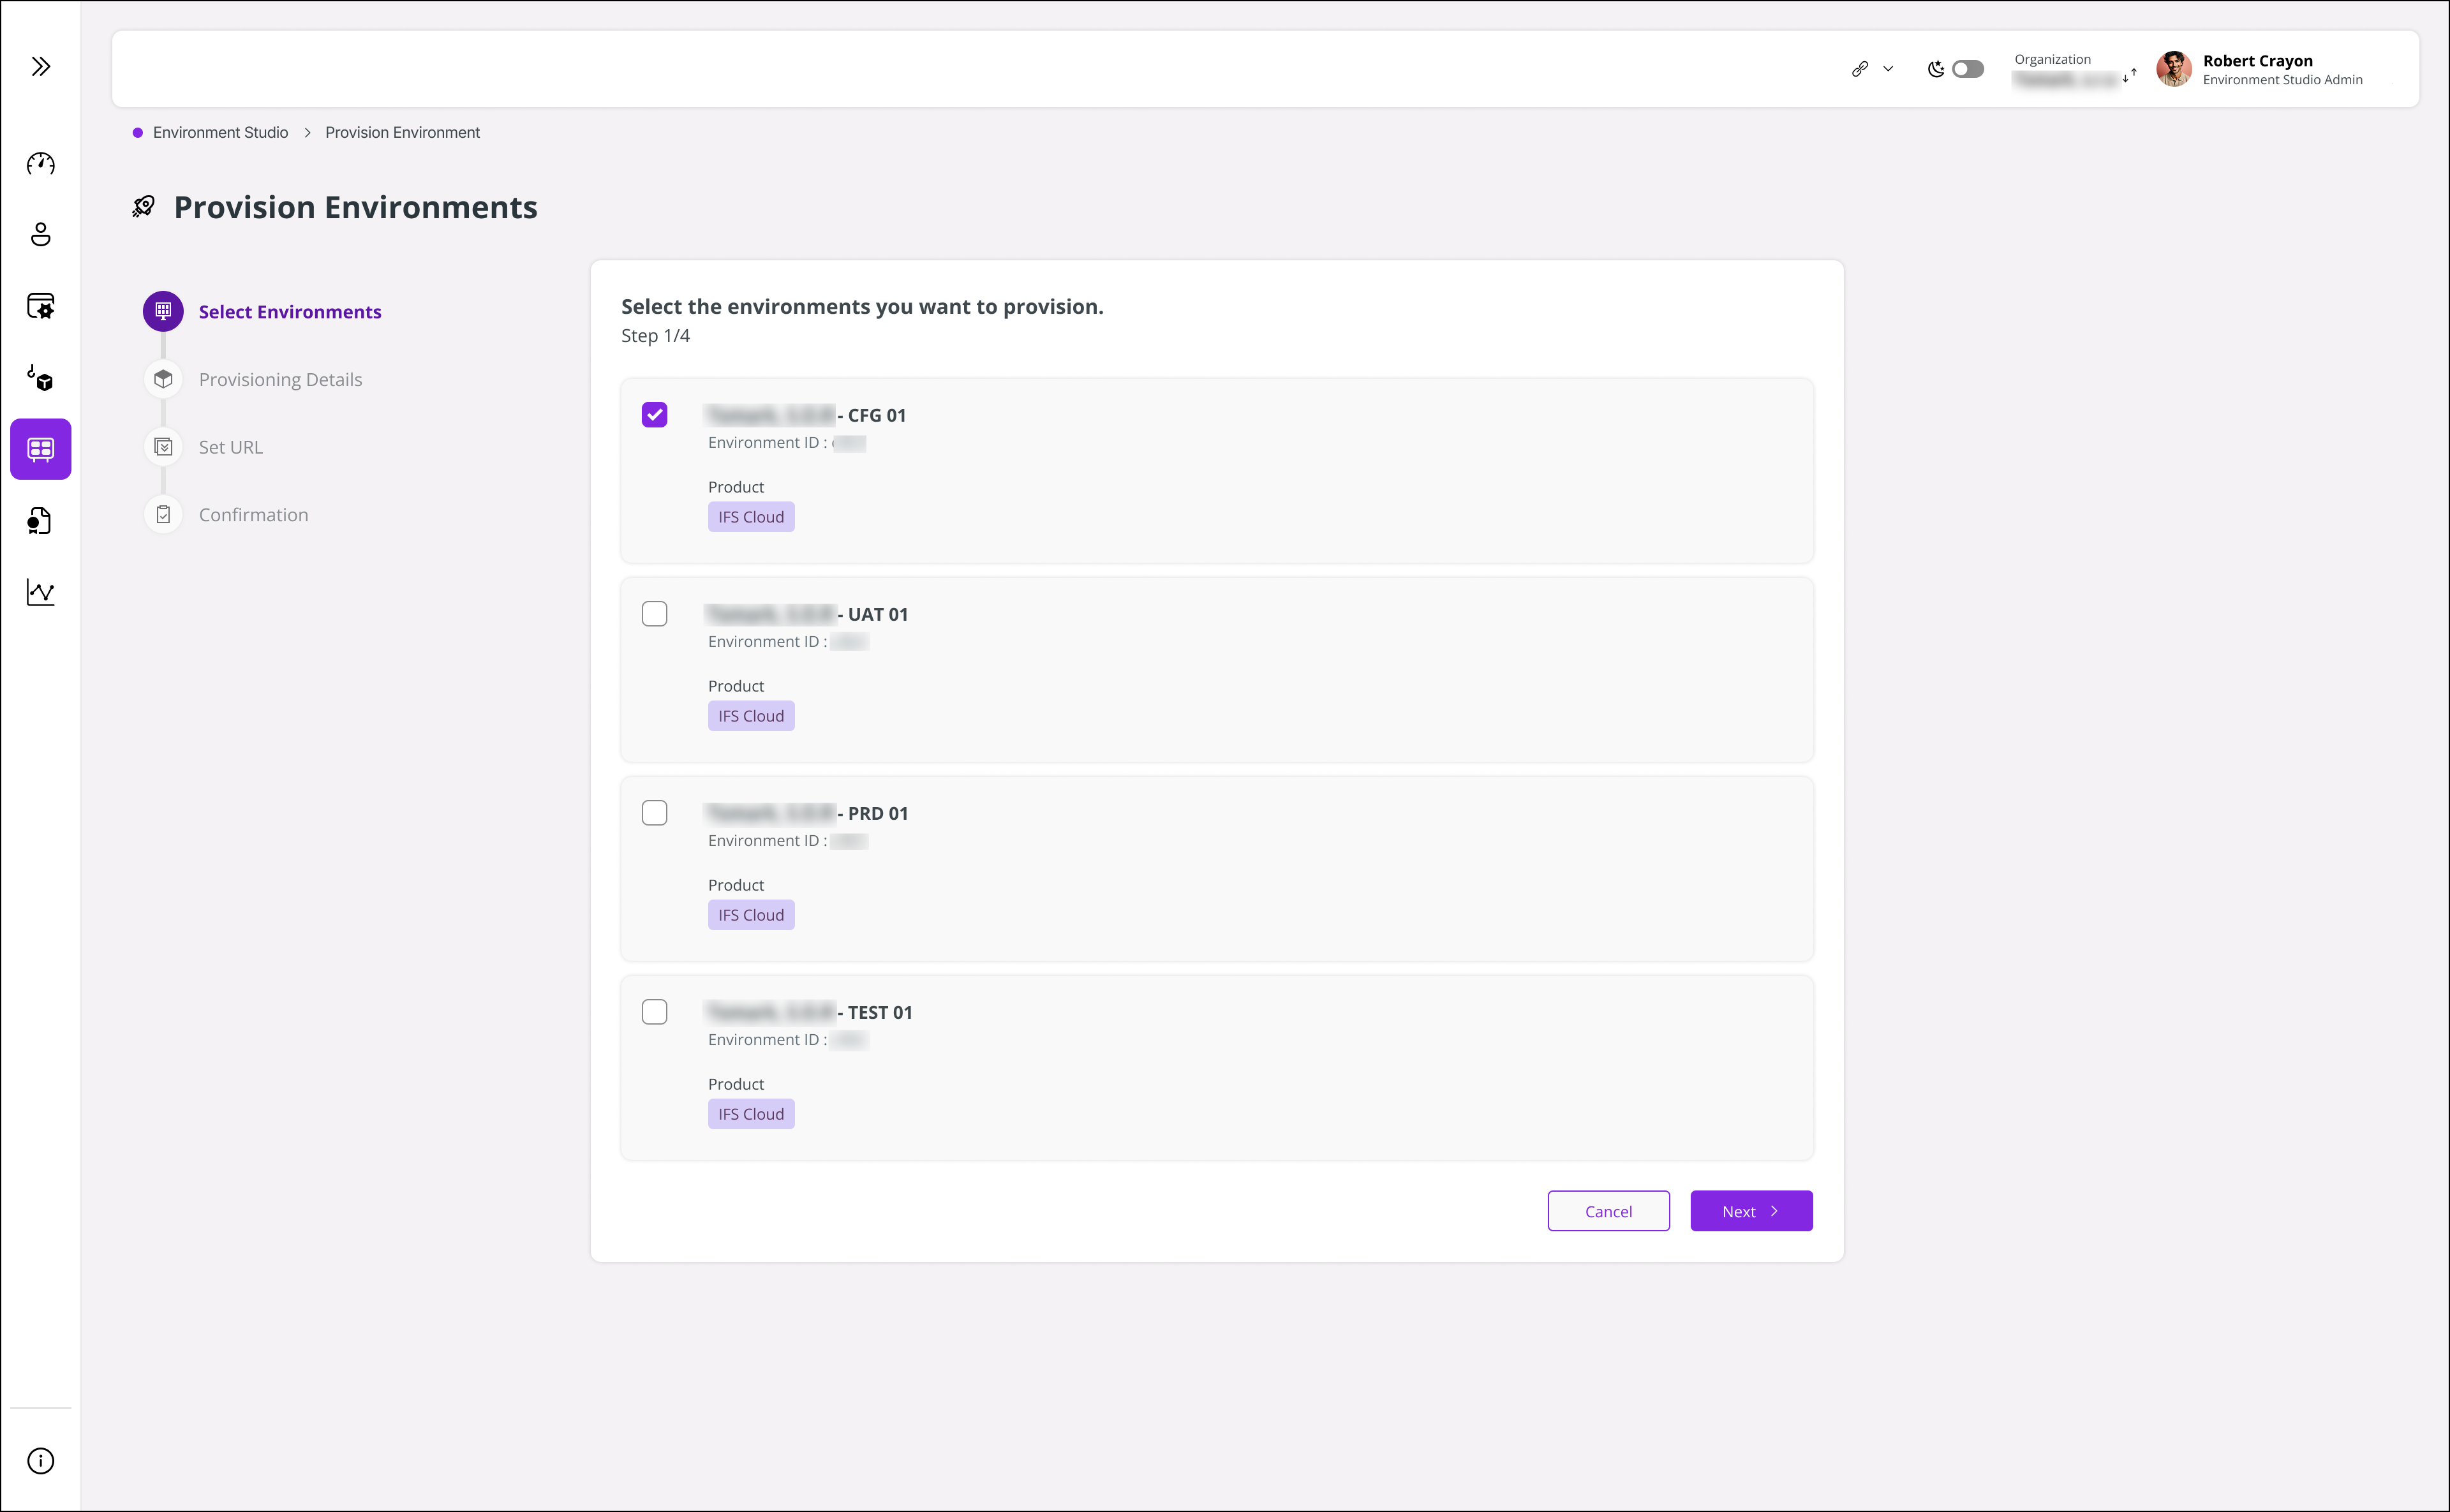
- Select the environments you want to provision ? can do parallel provisioning? Click Next.
 |
|---|
| Figure 3 - Choose the Environment |
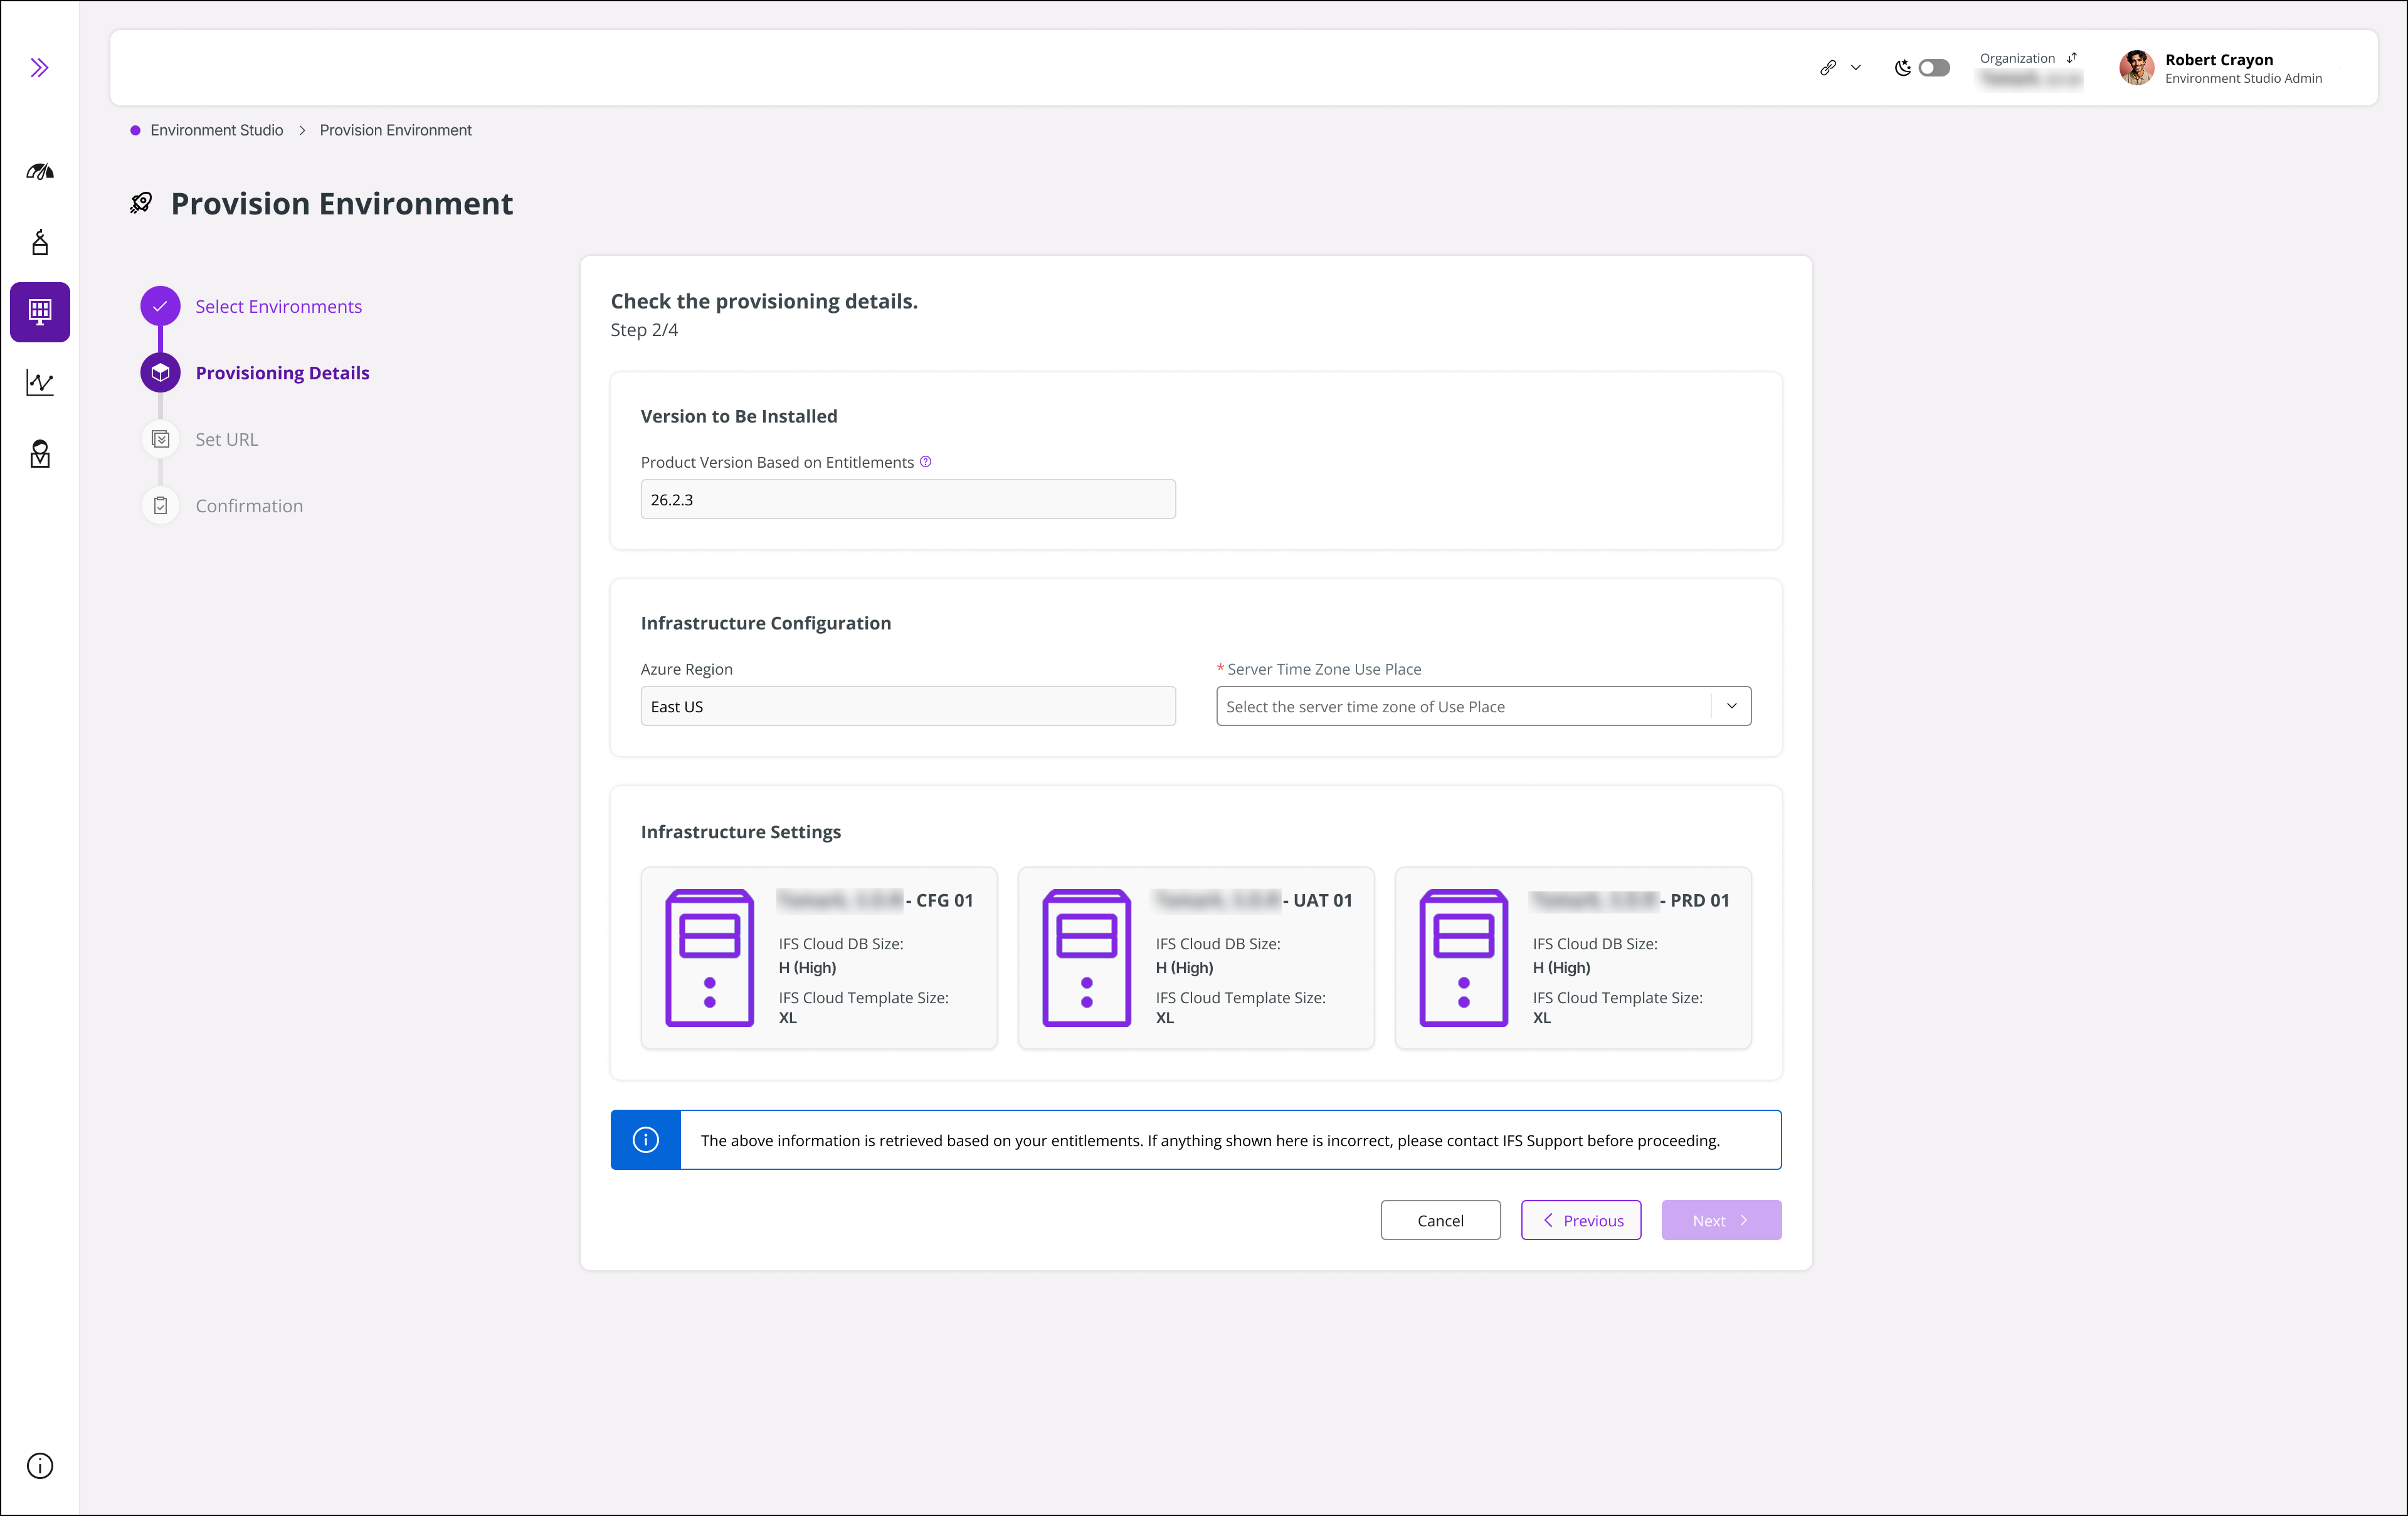
- Check the provisioning details. The provisioning details are retrieved based on your assigned entitlements. If any entitlement information is incorrect, contact IFS Support before proceeding.
 |
|---|
| Figure 4 - Check Provisioning Details |
- Set the server time zone from Server Time Zone Use Place. Click Next.
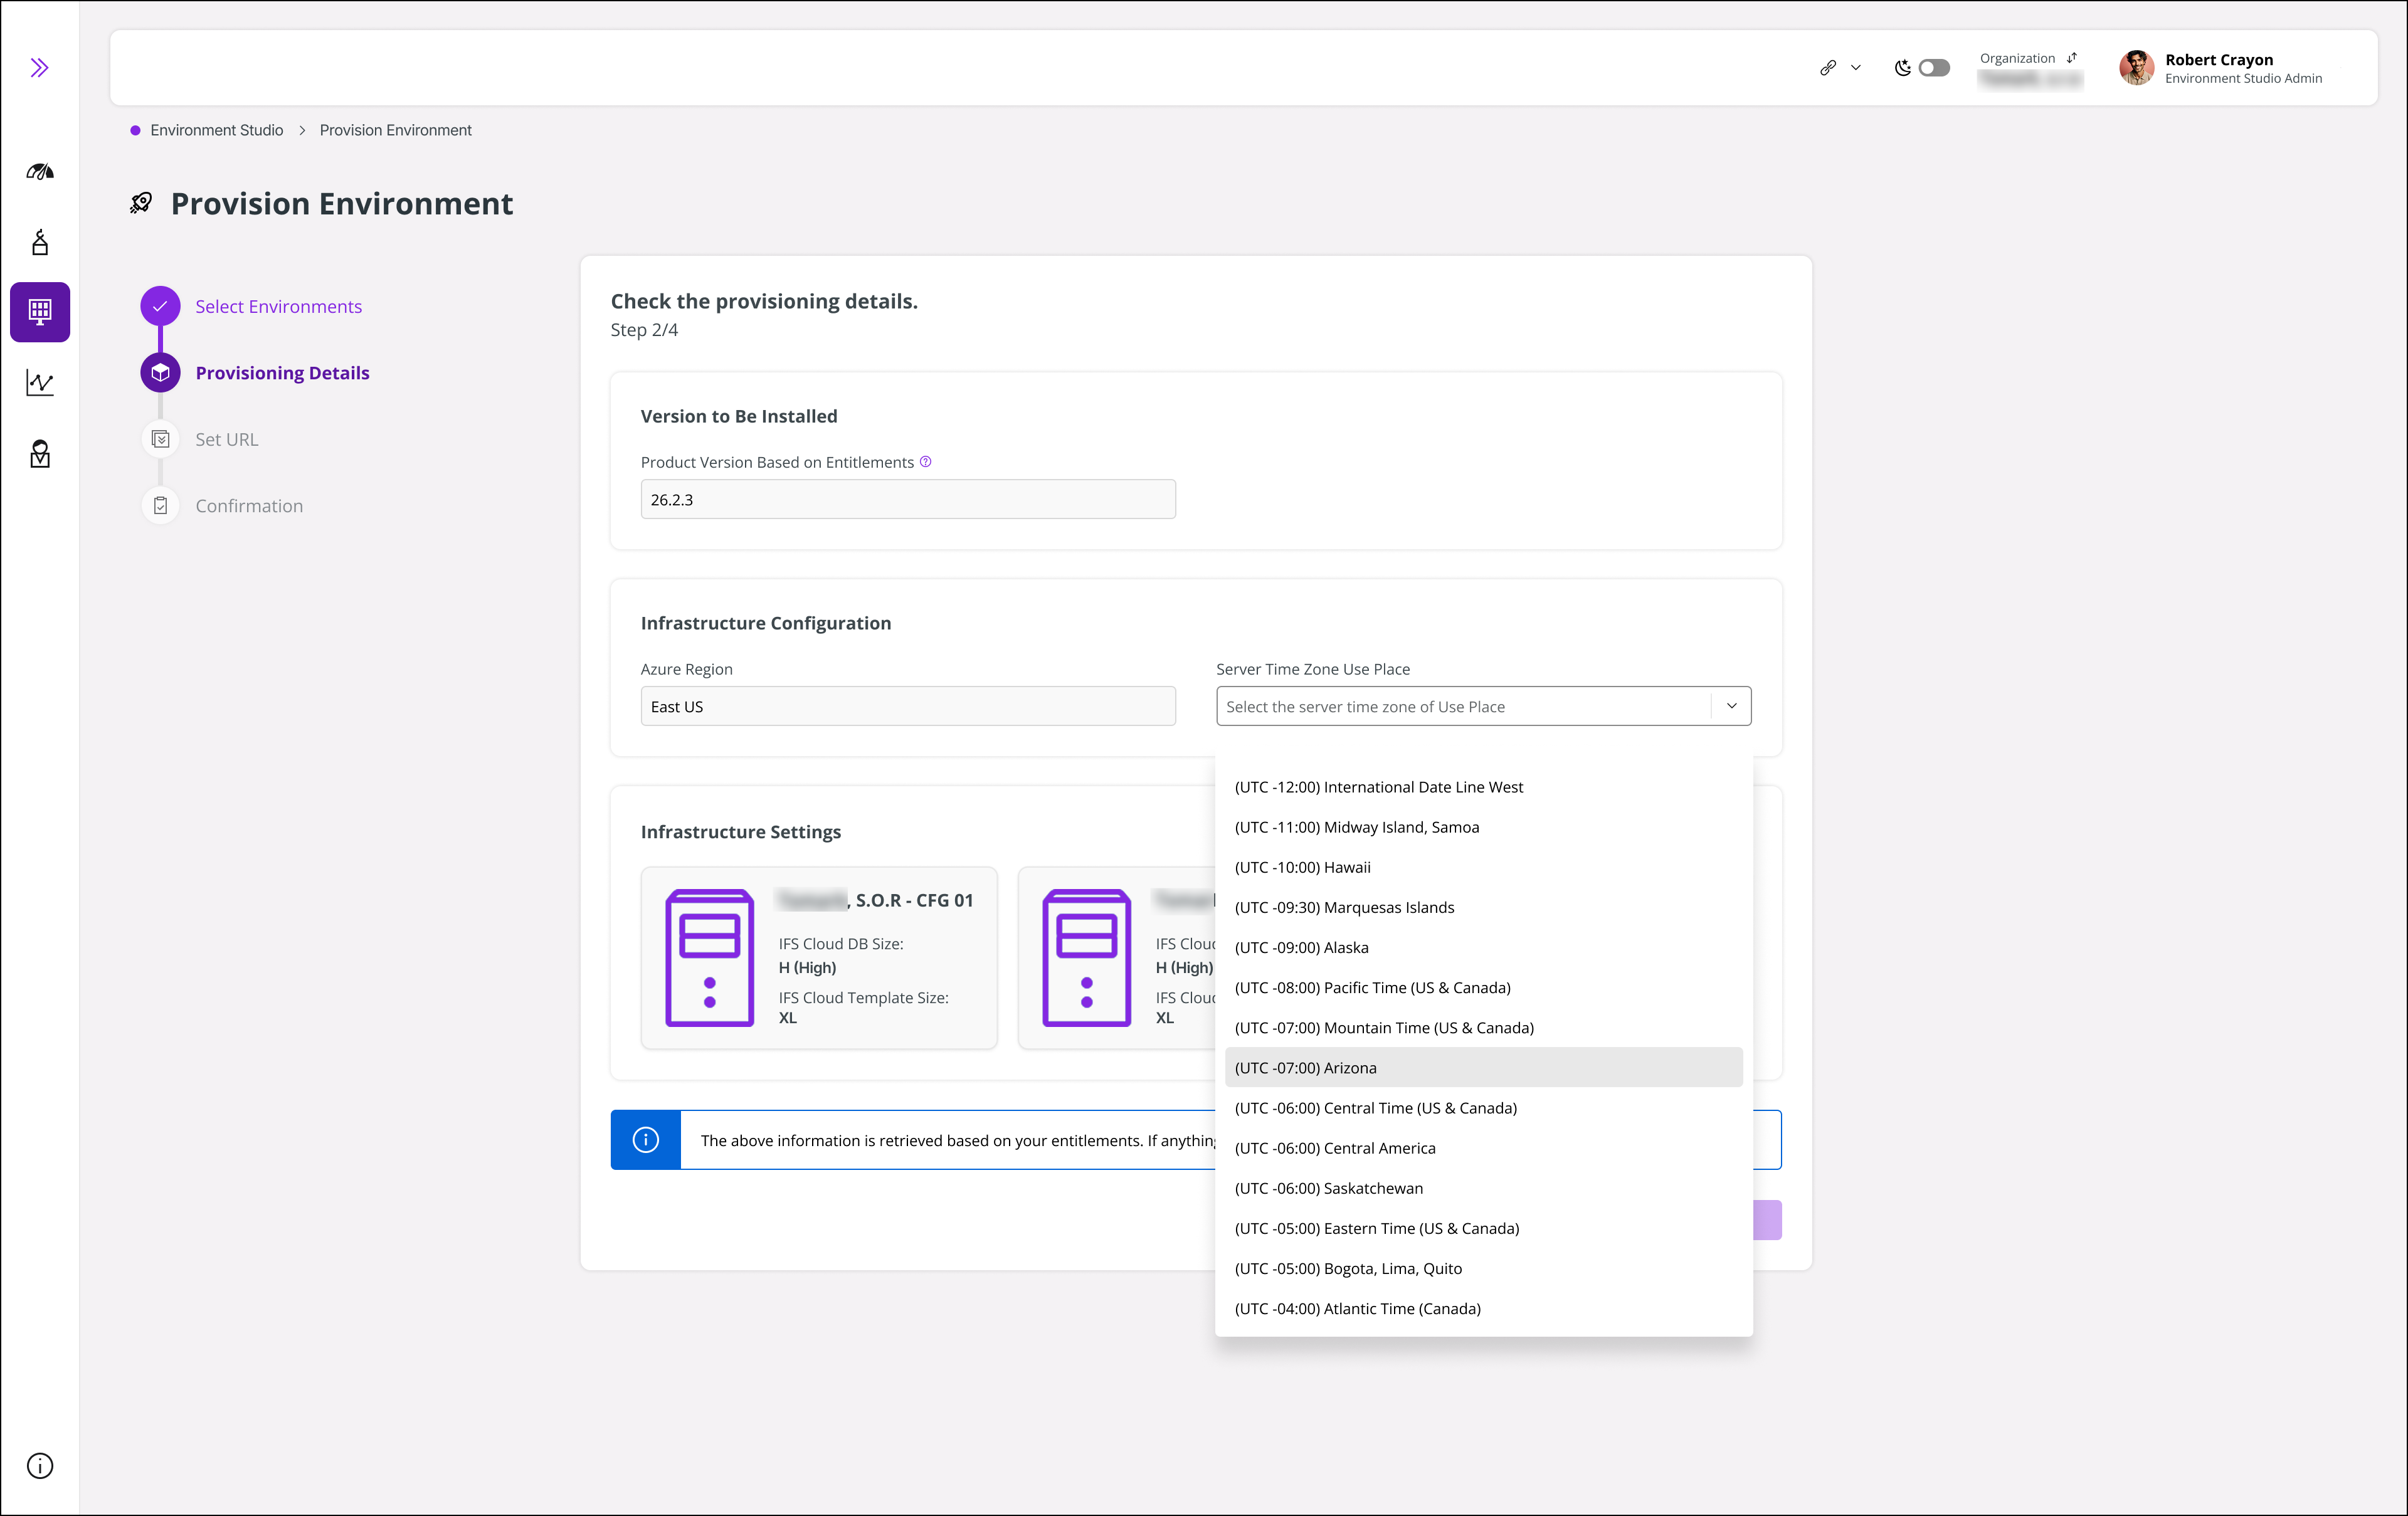 |
|---|
| Figure 5 - Set Server Time Zone |
- Choose the name for the Customer URL. Please make sure not to include special characters or spaces for the name. Click Check Availability.
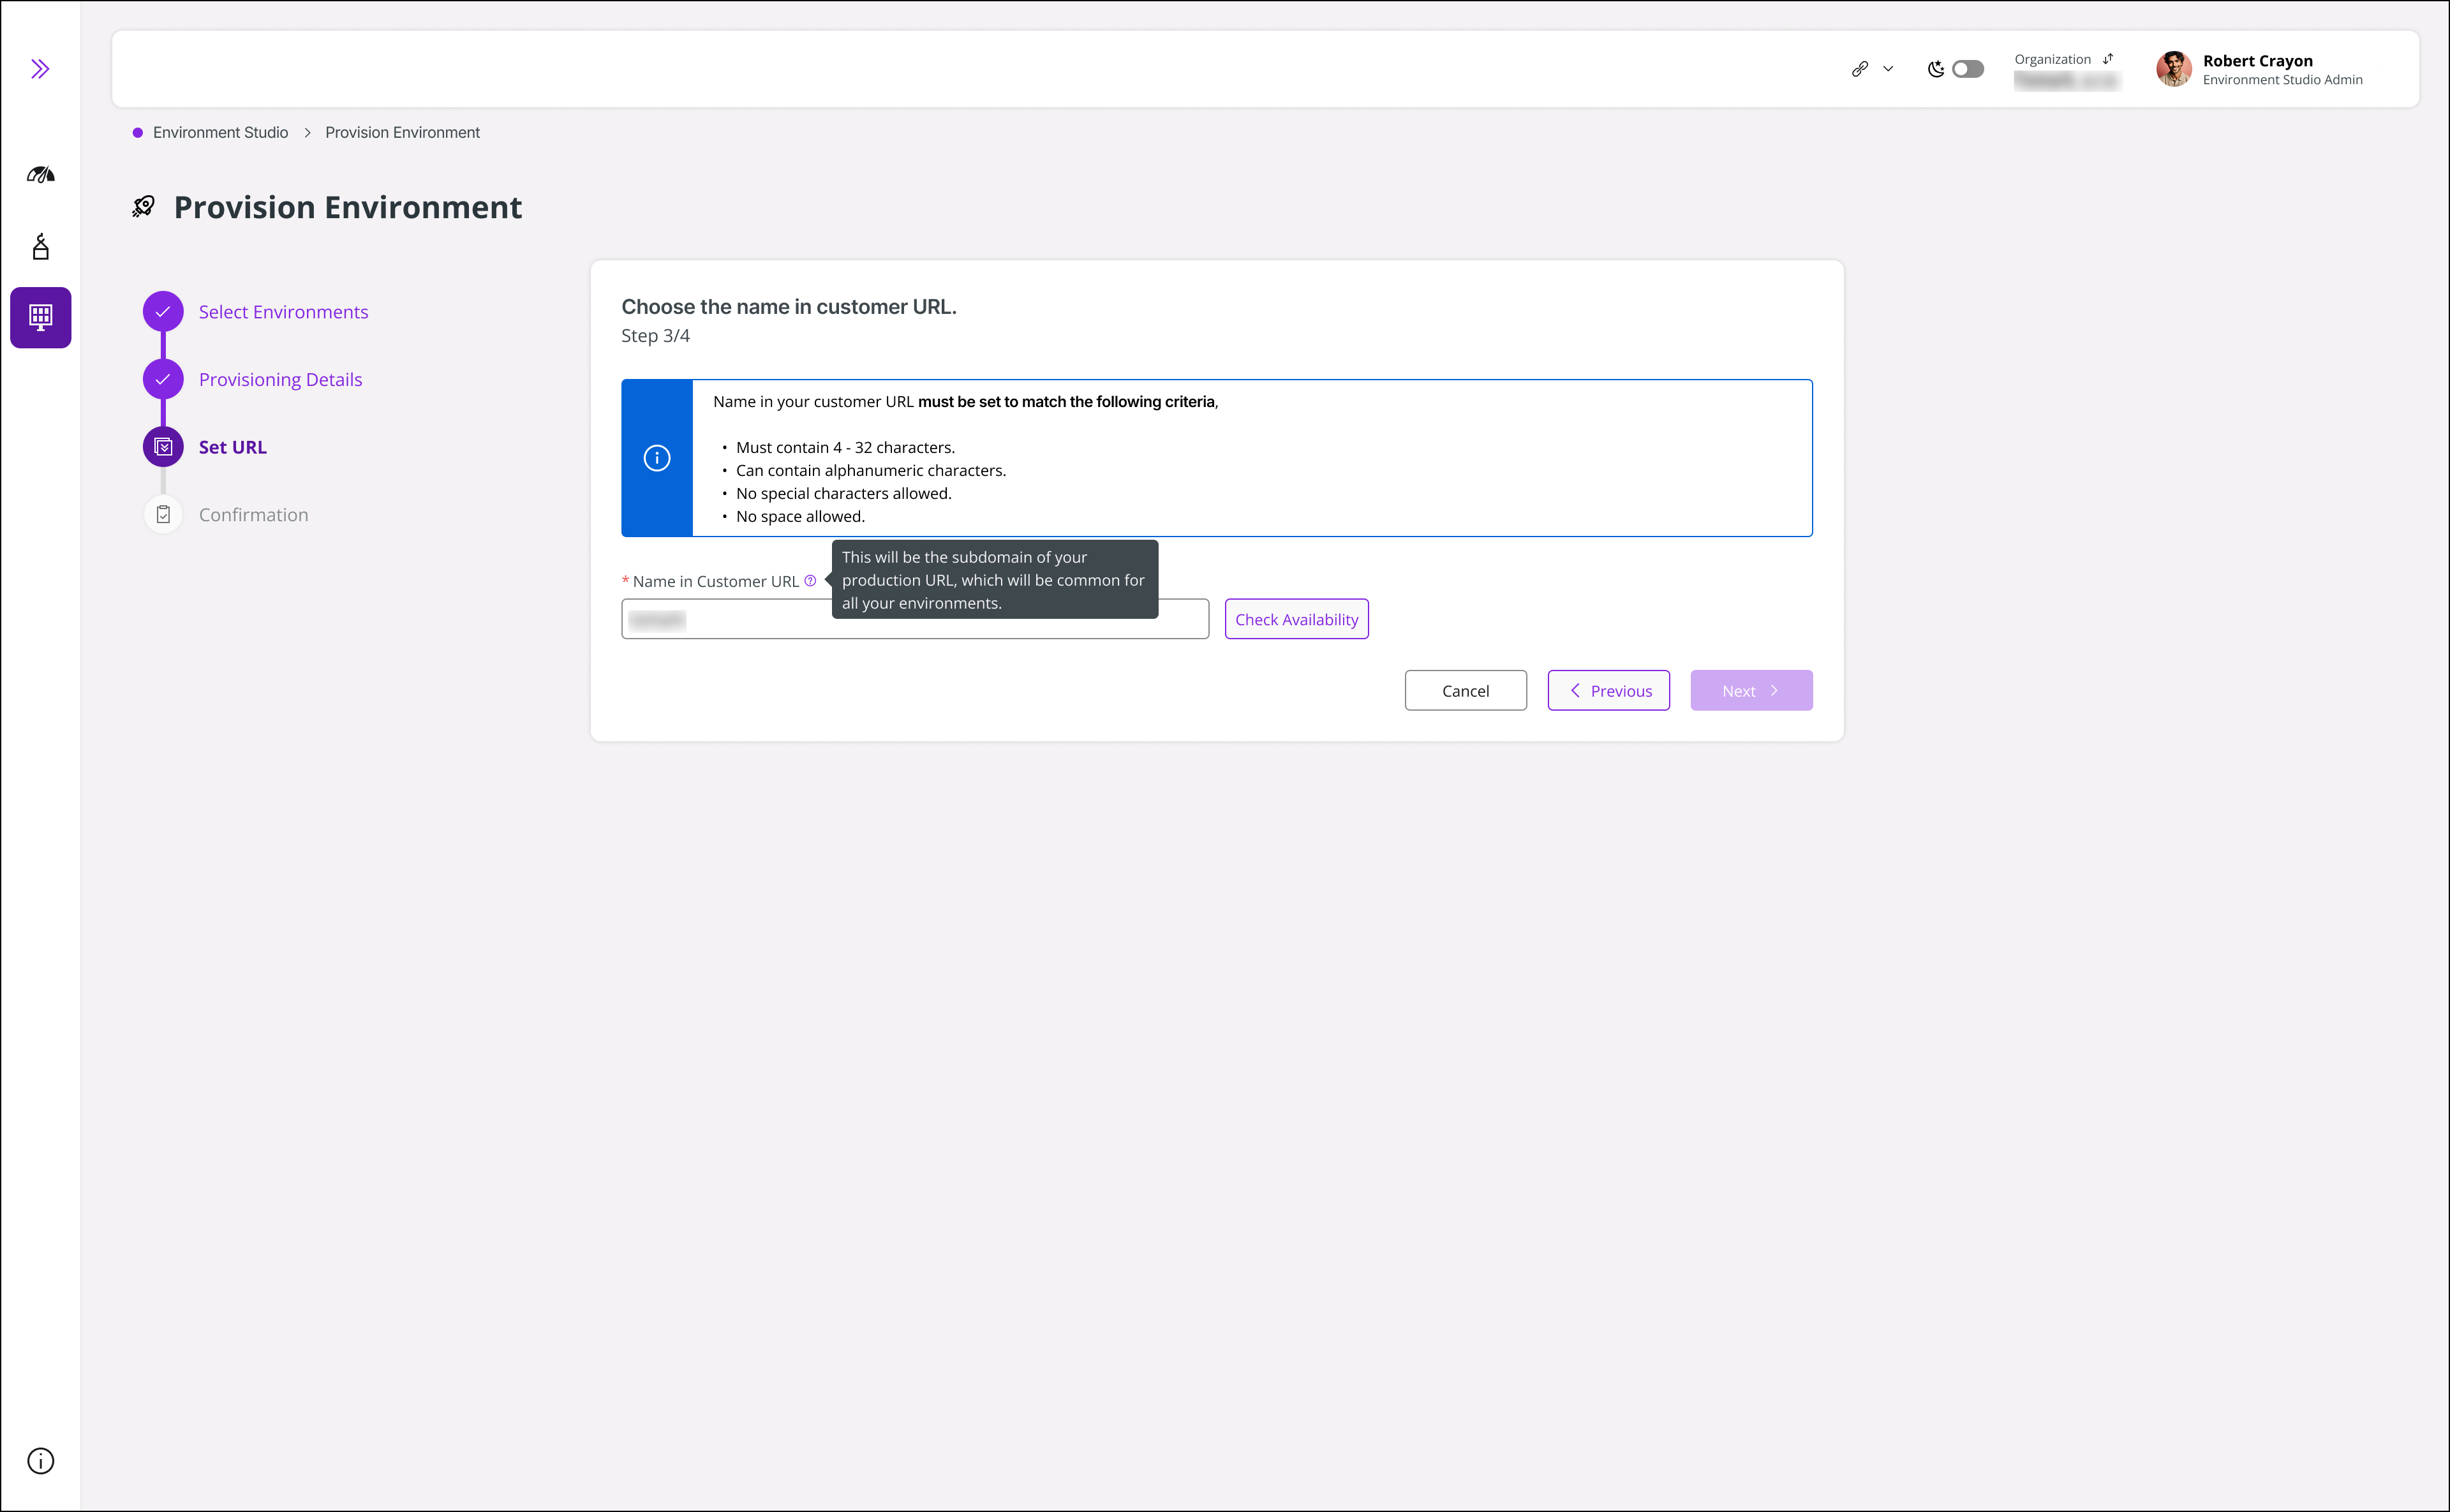 |
|---|
| Figure 6 - Name for Customer URL |
- If the name is verified, you see the production url and non-production urls. click Next to proceed.
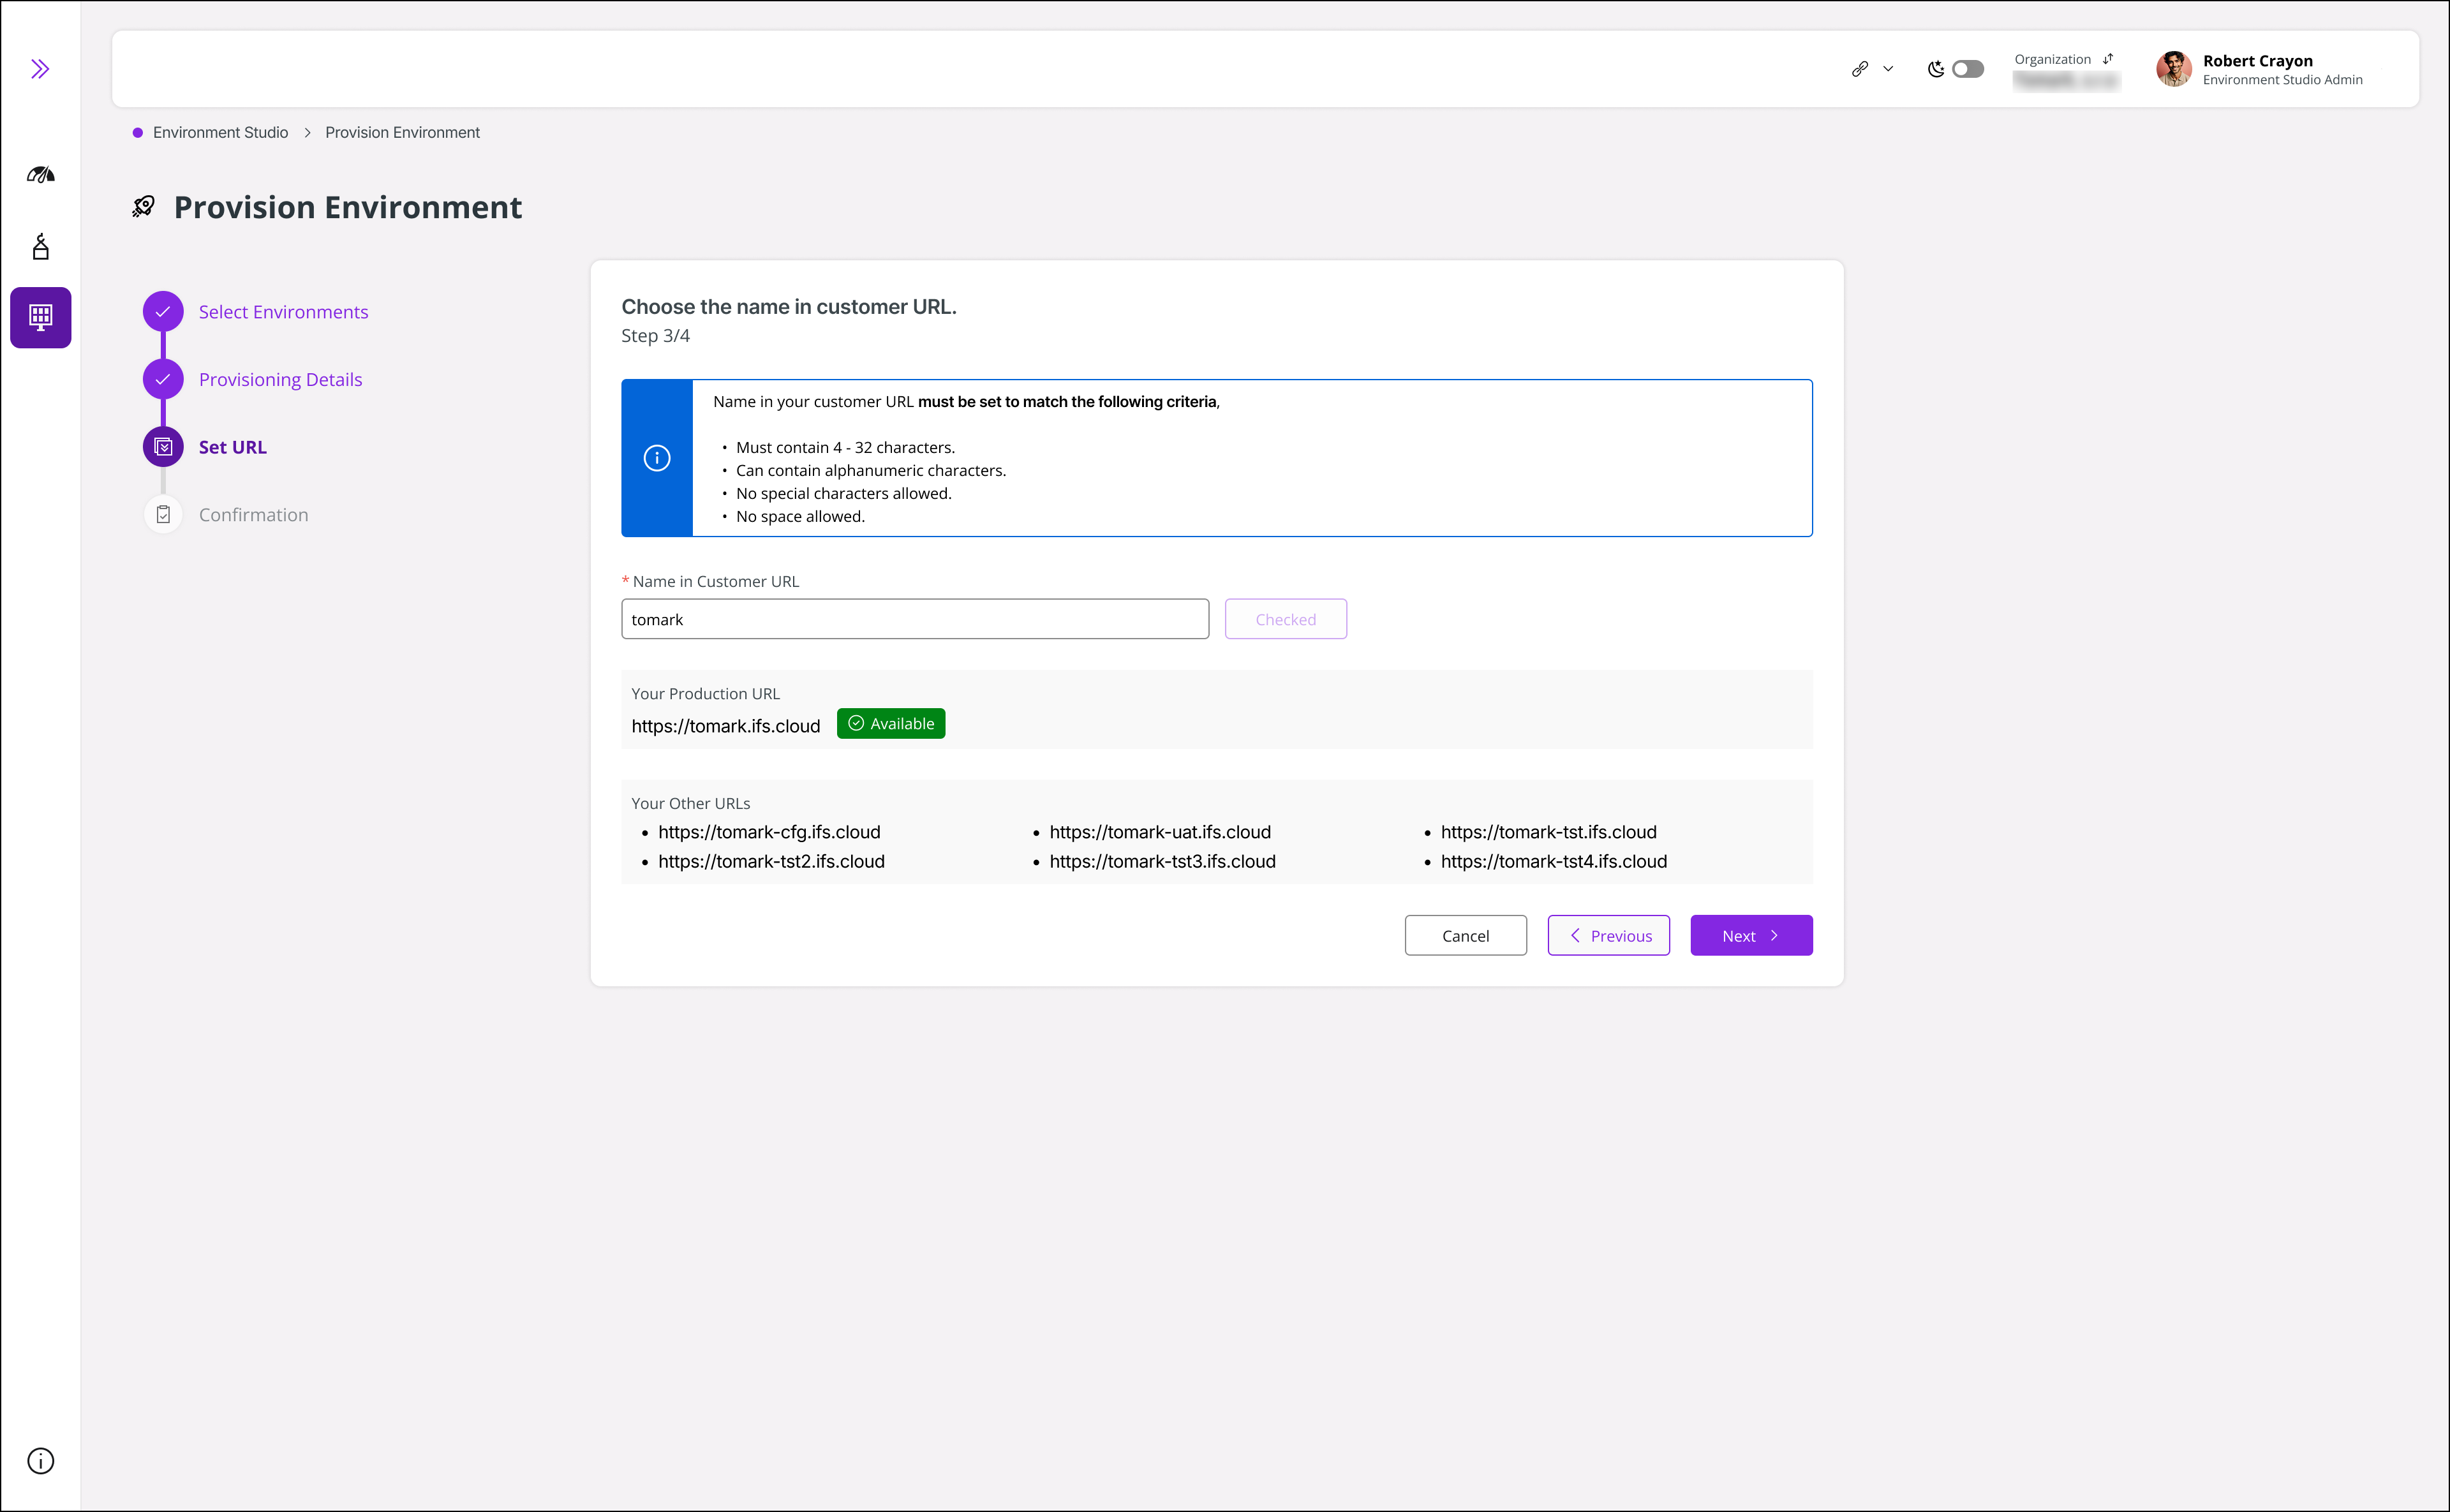 |
|---|
| Figure 7 - Environment URLs |
- The Name in Customer URL can be assigned only once. After it is set, the value cannot be changed or reversed. Click Confirm and Proceed.
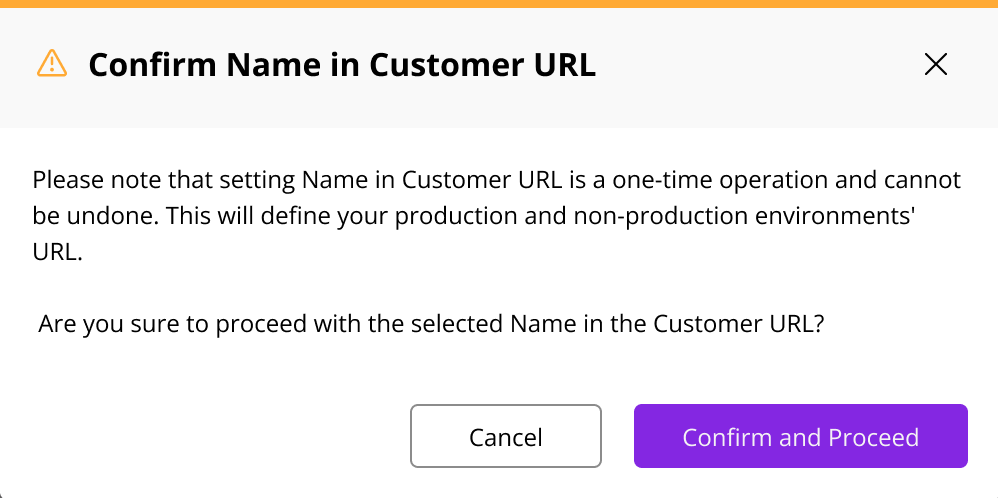 |
|---|
| Figure 8 - Confirmation Dialog of Name in the Customer URL |
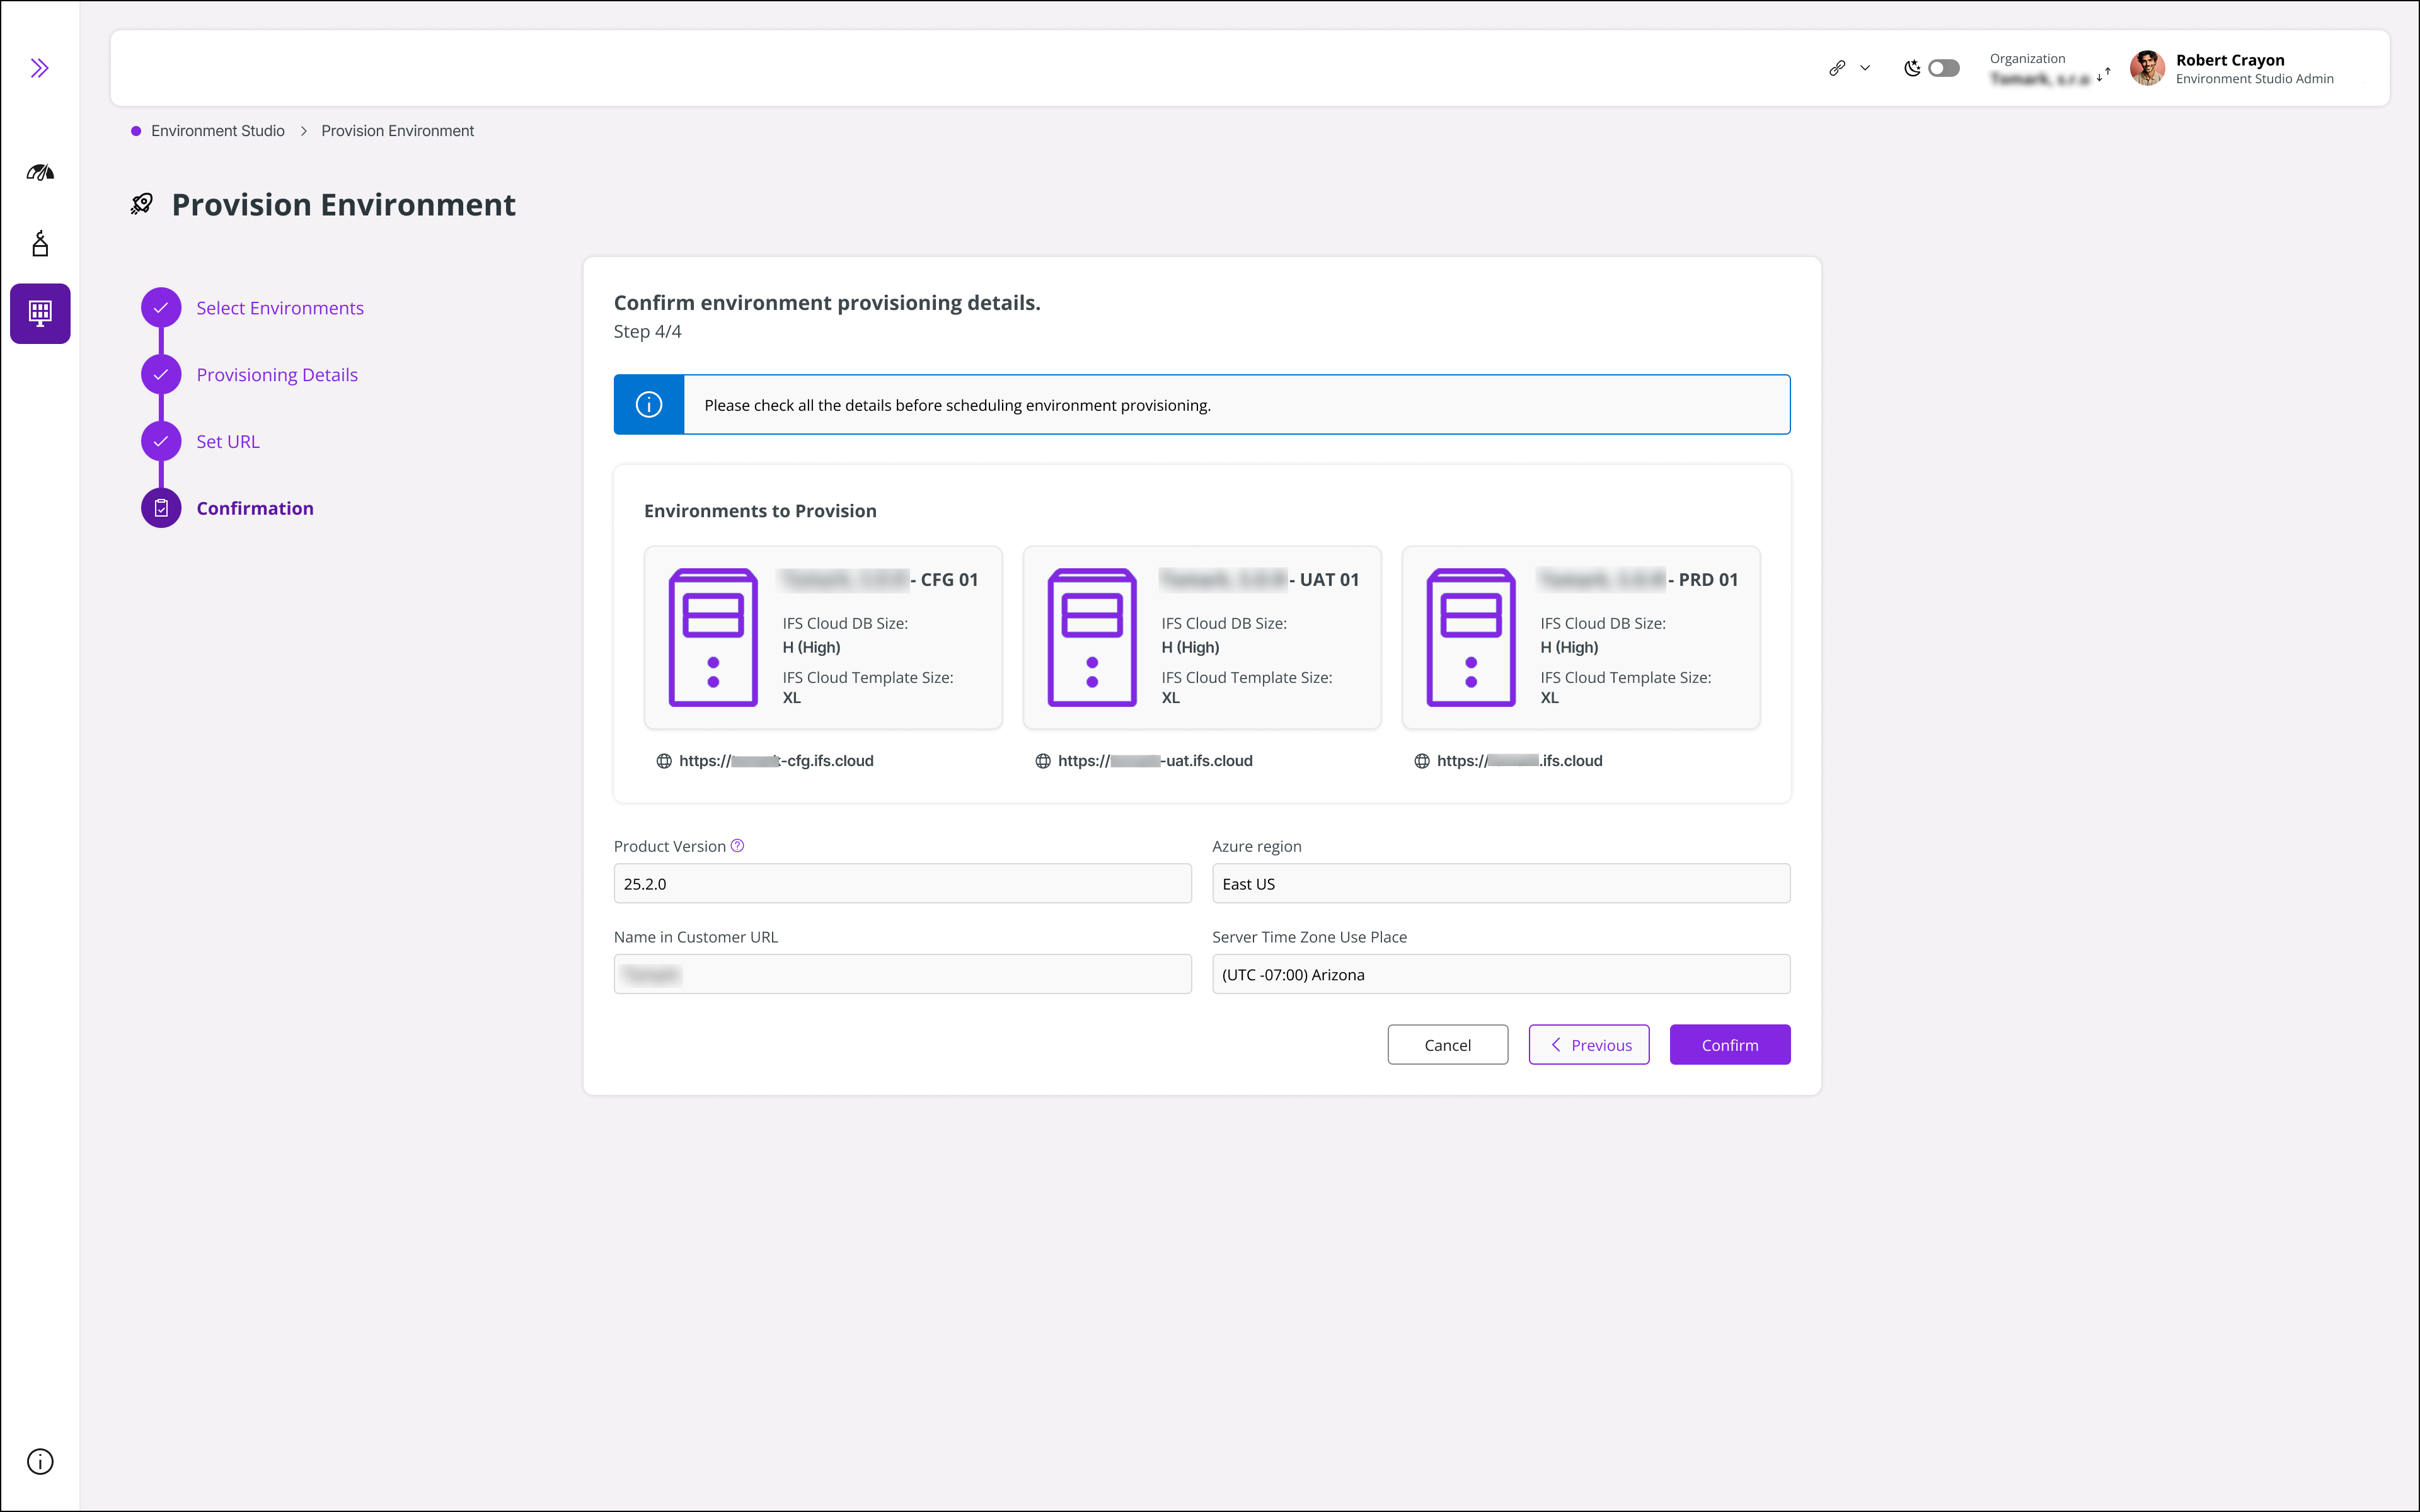
- Click Confirm after checking the provisioning details.
 |
|---|
| Figure 9 - Confirm Provisioning of Environments |
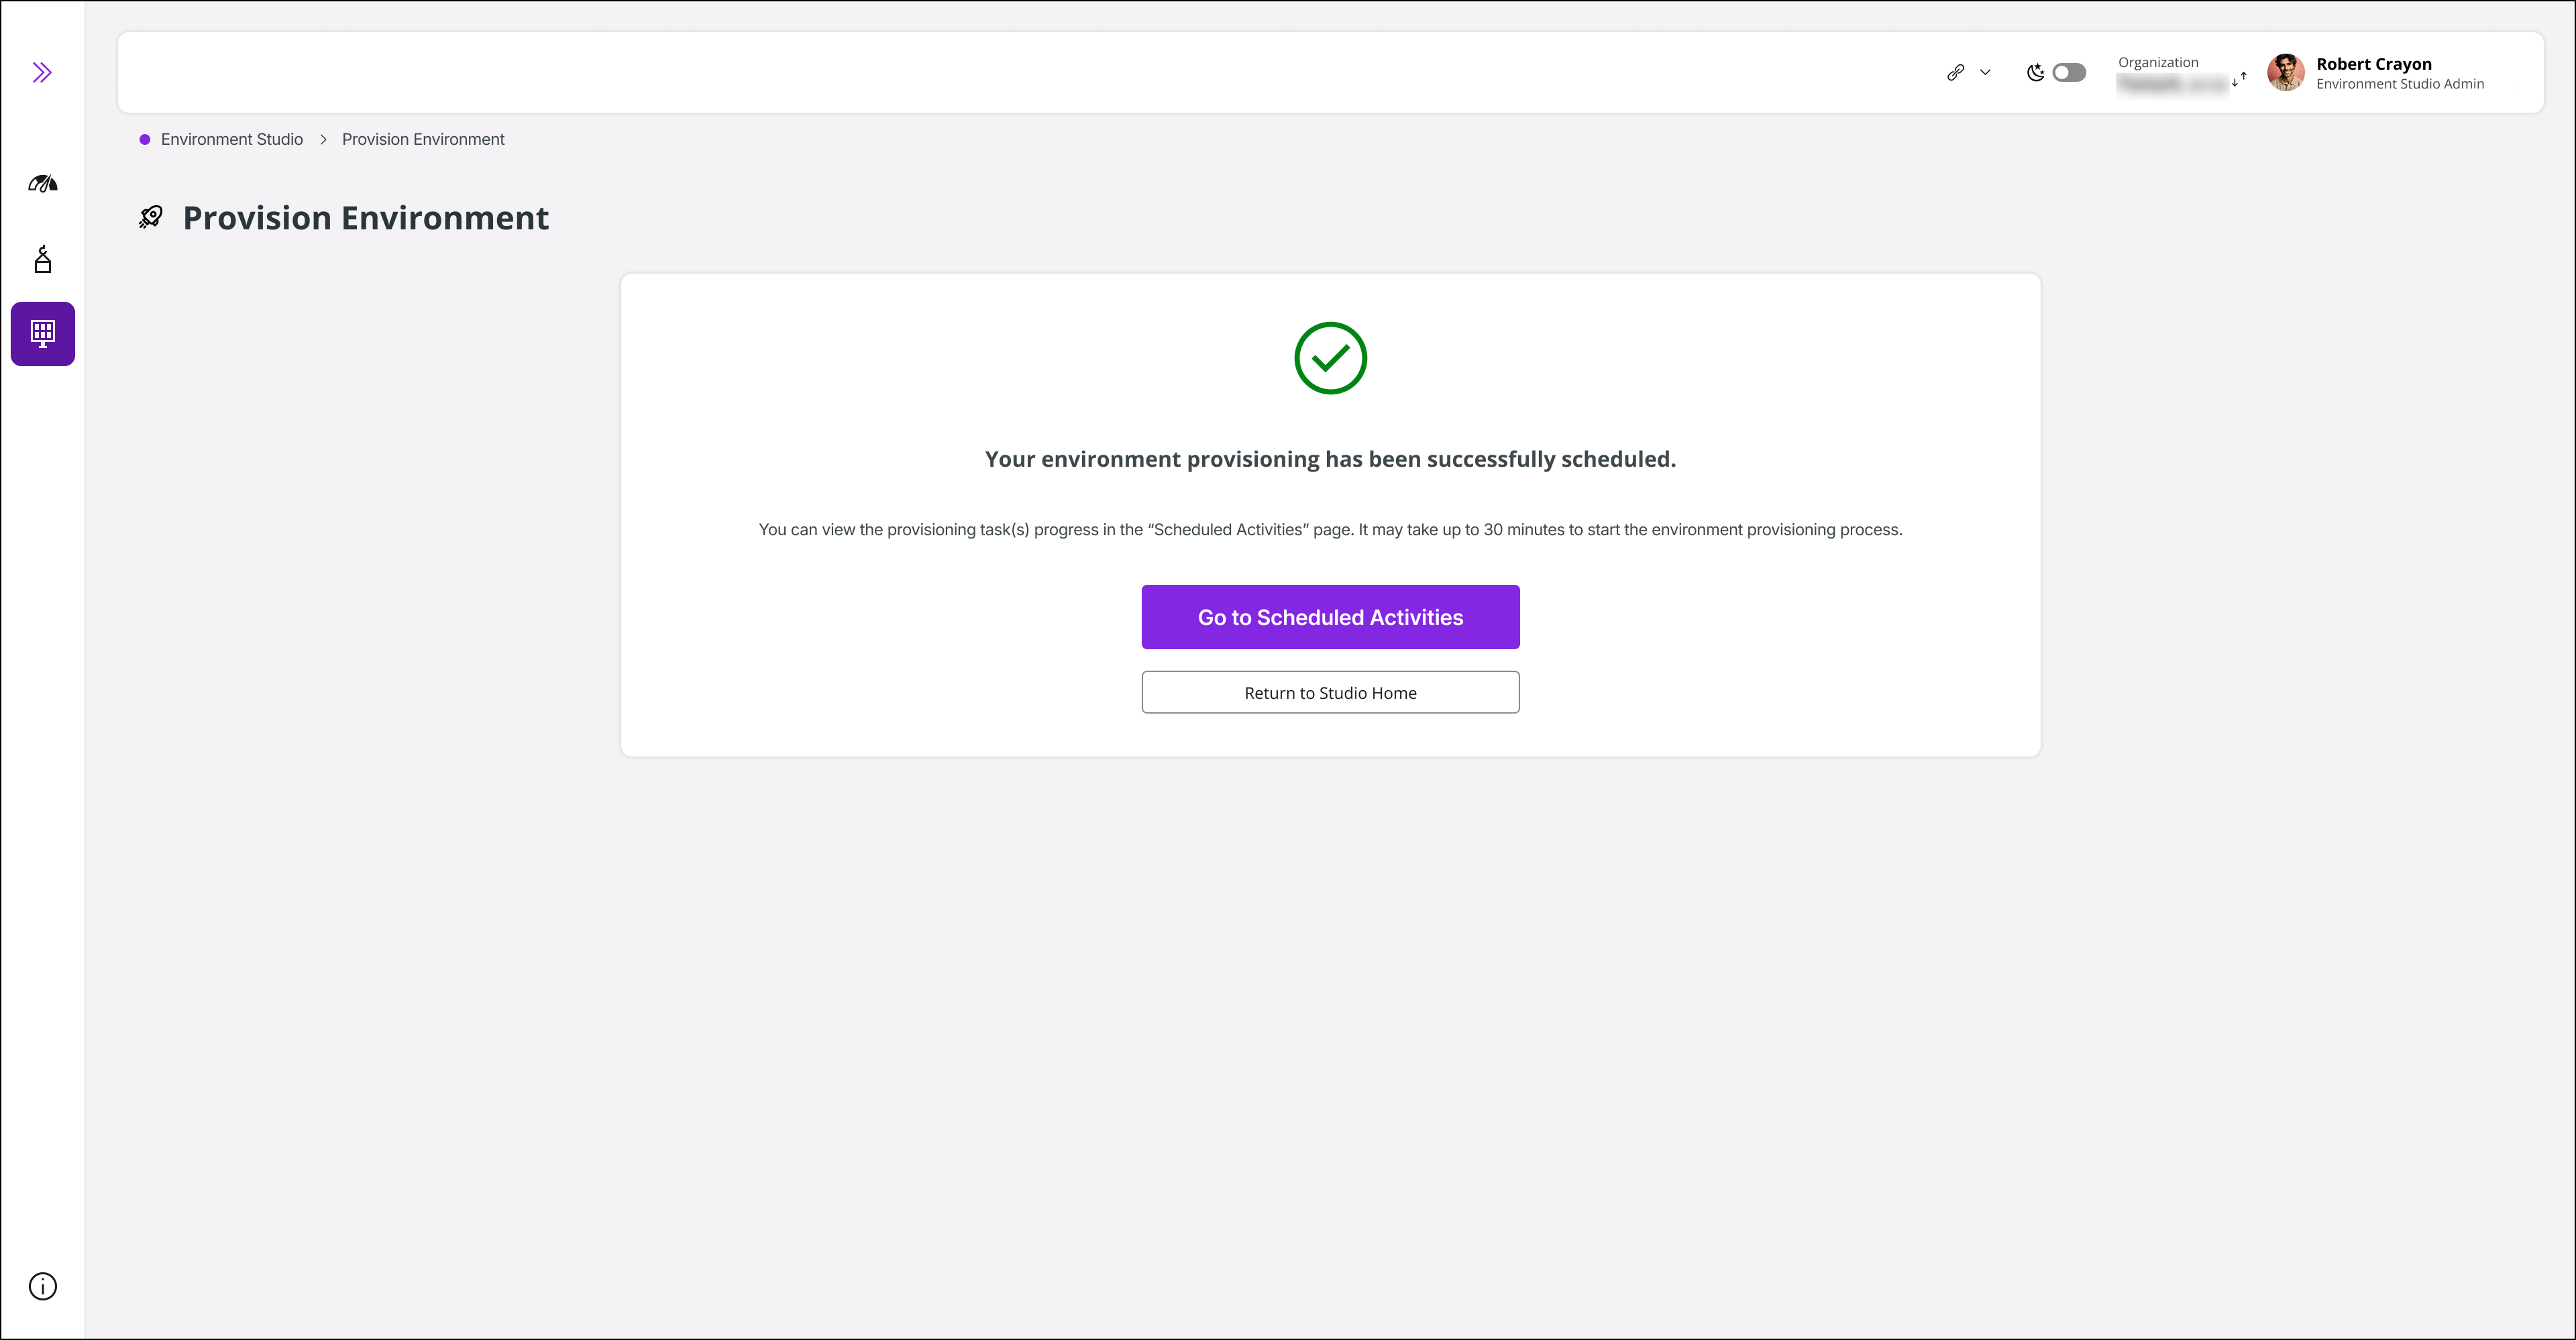
- After successful provisioning, the Provisioning Successful screen appears. Click Go to Scheduled Activities to check the status.
 |
|---|
| Figure 10 - Provisioning Request Successful |
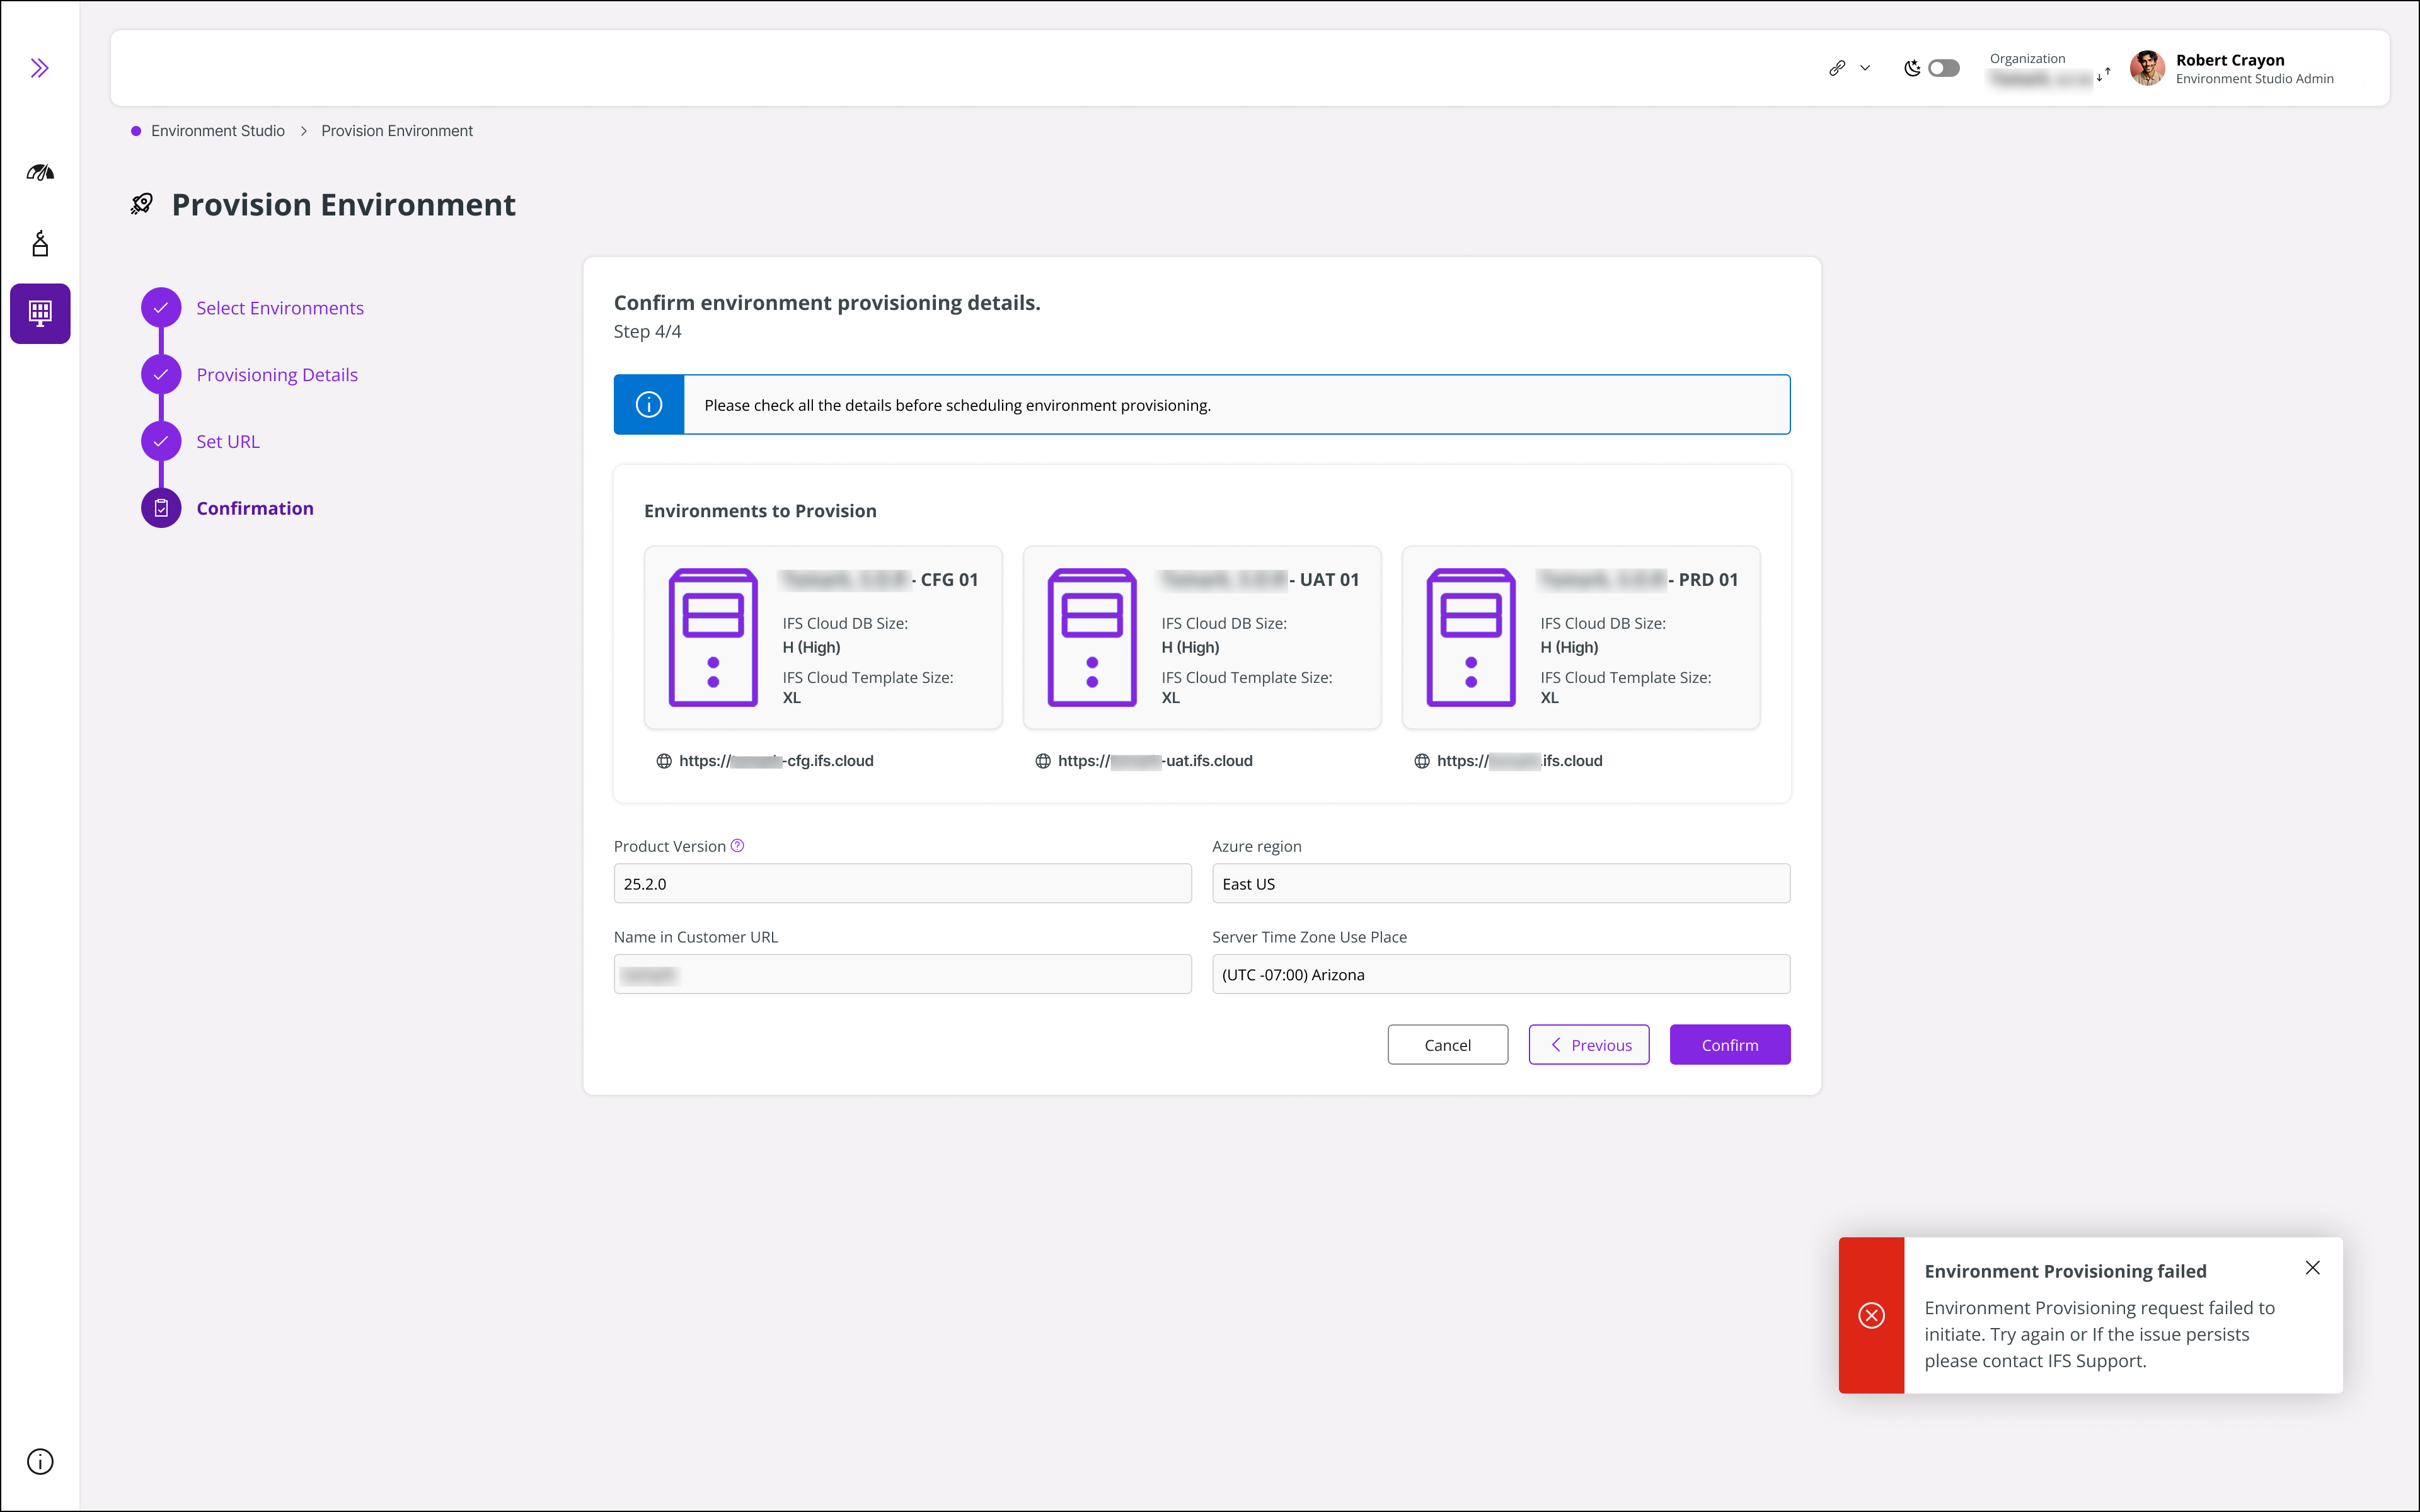
- If provisioning fails, an error toast appears. Retry the request, and if the issue persists, contact IFS Support.
 |
|---|
| Figure 11 - Error Toast on Provisioning Request Fail |
Monitoring Progress
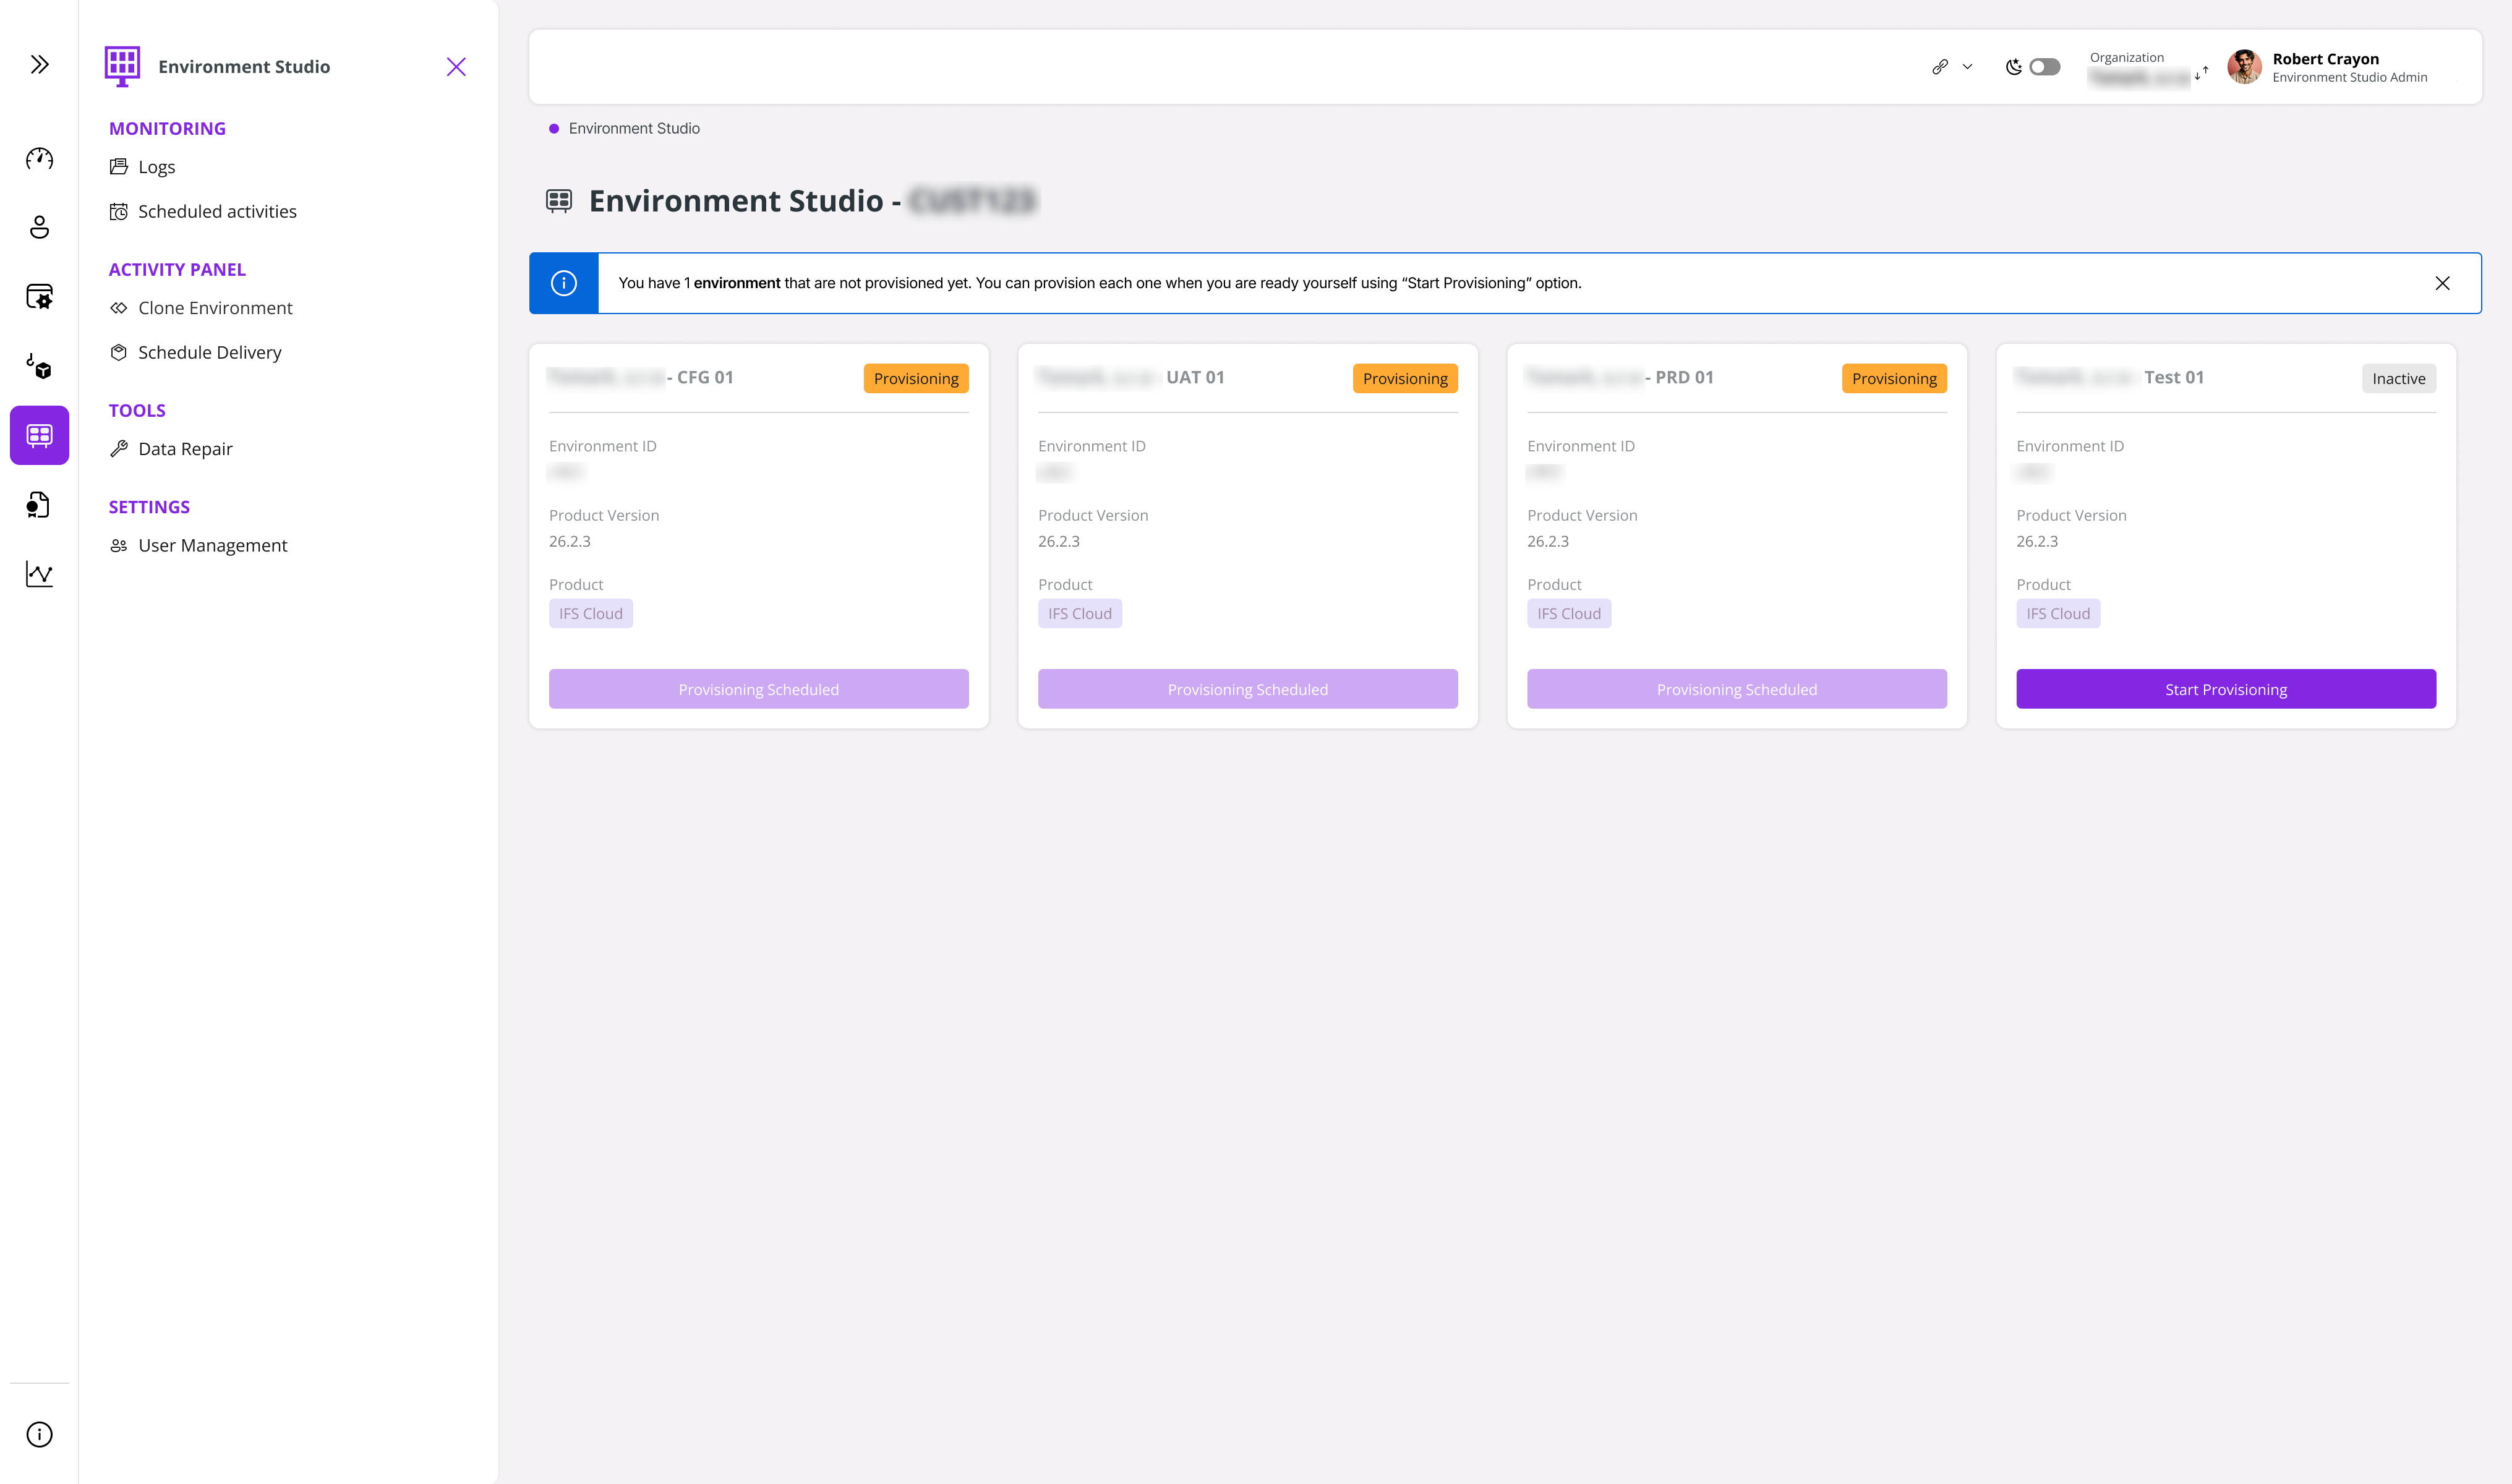
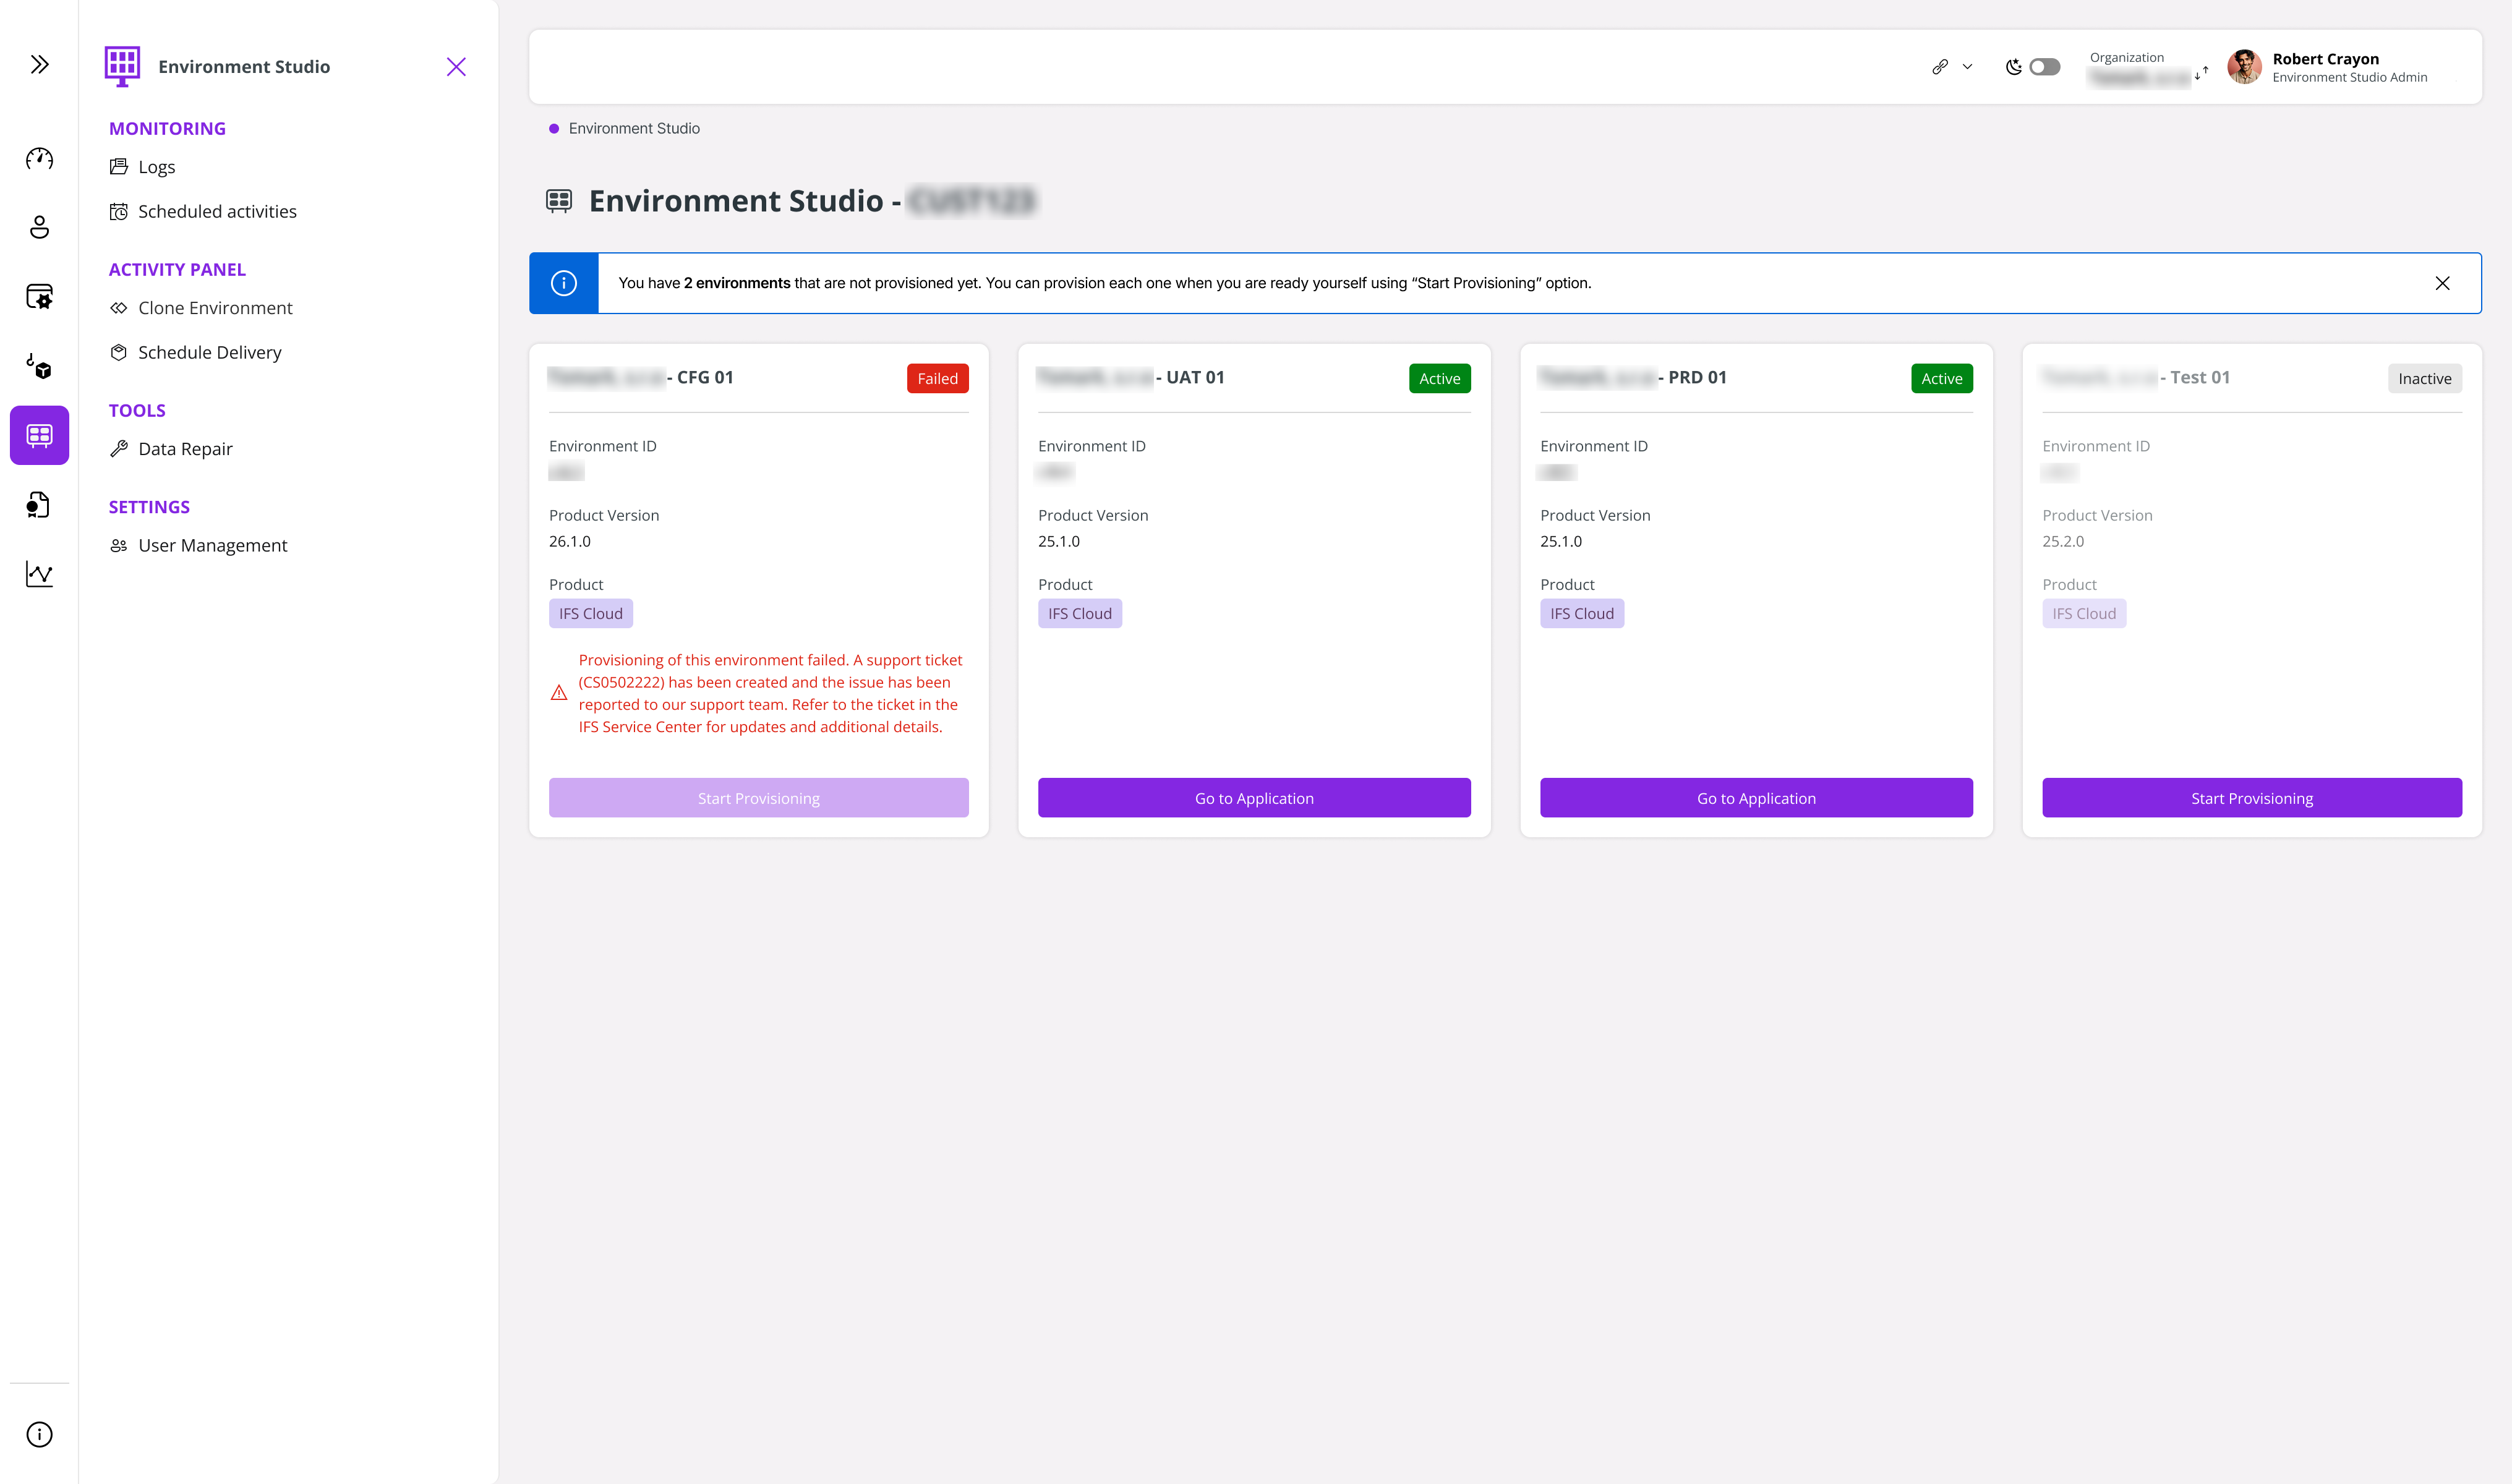
Once the environment provisioning started, the status of the environment updates to show it is in progress. You can return to Environment Studio at any time to check current status.
 |
|---|
| Figure 12 - Environment Status - Provisioning |
 |
|---|
| Figure 13 - Environment Status on Environment Cards |
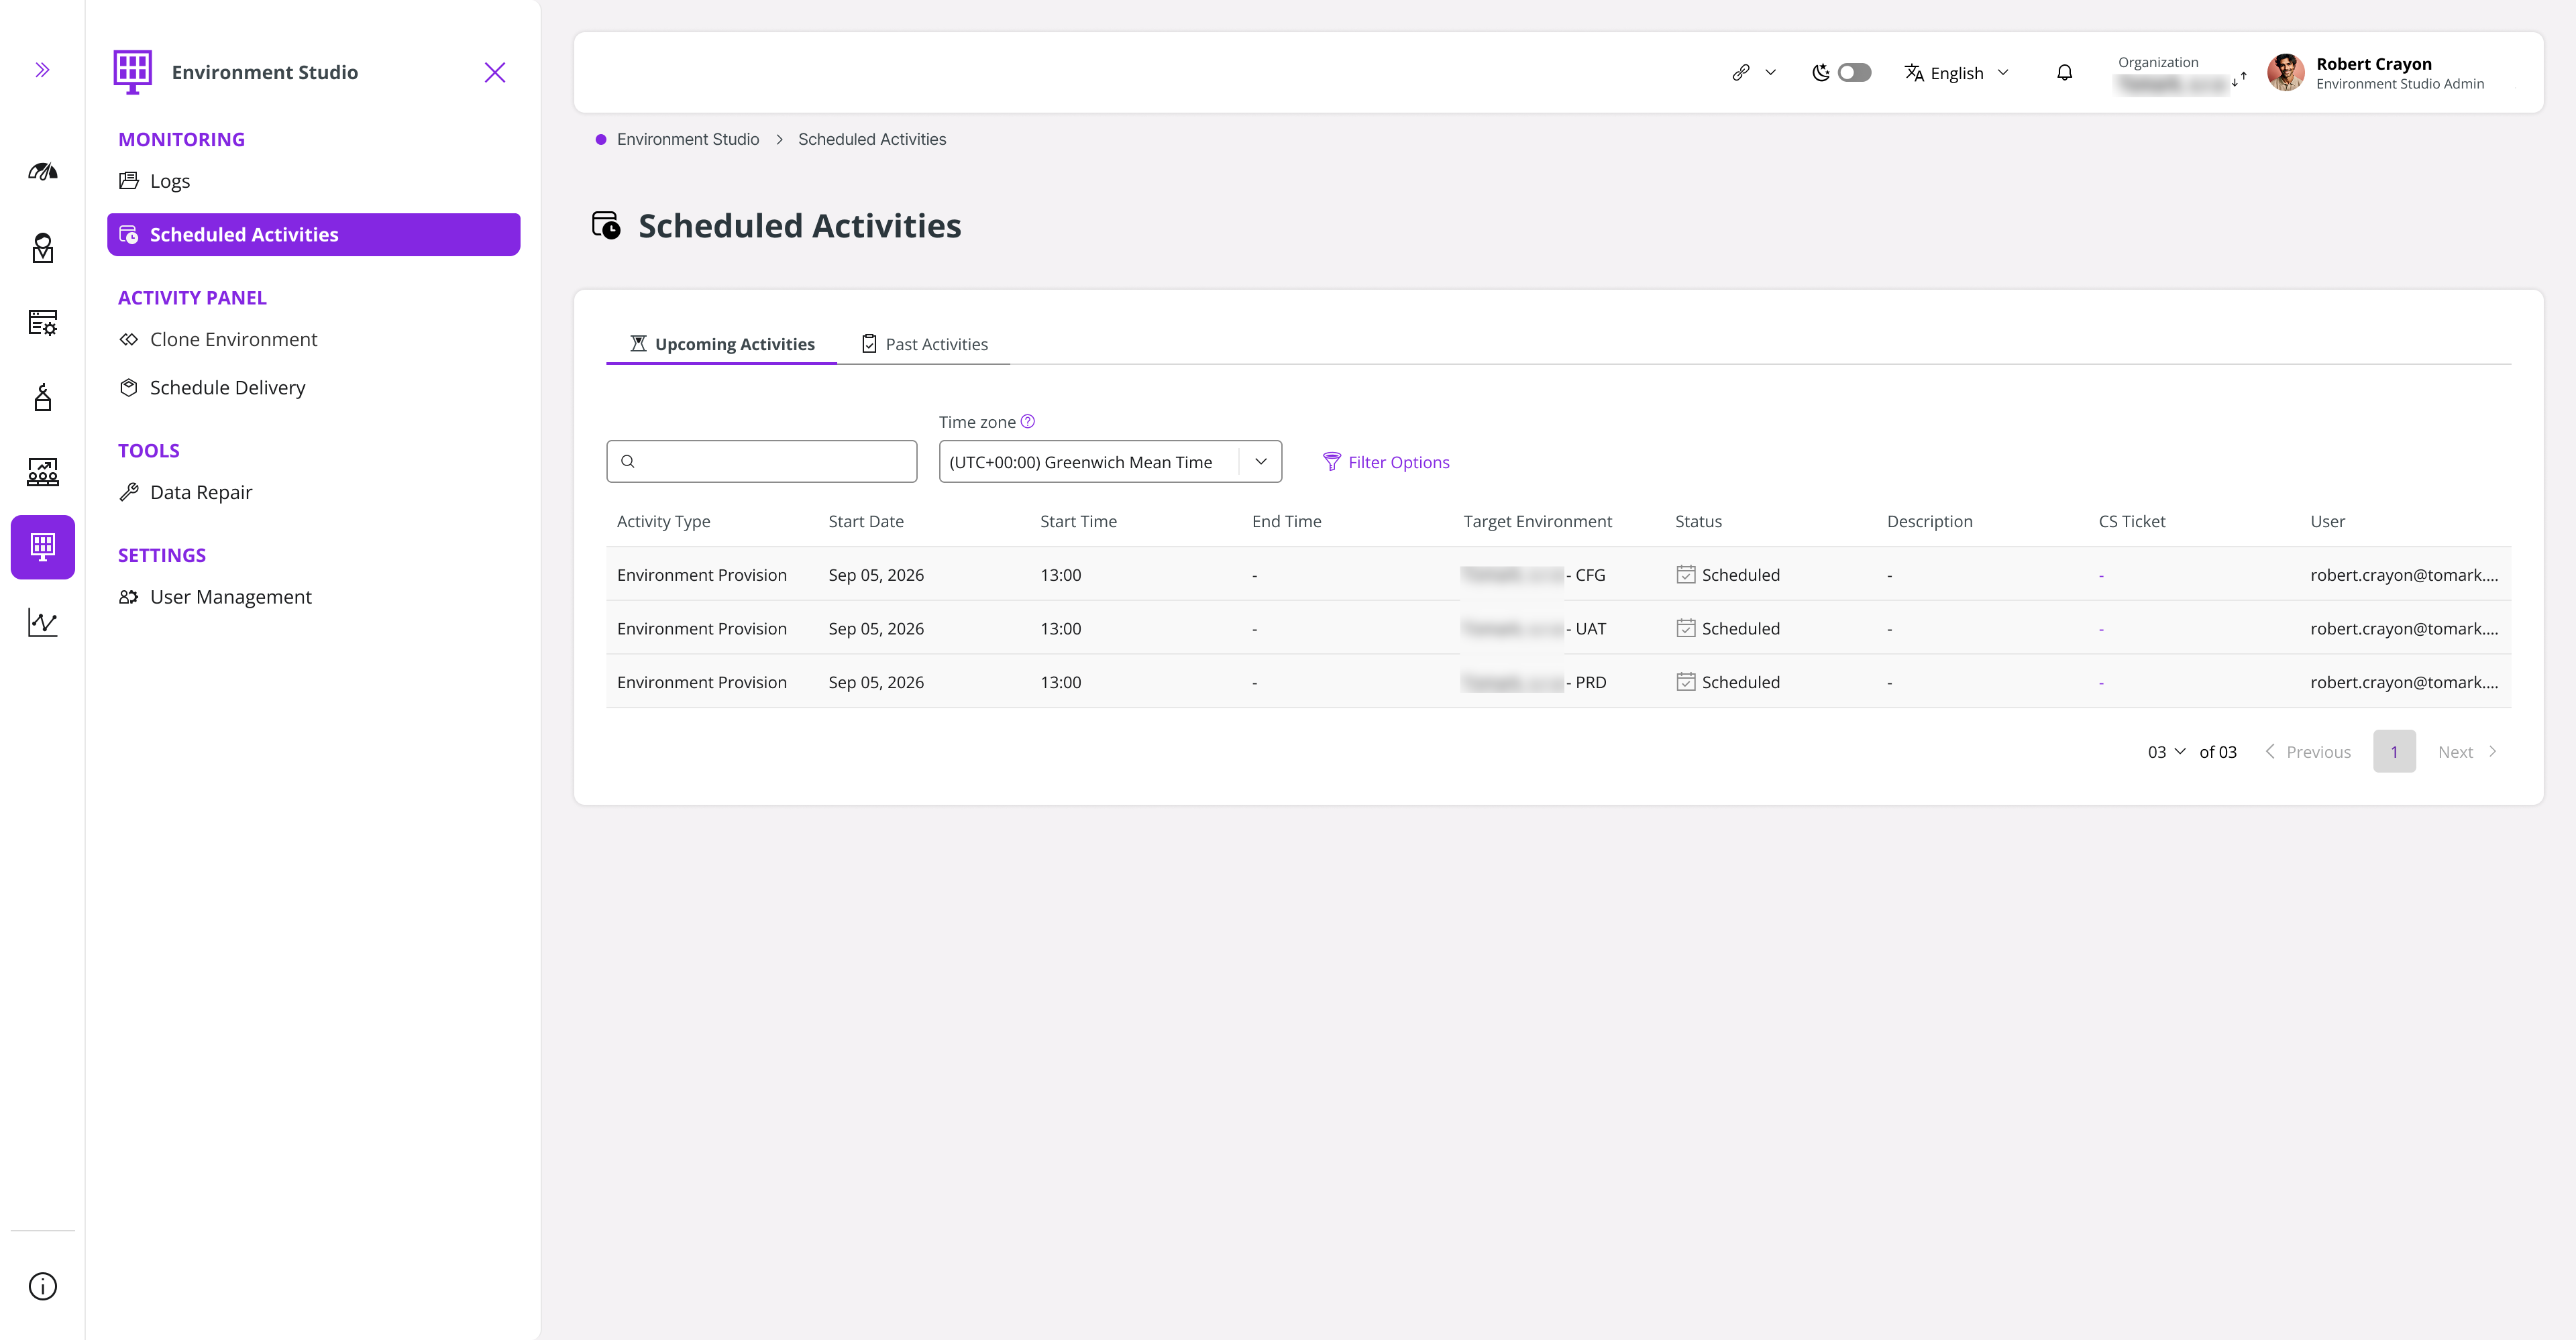
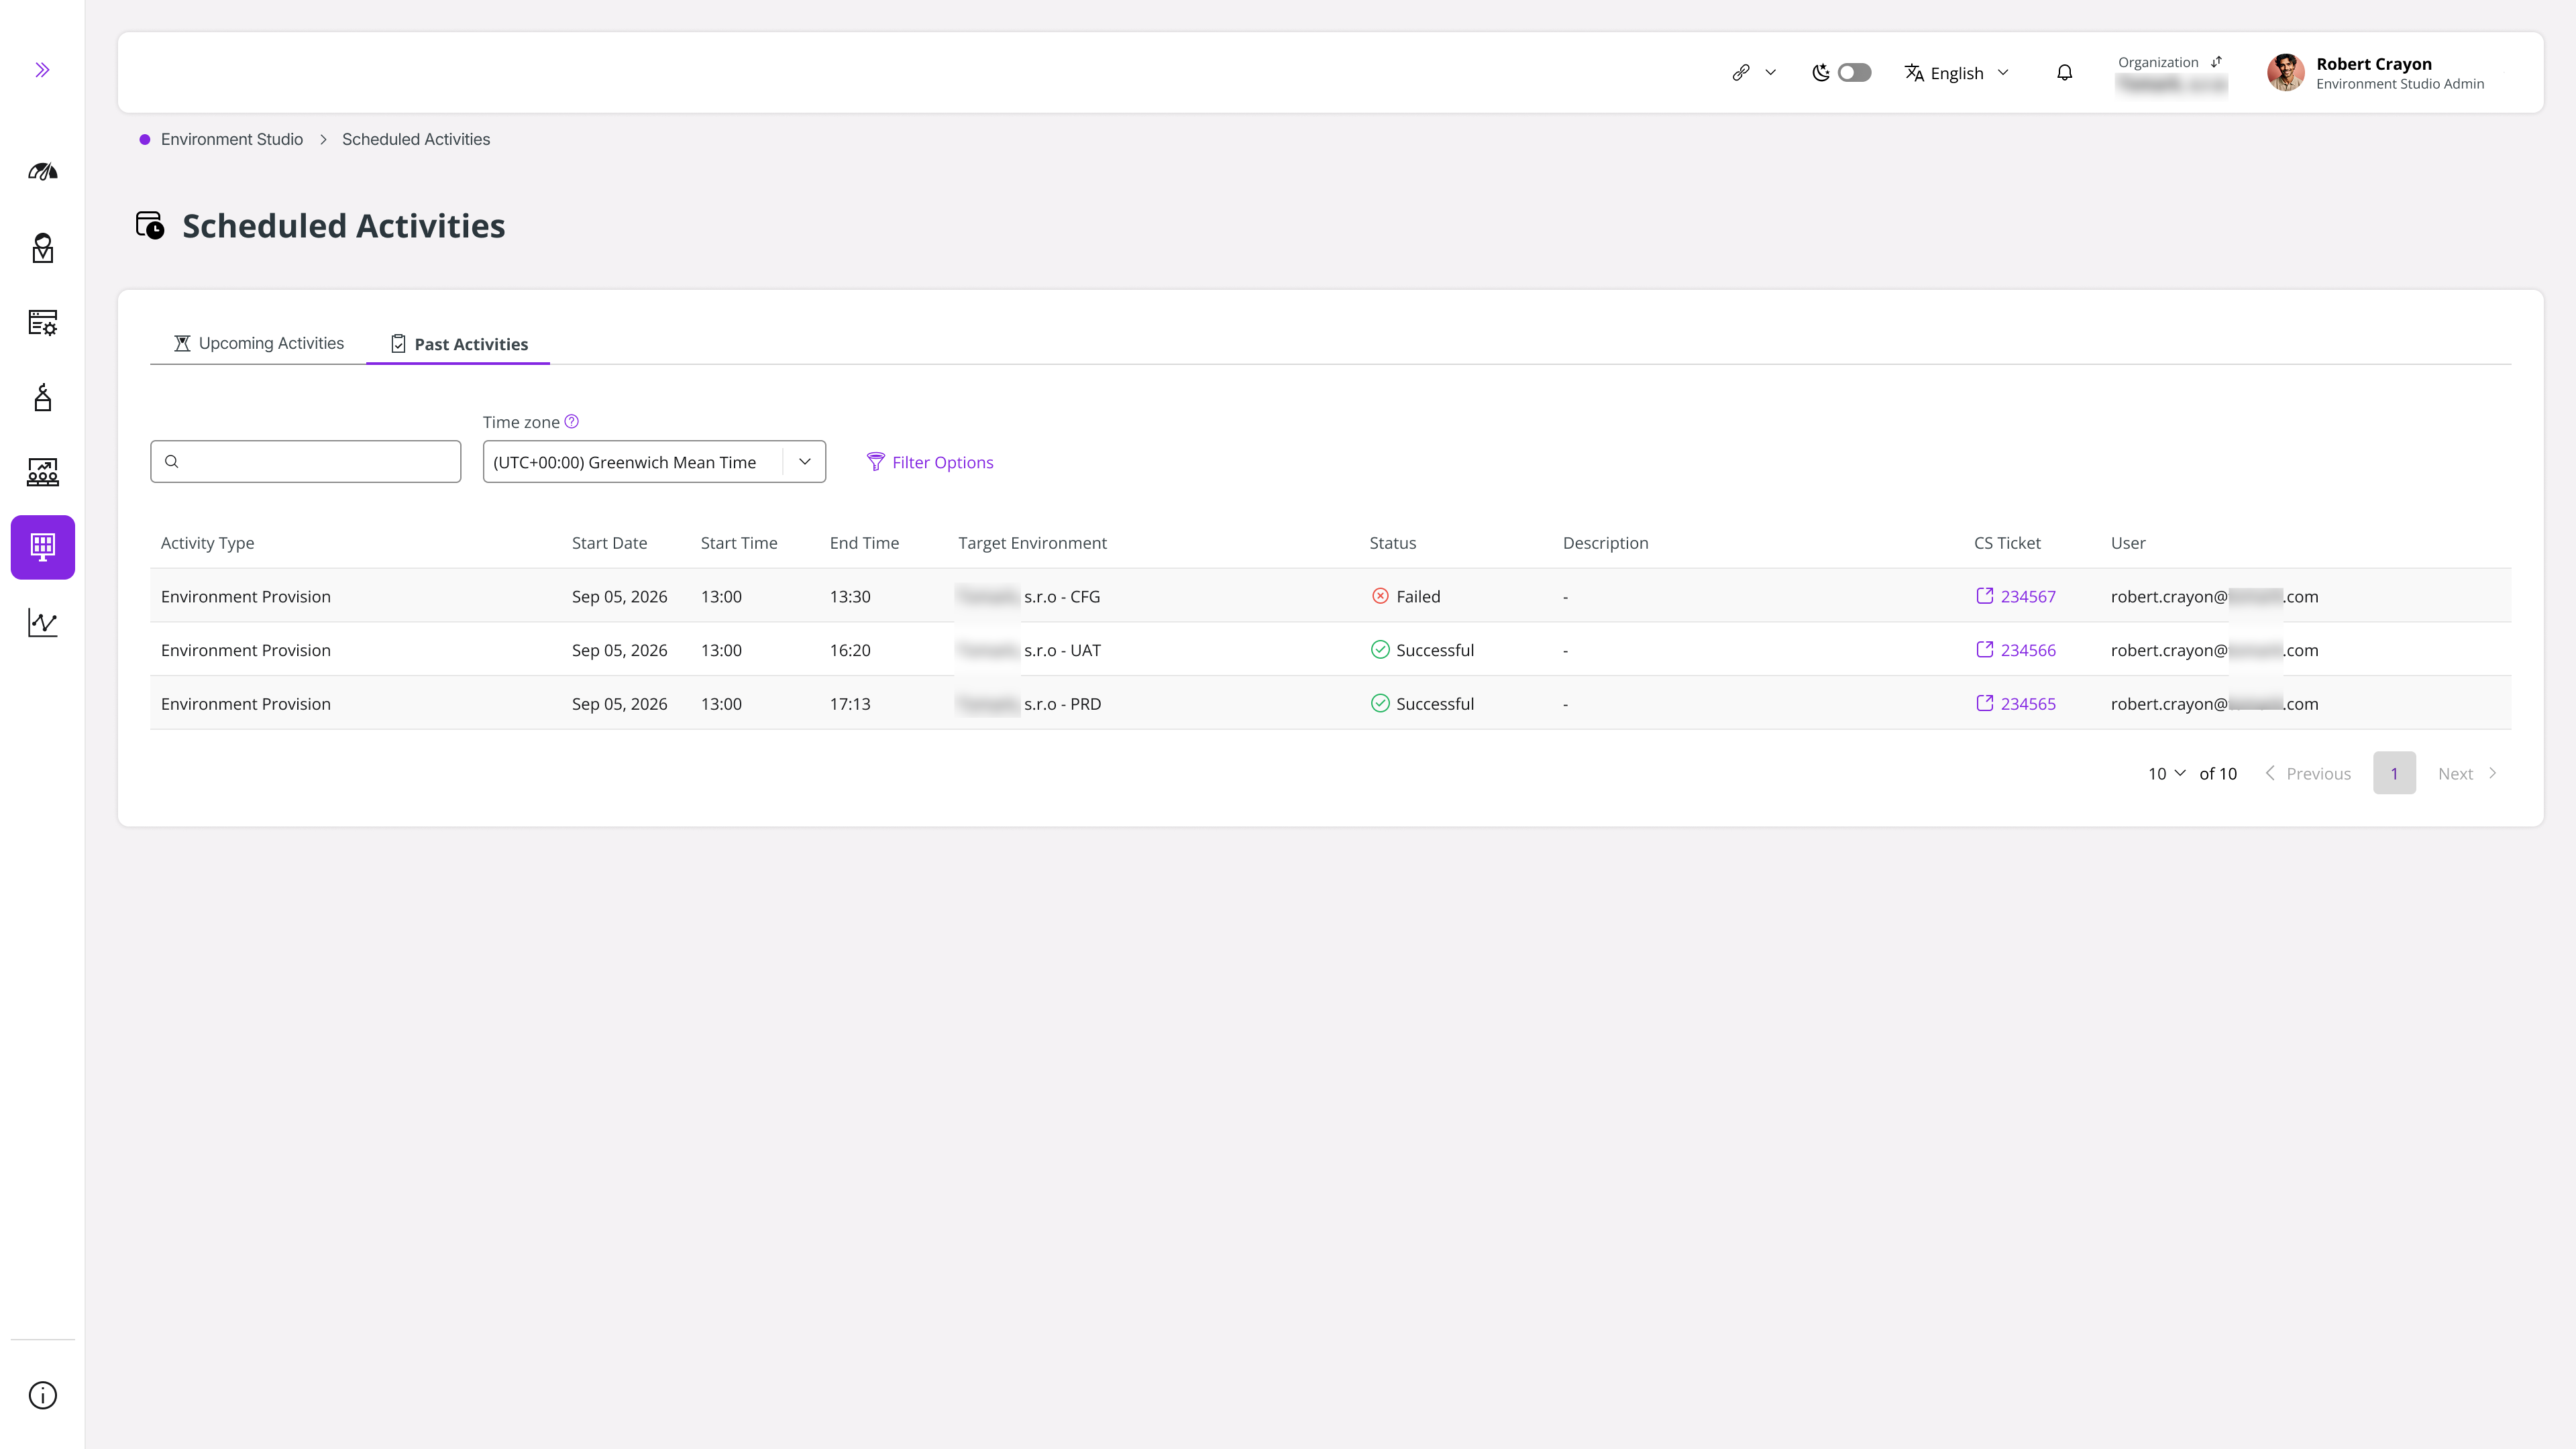
Furthermore, check Scheduled Activities table to check the status of the environment provisioning.
 |
|---|
| Figure 14 - Environment Status Set as Scheduled |
If status appears stuck, or your entitlement/SNOW record does not reflect a completed environment shortly after provisioning finishes, contact IFS support with your environment name and the approximate time you started provisioning.
 |
|---|
| Figure 15 - Failed Environment Status Displayed in Scheduled Activities Table |