Using List of Values
In IFS Cloud Web pages, Lists of Values (LOVs) are drop down menus which offer a list of options where you can select a value for the input field. This list can either be set in advance by the system administrator, generated from data in a database column, or you may even have the option to type in new values.

There are two types of LOVs in IFS Cloud:
Free Input LOV: Allows you to type any value to the field or select a value from the drop down menu.
LOV: You can only select a value from the drop down menu. If you try to select a value that does not included in the provided list, you will get the following error message :

Features
The LOV incorporates essential features to expedite your search, ensuring a more efficient and faster retrieval of the results you seek.
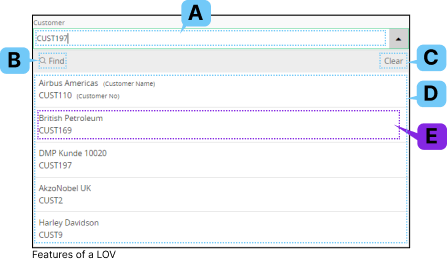
| Label | Name | Description |
| A | Value Field |
Type a valid value or any value
(depending on the type of LOV) into this field. As you input a value,
the data displayed in the Value List (D) will automatically filter to
show you the most relevant result. If the value you enter in the Value
Field doesn't match any of the options in the List of Values, you
will
receive a prompt saying "No valid matches."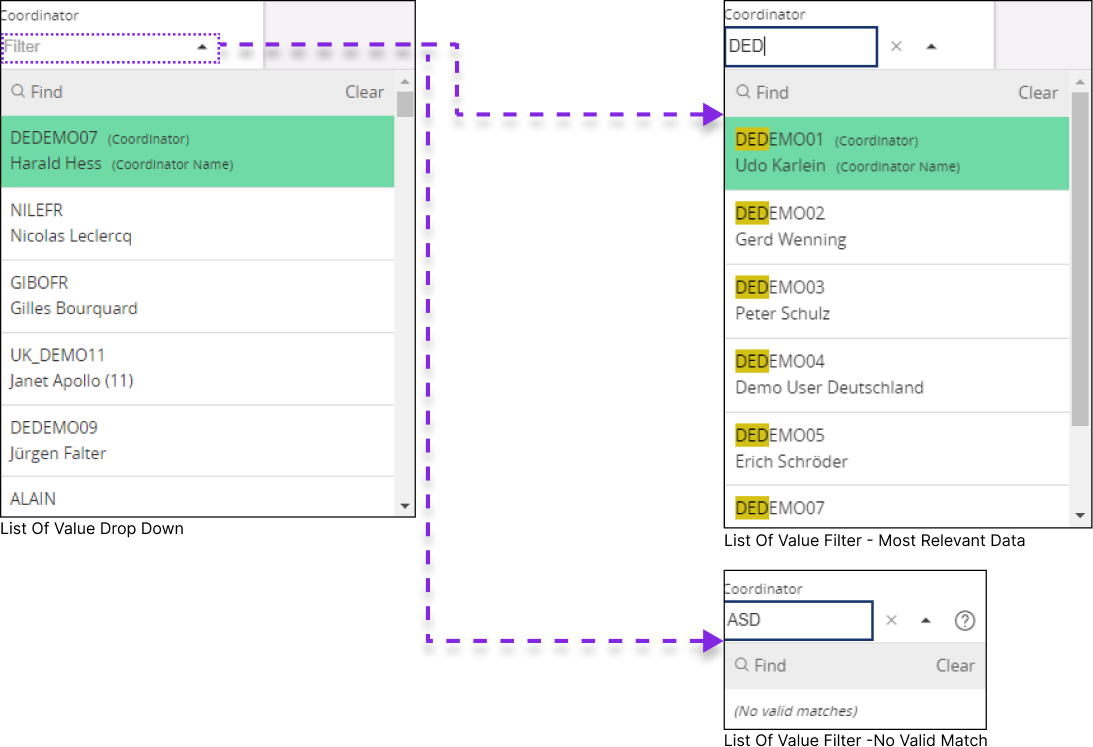 |
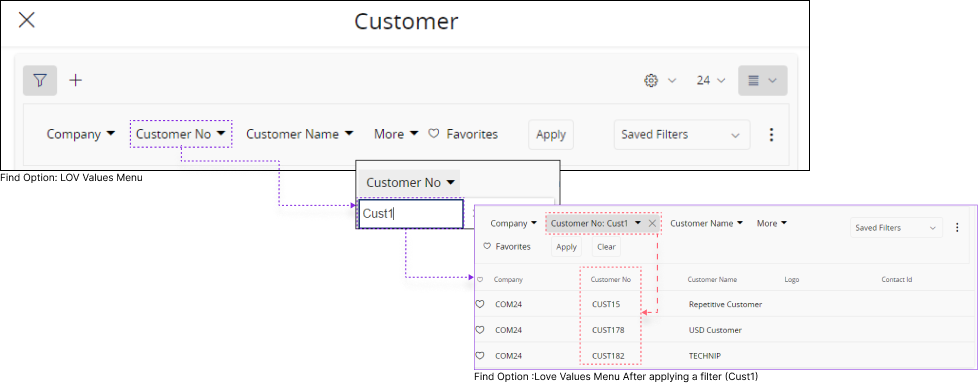
| B | Find |
 Click on the Find button to
access LOV filter section. This section shows all the values within the
list, and you can filter the desired value or perform any action shown
in Filter Search Pane section. Click on the Find button to
access LOV filter section. This section shows all the values within the
list, and you can filter the desired value or perform any action shown
in Filter Search Pane section. 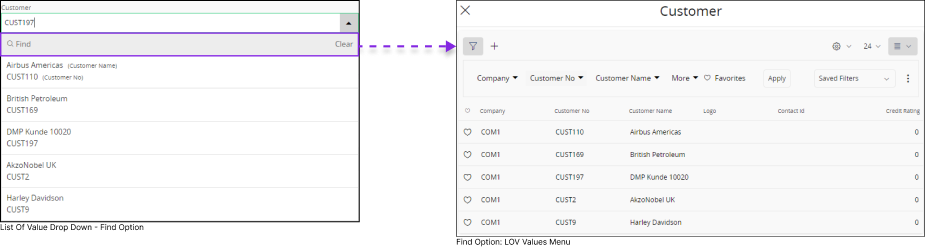
This option is handy when dealing
with a large number of records in the LOV, and you want to focus on
viewing a specific set of records initially. In order to filter set of
values follow the steps below: Example: Imagine you wish to view only the records in the LOV which has a customer number starts with 1
|
| C | Clear |
|
| D | Value List |
The Value List will only show a
limited number of input values initially, certain Value Lists
have a scroll bar on the left, allowing you to scroll down and choose
the specific input you require. Note: System administrator decides:
|
| E | Value List - Tile | Value list - Tile consists of
distinctive properties to help you to easily identify / filter it. System Administrators decides:
Example : The Value List Tile below displays two data fields: Customer Name and Customer Number. You can use either of these fields to filter and select the desired value from the drop down menu.
|