Configure/Install.Net based Print Agents
The IFS Print Agent is a stand-alone server component responsible for printing formatted business documents (operational reports) created using Report Designer layouts. The PDF documents generated by the IFS Report Formatter during the formatting step are then picked up by the Print Agent and sent for printing. This document guides you through the installation process and the configuration for the Print Agent functionality.
You can read a bit more about the print agent on the overview page.
Set up an IAM Client for IFS Print Agent
In the IFS cloud, the authentication is handled by IAM identity providers. Therefore, it is necessary to set up an IAM client id for IFS Print Agent
Please refer to this page for more information on creating IAM client ids.
Note: To log in to IFS Print Agent, you must set up an IAM Client first.
Setup Print Agent
Configuration & Installation
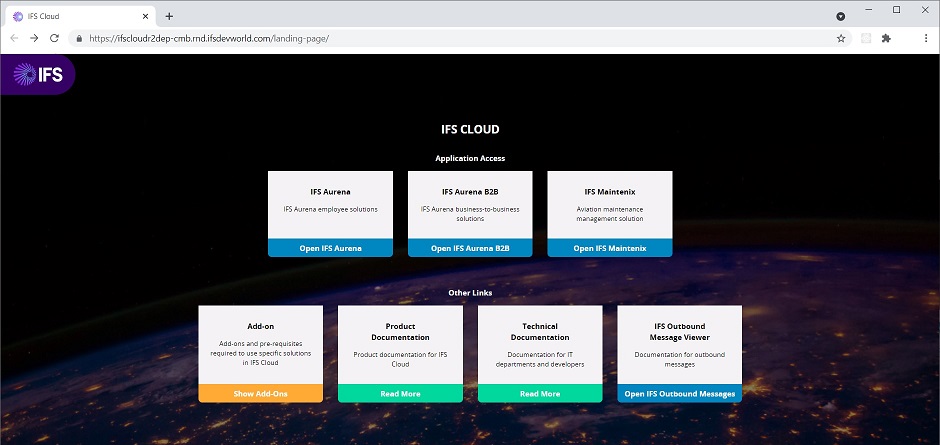
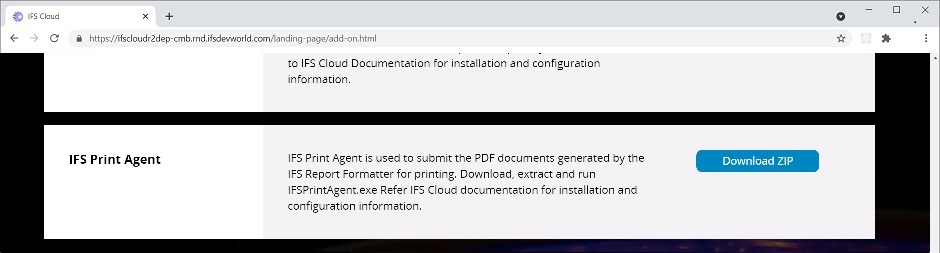
To begin installation you must first download the zip file which contains the required scripts and configuration files for installing a Print Agent. The zip file can be downloaded through the Add-ons page. A link to the Add-ons page can be found on the IFS Cloud Landing Page.
-
Click on the link to download the IFS Print Agent Dot Net installation version from the Add-ons page. You might be prompted to provide login information. If so, provide your IFS Cloud login details. Only 64-bit architecture is supported. Unpack the zip into a folder on the same or a different machine to install the Print Agent.
-
Locate the file AccessControlChanges.ps1 file in the extracted folder. Right click on the file and select the option Run with PowerShell.
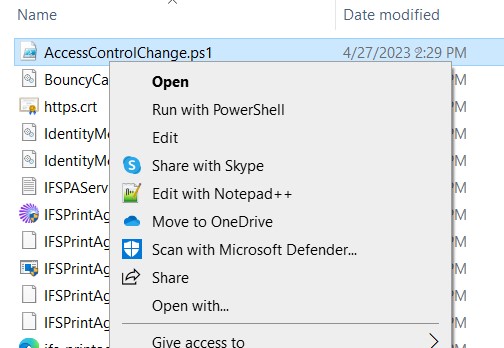
This script will change the ownership of the folder. The inherited permissions will be removed. Full control access will be granted only to the BUILTIN\Administrators user group and to the current user. It is not recommended to change the folder permissions of the folder containing IFS Print Agent application.
-
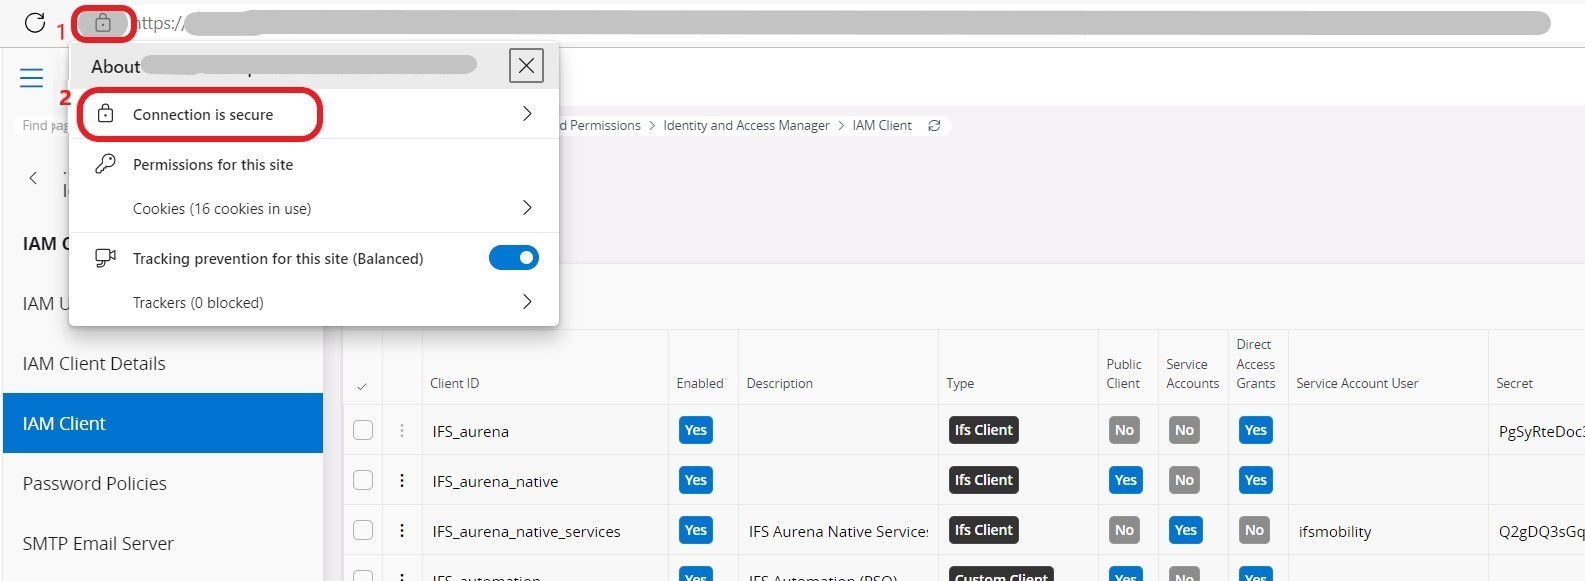
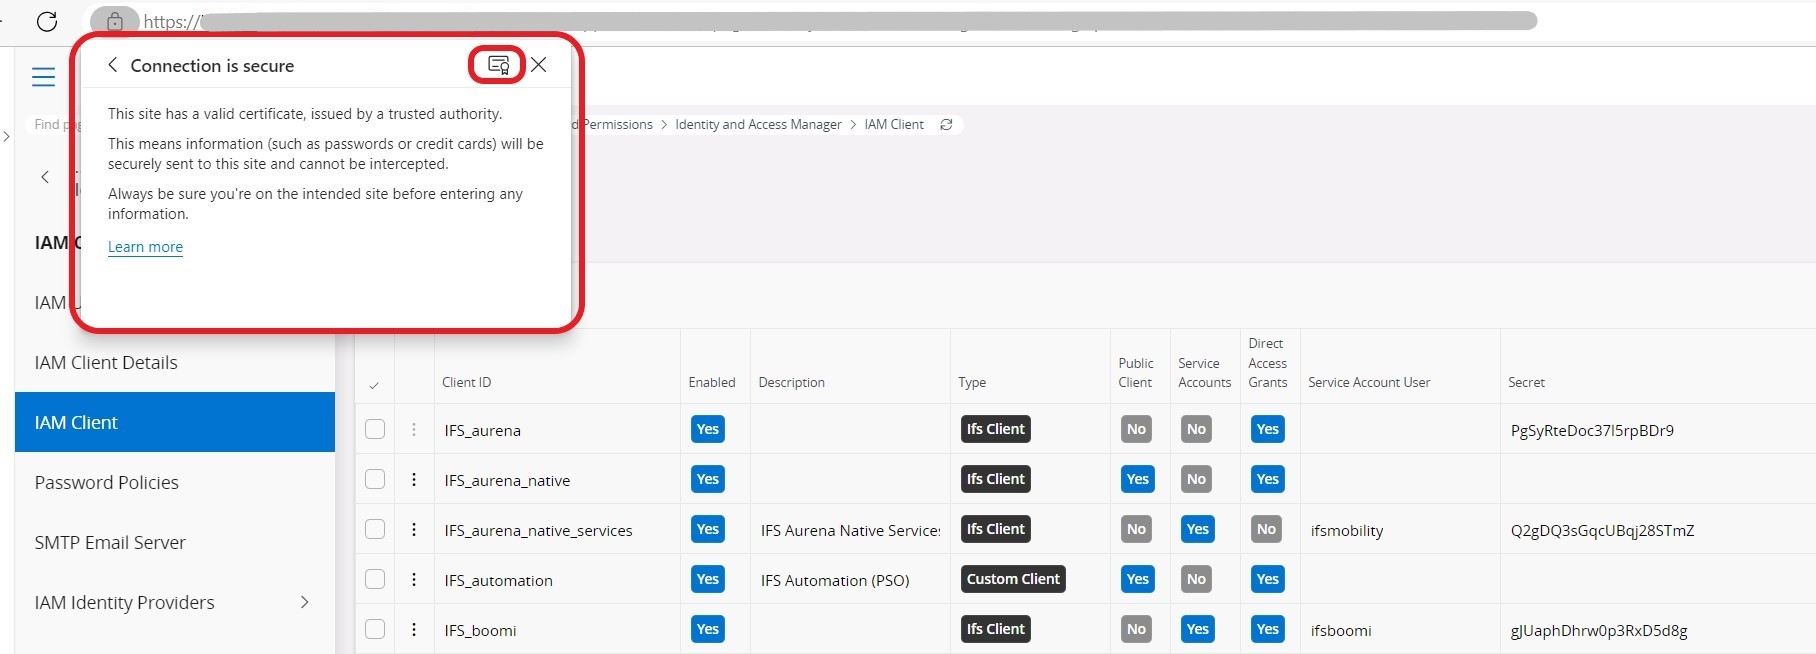
Go to the IAM Clients page on IFS Cloud and click on the icon highlighted in the top left-hand corner of the address bar. (see below)
-
Click the “Connection is Secure” link & then click the certificate icon from the pop-up window.
-
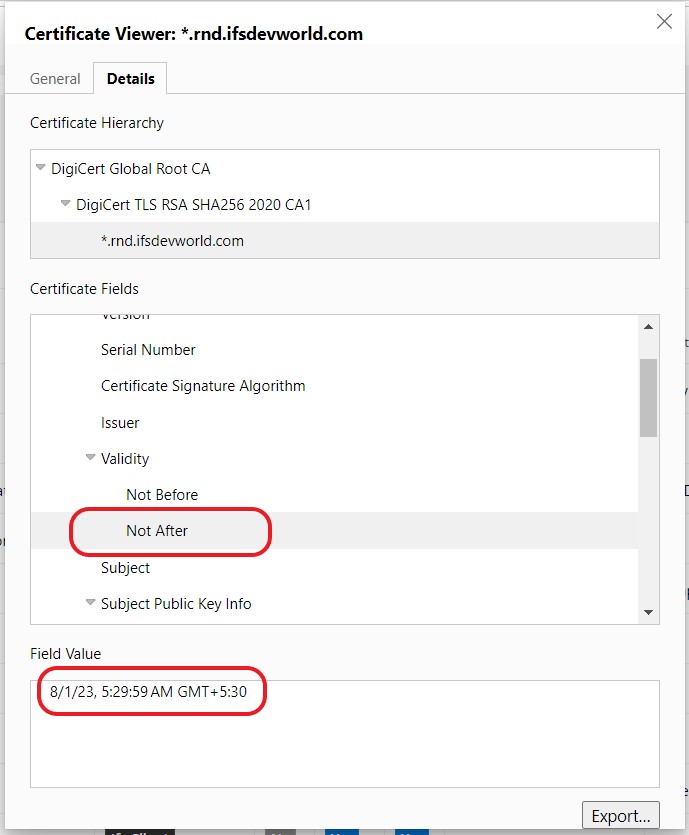
Go to the “details” tab and check the “Not Before” and “Not After” dates for the certificate. Those indicate the valid time frame for the certificate. If the validity period is expired, the user needs to download the latest certificate & follow the instructions from the beginning.
-
Click the "Export" button & download the certificate.
-
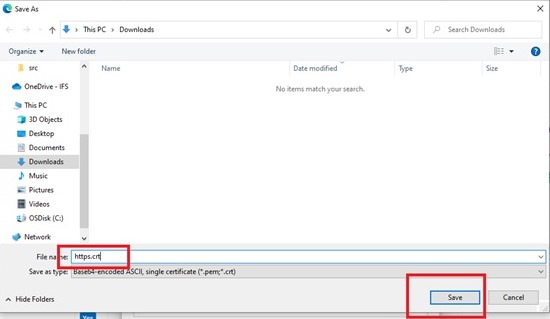
Rename the certificate file to “https.crt” and save the certificate on the machine where the Print Agent is going to be installed. Please do not share this certificate with anyone else.
-
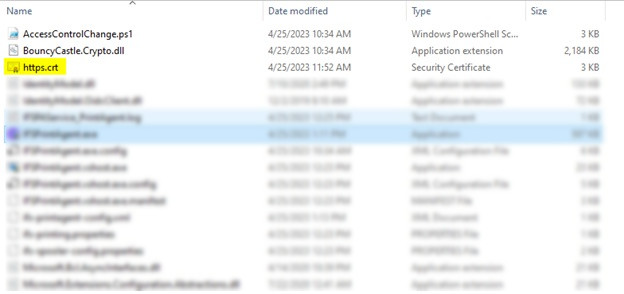
Copy the downloaded certificate into the folder which contains the IFSPrintAgent.exe file. Unless you copy the certificate file(https.crt), a warning message will be raised as “SSL Certificate for IFS Print Agent is not available”.
-
Run the IFSPrintAgent.exe as an administrator. It is located at the root of your recently unpacked zip file. It will open as a tray app only.
-
Locate the tray icon and "Right Mouse Click" it to bring up the context menu.
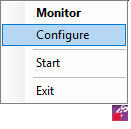
-
Select "Configure" to open the Installation/Configuration form.
-
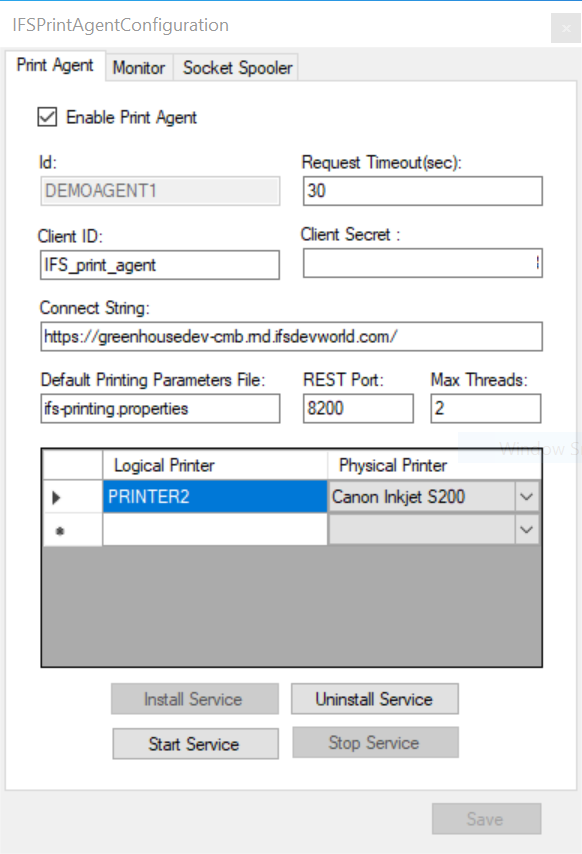
Specify the Print Agent ID. (Default id is PrintAgent)
-
Configure the rest of the properties in this form and press "Save".
The Connect string should be updated with URL of the IFS cloud environment and client secret should be updated according to the generated client secret on IAM clients page.
-
All properties can also be modified from the configuration file: ifs-printagent_config.xml.
Here is the list of properties::
| Parameter | Description |
|---|---|
| ID | This is the Print Agent ID. By default, the id is PrintAgent. This can only be amended when the Windows Service is uninstalled. |
| IAM CLIENT ID / SECRET | Credentials used by the Print agent when connecting to the extended server. Enter the IAM Client ID and Client Secret |
| URL | The connection string. |
| REST_PORT | The Print Agent opens a RESTful API for monitoring. Make sure to use different ports for each Print Agent if you run more than one and the same machine. |
| PRINTING_PARAMETERS_FILE | The name of the configuration file for Print Agent printing parameters. The default is ifs-printing.properties. |
| REQUEST_TIMEOUT/POLL_TIME | The timeout (in seconds) before the server will respond even if no new print jobs were found. Set the below other timeouts on the server to prevent technical issues. In the config file, this property is called POLL_TIME due to backward compatibility. |
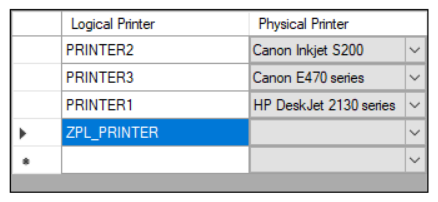
| PRINTER_MAPPINGS | A list of printers serviced by this node, each printer mapping contains:: |
| LOGICAL | Name of the logical printer, must match the name specified in system configuration. Make sure the printer name does not contain any white spaces as this is not supported. If a URL/Connection String is specified, a List of Values might be available from a context menu. |
| PHYSICAL | Path to the corresponding physical printer (relative to the server running the Print Agent). A list of values available from the combo box and adding new printers can be done with a right mouse click. |
| SOCKET_SPOOLER | Used to switch the Socket Spooler functionality ON and OFF. This is by default OFF. See more details further down in this document. |
| PRINT_AGENT | Used to determine if the normal print agent polling functionality should be started. This is ON by default and should be ON in most cases. It is really only when you want to run a dedicated Socket Spooler that you would ever consider turning this OFF. However, the socket spooler functionality is not supported so this option would always be ON. |
| MONITOR_UPDATE_RATE | Set how fast the Monitor will poll the REST API to get the current status of the Print Agent. |
| REMOTE_MONITOR | If set to on, the REMOTE HOST/PORT will be used for monitoring instead of the current host and REST_PORT. In this mode, only monitoring is available. You can not install, start or stop the service. |
| REMOTE_HOST | Used as the host when doing remote monitoring. |
| REMOTE_PORT | Used as the port when doing remote monitoring. |
Following is a sample ifs-printagent_config.xml file with the information listed above.
<?xml version="1.0" encoding="utf-8"?>
<REMOTE_PRINTING_NODE>
  <ID>CloudF1CMB</ID>
  <POLL_TIME>180</POLL_TIME>
  <USER>IFS_print_agent</USER>
  <PASSWORD>*************</PASSWORD>
  <URL>https://greenhousef1-dev-cmb.rnd.ifsdevworld.com/</URL>
  <REST_PORT>8200</REST_PORT>
  <PRINT_AGENT>ON</PRINT_AGENT>
  <SOCKET_SPOOLER>OFF</SOCKET_SPOOLER>
  <PRINTING_PARAMETERS_FILE>ifs-printing.properties</PRINTING_PARAMETERS_FILE>
  <PRINTER_MAPPINGS>
    <PRINTER_MAPPING>
      <LOGICAL>PRINTER1</LOGICAL>
      <PHYSICAL>DUMMY</PHYSICAL>
    </PRINTER_MAPPING>
  </PRINTER_MAPPINGS>
  <MONITOR_UPDATE_RATE>Medium</MONITOR_UPDATE_RATE>
  <REMOTE_MONITOR>OFF</REMOTE_MONITOR>
  <REMOTE_HOST></REMOTE_HOST>
  <REMOTE_PORT></REMOTE_PORT>
</REMOTE_PRINTING_NODE>
Note:: In order for a print job to be picked up at all a Report Formatter needs to have the logical printer defined/listed. Hence, it's not enough to only make the logical to physical mapping in the Print Agent configuration, you also need to make sure that the logical printer is included in the printer list of a Report Formatter. It's not necessary to map the logical printer to a physical in the Report Formatter configuration when you're using a Print Agent for a printer though.In order for a print job to be picked up at all a Report Formatter needs to have the logical printer defined/listed. Hence, it's not enough to only make the logical to physical mapping in the Print Agent configuration, you also need to make sure that the logical printer is included in the printer list of a Report Formatter. It's not necessary to map the logical printer to a physical in the Report Formatter configuration when you're using a Print Agent for a printer though.
-
Press the "Install Service" button to setup the Windows Service. You have to specify the user that will be running the service. Make sure this user has access to printers and folders etc..
-
Press the "Start Service" button to start the Print Agent. The Tray Application can now be closed. The server will run as a background process and will start up automatically when restarting the machine.
Verify
 |
Once the print agent is started, you can open the monitor and see the log. After the startup is finished it should say something like this.<br>[004] 2018-02-21 17:35:54: State changed: RUNNING<br/>[005] 2018-02-21 17:35:55: Looking for jobs...<br> |
 |
If you want to abort the installation, you can uninstall by clicking the "Uninstall Service" button. It will then try to connect to the application server to remove the registration and remove the windows service from registry. |
Configure Print Agent for HTTPS
There is no manual configuration needed to configure Print Agent for HTTPS. Once the Middleware server is configured for HTTPS, the created Print Agent_<bit_version>_<instance>.zip files automatically get updated and configured to run in a SSL environment.
All you need to do is, install a fresh Print Agent using a newly created ZIP file after the HTTPS configuration.
Run Print Agent
The Print Agent can be started using the tray application. IFSPrintAgent.exe
When started, the node will register itself with the server and as long as it is running all print jobs destined to a printer on this node's list will not be spooled by the Report Formatter. Instead the PDF will be created and later fetched and printed by the Print Agent. Use the Windows Service, to monitor the Print Agent status.
When run as a Windows Service the printers must be configured to accept anonymous printing, or the service must be run as a user with printing rights. There could be situations where some specific printers might have special security and access levels which limits leverage of printing, hence it is recommended to run the Print Agent service from an admin user who has full rights accordingly. The same applies for the Report Formatter when that is set up to spool print jobs to a printer.
Run Print Agent in Windows 10
When running Print Agent in Windows 10 for development purposes always run the Print Agent with Administrative privileges.
Updating the expired SSL certificate
When starting IFS Print Agent, if you get any warning message as "Print Agent SSL Certificate has expired. Please update the certificate" follow the instructions from steps 3-8 in the Configuration & Installation section & export the latest SSL certificate available from the environment and update the IFS Print Agent instance. Afterwards, restart the IFS Print Agent.
Printing Properties
It is possible to change a lot of minor settings for the PDF Library printing. However, that default values should work fine in most scenarios.
If you have problems, it might be a solution to amend them. On this page you can find a full list of the various properties.
Monitor Print Agent
You can start a monitor by double clicking the tray icon or using the first context menu option.
The monitor will show the current status and log. The view is updated automatically and the update rate can be configured between every second to up every 5 minutes using preset enumeration values. You can do a manual update by clicking the update spinner indicator or using the monitor context menu "Refresh" option.
From the context menu you can also control/clear the log window. It is also possible to save away the current log file and start a new. This will happen automatically when the log file gets too big.
Remote Monitor
You can start a monitor in a remote mode. This is done from the "Monitor" tab on the configuration form.
If you switch this on, the REMOTE HOST/PORT will be used for monitoring instead of the current host and REST_PORT.
In this mode, only monitoring is available. You can not install, start or stop the service. You can also not change the log file.
Socket Spooler
This functionality is mostly used when spooling ZPL printouts socket listening label printers but has a few other features that can come in handy in some setups.
Please see the overview page for a description of this functionality.
To use this you first have to enable it in the printagent_conf.xml with the socket spooler option set to ON.
<SOCKET_SPOOLER>ON</SOCKET_SPOOLER>
Note: From IFS Cloud 22R1 onwards, you need to have relevant logical printers mapped in print agent configuration to print using socket spooler.
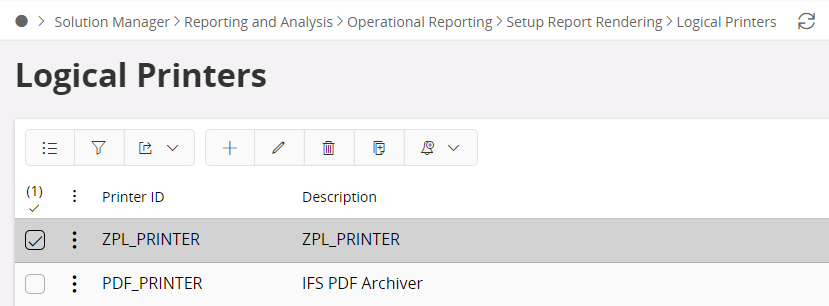
Steps to print ZPL using socket spooler
- Configure a new logical printer. eg:- ZPL_PRINTER
-
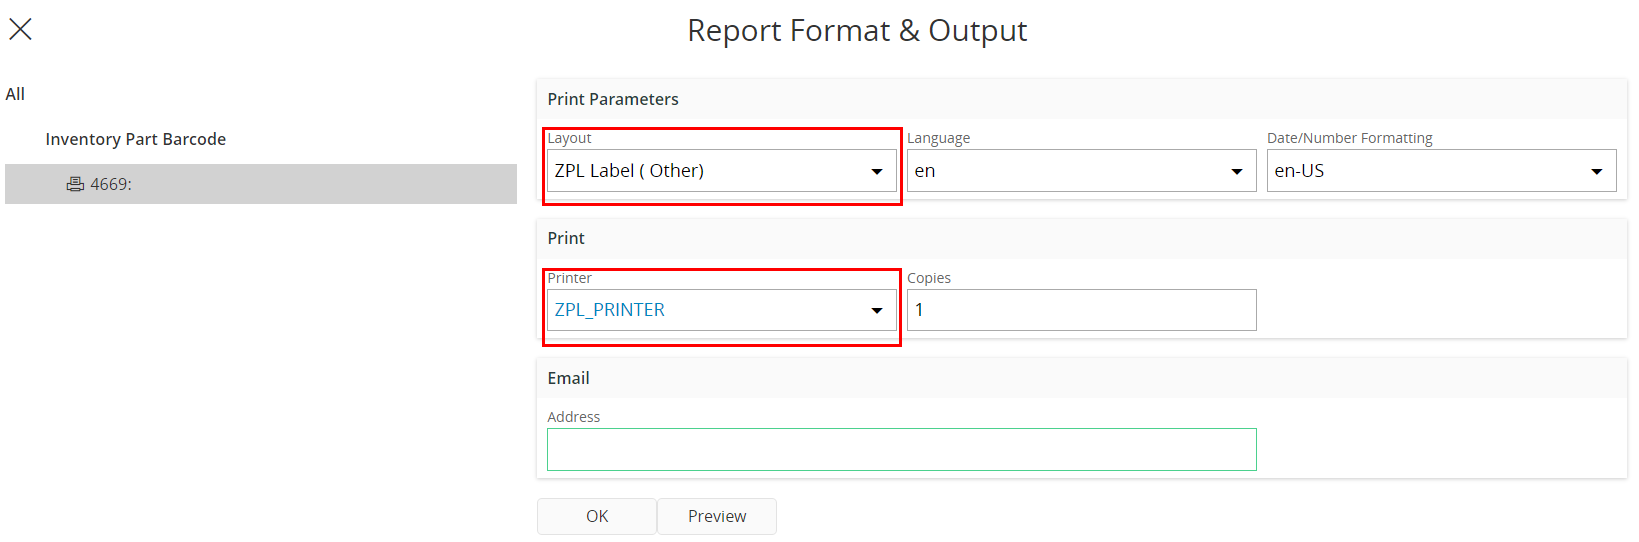
Add the relevant logical printer to the required report print task template and configure the socket spooler listener instance / label printer (host:port) as the physical printer.
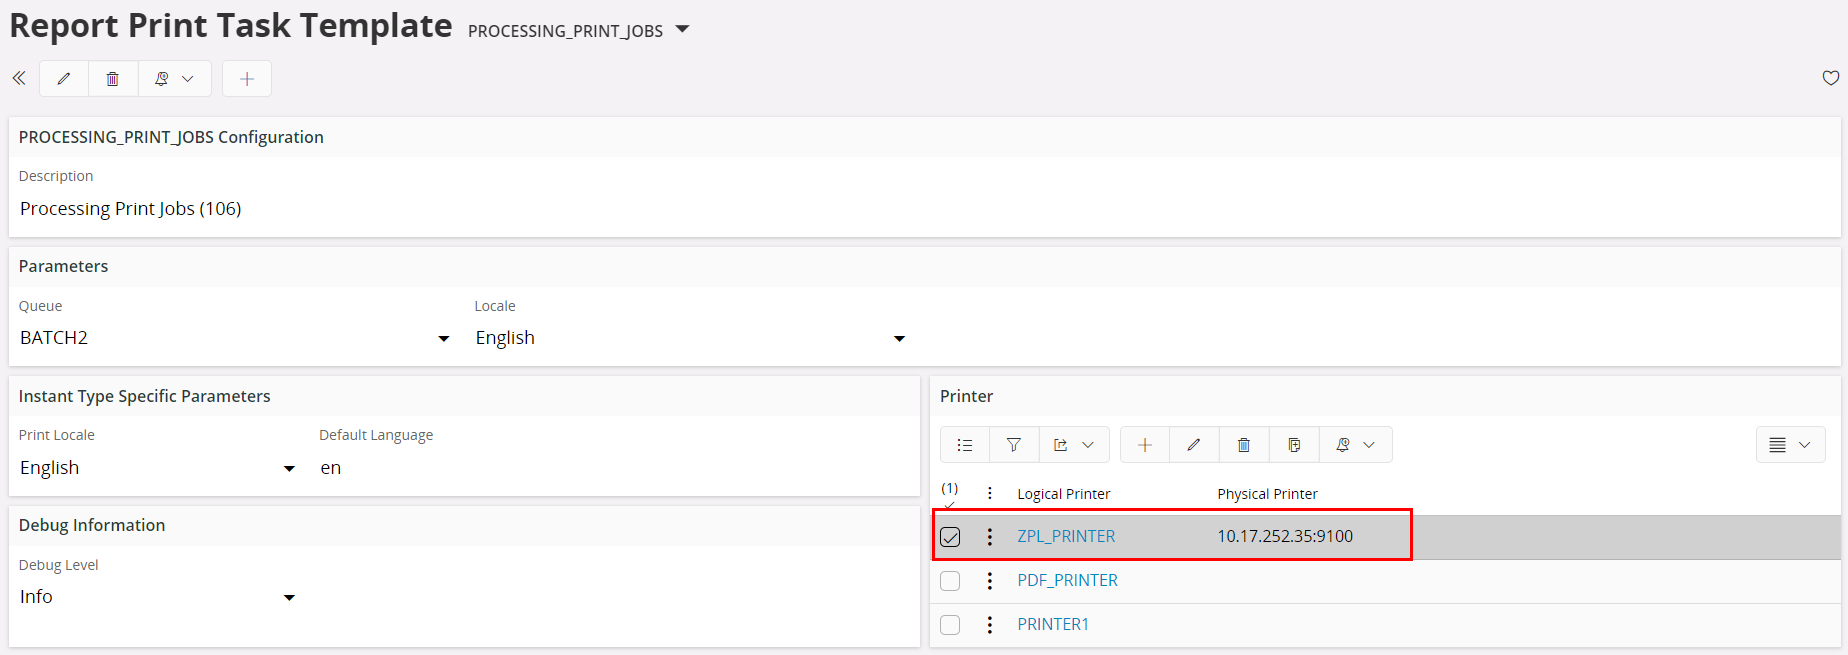
-
Make sure that the logical printer is mapped in print agent instance.
- Print the ZPL layout from IFS Cloud Web.
Located in the print agent folder you can find the socket spooler configuration file; "ifs-spooler-config.properties"
| Thread | Parameter | Description |
|---|---|---|
| Socket Listener | listener# | Listeners will listen for incoming connections on a port and pass the jobs to a spool queue. |
| *port* * | The port to listen to. Any socket connections on this port will be picked up and the content being passed will be placed in a spool queue. | |
| *path* * | The folder location of the spool queue. Here all queue related files will be saved. | |
| Queue Processor | queue-processor# | Queue Processors will poll a spool queue and send jobs to a printer, file or folder. Both socket and UNC-paths are supported. |
| *path* * | The folder location of the queue to process | |
| *printer* * | The destination printer. It can be either a host:port for socket connections or a UNC path for printer queues. But is can also be a folder or file. | |
| delay | This is the delay between each print in milliseconds. This is by default 0, but can be increased to reduce the load on slow printers | |
| polltime | This is the polling wait time and the default value is 5000. It is the sleep time for the process when no jobs are found in the queue. When the queue has multiple jobs, there will be no wait between each job. Use delay instead if you want to control this. | |
| output | This option can be either merged or separated were merged is the default. In the merged mode, multiple jobs will be sent to the printer during the same connection. If you print to a folder, all jobs will be concatenated into the same spool file. In the separated mode, each job has its own socket connation or spool file. | |
| File Processor | file-processor# | File Processors will poll a folder for files and pass them to a printer, file or folder. Both socket and UNC-paths are supported. |
| *path* * | The folder path where files will be polled from | |
| printer*,delay,polltime,output | Same as for Queue Processor, but path means the folder path where files will be polled from. |
* mandatory properties
The following is a sample ifs-spooler-config.properties file with the information listed above.
# SPOOLER CONFIGURATION
# Multiple listeners and processors can be added, just name them listenerX and processorX where "X" is a number.
# No two listeners or processors should work on the same source but it is fine to use the same output target.

# Listeners will listen for incoming connections on a port and pass the jobs to a spool queue.
# Queue Processors will poll a spool queue and send jobs to a printer,file or folder. Both socket and UNC-paths are supported.
# File Processors will poll a folder for files and pass them to a printer, file or folder. Both socket and UNC-paths are supported.
# For processors "polltime" and "delay" is in milliseconds but can be obmitted. The default values are: polltime=5000 and delay=0

listener1.port=9100
listener1.path=d:\tmp\spooler

#listener2.port=9300
#listener2.path=c:\tmp\spooler2

queue-processor1.printer=d:\tmp\spooler2\printer.txt
queue-processor1.path=d:\tmp\spooler
queue-processor1.delay=0
queue-processor1.polltime=5000


#queue-processor2.path=d:\tmp\spooler
#queue-processor2.printer=d:\tmp\spooler3

#file-processor1.printer=//lkpprinter1/GBG2C
#file-processor1.path=c:\tmp\files_to_print

file-processor2.printer=localhost:9100
file-processor2.path=d:\tmp\spooler3
file-processor2.polltime=5000
file-processor2.delay=0
file-processor2.output=separated