ClickOnce Deployment
Deployment of IFS Enterprise Explorer can be done using the ClickOnce
methodology. To achieve this you will make a deployment of the built client
files on the middle tier application server, or any web server. You will need to
electronically sign the deployment manifest files for the host you use. Once
this is done and your web server is running you need to verify that you can
start the client as an end user.
Contents
ClickOnce applications are fundamentally low impact. Applications are
completely self-contained & install per-user, meaning no-admin rights are
required. You don’t have to worry about a ClickOnce application breaking other
applications.
ClickOnce applications can be deployed via web servers, file servers or CDs. A
ClickOnce application can choose to be Installed, meaning it gets start menu &
add/remove program entries, or an app can simply be run & cached. ClickOnce
has several ways it can be configured to automatically check for application
updates.
ClickOnce applications run in a secure sandbox provided by the .Net Code
Access Security model.
When talking about deploying applications over the network, size of the
application is important. To help with this, ClickOnce support HTTP
compression. ClickOnce applications can also choose to incrementally download
themselves. Application files can be marked as optional.
Using ClickOnce requires that the target client already have the .NET
Framework installed. On the server side, ClickOnce needs only an HTTP 1.1
compliant web server or alternatively a file server.
If you are doing a real ClickOnce deployment with a "real" certificate, then
you need to generate a Personal inFormation eXchange (PFX) file, a certificate
and a private key, which must be obtained from a certificate authority.
Obtain a certificate for ClickOnce
deployment
ClickOnce deployed applications must be signed with a certificate. Signing the
deployment with an Authenticode certificate trusted by all computers in your
network is the recommended approach.
Note: This task must be repeated after an upgrade has been installed.
It is necessary to use different certificates for different environments without
duplicating and signing with the same certificate. If the same certificate is
used it may lead to inconsistencies in the download cache on the end user
machines.
To sign the deployment manifest files there is a tool called F1Mage.exe
(Foundation1 Manifest Generation) available. This tool is located in the
IFS Enterprise Explorer runtime directory.
You can run this interactively in a
graphical user interface
or from command prompt
using parameters.
- Locate the Client Runtime folder
The client runtime folder is located
in <ifs_home>\<repository>\client\runtime
- Start the F1Mage.exe tool
At the command prompt type
> f1mage.exe
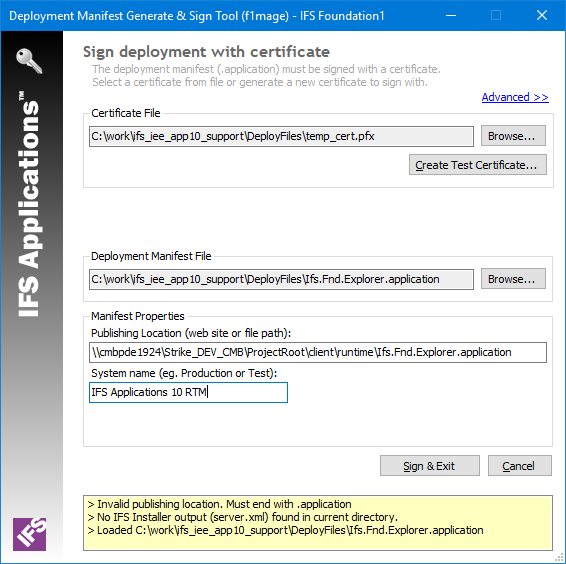
Click Advanced to see more options:
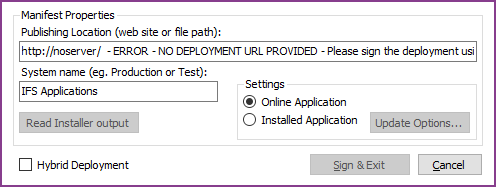
- Enter the parameters
| Parameter |
Description |
Certificate File
|
The deployment manifests must be signed with a certificate. The certificate
must be intended for code signing. It is recommended to use an Authenticode
certificate.
You can select an existing certificate from file (.pfx) or from your personal
certificate store to sign with. This is the recommended way. You can also
generate a new test certificate to sign with. This should be seen as a test
procedure and should not be used in production environments, since it will
prompt the end user with a dialog saying "Unknown Publisher"
. |
| Deployment Manifest File |
This should point to the file Ifs.Fnd.Explorer.application
in the
folder where the deployment files are located. |
| Publishing Location |
Points to the web server or network share where the application is
published. Must include the complete path to the deployment manifest file.
Example
http://myserver:58080/client/runtime/Ifs.Fnd.Explorer.application
or
file://myserver/mynetworkshare/client/runtime/Ifs.Fnd.Explorer.application |
| System name |
Typical the Instance Name |
| Online Application |
No shortcut will be added to the Microsoft Windows Start Menu. Users
starts IFS Enterprise Explorer from a web link (publish location). |
| Installed Application |
A shortcut to the application will be added to the Microsoft Windows Start Menu, and the
application can be uninstalled via Add/Remove Programs. The application checks
the deployment server for updates before started - just like Online
applications (unless you specify differently in Update Options). |
- If you already have a set of parameters you can load them by clicking Read Installer Output
This will read the publishing location
(such as http://server:port/path) and the system name from a
configuration file created by the IFS Installer.
This is a convenient way to set the manifest properties instead of typing
them manually. This button is only enabled if there is a file called server.xml present in the directory from where the tool was started. It will
read the configuration file and extract the Publishing Location
(web site
or network share) and the System name.
- Click Sign & Exit.
- Locate the Client Runtime folder
The client runtime folder is located
in <ifs_home>\repository\client\runtime
- Verify the syntax of the command by typing
> f1mage.exe /?

Usage: F1Mage CertFile=<file> [Password]=<password> [TimeStampUrl]=<url>
 [DeployUrl]=<url> [SystemName]=<name> FileToSign=<file> [NewCert]
 [ReadConfig] [Installed/Online]
- Use the following Command Line Parameters
| Option |
Description |
| /Q |
Command Line mode. No graphical user interface. |
| CertFile |
Certificate .pfx file intended for code signing and containing a
private key. |
| Password |
(Optional) Certificate password. |
| TimeStampUrl |
(Optional) Specifies the address of a server that timestamps your
signature. When you provide a certificate, this external site verifies
the time that the application was signed. Example: http://timestamp.verisign.com/scripts/timstamp.dll |
| DeployUrl |
(Optional) Change the Deployment Url in the manifest. |
| SystemName |
(Optional) Change the System Name in the manifest. |
| FileToSign |
The Deployment Manifest file to sign. |
| Installed |
(Optional) Mark as a ClickOnce Installed application. (Default is
Online) |
| Online |
(Optional) Mark as a ClickOnce Online application. (Default) |
NewCert |
(Deprecated functionality) (Optional) Create a new test certificate. Must specify a certFile.
Implies Quiet mode. |
| ReadConfig |
(Optional) Read configuration data from the Installer (if file
system.xml exists). This will override SystemName and DeployUrl
parameters. Implies Quiet mode. |
- Execute your command
Example:
f1mage CertFile=mycert.pfx
filetosign=Ifs.Fnd.Explorer.application ReadConfig
Deploying the application with ClickOnce from a Linux server is
possible.
Since signing the deployment manifest is a mandatory step, and this requires
Microsoft Windows and Microsoft .Net Framework 4.0 or later, you have to do some
manual steps to make the deployment work on a Linux server. F1mage.exe
will not run on a Linux machine.
- Copy the client runtime folder (<ifs_home>\repository\client\runtime) to a machine running Windows and
the .Net Framework.
- Run f1mage in graphical user interface mode or command line mode as
described above to sign the manifests.
- After this step, copy the folder back to the deployment server.
- Run the script pack-and-deploy-client.sh
located in <ifs_home>\repository\client.
When installing on several nodes of a cluster, only one copy should be signed
using the cluster alias URL and then copied to other nodes.
1. Sign the manifest on one node using steps described in
Sign Manifest Using
the Graphical User Interface or
Sign Manifest Using
the Command Line Interface
Make sure that the deployment URL is the one that will be used to access the
cluster.
2. Copy the signed runtime folder to other nodes.
Satellite deployment means having several ClickOnce deployment sites where
all the clients are connecting to the same application server. This can be
useful if you have one central application server, but want users to download
the client applications from a deployment server near (network wise) their PCs.
For example, you have a central server in the UK, but client machines in say
Sweden and France. You could then setup two local deployment servers to improve
client download performance, while IFS Enterprise Explorer client still logons
to the one IFS Applications application server in UK.
To perform a
satellite installation:
- Start with a normal installation as described above.
- Create satellite web servers using standard web server software.
- Copy all files in \client\runtime to the satellite web servers.
- For each satellite web server: run F1Mage and enter deployment URL
pointing to that particular server.
- End users then starts IFS Enterprise Explorer from their local
deployment server, but connects to the same application server.
You will now verify that the installation works for the end users.
- Make sure your Web Server is up and running
The web server was installed and configured when you created your
application server instance. If you followed the instruction the web
server is now already started.
- Start the home page for your IFS Applications instance
The home page is
normally located at the server where you have installed the extended server. The
URL for this was presented to you by the installer tool once the installation of
your instance was completed. For example https://myserver:58080

The IFS Applications instance start page
- Click the link Enterprise Explorer
to start the ClickOnce Deployment.
The Application Launcher presents the Launching Application window.
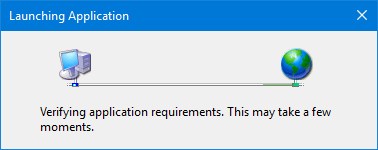
Launching Application window
If the application is not yet configured as trusted, the Launching
Application window will be followed by an Application Run Security
Warning window.
To obtain full ClickOnce ability - that the user does not need to make a
trust decision the first time using the application, certain requirements
needs to be met:
- The application must deployed from MyComputer, LocalIntranet or TrustedSites. Zones must be configured as Enabled (default) or Authenticode
Required.
- The application must be signed with a trusted publisher certificate; a
X.509 version 3 certificate with extended key usage properties Code
Signing (codeSigning) and Microsoft Authenticode (msCodeCom).
This certificate needs to be in the Trusted Publishers
certificate store.
- The trusted publisher certificate needs to be signed by a Certificate
Authority with a X.509 version 3 certificate with basic constraint
CA:TRUE. This certificate should be in Intermediate Certification
Authorities or Trusted Root Certification Authorities
certificate store.
If the deployment has been signed with a trusted certificate (
Obtain a certificate for ClickOnce deployment )
which is not listed as a Trusted Publisher, a yellow warning sign
will be shown. If you click the More Information... link, it will show
the Application Run More Information window, stating that the
application requires machine access.
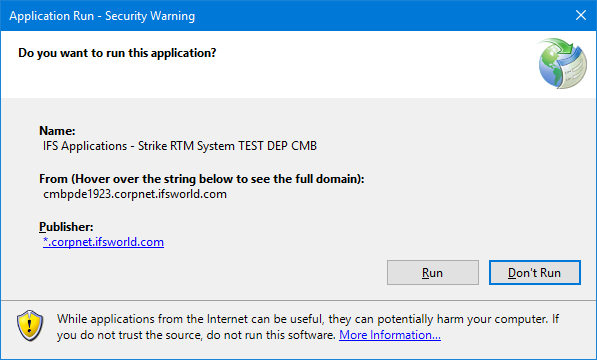
Application Run Security Warning (yellow) window
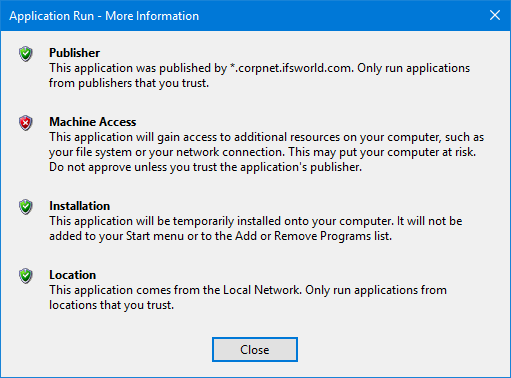
Application Run More Information (Machine Access) window
The 'Unknown publisher' message in the
ClickOnce information dialog is displayed when the certificate used to sign the ClickOnce manifests is not a
trusted certificate. In order to
be trusted, a certificate must chain to a trusted root certificate authority, and the
test certificates created by f1mage.exe "Generate New" are
not trusted by default.
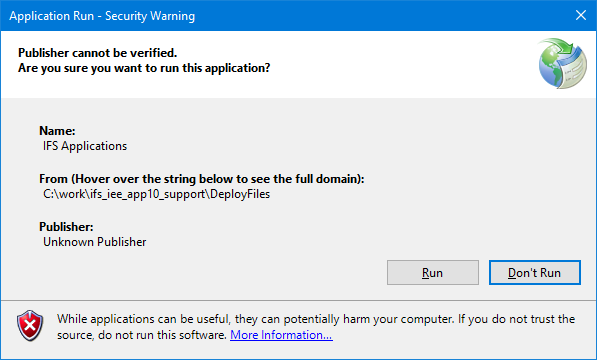
Application Run Security Warning (red) window
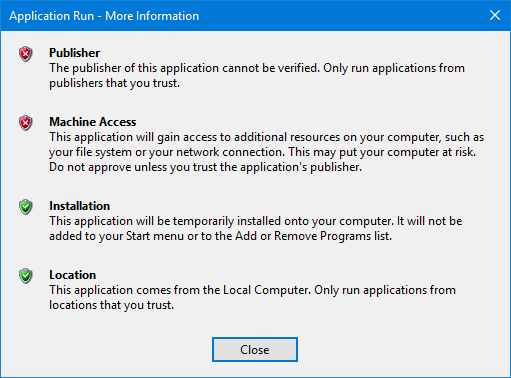
Application Run More Information (Publisher, Machine Access) window
- Click Run to continue to launch Enterprise Explorer.
Downloading of the application starts.
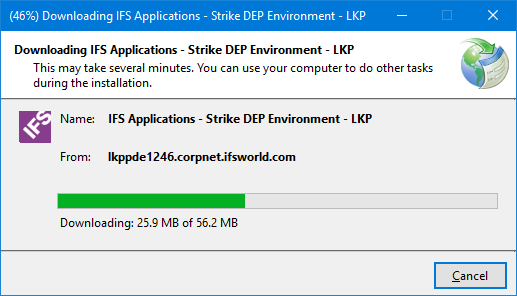
Downloading in progress
- Login to IFS Applications
After initial download, IFS Applications will automatically start.
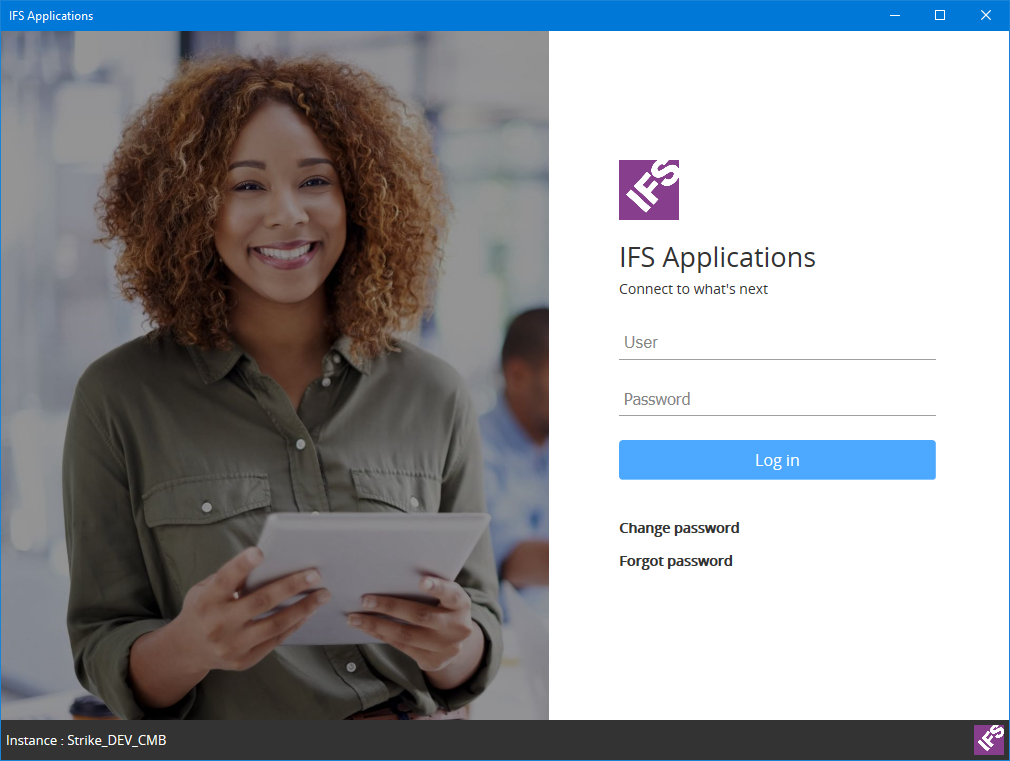
This is the IFS Applications logon dialog.
 |
If the logon dialog shows correctly you have managed to get the
deployment and signing ok.
To verify on-demand loading of features you need to logon as a valid
user and select a feature from the navigator. As the feature is loaded
from the server for the first time it will display a progress bar. The
feature is cached on the client. New deployment of client files on the
server will be detected at later logon. |
 |
Problem: Nothing happens when you use the link on the start web page!

The IFS Applications instance start page
Resolution: In Internet Explorer, open
Tools->Internet Options. On the Security
Tab, select the zone (typical Local Intranet) where the web page is
located and then click Custom Level. Make sure
settings under ".Net Framework-reliant components" are set to Enable "Run
components..."
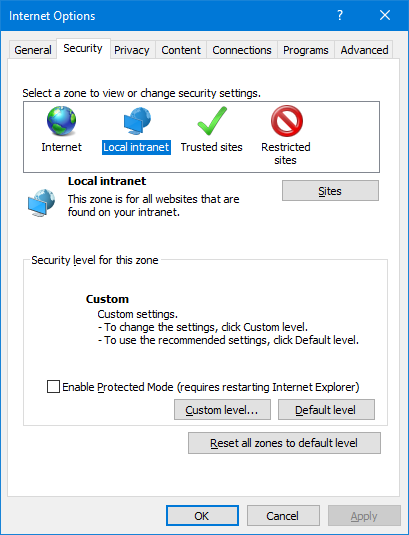
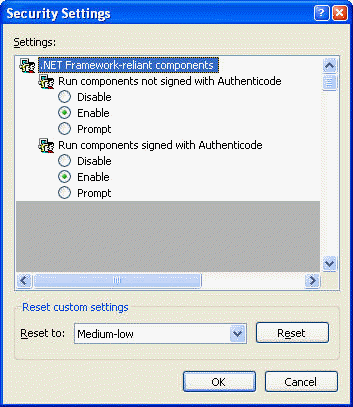
Internet Explorer Security settings for .Net components
|
| Problem: Errors when starting the application.

An error occurs when you start the application, either
from the web page or from the Start Menu shortcut
Analysis: This is most likely caused by an update of the application files on the server,
without rebuilding and resigning the application manifests
Resolution: re-sign the manifest using the sign tool
f1mage.exe as described
above.
If the error Details
shows as below:
ERROR SUMMARY

	Below is a summary of the errors, details of these errors are listed later
	in the log.

	* Activation of
	http://lkpgseapp57.corpnet.ifsworld.com:58080/client/runtime/Ifs.Fnd.Explorer.application
	resulted in exception. Following failure messages were detected:

	+ Downloading http://lkpgseapp57.corpnet.ifsworld.com:58080/client/runtime/Ifs.Fnd.Explorer.exe.config
	did not succeed.

	+ The remote server returned an error: (404) Not Found.
there is a problem
with the web server blocking this file from being downloaded. By default
Microsoft IIS does not allow download of .config files.
Configure your server to unblock any
restricted file extensions used by the application, such as .exe, .dll, .config.,
.manifest, .application. For more details see
ClickOnce FAQ.
One way of allowing the .config file to be downloaded is to use this
web.config file at the root of your web share folder:
<configuration>

	  <system.web>

	    <!--

	    Remove the *.config handler so that we_can serve up

	    *.exe.config files, but make it forbidden to serve up the

	    web.config file itself.

	    -->

	    <httpHandlers>

	      <remove verb="*" path="*.config" />

	      <add verb="*" path="web.config"


	type="System.Web.HttpForbiddenHandler"/>

	    </httpHandlers>

  </system.web>

	</configuration>
|
| Problem: Error when starting an Online application from the
publishing location. Analysis: The System Administrator chooses to deploy the application as an
Installed application and end users installs the application and runs for a
period of time. The System Administrator then chooses to change the deployment
setup to use Online mode. End users having the application installed now
tries to run the Online application from the publishing location. This will
fail, unless the end user first uninstalls the application using
Add/Remove Programs
in Control Panel .
|
|
Problem: Link IFS Applications - <Instance Name> exists in start page but do not execute.
Analysis: In
Windows 2003 Server, IE runs Enhanced Security settings as default and the
setting "Display enhanced security configuration dialog" is NOT Enabled.
This means that end users will get no warning on "Trusted sites".
Resolution:
Enable "Display enhanced security configuration dialog" OR add the site as a
“Trusted site" |
Problem: When you click Create Test Certificate, a dialog pops up
asking for a Password/Confirm Password.
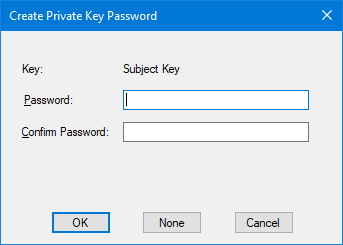
A dialog pops up asking for a password when you click on the "Create
Test Certificate"
Analysis: This
is a result of a Microsoft introduced bug in cryptAPIs which forced us to
use external SDK tool makecert.exe to create test certificates.
Unfortunately makecert.exe being a command line tool, shows this UI and
there is no way to suppress it and go with a blank password.
Resolution:
Click on None leaving Password/Confirm Password fields blank. When
you click Sign & Exit another dialog will pop up asking you to
enter password to open the created test certificate file. This should also
be kept blank and click OK.

A dialog pops up asking to enter password to open the created test
certificate. |
|
Problem: Errors occur if you have the same deployment “IFS
Enterprise Explorer 1.x”
installed on two different publish locations and run them side by side which
are signed with the same certificate.
Analysis: This
problem will occur if you have the same deployment “IFS Enterprise Explorer 1.x” installed on
two different publish locations and run them side by side. If the same
certificate is used it may lead to inconsistencies in the download cache on
the end user machines. The second deployment, when started (downloading)
overwrites parts of the first deployment.
Resolution:
It is necessary to use different
certificates for different environments without duplicating and signing with
the same certificate. |
|
Problem: Error occurs when trying to Sign & Exit with a
certificate signed by your own Certificate Authority.
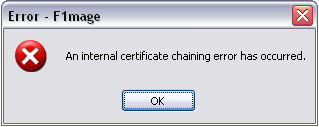
An error occurs when signing with a certificate signed
by your own Certificate Authority
Analysis:
If you want to use a certificate signed by your own Certificate Authority,
the Certificate Authority must be added to the Trusted Root Certification
Authorities on the target computer. Else this error message is shown.
Resolution:
Add the Certification Authority to Trusted Root Certification Authorities on
the target computer using the Certificate Manager Tool (Certmgr.exe). |


