This document describes each of the steps in the IFS Analysis Models Installer and what happens when running it.
The IFS Analysis Models Installer is not intended for re-configuration of existing installations. The installer however supports a scenario where a set of steps are initially performed and then later an additional step as e.g. deploying SSRS (SQL Server Reporting Services) reports is performed.
Note: The following prerequisites are related to IFS Analysis Models Installer and not to the IFS Analysis Models in general
Note: There are some manual tasks to consider before using the installer. See the configuration documentation for information.
The computer running the installer must also have SQL Server installed.
The installer (IFSBIAPInstaller.exe) can be
started from the
IFS Build Home. The file is
located under
<IFS Build
Home>external\BIAnalysisPackage\Installer.
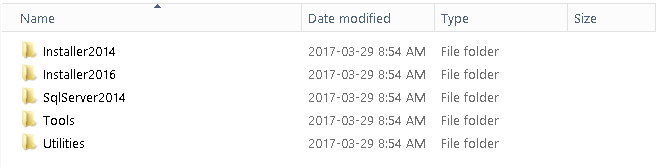
There are two IFSBIAPInstaller.exe files valid
for SQL Server 2014 and SQL
Server 2016. The file are stored in folders Installer2014
and Installer2016 respectively.
Note that the folder SqlServer2014 contains files that support both SQLServer 2014 and 2016.
Run the installer as an administrator. Write permission to sub folders under <AM Instance Home> is needed.
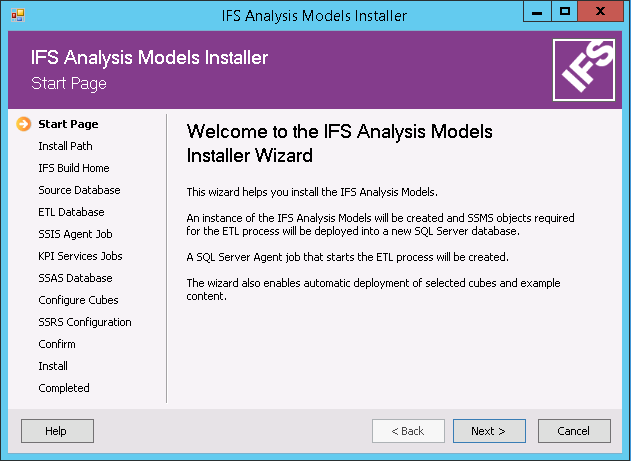
The installer is built as a wizard that will guide you through the installation.
The status of each step is displayed in the left hand side navigator. The following symbols are used:
| Symbol | Meaning |
|---|---|
|
|
Current step |
|
|
Step ok |
|
|
Step not defined |
|
|
Step partly defined |
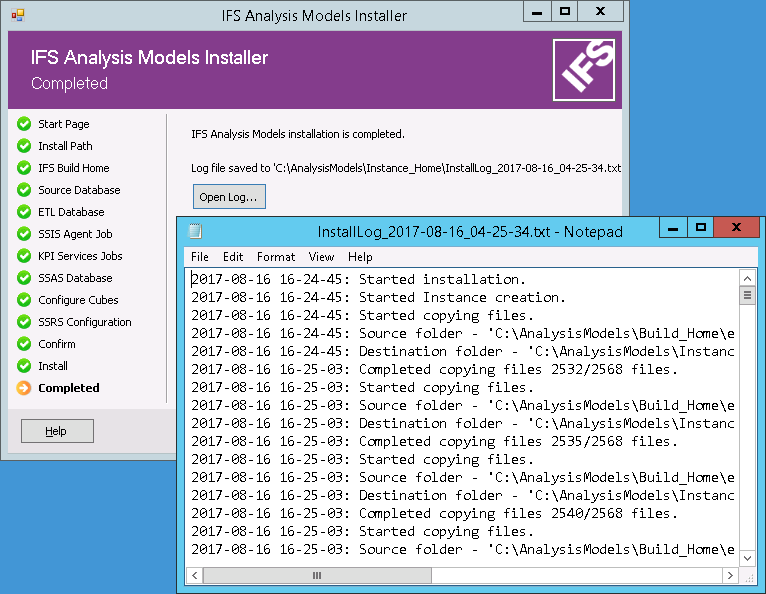
After input of all necessary data, a confirmation is done and then the installation is started. Each step during the installation will be logged on screen as well as on file. When the installation is ready the Completed step will be highlighted.
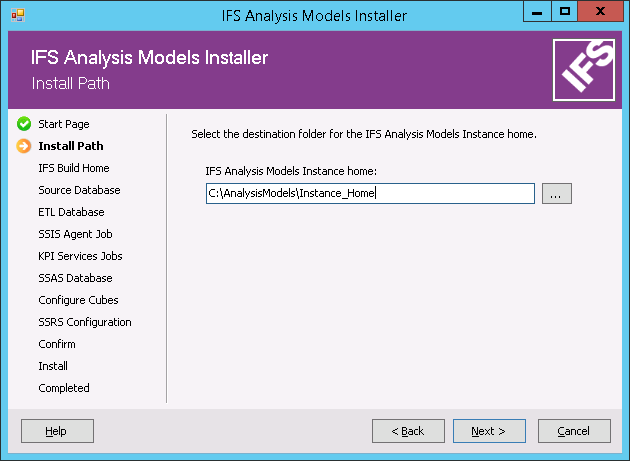
The IFS Analysis Models Instance home is the folder where all files will end up when running the IFS Analysis Models Installer.
This is the folder from where installations should be made.
The files in the AM Instance Home will be modified with data entered through the installer. Some examples are the name of SQL Server Initial Catalog and connection details.
Choose an empty folder of your own choice.
When pressing Next the following dialog will appear if a AM Instance Home has not yet been created:
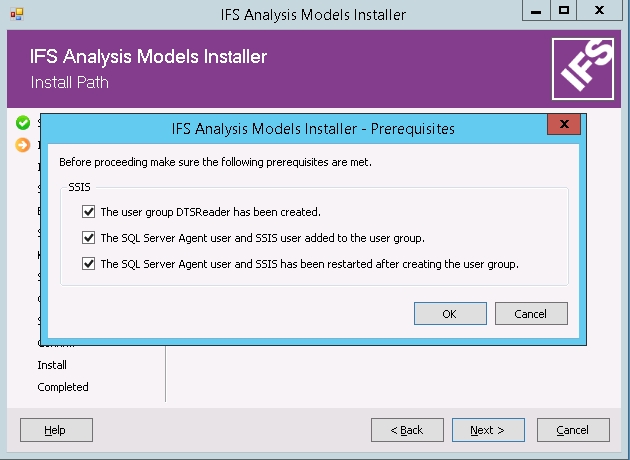
The purpose with this dialog is to highlight some installer prerequisites.
Please make sure that the listed prerequisites are fulfilled before continuing the installation.
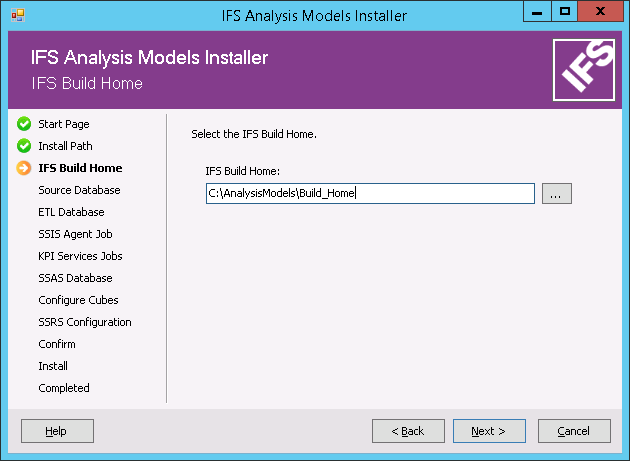
Enter the IFS Build Home, i.e. the output after running the IFS Configuration Builder.
The IFS Build Home contains the consolidated set of files from the chosen Analysis Models components.

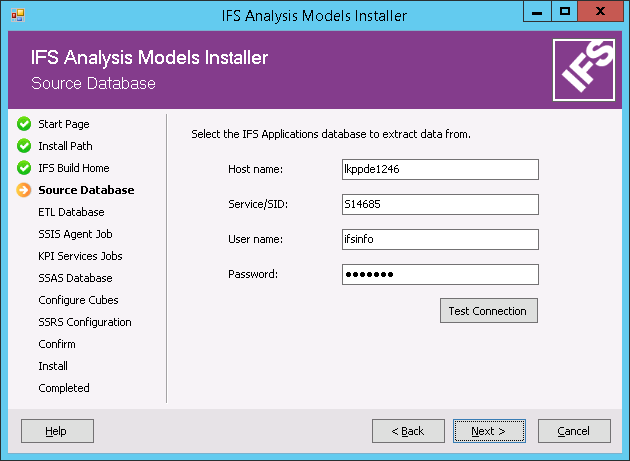
The Source Database is the IFS Applications Oracle database used when loading data into the Data Warehouse.
Enter all connection details to the Oracle database and test the connection before proceeding to the next step.
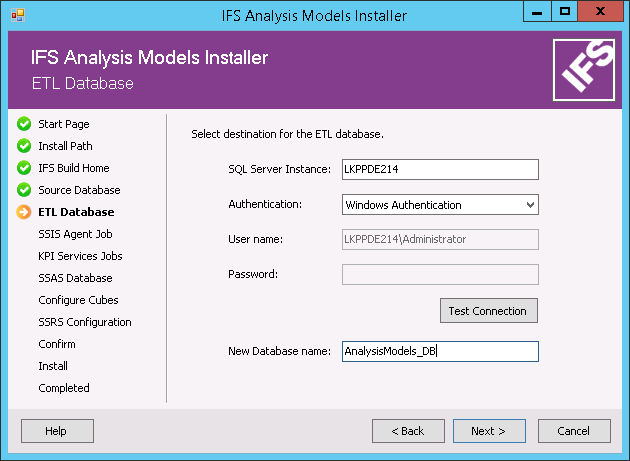
The ETL Database is the database in SQL Server where the all ETL tables will be created.
Choose the SQL Server Instance of your choice.
Enter the name, authentication method and credentials for that database.
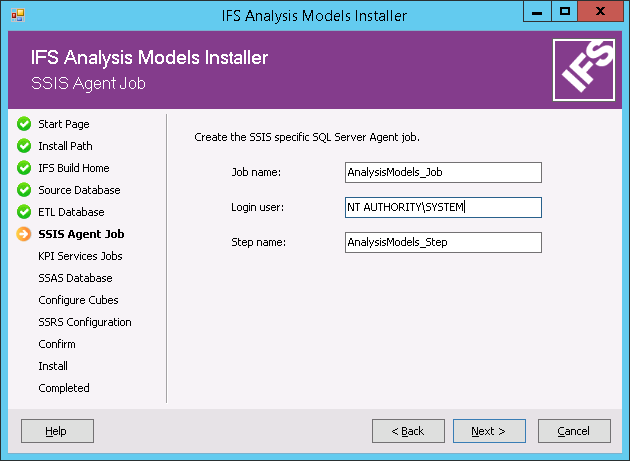
In the SSIS Agent Job tab, enter job name, step name and the user that will own this SQL Server agent job.
The Login User is the owner of the agent job. NT AUTHORITY\SYSTEM is entered as a default value that should work in many situations.
It is required that the owner of SSIS related jobs represents an account that is in the sysadmin fixed server role. This means that SSIS package steps will be executed under the account used by the Sql Server Agent service. IFS Analysis Models can only handle this situation.
If a Proxy Account is defined as the SSIS job owner when running the installer, then the execution of the job might fail. In order to make security for configuration files to work properly, the Windows services users for SQLServer Agent and SSIS should be users that are NOT created automatically, i.e. avoid users like NT AUTORITY\SYSTEM for these services.
The agent job can be set to run on a schedule by adding it to the the Agent job in SSMS.
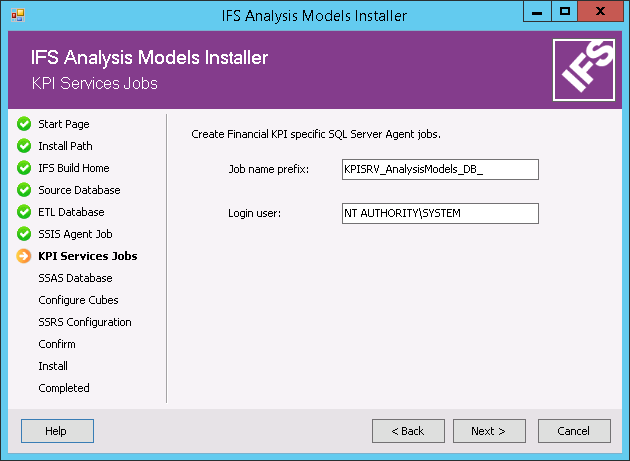
In the KPI Services Job tab, enter job name prefix and the user that will own this SQL Server agent job. This page will only appear of the component KPISMS is part of the build. The prefix is added to agent jobs that are related KPI Services functionality. Each instance of BI Analysis Package where KPI Services is included should have its own prefix to make it possible to distinguish the agent jobs that belongs to a specific instance. Assume that the prefix is given as KPISRV_Bi_Prod then the following agent jobs will be created by the installer:
Runs ETL job that transfers standard non-KPI specific information from IFS Applications to SQL Server. This information relates mainly to Company Groups that is defined as a part of the Financial KPI functionality but can be used without defining any Financials KPIs.
This job is always executed as a part of processing the OLAP Cube database.
Runs ETL job that transfers ALL data for all active BI sources from IFS Applications to SQL Server. This job will however not be started as part of the Financial KPI functionality. It will only be there as a safety measure. For more information see Special Considerations related to Financials KPIs
Runs ETL job that transfers ONLY General Ledger cube specific information from IFS Applications to SQL Server. This job is activated from IEE.
Runs ETL jobs that transfers non-KPI as well as KPI specific information, defined as a part of the Financial KPI functionality, from IFS Applications to SQL Server.
This agent job is activated from IEE when performing validation and publishing of Financials KPIs.
The Login User is the owner of the agent job. NT AUTHORITY\SYSTEM is entered as a default value that should work in many situations. It is required that the owner of SSIS related jobs represents an account that is in the sysadmin fixed server role. This means that SSIS package steps will be executed under the account used by the Sql Server Agent service. IFS Analysis Models can only handle this situation.
If a Proxy Account is defined as the SSIS job owner when running the installer, then the execution of the job might fail. In order to make security for configuration files to work properly, the Windows services users for SQLServer Agent and SSIS should be users that are NOT created automatically, i.e. avoid users like NT AUTHORITY\SYSTEM for these services.
Note: The agent jobs related to KPI Services should not be scheduled. They are triggered by functionality related to KPI Services
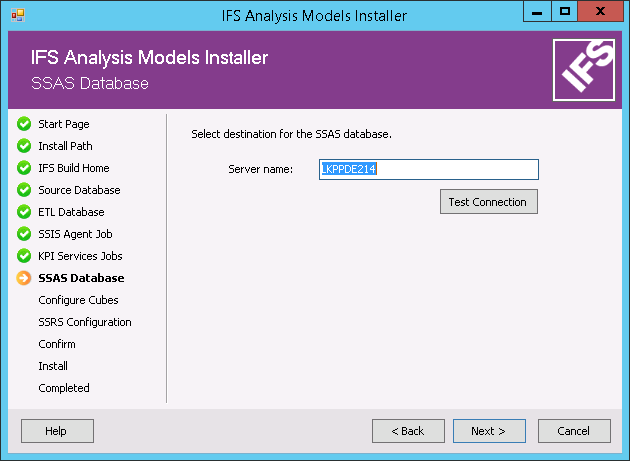
Enter the Server name which is the SQL Server instance where you want to have your SSAS database.
Test the connection before proceeding.
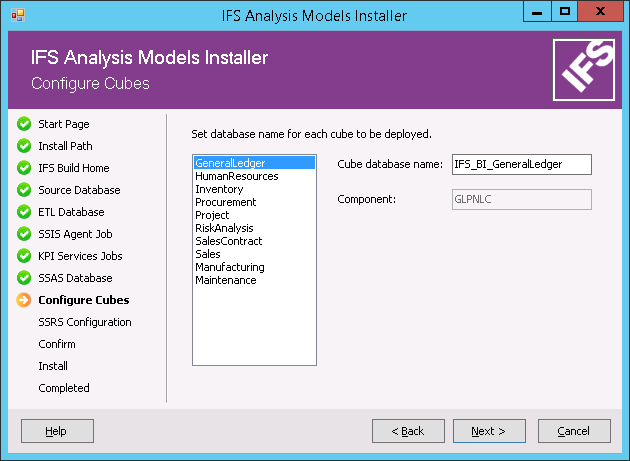
This step lists available cubes and enables modification of the Cube database name if the default names are not ok.
These names will be the initial catalogs used per cube in SQL Server.
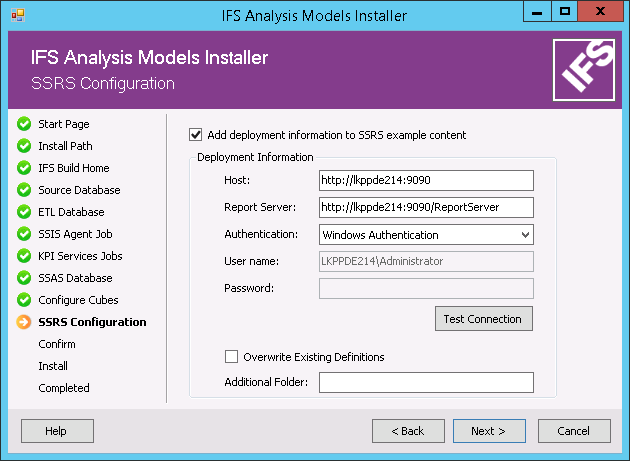
This step enables installation of example reports to SQL Server Report Server.
Select the checkbox, called Add deployment information to SSRS example content, to enable the input fields. These field are by default disabled to avoid unwanted installation of example reports.
Enter the host URL of the SSRS Report Manager. The Report Server will be automatically populated with the default Report Server name.
Optional: Select the checkbox Overwrite Existing Definitions if you would like to overwrite previously installed reports etc. with the same names on this Report Server.
Optional: Enter an Additional Folder to deploy the reports to a sub folder in SSRS.
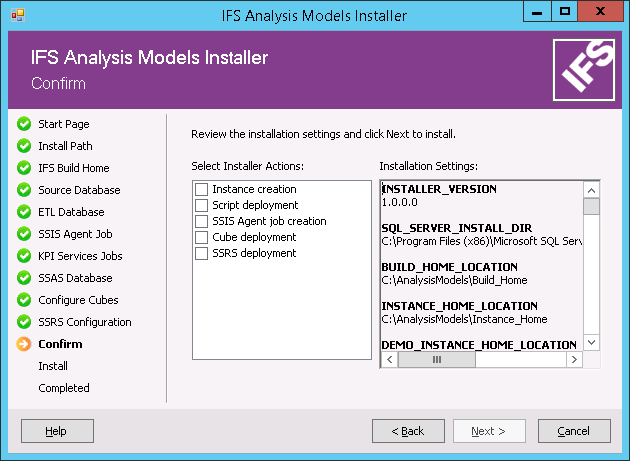
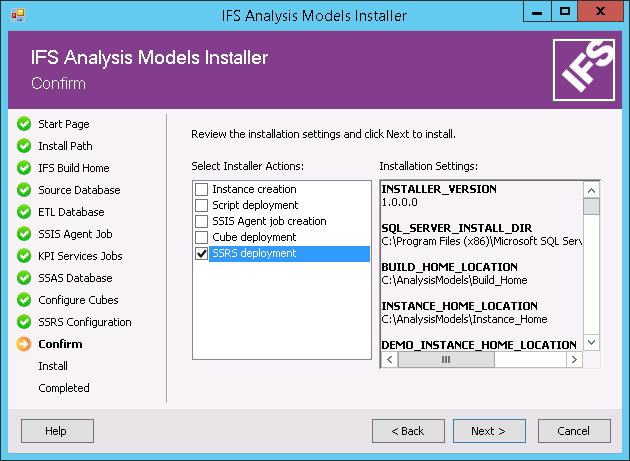
Check and verify the Installation Settings and select the Installer Actions to be performed by the installer.
The installer actions are independent of each other, but you will not be able to use the IFS Analysis Models without at least checking the following options or manually complete the installation afterwards:
If a non-mandatory step has been skipped totally or only partly defined, the associated installer actions will not appear in the list.
Clicking Next will start the installation.
When the installation of the selected steps is ready the installer looks as follows:
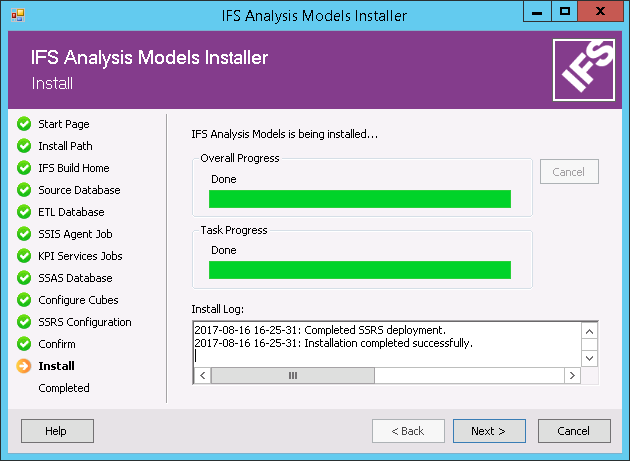
Click Next to complete the installation,
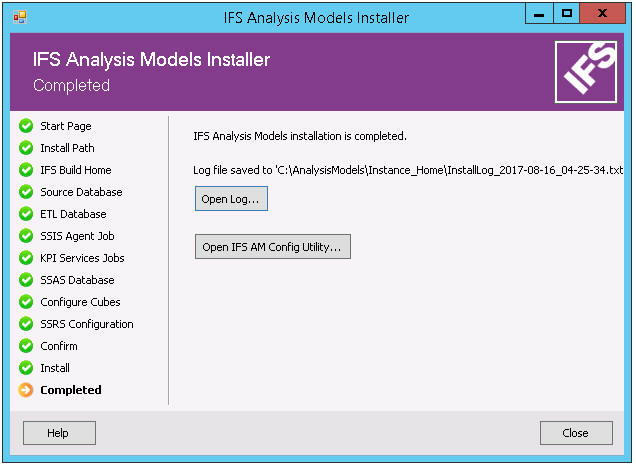
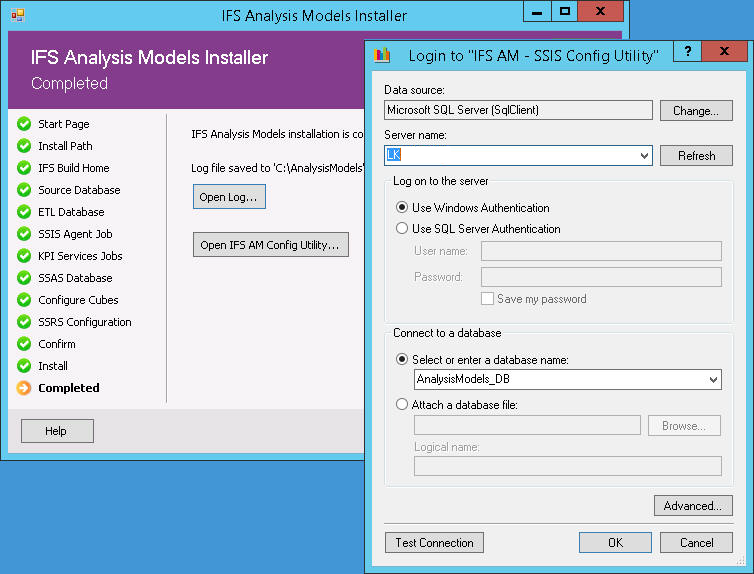
On this last page there are two options available:
Please refer to the document Analysis Models configuration for more information.
The installer also supports installation in step. One scenario could be:
The first part is handled as described in previous section.
Now the installer is started again and the existing instance home is selected.

Just click Next for steps that have already been executed.
In the SSRS Configuration step, define deployment information for the Report Server.

Go to the Confirm step and select the SSRS Deployment action..
Click Next to complete the installation.