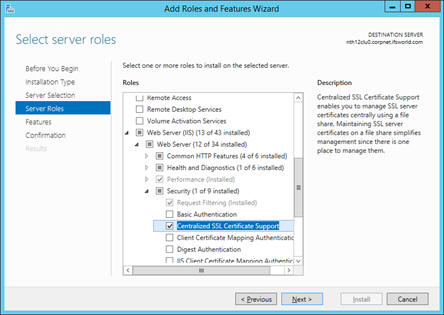
Helpful advice on setting up a web farm can be found from the following link http://www.iis.net/learn/web-hosting/scenario-build-a-web-farm-with-iis-servers
The TAS administration database must be visible to all servers in the web farm.
On Windows Server 2016 and up (all web servers), ensure that "Centralized SSL Certificate Support" is installed, which is typically found in the Add Roles and Features Wizard.

The File Server is used to hold the shared website and IIS configuration. Install on the file Server as if installing on a single server. The File Server can become a single point of failure in the web farm. DFS Replication can be used to alleviate this problem.
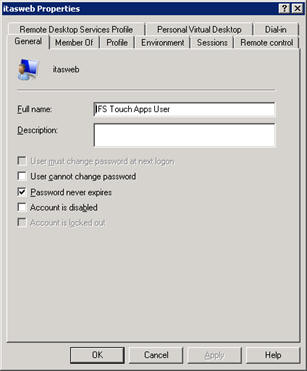
The Web Servers communicate with the File Server using file shares. If a Domain is not available to create a common user, local users with the same name and password can be created on the File Server and the Web Servers.
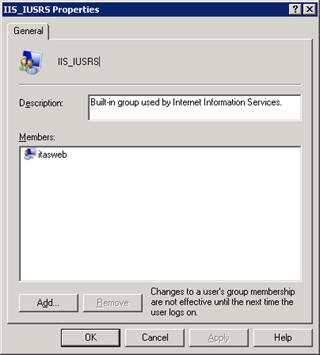
The common user must be added to the local group IIS_IUSERS.
The IFS Touch Apps Server Application Pool must be modified to run as the Common User instead of Network Service. In IIS Manager, navigate to the Application Pools and click Advanced Settings for the IFS Touch Apps Server.
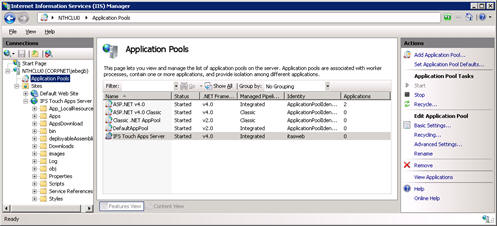
Change the Identity from the Built-in account NetworkService to the Common User (Custom account).
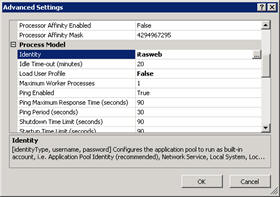
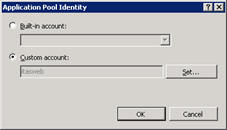
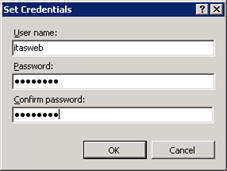
The common user must also be given access to the local machine certificate store through IIS. Run (as Administrator) the following command
%windir%\Microsoft.NET\Framework\v4.0.30319\aspnet_regiis.exe -pa IFS_TOUCHAPPS_SERVER <common-user>
The TAS Installer creates the web content in C:\inetpub\IFS Touch Apps Server. This folder must be shared so that the web servers can access it. The share name must not include spaces so use the folder properties Advanced Sharing form to create the share.
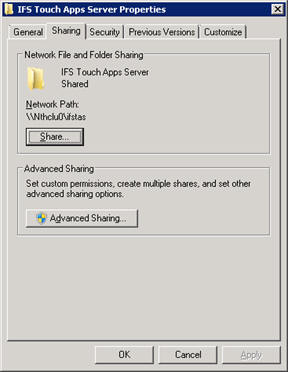
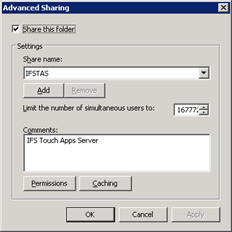
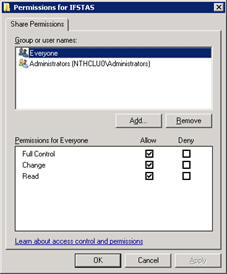
The Share permissions are open. Security is imposed using the Folder Security properties.
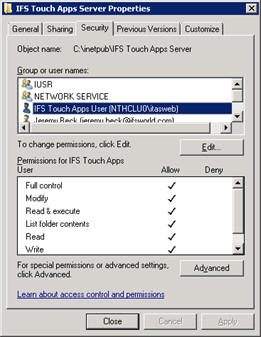
Using IIS Manager, modify the IFS Touch Apps Server web site to access its files using the shared folder using the credentials of the common user.
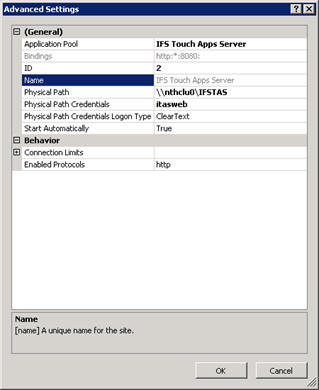
Restart the IFS Touch Apps Server Application Pool and check that the web site still works.
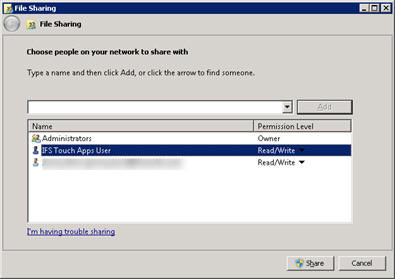
On the File Server create a folder C:\Config and share it with the common user. As the folder name does not contain spaces, the simplified File Sharing form can be used.
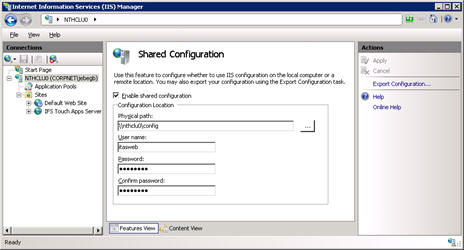
In IIS Manager, use the Shared Configuration feature and Export Configuration to the Shared Folder. Then enable Shared Configuration using the shared folder.
Restart IIS and check that the web site still works.
The IFS Touch Apps Server Certificate must be exported from the File Server and shared so that it can easily be imported on each Web Server. Using the Microsoft Management Console (mmc.exe), add the Certificates snap-in for the Computer account, managing the Local computer and browse to the Personal Certificates.
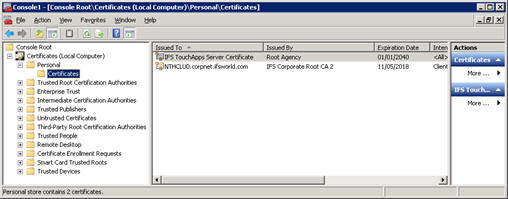
Right click the IFS TouchApps Server Certificate and select Export (beneath All Tasks). This starts the Certificate Export Wizard. Choose to export the private key and enter a password. Create a shared directory for the export file (you need read access to import the certificate on the web servers). Click Finish to export the certificate.
Install IIS on the web server as detailed above. If using a local common user, create it and add it to the IIS_IUSERS group. Using IIS Manager, enable Shared Configuration on the IIS Server. Restart IIS Manager and restart IIS. Check that the web site is served by the new web server.
Using the Microsoft Management Console (mmc.exe), add the Certificates snap-in for the Computer account, managing the Local computer and browse to the Personal Certificates. Right click Certificates and select Import (beneath All Tasks). This starts the Certificate Import Wizard. Navigate to the shared folder and change the filter to Personal Information Exchange. Select the certificate file you previously exported and enter the password.
The common user must also be given access to the local machine certificate store through IIS. Run (as Administrator) the following command
%windir%\Microsoft.NET\Framework\v4.0.30319\aspnet_regiis.exe -pa IFS_TOUCHAPPS_SERVER <common-user>
A Load Balancer is used to distribute client requests between the Web Servers. The Load Balancer may be implemented as software or in hardware. The Load Balancer is another single point of failure in the web farm.
Touch Apps requests require Client Affinity, i.e. all requests from a client (in a session), must be handled by the same server. If a client is routed to a different server, they must re-authenticate. Many Load Balancers (including Microsoft's ARR) use cookies to implement Client Affinity. Most Touch Apps clients do not support cookies yet. This can affect your choice of Load Balancer.
For ARR installations please refer to the next section for installation guidelines.
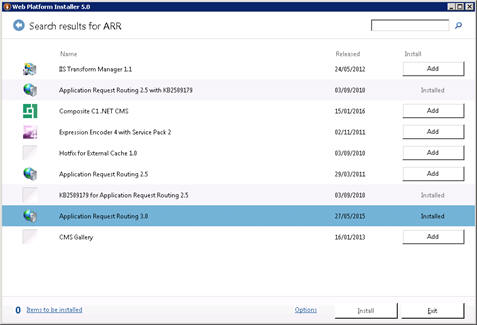
Install IIS on the Load Balancing Server as detailed above. Afterwards, install the latest version of Application Request Routing (ARR), which can be downloaded from IIS.net. Note that URL Rewrite is a prerequisite, see also the section OWASP configuration changes.
Alternatively, if you already have the Web Platform Installer, you can use that to install ARR.
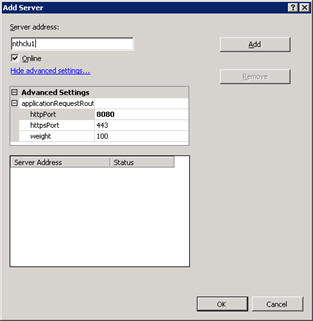
Using IIS Manager, create a new Server Farm and add each Web Server to the farm. Use the Advanced Settings to specify the outgoing HTTP port number.
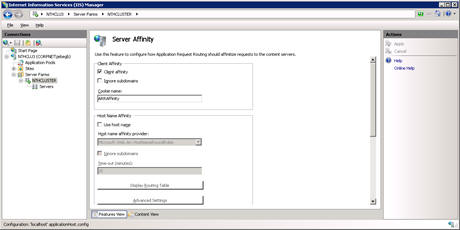
Use the Server Affinity feature to enable Client Affinity.
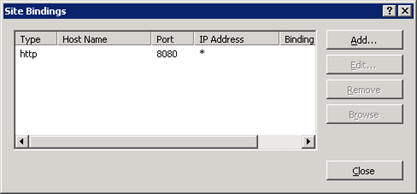
Edit the Bindings of the Default Web Site to change the port number from 80 to 8080.
Restart IIS and check that the Load Balancer works. Note that Client Affinity will not work unless the machine name in the URL contains a ".". Use the full machine name in the address.
As all file content and web site configuration is shared from the File server. Just upgrade the installation on the File Server and the rest of the web farm will pick up the modifications automatically.
The Customer Portal allows a sign in as a Local Administrator. In a clustered web farm, there is no sensible definition of Local. In a web farm, Local Administrator sign in can only be achieved using the IFS Touch Apps Authentication Web Service. The machine used to host the Authentication Web Service is the Local machine. This is another single point of failure.
The Web Deployment Package for the Authentication Service can be found in the AuthenticationService folder in the TAS installation.
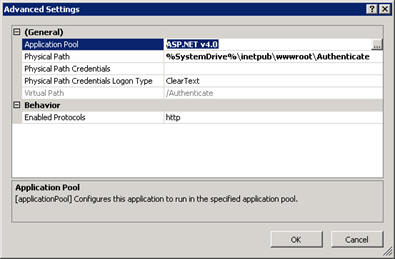
By default, Web Deploy installs the Web Service on your File Server (or another Web Server) as the Authenticate application under the Default Web Site. In IIS Manager, use Advanced Settings to change the Application Pool for this application to ASP.NET v4.0 (or .NET v4.5).
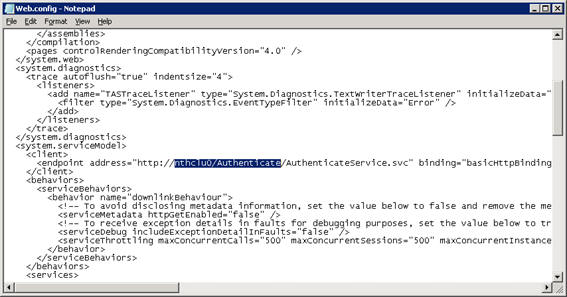
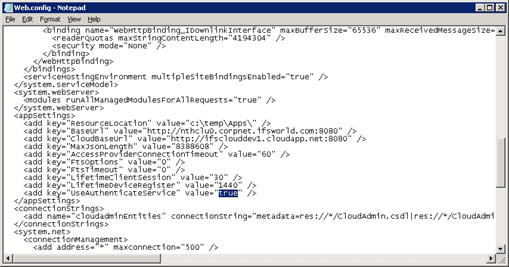
The Touch Apps Server Web.Config file must be changed so that it passes all authentication requests to the Authentication service.
Change the endpoint for the Authentication Service to the correct machine and application name.
Change the UseAuthenticateService key value to true.
Note 1: You must repeat these changes every time you upgrade the Touch Apps Server.
Note 2: The section does not apply if the user logs into the Customer Portal using OpenID Connect. The section only applies if the user chooses to login to the Customer Portal in "Local Admin" mode.
For Push Notification, IFS Apps Server is informed how to call the TAS using the BaseUrl setting in Web.Config. This URL should identify the TAS Load Balancer. You must repeat this change every time you upgrade Touch Apps Server.