| Foundation1 / Administration Guide / Integration / Ifs Applications Business Components / Riva Integration / |
The purpose of this page is to provide information about installation steps for the integration between IFS Applications and the third-party product RIVA. From IFS Applications, a component called CCTI (Calendar, Contact and Task Integration) is developed to provide a generic integration framework to integrate with RIVA. RIVA enables server-side, two-way, synchronization of appointments, tasks, contacts, leads, etc. between supported E-Mail system and IFS Applications. More information about RIVA can be found in http://www.rivacrmintegration.com/
In this implementation we only support for RIVA on premise solution.
Download and install RIVA following the RIVA instructions:
http://kb.omni-ts.com/entry/16/
Once completed, please continue with these steps:
For RIVA On-Premise system requirements refer http://kb.omni-ts.com/entry/397/
Note: Give the RIVA folder path in the setup wizard where you have installed RIVA.
All IFS users who will synchronize need to have the permission set
CCTI_RIVA_SYNC_USER granted
(Refer
section
Security for more infromation).
The Riva SDK setup
should be done with a system user with the same access as above.
After the installation, you have to do the necessary configurations of RIVA
using Riva.exe (located in RIVA installation
folder).
Configuration mainly consists of the following,
Open Riva.exe and Create new SDK connection.
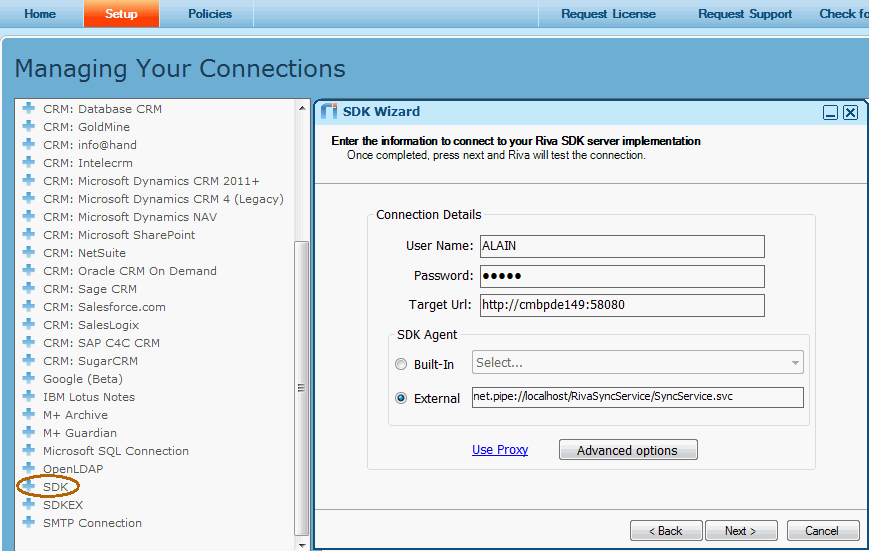
User Name: Enter the IFS user name and password.
Note: This is a very powerful system privilege that should not be given to normal user accounts.
Target URL: Enter the IFS Application server URL.
External: Location of the Sync Service is running. The
string used is: net.pipe://localhost/RivaSyncService/SyncService.svc
Once the setup of the SDK Wizard has completed, we need to fetch the current schema to RIVA. Double click on the SDK connection you just created and click on the Connection Test tab.
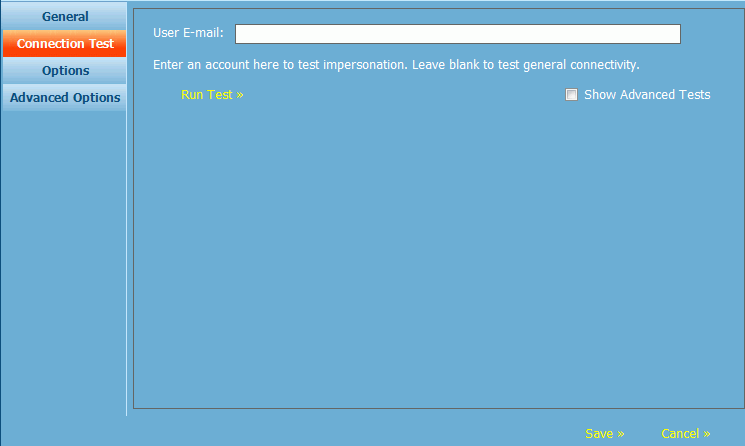
Click Run Test which if successful shows a message box
with the text Test succeeded.
Please note that this step is needed every time a new schema has been set to
Active in IFS as it will refresh the schema configuration. The second step is to refresh the configuration in
RIVA
which is done by clicking on the Options tab.
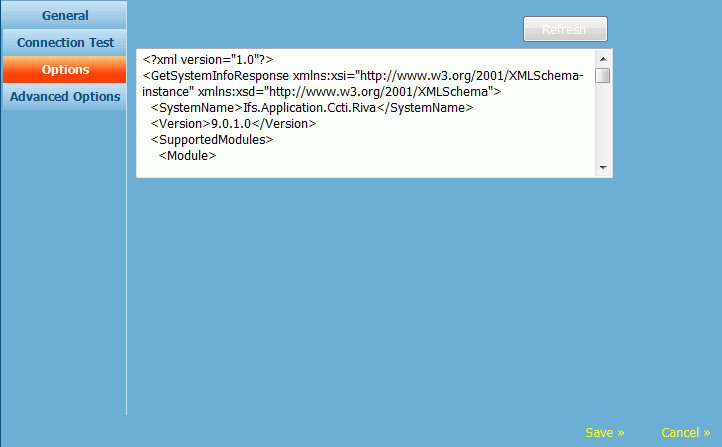
Click Refresh to load the configuration from IFS to RIVA.
Note: The above process, to both test the connection and refresh the option needs to be completed every time a Sync entity has been added or a schema has been activated or de-activated in the Integration Schema window.
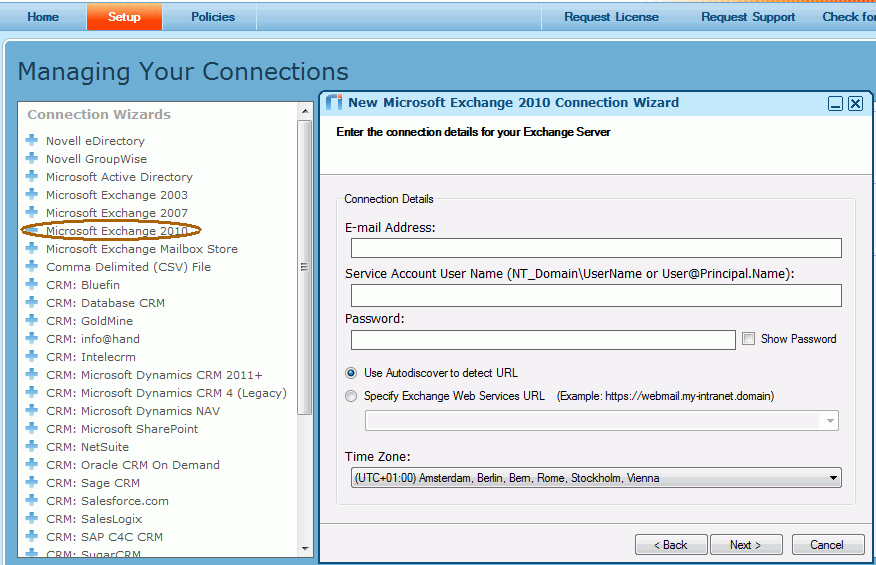
Add a connection against the e-mail system which you are
using. Master account with access/impersonate rights to all user accounts is
required.
Following is from Microsoft Exchange 2010 connection.
Follow the instructions at
http://kb.omni-ts.com/entry/947/ in order to configure your IBM Notes sever
before creating the below connection.
After configuring your server, create the IBM notes connection from
Riva.exe. Master account with access/impersonate
rights to all user accounts is required.
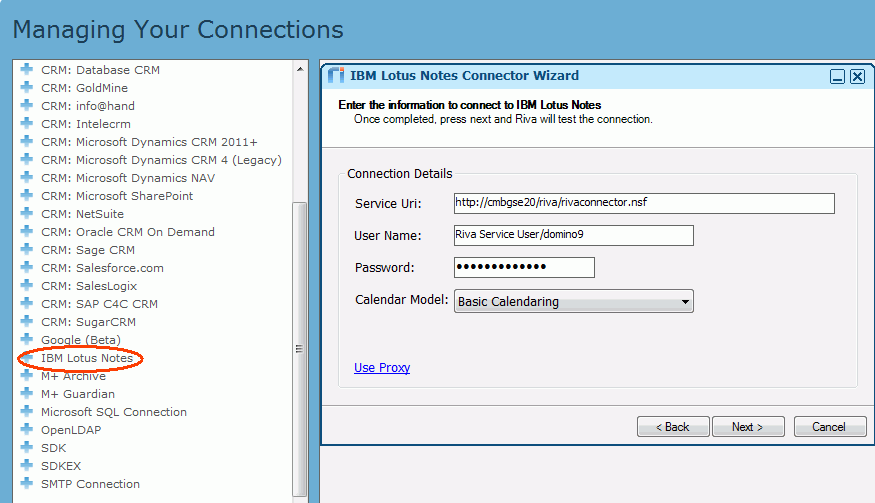
Service URL – Sever URL where RIVA connector is installed.
User name – You need to provide a user who will be able to access the target
mailboxes that you want to sync. Usually this is a dedicated RIVA service user.
A RIVA policy is needed to configure how and what should be synchronized between e-mail systems and IFS. Also you can schedule the times to synchronize.
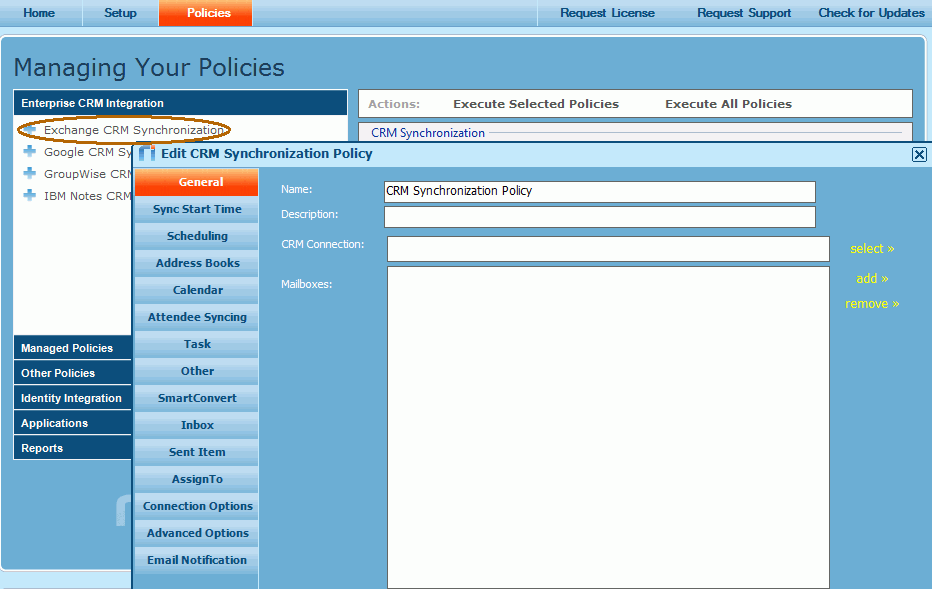
You can quickly set up a policy by entering/configuring basic settings. In the current implementation we support following tabs in policy setup,
General – Select the SDK connection and add mail boxes.
Sync Start Time – Configure the initial synchronization date and time.
Scheduling – Schedule the times to synchronize.
Address Books – Configuration about contacts and lead contacts.
Calendar – Configuration about Appointments.
Task – Configuration about Tasks.
Other – Configuration about other entities such as Opportunities.
Connection Options – Define the connection type ex: Impersonation.
Advanced Options – Use this in order to add custom options.
Refer more information at http://kb.omni-ts.com/entry/476/ on how to configure a sync policy.
Note: Number of values can only be set when the policy is created and cannot be changed.
There are some configurations that need to be done on the IFS Applications as well.
By default, permission set CCTI_RIVA_SYNC_USER is granted
with the Database Objects necessary for the synchronization.
Following CCTI
Database objects are granted to the role.
CctiIntegrationSchema (Query Access)
CctiIntegSubSchema (Query Access)
CctiIntegSchemaField (Query Access)
CctiIntegrationCommon (Full Access)
CctiIntegrationLog (Full Access)
CctiIntegPackAreaField (Full Access)
CctiIntegPackageArea (Full Access)
All CctiSync% LUs (Full Access)
According to the RIVA configuration, you can grant Sync entities which will be used in integration.
|
Sync Entity |
RIVA module |
|
CctiSyncContact |
Contact |
|
CctiSyncLead |
Lead |
|
CctiSyncTask |
Task |
|
CctiSyncAppointment |
Appointment |
|
CctiSyncAttendee |
Attendee |
|
CctiSyncOpportunity |
Opportunity |
|
CctiSyncUser |
User |
|
CctiSyncOrganization |
Organization |
RIVA expects to have a column to fetch the last modified value of IFS records. This column should contain the modified date of the record in the UTC time zone. In IFS, we use row version or last modified (separate column) to store the current date and time. This value will be converted to the UTC time zone in the Sync views. In order to find out the UTC value, you need to specify the correct DB time zone in the Object Property tab of the System Definitions window (by default this will be empty).
See below picture:

You can find the valid time zones in the ISO Code Usage window.
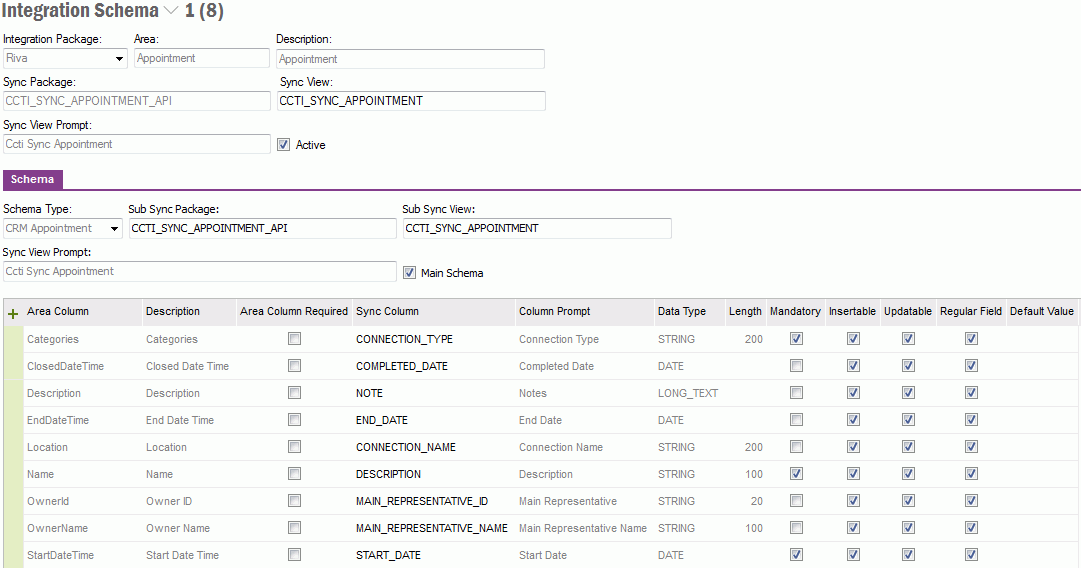
Since IFS fields and RIVA fields differ, we need to create a translation
mapping between them. This mapping will be used in every synchronization cycle.
There is a window to map the fields. A default mapping is inserted during the
installation of the component. Add/edit the mapping according to your
requirements and select the Active check box in
order to use the schema in synchronization (after activate, follow the steps in
Refreshing the schema and configuration).
In order to limit the no of log entries in the Integration Log window, object
property DETAILED_LOGGING defined in Application Base Setup/System
Setup/System Definitions – Object Property tab, can be used.
DETAILED_LOGGING = TRUE : All details are logged to CCTI_INTEGRATION_LOG_TAB
DETAILED_LOGGING = FALSE: Only errors are logged to CCTI_INTEGRATION_LOG_TAB
In order to clean up the records
in the Integration Log window, a database task
will be created by default. Change the DAYS_TO_KEEP_ parameter value according
to your requirement. This parameter will be used to delete the log records older
than the value mentioned. Using this database task, create a schedule to
automate the deletion of the log records periodically.
To enable more extensive logging from the IFS service
library, you can edit the file Ifs.Application.Ccti.Riva.dll.config.
Find the line which specifies the log level, typically something like:
<level value="INFO"/>
And change the value to DEBUG and restart the
Omi
Riva SDK Sync Service Windows service.
It is also possible to get more details in the RIVA log files by following the
instructions here:
http://kb.omni-ts.com/entry/67/