| Foundation1 / Development Guide / User Interface / Ee Dev / Apf Development / Develop Dialog Box / Index Itd / |
Add a dialog to your project by using the Dialog Window template. For detailed information about how to add a project item read Add items to your project.
dlgExchange.Note: A new dialog box class has two buttons by default,
the OK button and the Cancel button. The dialog box also has two FndCommands by default, that are connected to
the
corresponding push button. The dialog box will have two event handler methods
created for the Execute event in each FndCommand. The
methods are commandOk_Execute and commandCancel_Execute.
The Execute event is fired when a pushbutton is pressed and the
event handler methods will be called. Default implementation of these methods
are to call Sal.EndDialog. Closing the dialog box should always be done through
a call to Sal.EndDialog.
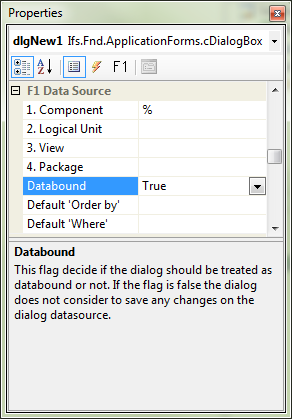
The default for a dialog in APF is to require a data binding. However, it is
quite common to use dialogs which should not have a data binding. The cDialogBox
has a property called Databound. The property
can be set using the property window when you have opened the dialog box in the
Visual Studio designer. By default the property is set to
True.

When the property is True, a field on the dialog must be connected to an SQL column to be editable. By setting the Databound property to False all fields on the dialog will be editable in runtime, without having to be connected to an SQL column. Furthermore all framework logic that handle saving of changed data are disabled when Databound is False.