| Foundation1 / Development Guide / User Interface / Ee Dev / Apf Development / References / Apf Application Activities / |
Some controls in the APF framework can be enriched by adding graphics to enhance the user experience. This page describes the steps to add these graphics to your project.
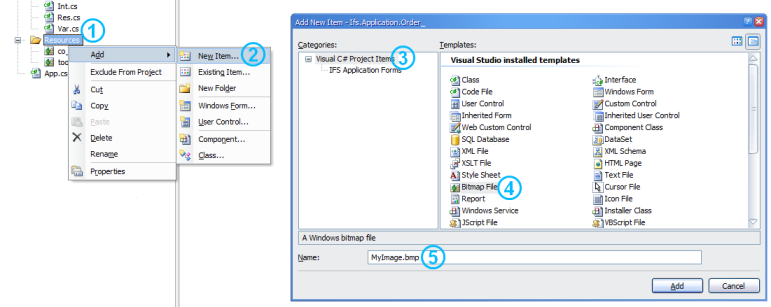
The first step is to add an image resource to the project. The instructions below creates an empty image in the Resources folder, that can be modified afterwards.
Figure 1: Adding a new image to the project.
Note: Images you already have on disk can be added directly by choosing Add -> Existing Item... Make sure to set the Build Action for the image to Embedded Resource.
The next step is to add a SalResource that the APF framework can
use.
Res class in your project. For ported projects this
class is usually located in the Res.cs file
in the Globals folder. Res class, you can add it to the project. To
make it work, the class must be called Res and it must be in the
default namespace of the project.Res class, add a public static
instance of a SalResourceImage for an image resource as added above.
	namespace Ifs.Application.Order_
{
    public sealed class Res
    {
        public static SalResourceImage bmpMyImage = new SalResourceImage("MyImage.bmp");
    }
}
Figure 2: Example of a
SalResourceImage instance added to the Res class.