| Foundation1 / Development Guide / User Interface / Ee Dev / Layered Application Forms Dev / Customization Examples / |
This section describes how you customize an existing form window by adding a cColumn to it.
The example is using the steps described in A Simple Client Customization as base, followed by additional steps for adding the column.
A Simple Client Customization getting a customized form window named tbwCustomerInfoOverview_Cust.
Note: Customize the tbwCustomerInfoOverview table window instead of frmPersonInfo form window which is used for example above

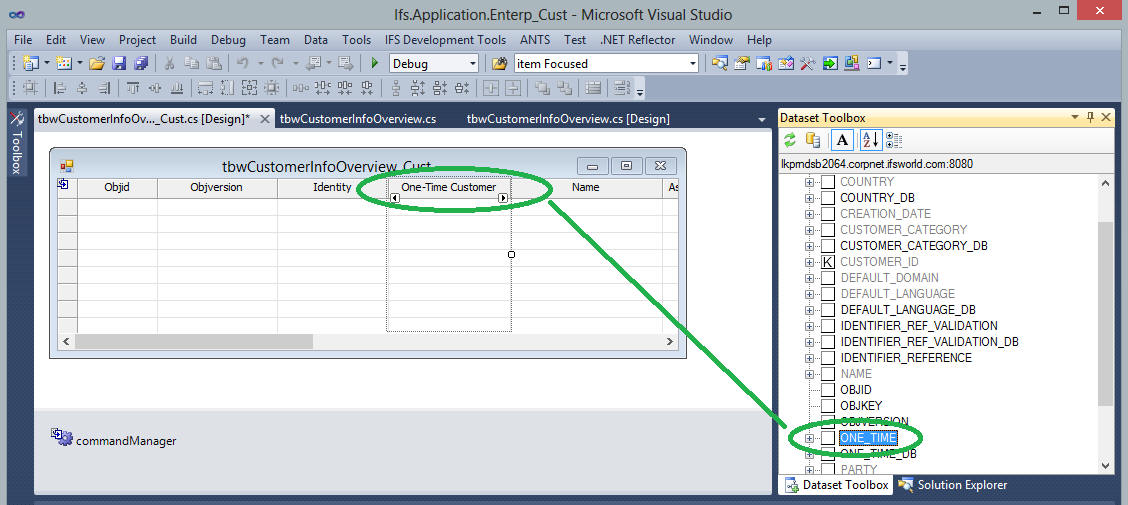
Example: Shows how column ''One-Time Customer'' is dragged from the Dataset
Toolbox into the Design area of tbwCustomerInfoOverview_Cust
Your column should now be available on the customized table window.
You might encounter having added a column like in the example above, placing
it between two other columns e.g. 'Identity' and 'Name' but when run, getting
the column placed at the very end on the table window. This is probably due to
having run the original table window earlier having it stored the column order
in the personal profile. Now when a new column in added, the personal profile
gets 'updated' by placing all new columns at the end.
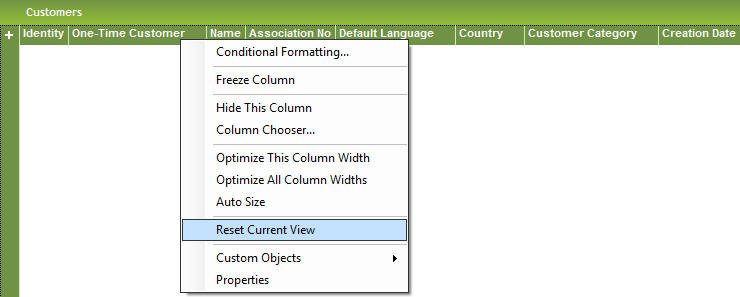
Solution: Ensure to 'Reset Current View' for the table window making the
columns be shown in the same order as in design time.
