
This is the default identity provider which comes with IFS Applications. It implements the OpenID Connect protocol. When there is no other identity provider configured, database identity provider can be used to provide authentication. It authenticates against database identities. This is the reason for it to be called as database identity provider.
NOTE: Regardless of the Open ID Connect configurations to use other identity providers, admin mode logins will always use database identity provider
Database identity provider can be configured from the IFS Middleware Server Admin Console. To access the configuration, first you must login to IFS Admin console. Once logged in, navigate to Security section. which is located under Common tab. There, database identity provider configurations can be found under DATABASE IDENTITY PROVIDER tab.
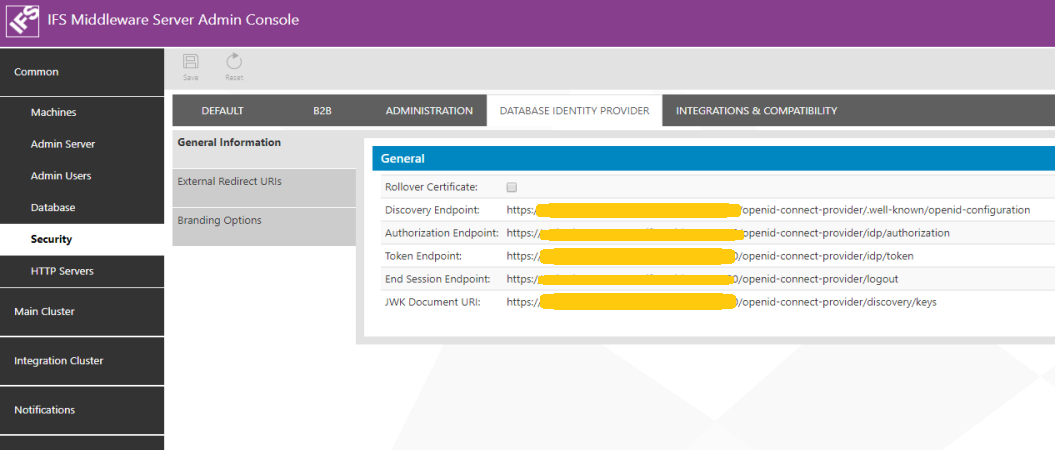
General information section will present important endpoints of database identity provider.
Database identity provider uses a certificate to sign tokens issued by it. This certificate will be auto renewed when it is expired or about to expire.
NOTE: "About to expire" is defined as when certificate expiration falls within 1 day at the time of it being accessed. Automatic rollover happens at the time certificate is being accessed.
Certificate is stored in the database. For some reason if you think it is compromised, it can be renewed through IFS Admin console.
NOTE: Certificate rollover can take considerable amount of time
To rollover a certificate tick the Rollover Certificate box. Then press the Save button
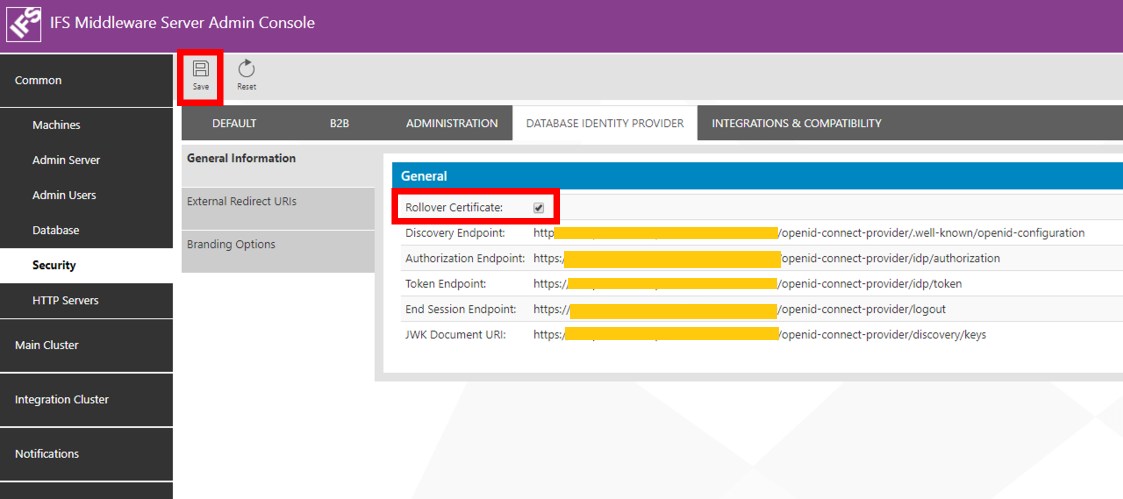
This will bring up a dialog box to confirm the rollover action

Accepting the dialog will rollover the certificate. A dialog will pop-up once the action is completed

Note that certificate rollover will invalidate currently issued tokens. So it will make already logged in clients to re-authenticate.
OpenID Connect protocol requires redirect URI(s) to communicate with client application. These URIs must be pre-configured to use OpenID Connect flow. Database identity provider automatically detects redirect URIs for Aurena and Enterprise Explorer clients. However for the Touch Apps Server and the Touch Apps, their redirect URIs must be first registered.
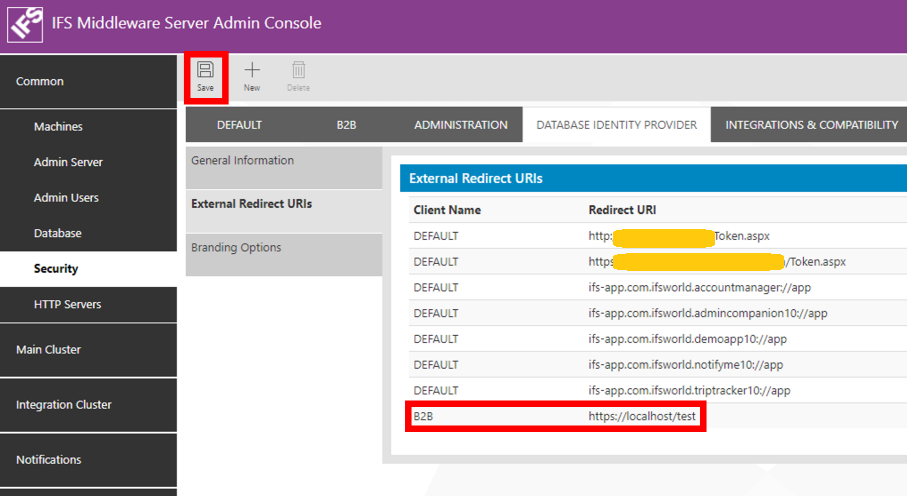
To do this registration, proceed to External Redirect URIs section. It will display previously registered URIs if there are any.
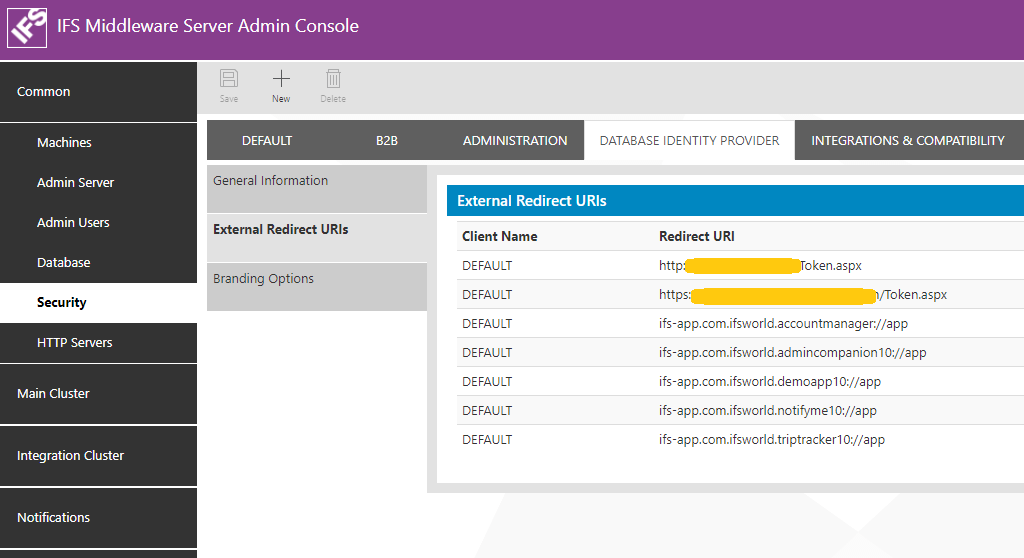
To add a new redirect URI, press the New icon. It will bring up a dialog to insert required details.
First you need to select a Client Name. There you have the option to select one from Admin, B2B or DEFAULT. They stand for the type of client for which the redirect URI is being registered. Admin is for administration clients, Default for general application which are targeting casual users and B2B for business to business application. When configuraing the redirect URIs for the Touch Apps Server and/or Moible Applications the Client Name should be DEFAULT always. Please refer Touch Apps Server Configuration for Redirect URIs for more information on the redirect URI configuration for Touch Apps Server and the Touch Apps.
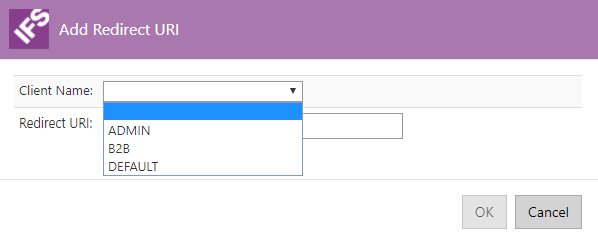
Then insert the Redirect URI. This could be any preferred URI from your OpenID Connect based application.
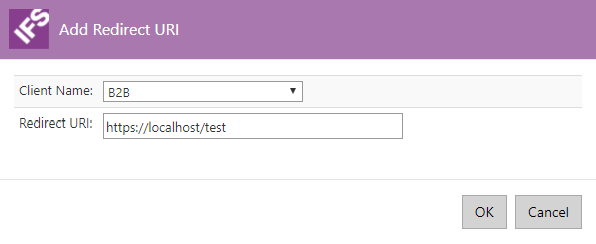
Once everything in place, press the Save button to save new redirect URI. This will bring the updated external redirect URI page with updated values
NOTE: Re-authentication behavior: When the user logs in and work in IFS Enterprise Explorer client the client session is refreshed based on the session timeout (Default 10 minutes). When the current session times out the Access Token given by the DB Identity provider is used to refresh the client session. The Access Token is has a limited lifetime. Once the Access Token is expired the Refresh token given by the DB ID provider is used to obtain a new Access Token. The DB Id provider will issue a new Refresh token every time it issues a new Access Token. If there is an issue in obtaining a new Access Token the user will be prompted for credentials.
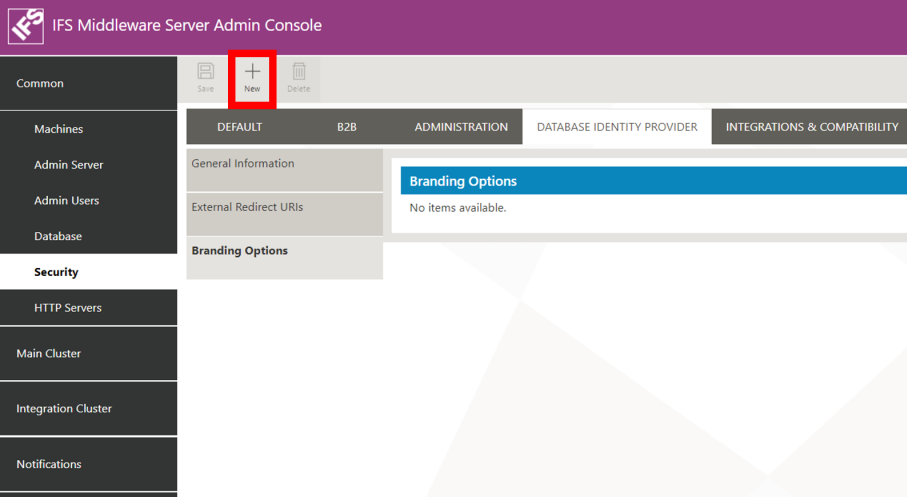
Under the DATABASE IDENTITY PROVIDER tab, it is also possible to customize some information which is shown at the different application login pages. This functionality is accessible under the Branding Options section.
Such customization can be done for each of the three available clients: ADMIN, B2B and DEFAULT. In case a specific client has not a customization attached to it, the default IFS information will be used with no further actions needed from the user.
Below is an example of IFS default choices for a specific login page.
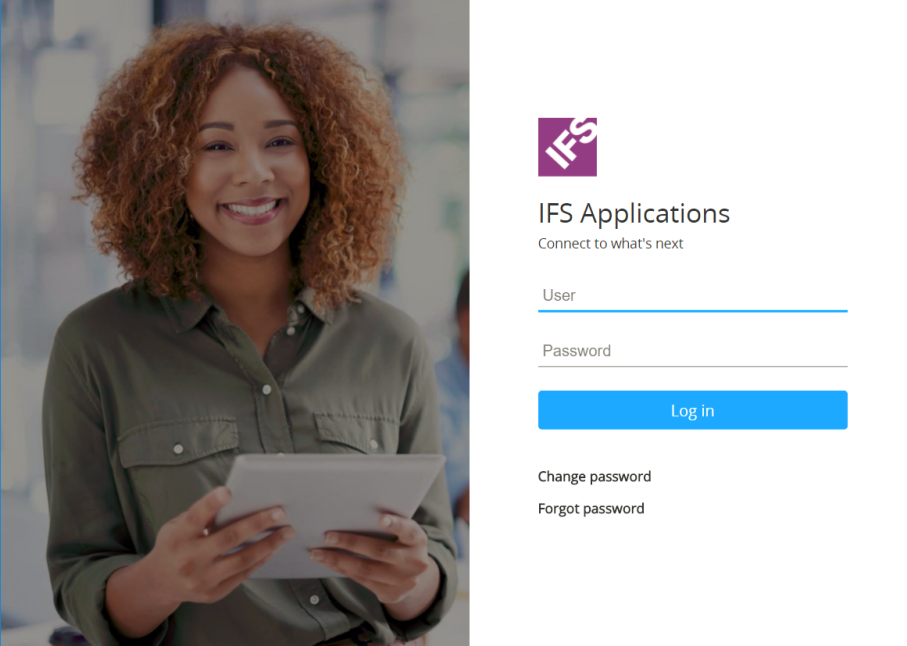
Through branding customization, it is possible to change the logotype, the background image and the welcome message in the login page, for each type of client.
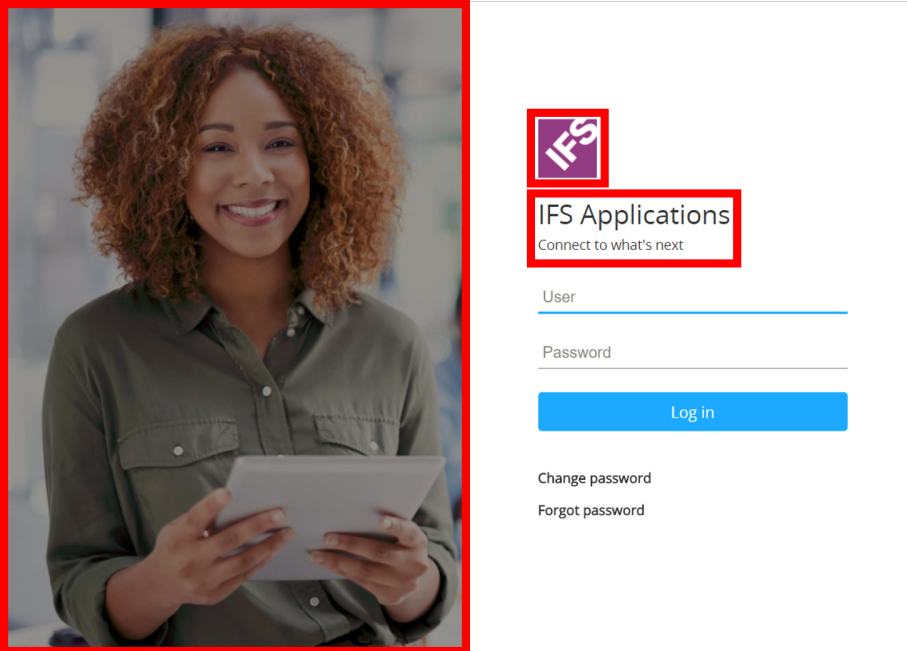
To do that, in the Branding Options section, click on the New button.
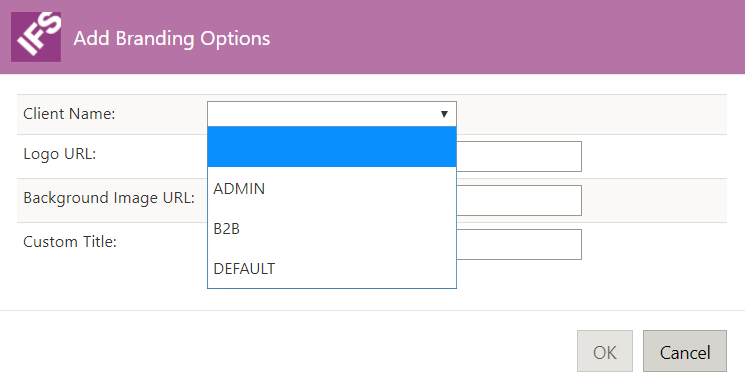
A popup window entitled Add Branding Options will open, where it is possible to choose a type of client in the Client Name dropdown, URLs for a logo and a background image, and a custom title.
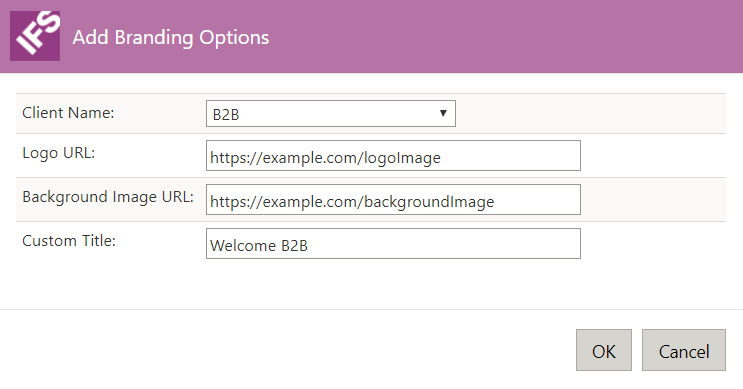
After entering the desired information, a new line containing the branding information will be visible in the Branding Options table. Click Save to keep the changes.
NOTE: Changes in branding information require main servers to be restarted if any changes are to take effect.
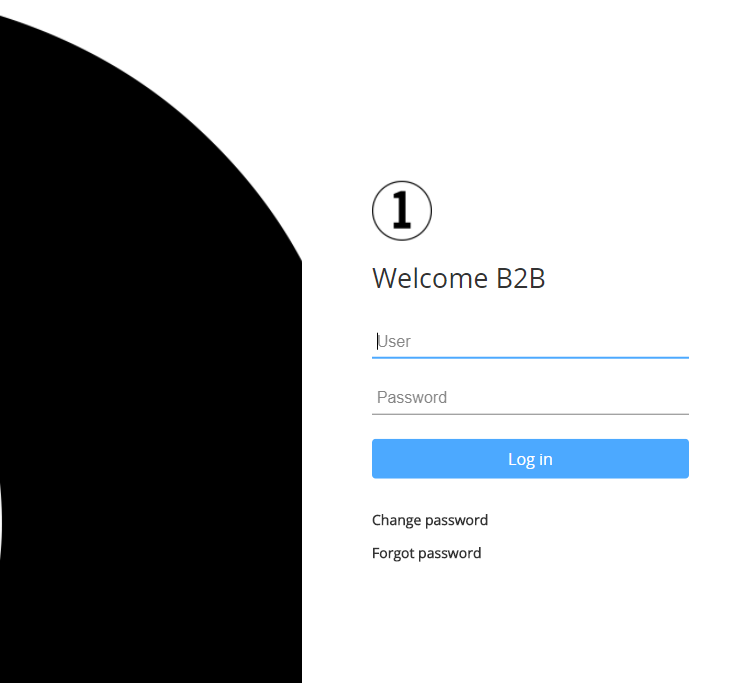
The result of the branding customization is now visible in the client’s login page.
In order to remove a branding customization, just click on the correspondent line in the table Branding Options and then click on Delete. Then, save the changes and proceed with the restart of the servers.

There are some configurations that can be set through JVM startup paramters. These can be used to change the behaviour of databse identity provider. Following table contains avaialbe paramters, their descriptions, default values and recomended values. Note that default value will be used if paramter is not set or invalid.
NOTE: You can add/change these startup paramters from IFS Applications intaller at installation time or by using IFS MIddleware Server Admin Console
| JVM Parameter | Description | Default value | Recommended Values |
|---|---|---|---|
| ifs.oidc.authcode.lifetime | Defines OpenID Connect
authorization code lifetime. This value is used to mark the expiration
of authorization code issued from identity provider. Value must be defined in seconds. |
120 | Greater than 60 seconds and less than 5 minutes |
| ifs.oidc.accesstoken.lifetime | Defines OpenID
Connect access token lifetime. This value is used to mark the expiration
time of access tokens issued from identtiy provider. Value must be defined in seconds. |
3600 | Greater than 15 minute and less than 1 day |
| ifs.oidc.refreshtoken.lifetime | Defines OpenID
Connect refresh token lifetime. This value is used to mark the
expiration time of refresh tokens issued from identity provider. Shorter
refresh token lifetime values will require end users to login to
respective applications frequently. Value must be defined in seconds. |
172800 | Greater than 15 minutes and less than 90 days. Ideally refresh token can have a longer life time. |
| ifs.oidc.rememberme.cookie.enabled | Enable or disable
remember me functionality. This functionality is independent from OpenID
Connect specificiaton. By default functionality is disabled.
Cookie does not store user credentials. This is a global setting and will affect all clients using the identity provider. |
false | true or false depending on the requirement. |
| ifs.oidc.rememberme.cookie.lifetime | Defines the lifetime
of remember me cookie which is used to store logged in state in remember
me functionality. Value must be defined in seconds. |
172800 | Greater than 15 minutes and less than 90 days. |
For example, if you want to enable remember me functionality add startus paramters -Difs.oidc.rememberme.cookie.enabled=true to server startus paramters.
NOTE: Once a paramter is added or if value is changed, application server must be restarted to make the change effective
Remember me functionality is disabled by default. To enable it, you must follow steps explained in Configure behavior through server startup parameters section.
This feature is suitable if you want to keep previous logged in users remembered in the identity provider. When enabled, a check box will be enabled in the login page as shown below.

If the remember me check box is checked, identity provider will create a cookie in the browser. Note that this cookie does not store user passwords in browser or storage tier. Instead, cookie uses a cryptographically secure random string to correlate users to stored cookie.
If remember me check box is not checked during a login, then the login behavior will be similar to a default login (as if this feature is not enabled).
Once remember me cookie is used, it will remember the end user against the browser until one of the following occur,
If none of above happens and user visits the application (ex:- IFS Enterprise Explorer or Aurena), then user will be presented with following screen containing previous logged in user name,

There are two options users can take from this screen. User can choose to login as the remembered user (user mike as given in above screenshot). To do so, user should select the button with remembered user name (highlighted in below screenshot). User will log in to the application as highlighted user without requiring to enter user credentials.

If user prefers to login as a different user, user can proceed to login screen by clicking "Choose another account" button. This will bring a usual login screen. Note that a successful login here will remove the previous remember me cookie.