Getting Started with Workflows
Quick Start
Let's get started with Workflow in the IFS Cloud,
Create a Workflow
There are three ways of creating a workflow,
Create New Workflow
To create a new Workflow, the User navigates to Workflow in the IFS Cloud (Solution Manager ->Workflow Manager -> Workflow). On the Workflow page, the user creates an empty Workflow with a unique Process Key and a Version by clicking the control below.
| Control |  |
|---|---|
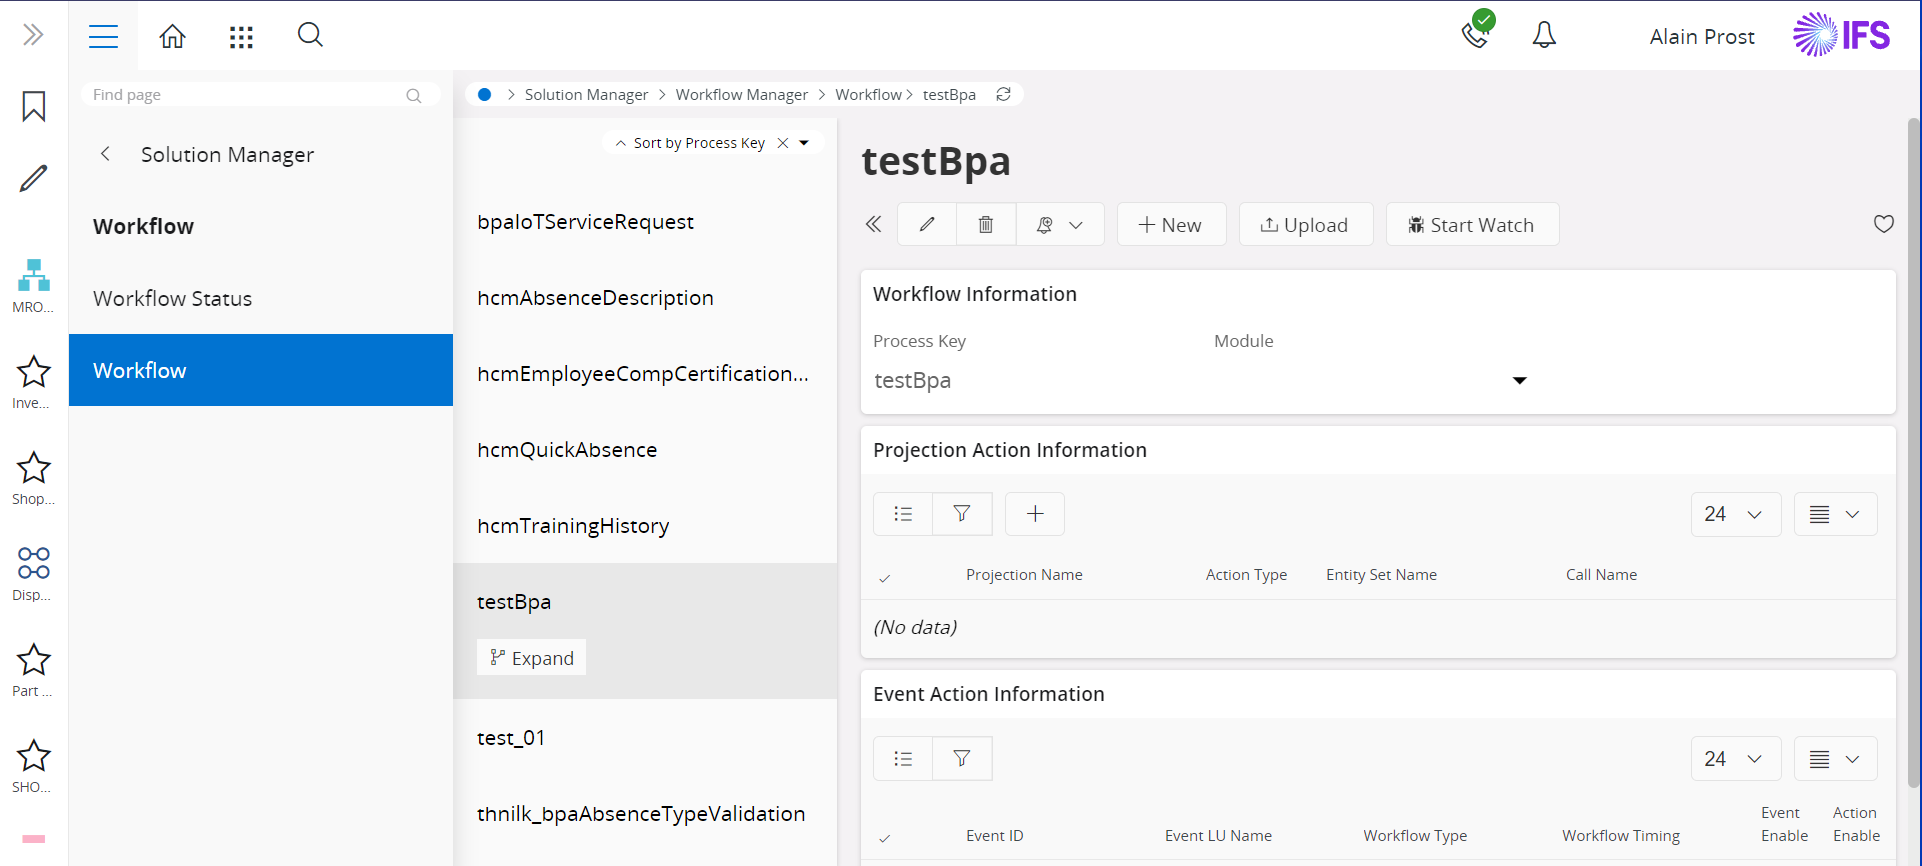
Once the user clicks on the New button, it prompts the user to specify a Process Key for the Workflow. Upon a successful entry, the User could browse to the Process Key and Version through the navigation on the left.
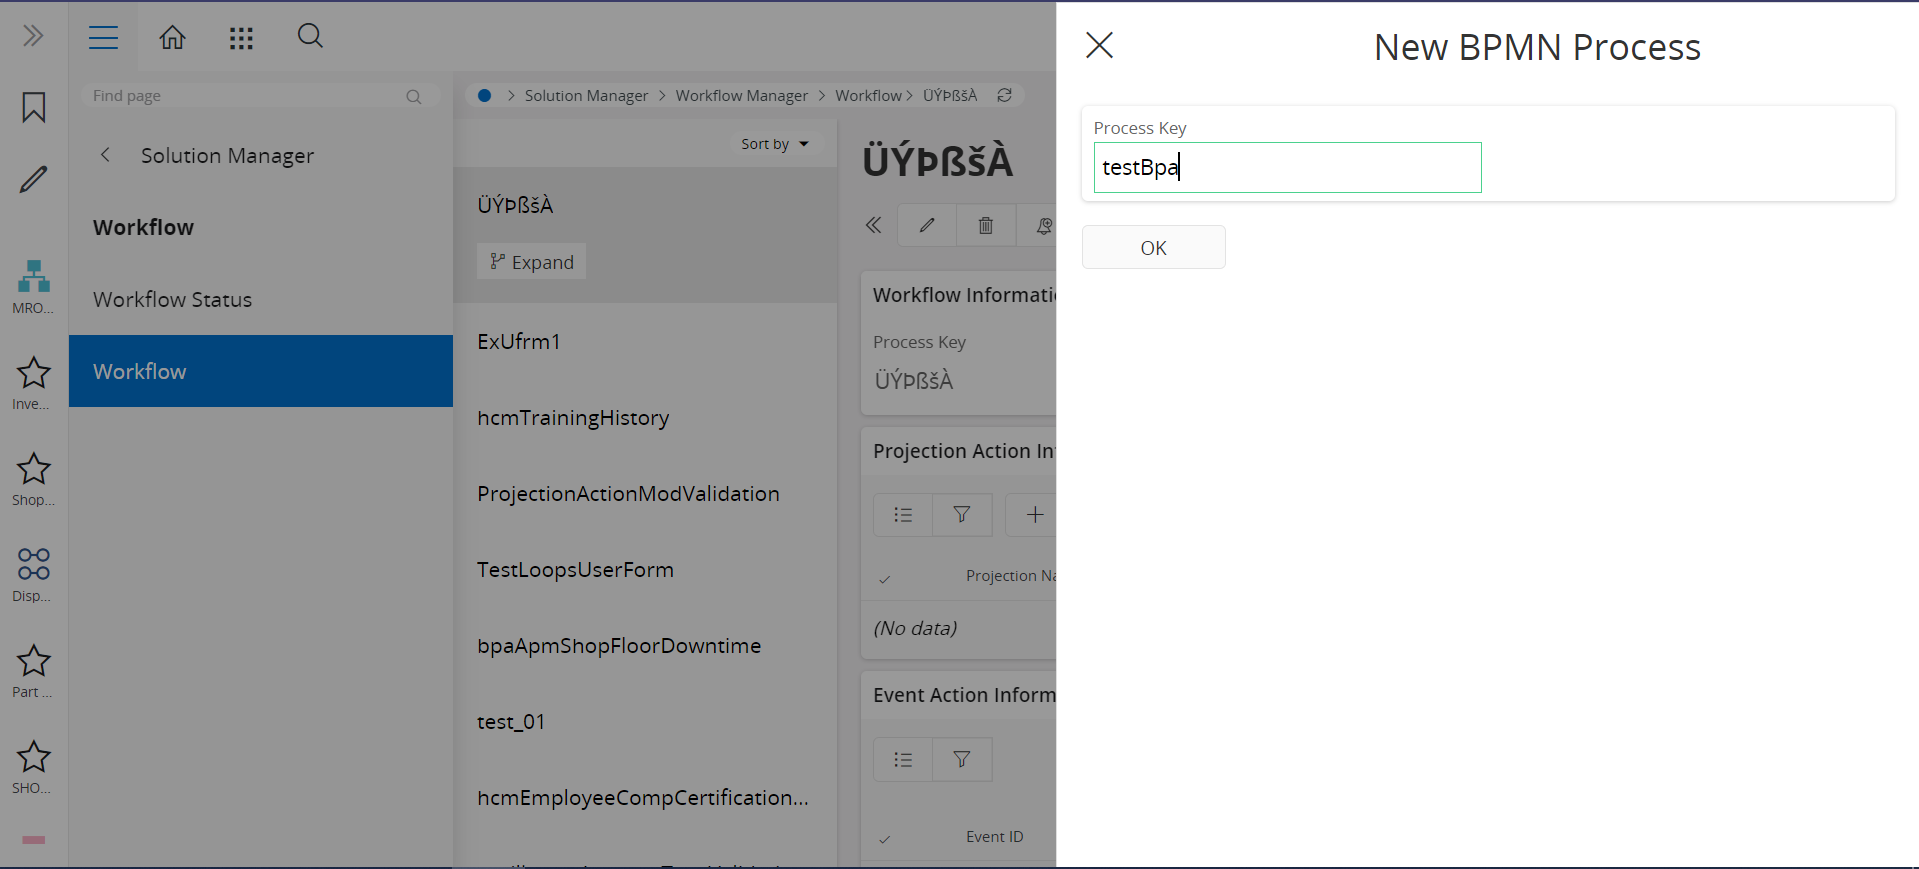
When you click on the OK button 'testBpa' Workflow will be created.
Import a Workflow from the Local File System
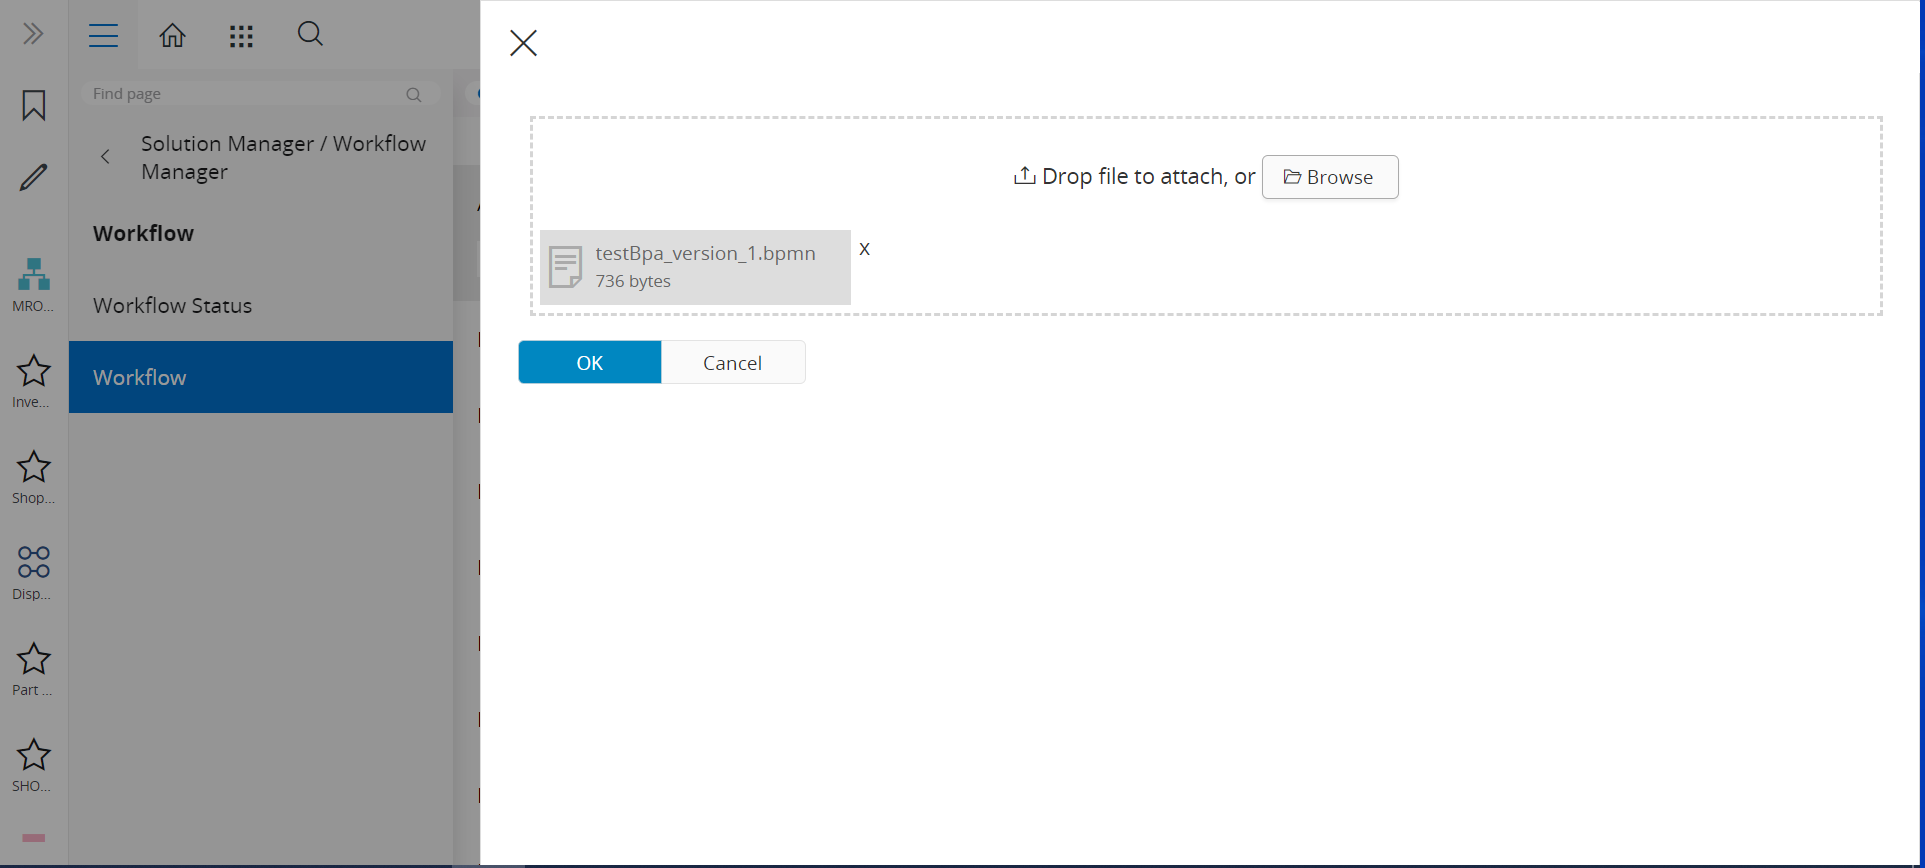
The upload button on the Workflow page enables the user to upload a Workflow into the IFS Cloud from the local file system. The user could upload a file with an extension of *.BPMN. Refer to the BPMN section for more information.
| Control |  |
|---|---|
Once clicked, the user will need to browse the Workflow diagram from the local file system. Upon a successful upload, the User could browse to the uploaded Workflow through the navigation on the left.
Note: The Process Key for an uploaded workflow will be taken from the process id attribute in the BPMN file. In case the uploaded Workflow process key does not exist in the IFS Cloud, then a workflow version will be automatically created. If the upload Workflow process key exists, a new version will be created for the same Process Key by incrementing the Workflow version.
testBpa Workflow can be downloaded from here.
Clone an Existing Workflow Version
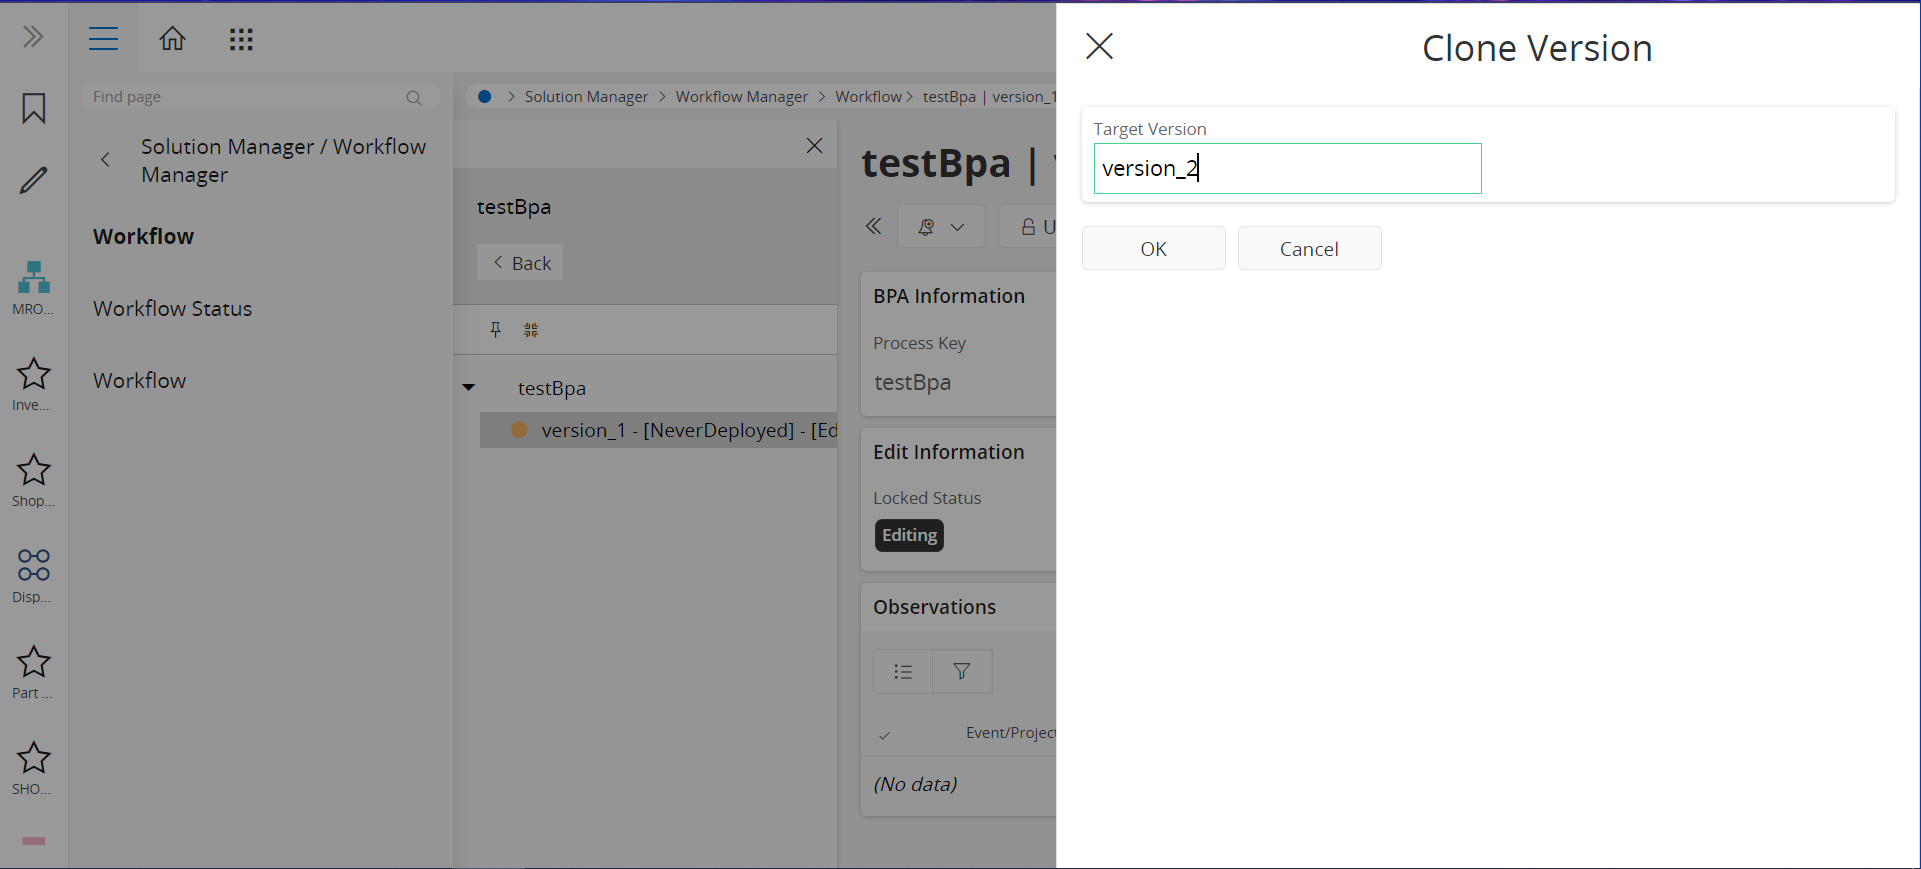
Clone functionality will enable the User to make a copy of an existing Workflow version, by specifying a different version name.
| Control |  |
|---|---|
Once the user navigates to the Workflow from the left navigation, the versions for the selected Workflow will be displayed in the navigation. The user could click on the version that needs to be cloned and press the clone button. Then it'll prompt the user to specify a new unique version name. Upon a successful clone, the new version cant be found alongside the other versions.
Design a Workflow
Upon creating a workflow,uploading a workflow or by cloning a workflow version successfully, the user could navigate to the Workflow from the navigation on the left. And click on the below control to navigate to the Workflow Designer to make changes to the Workflow.
| Control |  |
|---|---|
Refer to Workflow Designer section for information on designing a Workflow.
Save a Workflow
On the Control Panel of the Workflow Designer, the below control enables the user to save a specific Workflow to the server.
| Control | |
|---|---|
The user could make changes to the Workflow or save to the same Workflow version if the deploy status of the Workflow version is never deployed (Lock Status: Open/Editing) only. Refer Workflow Information Section section for more information on lock status and deploy status.
In case, the Workflow version is deployed (deploy status: Active | lock status: Permanent Lock) the user could save the Workflow to different a version by specifying a unique version name.
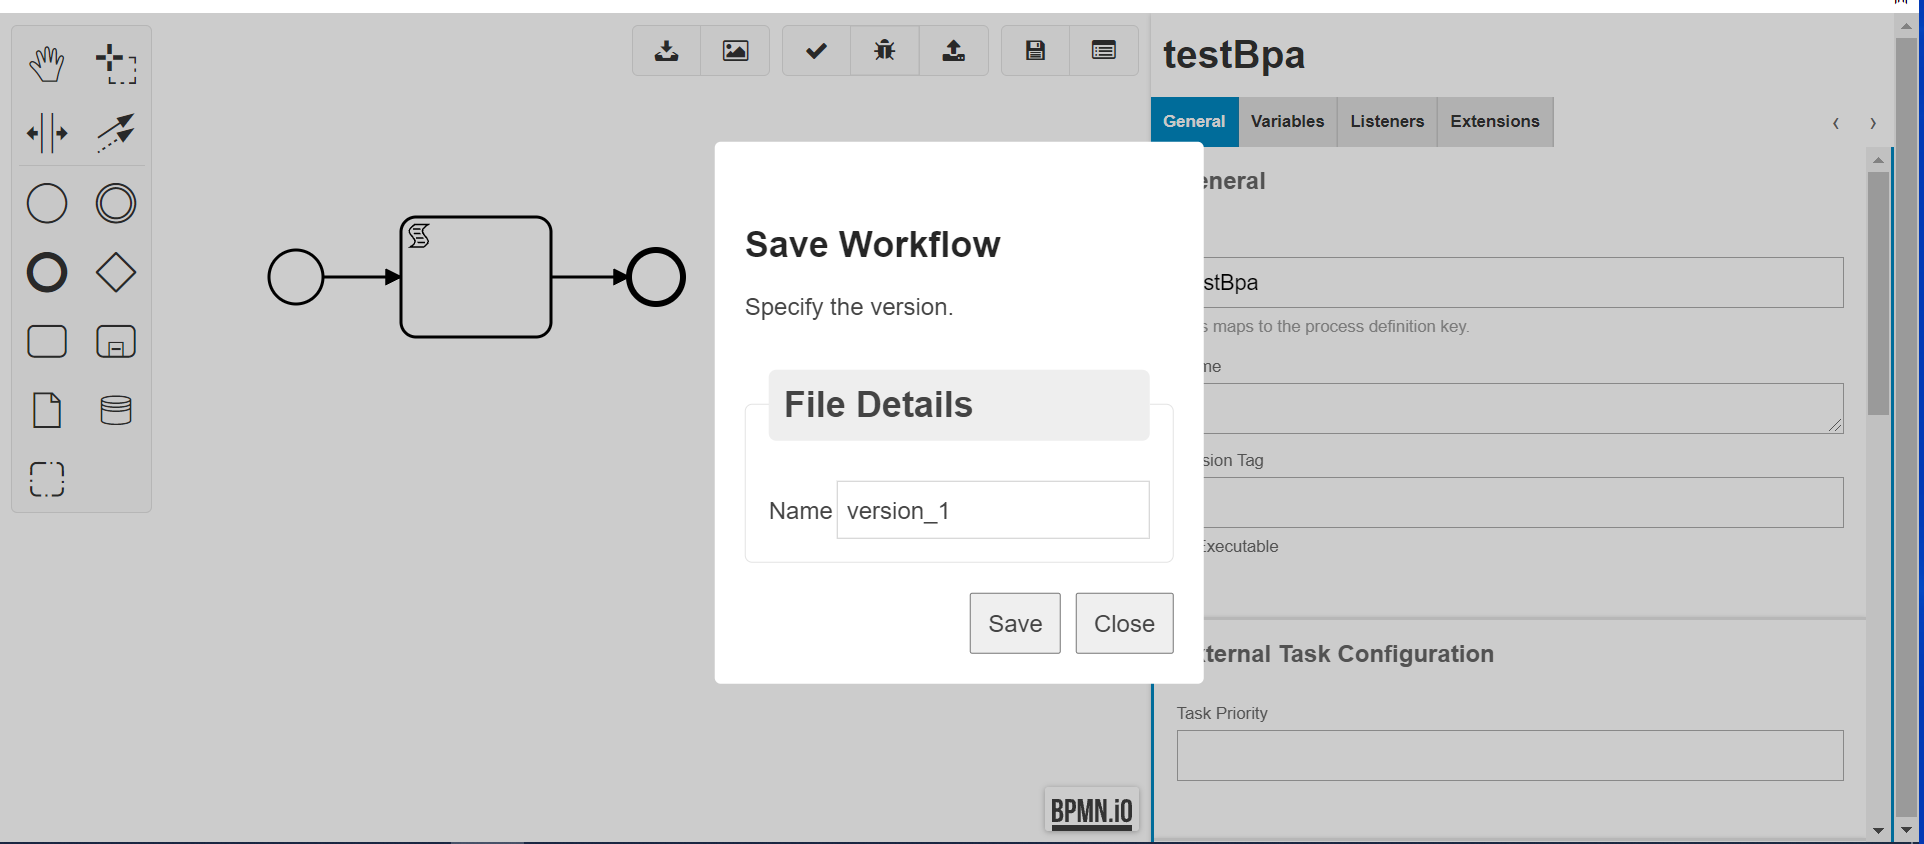
Once the user clicks on the Save Control, it prompts the user to specify a unique version name to save the Workflow.
Deploy a Workflow
On the Control Panel of the Workflow Designer, the below control enables the user to deploy the Workflow to the Camunda Engine.
| Control |  |
|---|---|
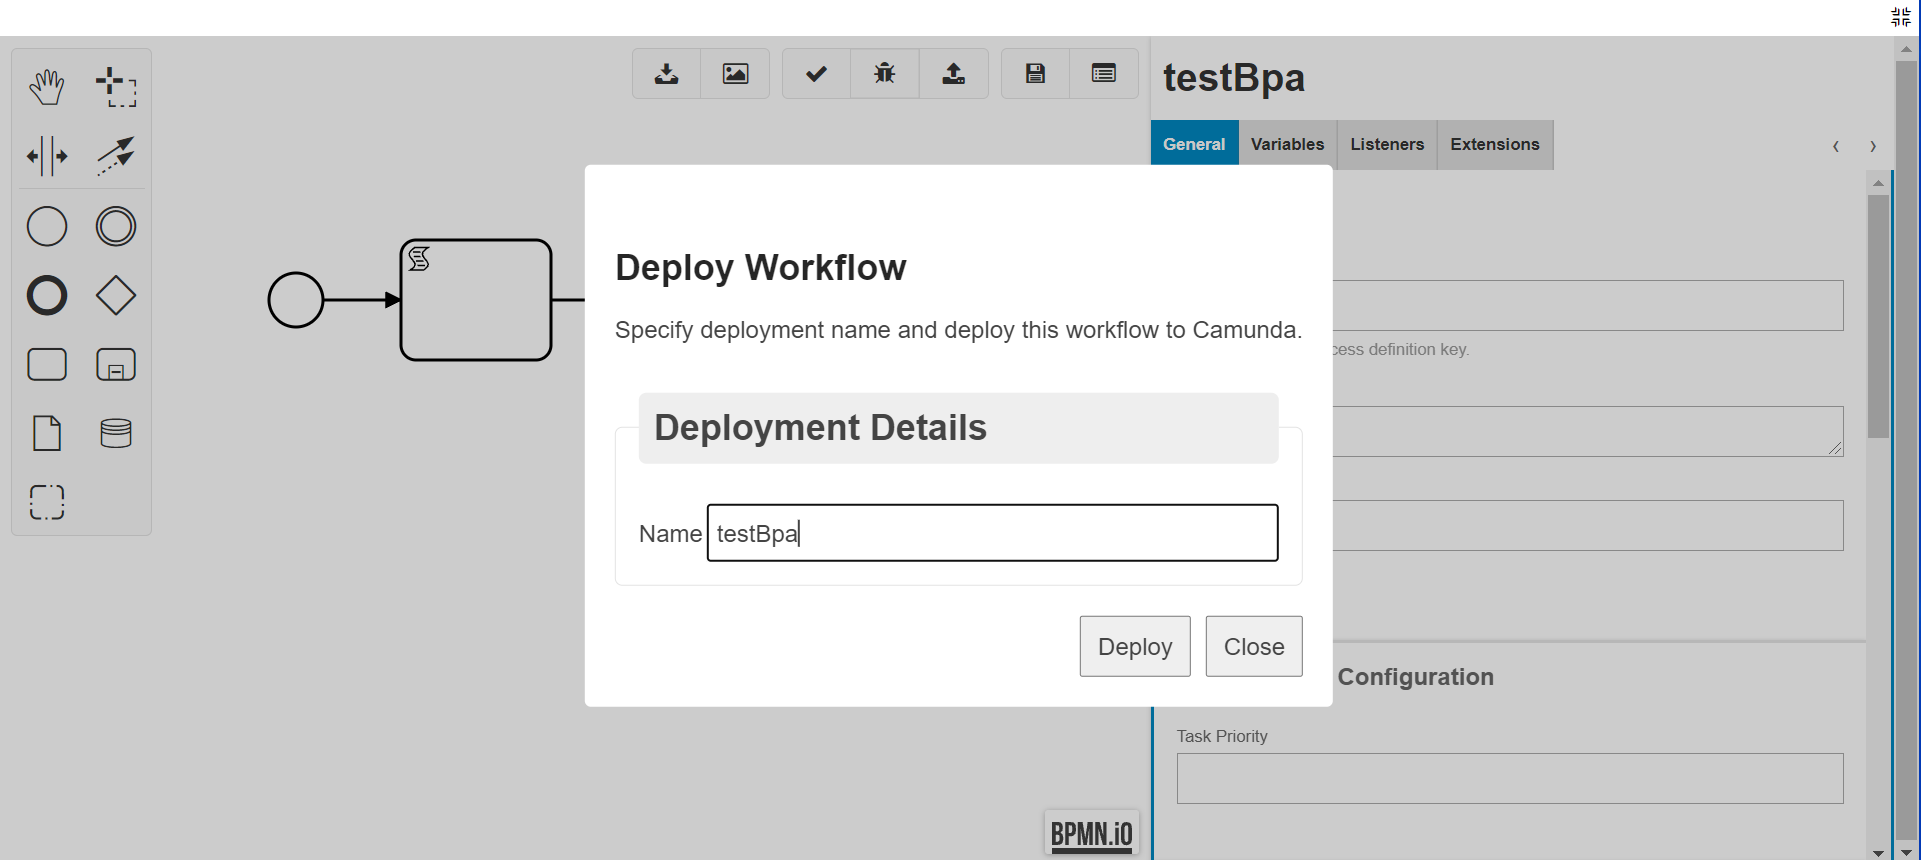
Once the user clicks on the Deploy Control, it prompts the user for the deployment name, which is the Process Key for the specific Workflow.
Upon successful deployment, the deploy status of the Workflow version will change to active disabling any changes to the Workflow version. Further, the lock status of the Workflow version will change to a permanent lock. Refer Workflow Details section for more information on lock status and deployment status.
A Workflow must be both deployed and assigned to a Event Action or Projection Action before the expected automation occurs. Refer to invoking a workflow section for information.
Building a Validation Workflow
Validation Workflows are configured to conditionally prevent a user completing an action within the system, they populate an error message to the user which is localized and is then alerted to stop the transaction occurring without the need for custom development.
As a start you need to follow the below three steps to execute a validation workflow within IFS Cloud.
- Design the validation workflow & Deploy
- Configure an event/event action OR projection action
- Trigger the event manually
Design the validation workflow & Deploy
The following workflow is a validation workflow. Users can find a sample workflow from here. workflow and it can be uploaded in the workflow manager.
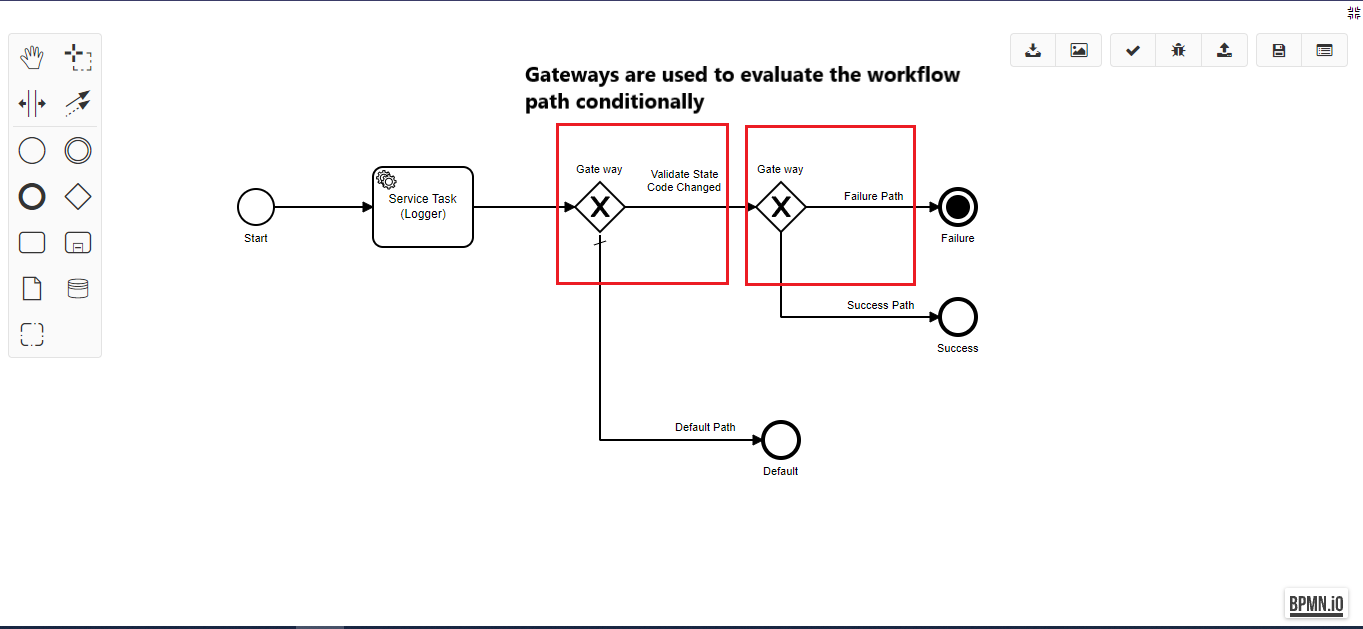
Usually the validation workflows contain gateways and in the end an 'IFS Failure Event' type activity. More details can be found in the What are Workflows section. Once the workflow designing part finished, it needs to be deployed.
Configure an event/event action OR projection action
In this example, event action has been configured to trigger the workflow. But users can configure a projection action instead of an event action.
New custom event needs to be configured as the following.
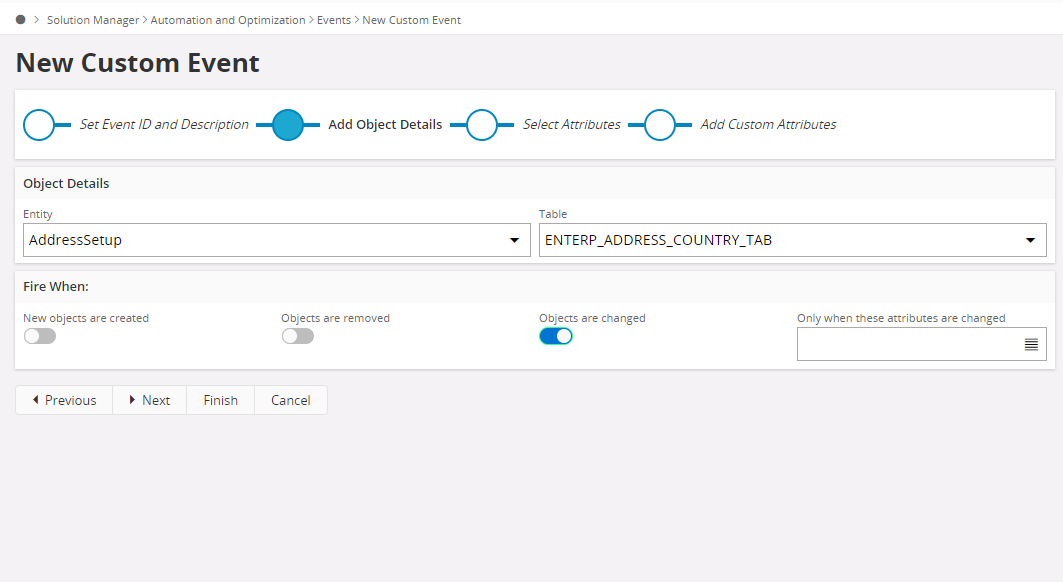
More details on creating custom event can be found here.
An event action needs to be created with the 'Validation' workflow type.
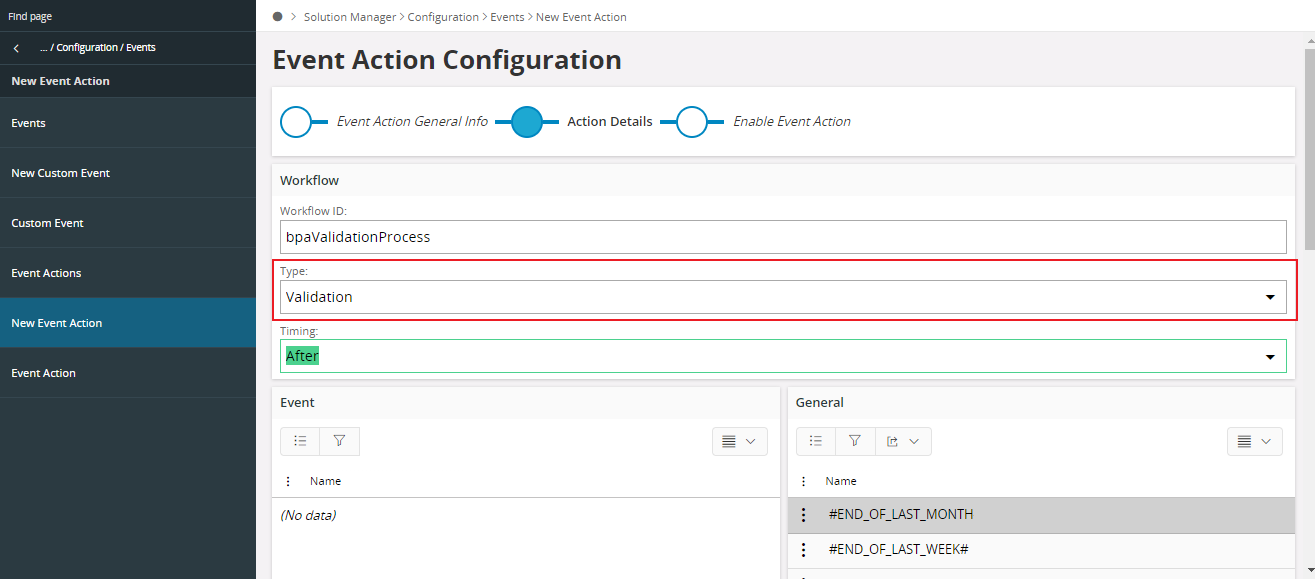
Note: Timing will be 'After'.
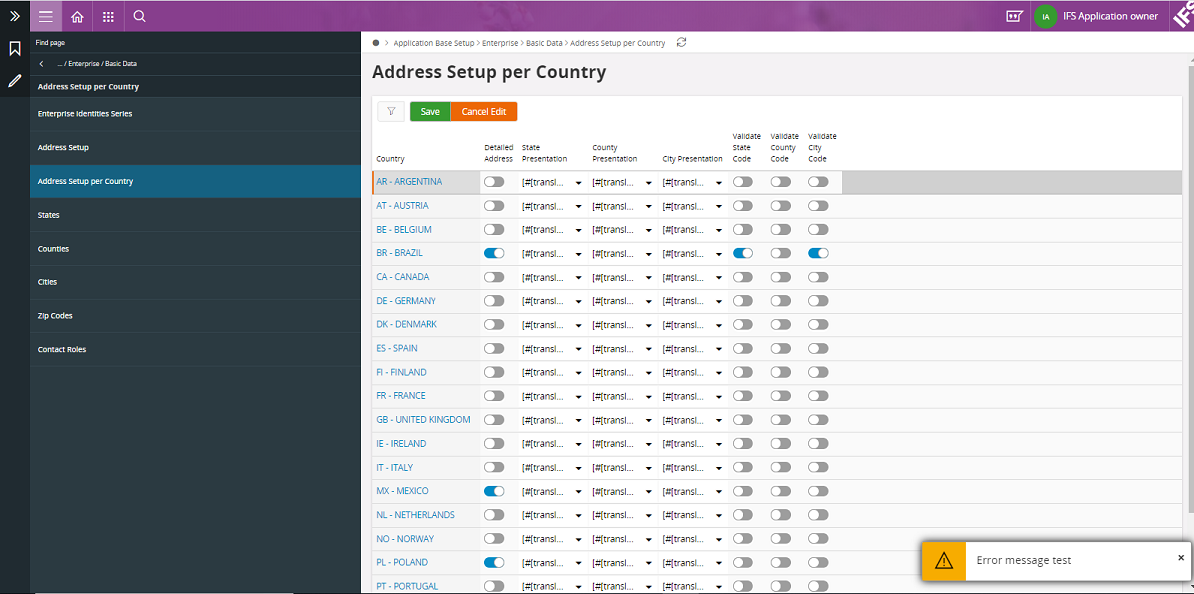
Trigger the event manually
Then go to the 'Address Setup per Country' page and try to change the validate state code from 'true' to 'false' state. This will trigger the workflow and toast message will be displayed.
The output of the Workflow is as follows:
Building an Enhancement Workflow
Process Enrichment Workflows provide the functionality where data is required to be created, altered or deleted. Process Enrichment is where the Workflow invokes automation that enriches the transaction, process or action within the system.
As a start you need to follow the below three steps to execute a enhancement workflow within IFS Cloud.
- Design the enrichment workflow & Deploy
- Configure an event/event action OR projection action
- Trigger the event manually
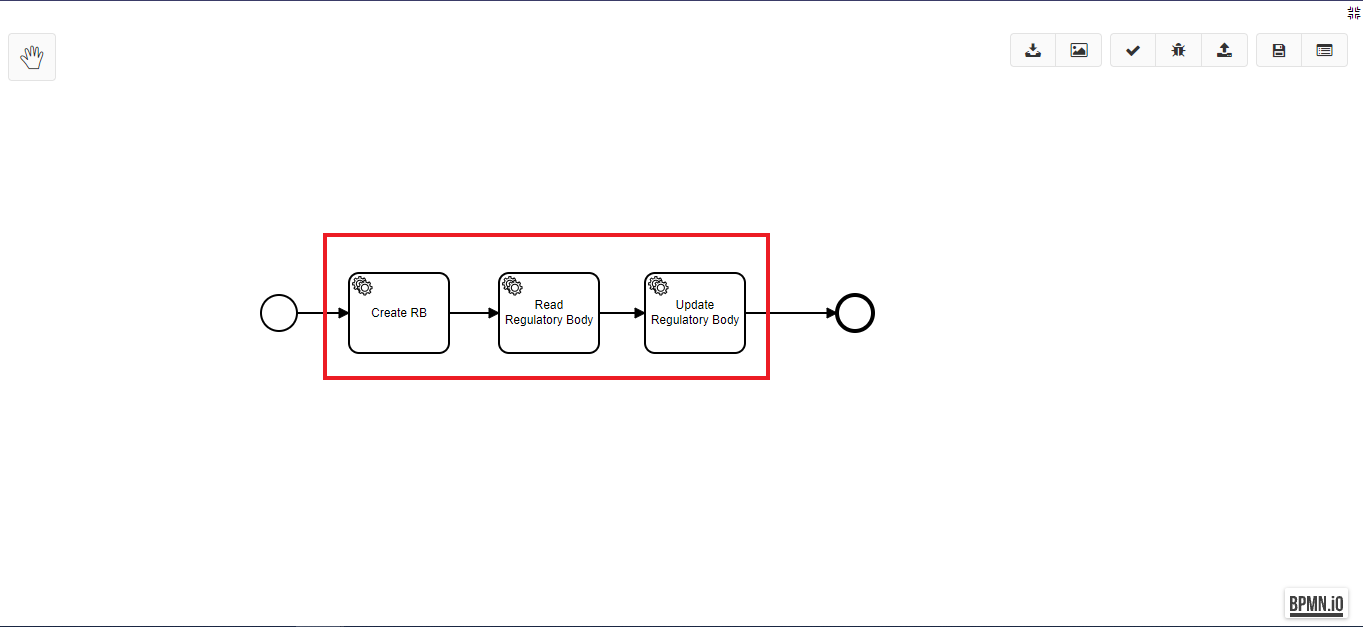
Design the enhancement workflow & Deploy
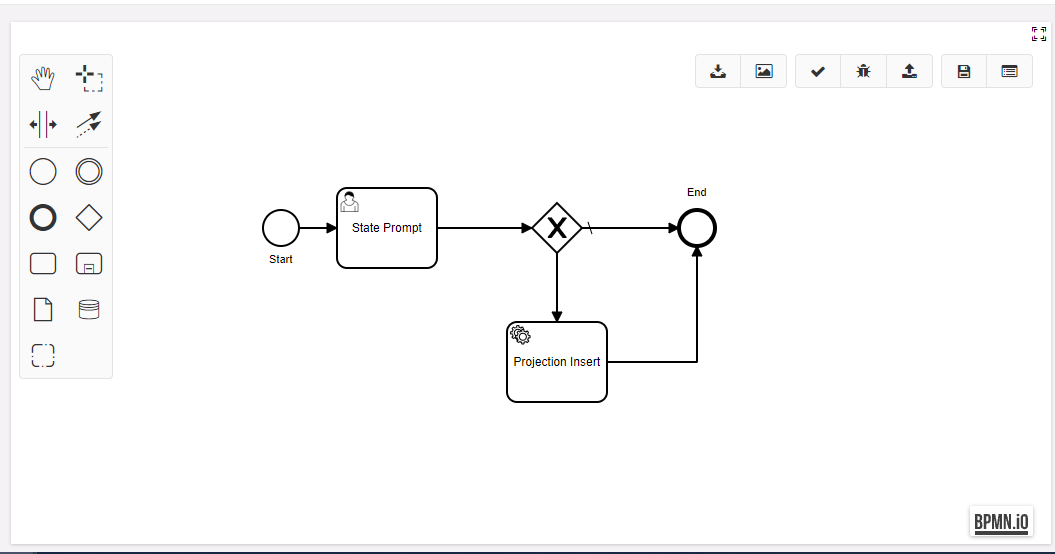
The following workflow is a process enrichment workflow and it can be download from here. Normally a process enrichment workflows contain projection delegate type activities as shown below.
Once the designing is finished, user needs to save and deploy the workflow.
Configure an event/event action OR projection action
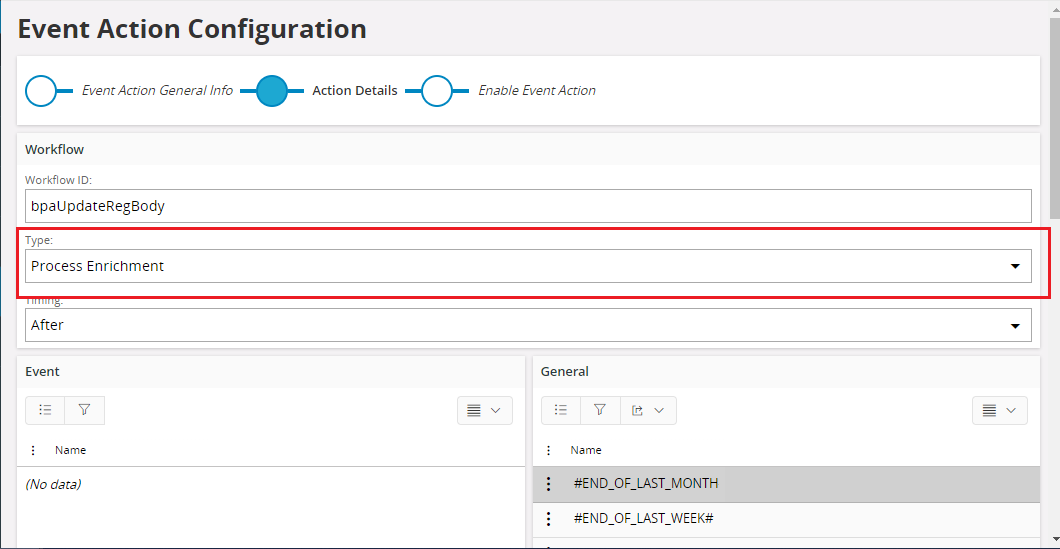
In this example, event and event action has been created for this enrichment workflow.
It is possible to configure a projection action instead of an event action. The workflow type should be 'Process Enrichment'.
Trigger the event manually
Users can navigate to the 'Address Setup per Country' page and edit a row and save it. Then the enrichment workflow will be executed and the relevant data will be inserted/updated in the tables accordingly.
Building a User Interaction Workflow
User Interaction Workflows are used when a user performs an action and the business process requests the user to enter additional information regarding that transaction. The new data can be used to make a decision within a gateway or to invoke one of the many different projections within IFS Cloud. When a User Interaction Workflow is invoked, one of more forms may appear within the IFS Cloud Aurena client based on the Workflow's definition. For each User Task defined, the user is expected to provide the information required based on the task configuration.
As a start you need to follow the below three steps to execute a user interaction workflow within IFS Cloud.
- Design the user interaction workflow & Deploy
- Configure a projection action
- Trigger the projection action
Design the user interaction workflow & Deploy
The following workflow is an user interaction workflow. Normally the UI workflows contain 'User Task' type activities and the 'User Task' activity has form field configuration tab to define user form fields. More details on user form configuration can be found in What are Workflows section.
The example user interaction workflow can be found here. Users can download it and upload in the workflow manager. Then it needs to be deployed.
Configure a projection action
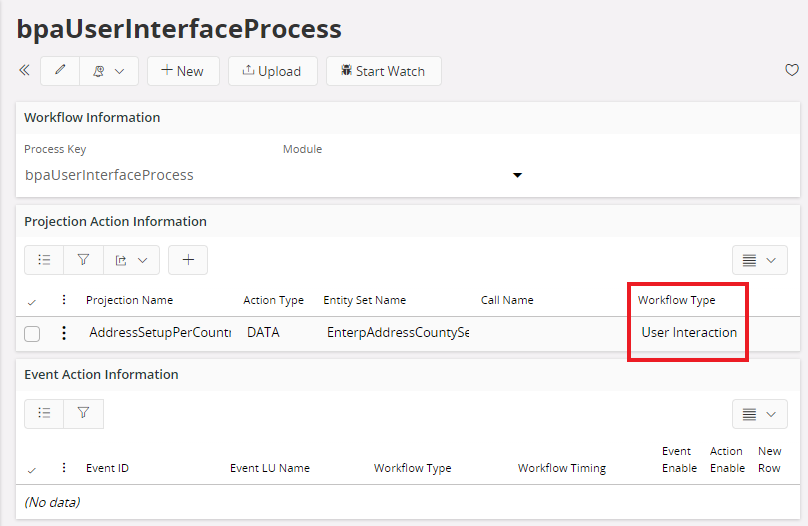
User can configure a projection action as discussed in Projection Action Configuration section.
In this scenario, workflow type should be 'User Interaction' as shown below.
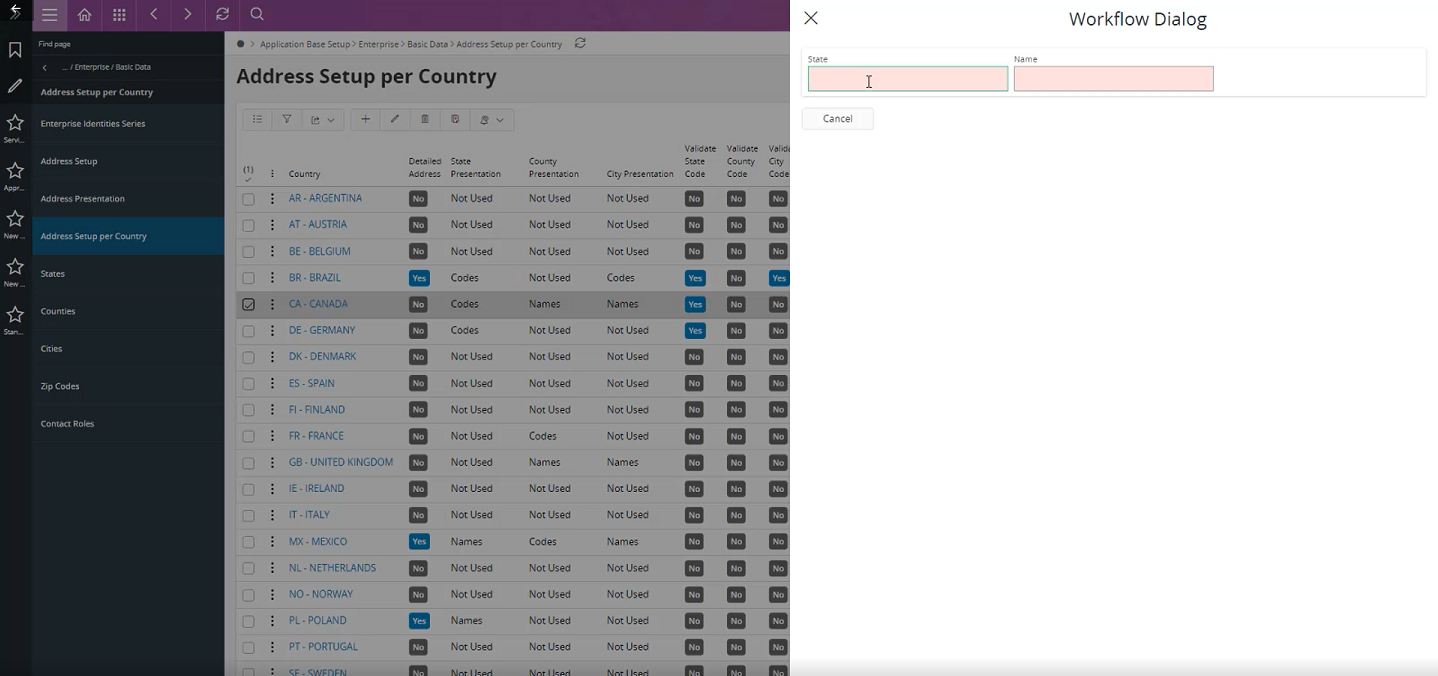
Trigger the projection action
Users can trigger the projection action by calling to the endpoint and the output should look like the following.
Calling a Projection
Purpose of this is to execute a Workflow alongside a Projection.
The registration and management of the association between a Workflow and Projection should follow the patterns set out in [inlineCard]
Workflow <-> Projection associations:
- CRUD for either ALL EntitySets OR a specific EntitySet
- Call for either ALL Functions, Actions OR a specific Call
Projection Mapping Timings:
- Before: Enhancement, Validation
- After: Enhancement, Validation, UI
- Async: Enhancement
A simple example for this use case would be automating the new custom event assistant.
-
In Aurena go to Solution Manager/Workflow Manager/Workflow
-
Upload the diagram DEMO_CreateProjectionAction.bpmn
-
Create a Projection Action for the DEMO_ CreateNewCustomEvent Workflow that you can use to trigger it. For example, this will work:

- Deploy DEMO_CreateProjectionAction
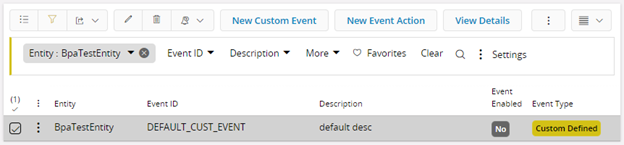
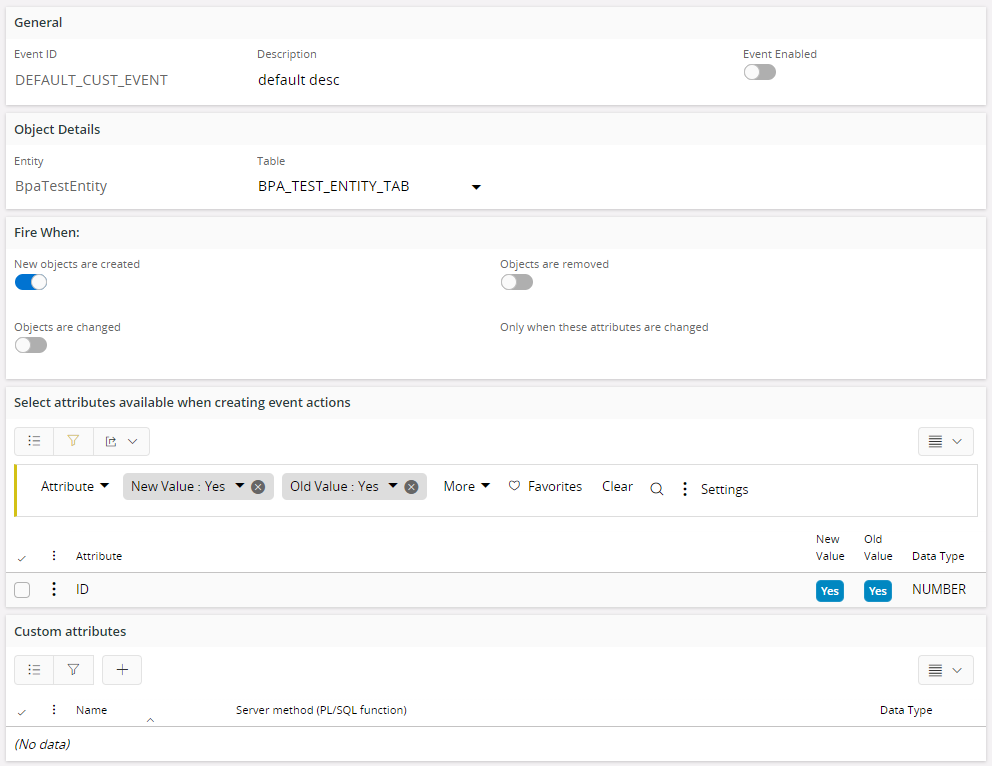
Trigger the Workflow. If you are using the same Projection Action as shown above then you can trigger it by creating a new Workflow using the +New button on the Workflow page. After creation if you go to the Solution Manager/Configuration/Events/Events page and filter by Entity for BpaTestEntity you will find a newly created Custom Event by the name DEFAULT_CUST_EVENT. It should look like this:
If you look at the Custom Event’s details it should look like this:
NOTE: As all the default values are hard-coded, triggering this BPA will only work once. Any subsequent times the Workflow is triggered will lead to an “Object already Exists” error.
Creating a Loop
Workflow Loops provide the ability to retrieve a set of data from a projection and perform a set of operations on each item within the set of data retrieved.
A simple example for this use case would be updating the description of all sub projects with the same value as the parent project when the parent project's description is altered.
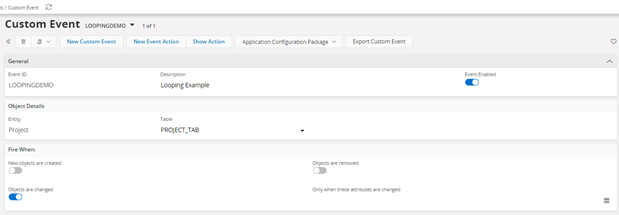
Custom Event Setup
Custom event should be setup like below
Event Action Setup
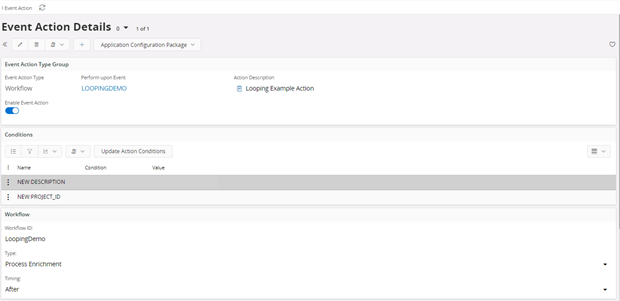
Workflow Setup
-
In Aurena go to Solution Manager/Workflow Manager/Workflow
-
Upload the diagram loopingDemo.bpmn
-
Deploy loopingDemo
To trigger the Workflow, change the description of any project. If workflow executed successfully all the subprojects description will be updated with the changed value.