Message routing describes queuing and dispatching to different targets a message from/to IFS Applications. This will be based on the message type and/or the content of the message. This page describes the different ways a message may be routed and how to configure message routing rules and addresses.
Note: This version of IFS Application is supplied with a new Router implementation. Read more about that below.
SOAP_IFS and
SOAP_SIMPLE. Note: You may use any other envelope that is defined in the IFS Connect configuration.
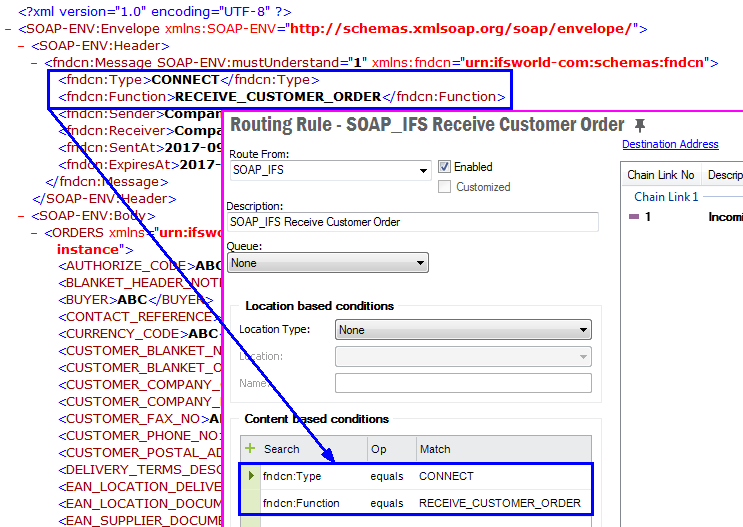
UNKNOWN_XML. NONE_XML.Routing parameters are always located in the SOAP header and are recommended to use :
fndcn:Type Type of the messagefndcn:Function Message Function (normally the BizApi name)fndcn:Sender The sender of the messagefndcn:Receiver The receiver of the message
Example of routing from SOAP_IFS
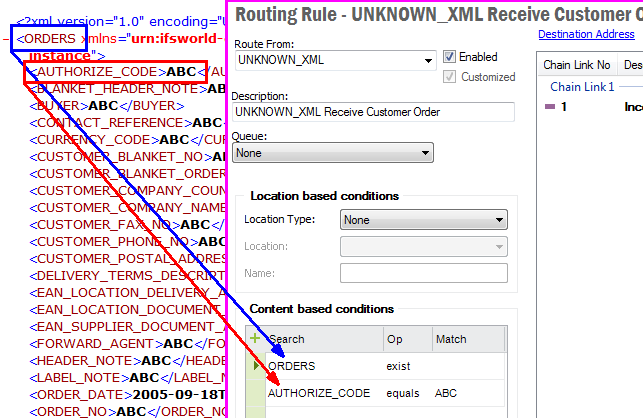
UNKNOWN_XML is the whole inbound XML strings that can't be recognized by IFS Connect
as having a known envelope. Routing parameters can be located in any element or
attribute in the XML string.
Example of routing from UNKNOWN_XML
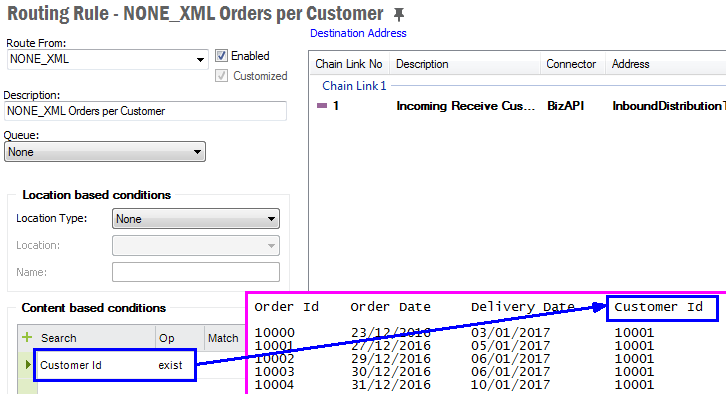
NONE_XML is the whole inbound string or binary content that is not recognized as valid XML.
Content based routing is not performed for binary data. If the data is any type
of text, routing parameters are search strings that can be located anywhere in
the incoming data.
Note: This should only be used when a Java transformer is implemented (transformation must be done from the incoming format to IFS XML).
Example of routing from NONE_XML
The location based routing uses Name and Location parameters with information
provided by the different Transport Connectors. This type of routing is very useful
when there is no way to solely use the content for uniquely identifying a message.
Please notice that these routing parameters only apply to the Connector that is
receiving the message. A file Name parameter is for example ignored if the message
is received as a mail.
The following rules can be used by choosing a value in Location Type
drop-down list:
Note: The length of the mail subject should be less than 200 characters.
Outbound Routing Rules with value APPLICATION_MESSAGE in the Route
From field are used for routing of outbound messages.
Routing of outbound messages is performed in two phases:
The pre-routing is performed in the PL/SQL code. The only goal of this stage is to find out the name of the queue the message should be put into. At this point only the following Application Message header fields are used:
The algorithm is trying to find a rule that matches most conditions, even if there are other conditions on the rule that are not possible to check at this stage. See more details about pre-routing phase.
The mentioned fields are created differently depending on use of PL/SQL Access Provider or use of existing messages in the Connectivity outbox. See more details in the two sections below.
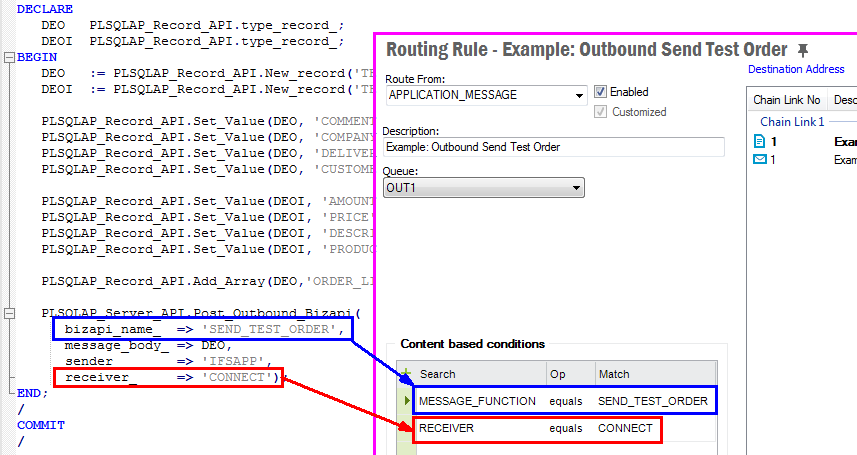
The routing parameters are created in the call to Post_Outbound_BizAPI with the
following mapping.
CONNECTbizapi_name_sender_receiver_ Example
of outbound routing when using PLSQL Access Provider
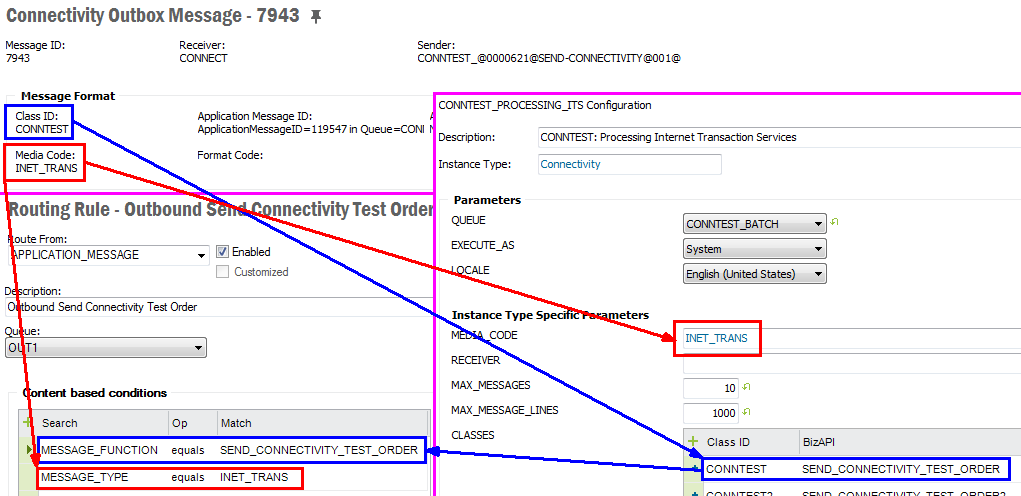
Examples of this are Internet Transaction Services (ITS) that publish existing
IFS Applications EDI messages to XML.
The routing parameters are fetched from the Connectivity outbox header with the
following mappings.
Media_Code from the Connectivity header eg INET_TRANSBizApi Name Sender from the Connectivity headerReceiver from the Connectivity header Note: The connection between Class ID and BizApi name is done in Task Template definition in Setup IFS Connect.
Example of outbound routing for Internet Transaction Services.
The content based routing will take place after the message has been processed by the BizAPI. The data for routing is parsed in the following order:
When parsing Application Message all existing simple attributes, i.e. neither
aggregates nor arrays, are taken with exception of the OBJ_VERSION attribute.
Content based conditions are used only once, i.e. only the first occurrence of a view attribute or XML element (XML tag) matching a given condition in all three data sources will be taken. And this is independently if the condition will be satisfied or not. Therefore it is not recommended to use elements that can occur in more then one data source. The similar is valid if there are several occurrences of the same element in one data source.
If there are nested elements matching the same condition in an XML document, the most inner one will be taken. But if a condition defines an XML tag attribute, for nested tags matching the same condition the most outer one will be taken instead.
Because of the double routing mechanism there are some limitations. Read more about routing of outbound messages.
Standard routing is a very powerful mechanism, but can be quite heavy and take time, especially in an installation with many message queues and/or many routing rules. This is because every rule has to be matched against the message. In many cases the flexibility of the standard routing is unnecessary and can be replaced with a simplified, "light", algorithm, which is very quick.
Simplified Routing can be enabled for inbound and outbound messages
independently. For inbound messages only messages of type SOAP_IFS (Route
From field in Routing Rule definition) can be routed using the simplified
routing. For outbound messages the type must be APPLICATION_MESSAGE.
Simplified routing uses one of the four message attributes: MESSAGE_TYPE,
MESSAGE_FUNCTION, SENDER or RECEIVER.
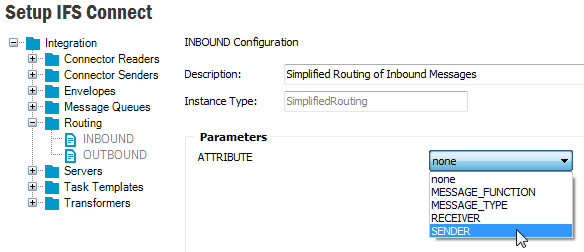
To enable Simplified Routing go to Setup IFS Connect feature of IFS Solution
Manager, choose Routing, then the appropriate type of message you want enable
Simplified Routing for (INBOUND or OUTBOUND) and choose the attribute you want
to use for Simplified Routing:
For inbound messages the attribute will be matched against the corresponding
SOAP_IFS header parameter: fndcn:Type, fndcn:Function,
fndcn:Sender or fndcn:Receiver. For outbound messages
it will be the value of the corresponding attribute of the Application Message.
During the server startup all routing rules of the particular type having the
chosen parameter defined as Content based condition with operation equals
will be loaded to a map in the memory with the attribute value as a key.
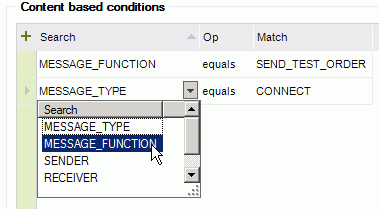
Example rule configuration with SENDER attribute for inbound and
RECEIVER for outbound
messages.
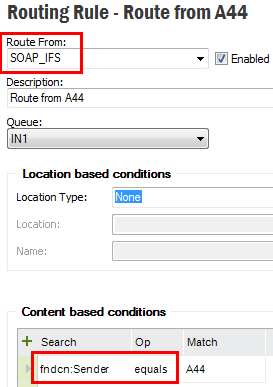
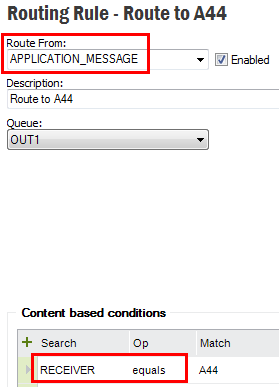
On arrival the message is checked for existence of the defined attribute. If the attribute exists, the algorithm just makes a simple look up in the map with the attribute value as a key, which will typically result in one or maybe a couple of rules only. If the attribute value is not present in the map, i.e. there are no rules with appropriate Content based definition, or attribute doesn't exist in the message, the standard routing will be used instead.
Note that the map can return a rule (or a collection of rules) that have additional conditions, which are not satisfying the message. The message will then fail with error saying that no matching rules have been found, even if there can exist other rules, not used by the simplified algorithm, matching the message. Standard routing will not be used in such case.
Example
A central onshore site is configured to communicate with a number of offshore sites, each of them containing a copy of the central database. Information is replicated using IFS Connect with simplified routing.
Each site has it's own ID on form "S<nn>", where "<nn>"
represents a two-digits site number, e.g. "S25". Each time an offshore
site is sending a message with updated information, it is setting it's ID in the
Sender header field of the IFS_SOAP message.
The onshore site wants to have a separate Routing Rule for each
offshore site, thus the configuration contains as many routing rules as there
are offshore sites with the offshore site's ID specified as a Content based
condition, e.g. for site 25: Search: fndcn:Sender, Op:
equals, Match: S25.
This version of IFS Applications is supplied with a new implementation of Message Router. The new version is optimized and eliminates risks for data inconsistency, which could occur in some circumstances with the previous one. But because of different algorithms there are minor differences in how messages are processed. Normally it shouldn't lead to any problems, but in the rare situation when the new implementation will not meet the expectations, it is possible to switch the implementation and use the previous one. This can be done using a property defined in the Setup IFS Connect feature, configuration of J2EE_SERVER.
Simply define a new property with name fnd.routerImplementation.
The property can have following values:
When using both the new implementation will be used to process the
message, but the legacy routing will also be performed and, if both
implementations return different results, a warning will be written to the log
file for category Integration, tagged with ROUTING. It can be useful to use this
mode when testing and/or debugging routing.
Of course, to spool the logged
messages, the Integration category has to be set to at least warning level.
You
can also define a separate file for these warnings by adding following section to
the j2ee-logging.properties file:
handler.routingalert.type=textfile
handler.routingalert.filename=@IFS_HOME@/instance/@IFS_INSTANCE@/logs/j2ee/@IFS_MWS_SERVER@/routingalert.log
handler.routingalert.filter=ifs.fnd.log.TagFilter,ROUTING
handler.routingalert.level=warning
A file defined according to the above will normally remain empty. Only if legacy and new routing return different results, the information will be written to this file together with the Application Message ID of the actual message.
Read more about logging IFS Application logging section.
Outbound routing rules that has the value REPORT as Route
From field will be used in routing the Report Designer type reports. There
are three main attributes that can be used on routing an ordered Report Designer
type report data.
MESSAGE_TYPE
MESSAGE_FUNCTION
SENDER
Message Type define the content of the data that is generated. The content will vary with the logical printer that will be used in ordering the report. There are three main type of logical printers
When the SEND_XML_TO_CONNECT logical printer is used, it will generate
an xml file that includes the raw data extracted by the RDF file (pl/sql code that
is specific to the report). The SEND_FULL_XML_TO_CONNECT logical printer
will generate an xml file with all translated data and some framework added data.
The SEND_PDF_TO_CONNECT logical printer generates the same pdf file
that is used in previewing and printing.
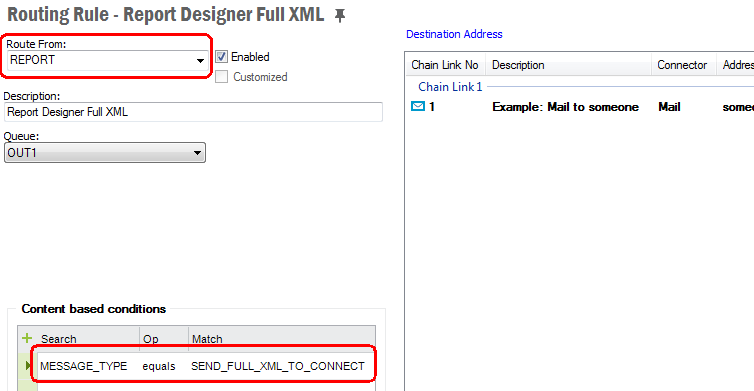
In routing term you can use the logical printer name as the content based condition to separately identify the content type.
Example of routing a full xml file.
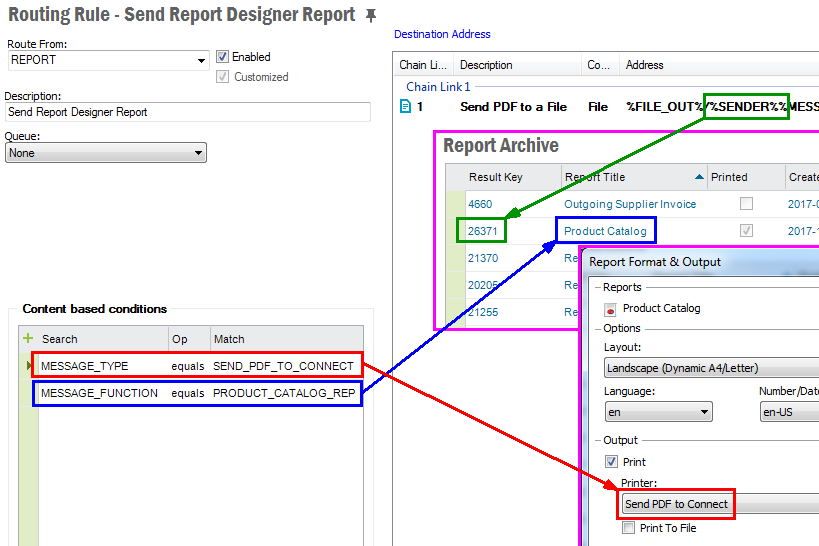
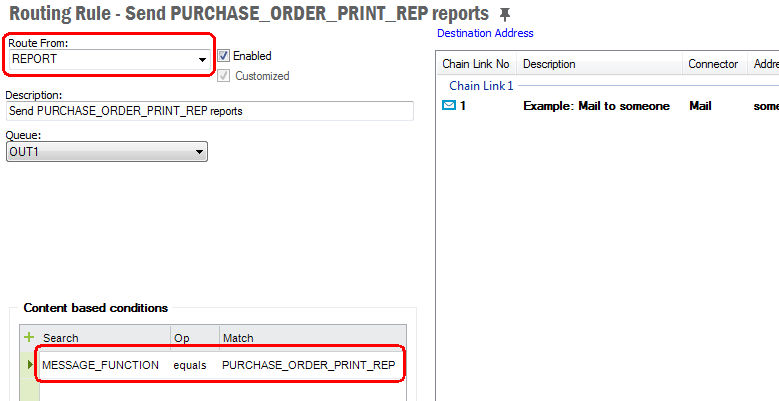
There is a unique id for each and every report which is an UPPERCASE name ending
with _REP (e.g. PURCHASE_ORDER_PRINT_REP). You can use this report id when routing
the report. For this you have to define the routing rule with MESSAGE_FUNCTION
equals to the report id.
When a report is sent to connect its result key will be set in the
SENDER field
of the Application Message. So you can use a routing rule that looks for the SENDER
of a given value in routing. The result key is a unique number when a new report
is generated. It has the same value when the same report is ordered over and over
again.
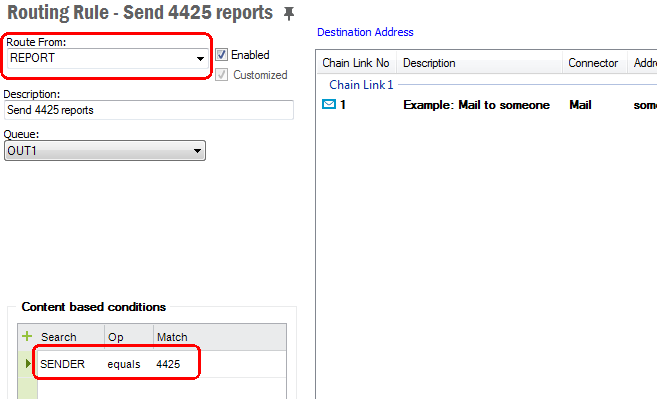
Example of report routing to an outbound PDF file
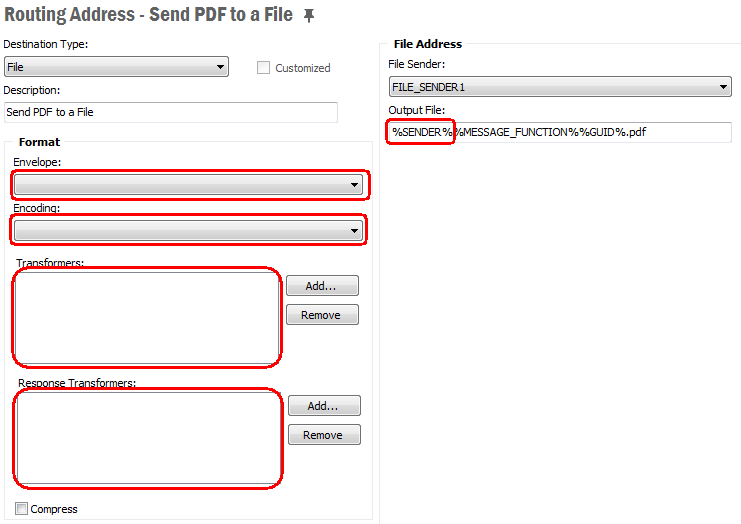
In general the destination address contains a separate section to be used in formatting the in and out going messages. This section describes the attributes like Envelope, Encoding and Transformers. To keep the original format of the PDF files that are routing, the destination address should not have any of the above format attributes. Otherwise it will affect the file format of the original PDF file and the end result may be a corrupted file.
Destination address of a Report Designer type Report Rule
Node Solution Manager/Integration/IFS Connect/Routing Addresses will list all available destination addresses.
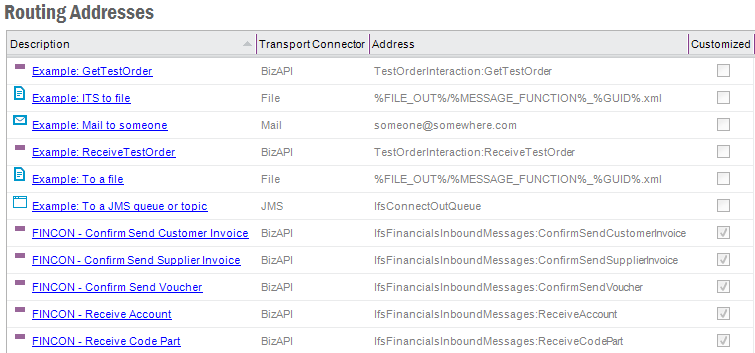
You can create a new address or edit an existing one from here. Click
Create New to create a new destination
address. You can set the destination parameter values there.
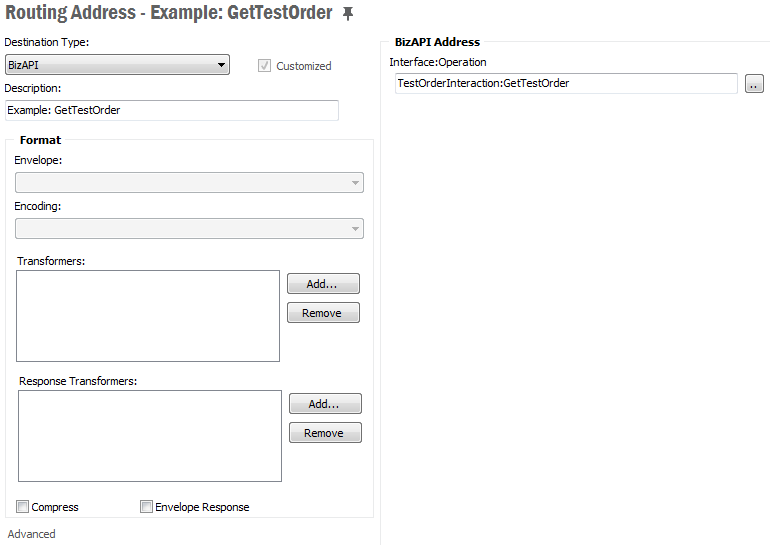
Note: It's important to give the destination a unique description so you can see what it is. Many destinations may be defined in an operational system and this method of documenting them is very important.
The in and outgoing files can be adjusted to this settings.
SOAP_IFS and SOAP_SIMPLE are implemented as part of the standard. It is possible
to create your own envelope standards and define them in the IFS Connect
configuration.
They will be available in the drop down list then.None
designates that no enveloping is to be performed, the message will be sent without
an envelope. Read more about
envelope
configuration.Note: Transformers can be set up in a flow, e.g. first transformer for preprocessing (e.g. removing namespace), second transformer for the next stage and so on.
Note: Transformers are stored in the database and are administrated
in the IFS Connect configuration tool. Blank or
None designates that no transformation
is to be performed.
Note: Binary data can only be transformed using binary Java transformers.
UNKNOWN_XML or NONE_XML it will be just a simple
SOAP envelope.Reade more about processing of a single address.
This will open the Channel Address Data form.
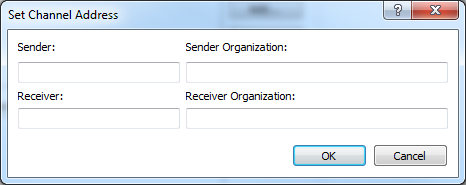
These are some optional attributes which can be used when send messages use some
customized envelops.
The right hand side of the window enable you to enter the destination address.
The content of this part will depend on the Destination Type.

Note: When the Destination Type is BizAPI the BizAPI Address
has an LOV containing all Inbound BizApi's installed in the application server. It is possible
to call other interfaces in the application server. Enter the operation on form
<handler>:<operation>.
For example there is a
predefined Routing Address Load Connectivity Inbox using an interface not
being defined as a BizAPI: ConnectivityProcessingHandler:LoadInboxMessage.
Note: BizAPIs and Handler Operations are executed in separate thread using concept of Work Managers.

Note: The given PL/SQL method has to be defined as
function taking CLOB as input argument and returning CLOB,
e.g.:
FUNCTION Plsql_Address_Test (xml_ CLOB) RETURN CLOB;
The returned value can be null.
Note: PL/SQL methods are executed in separate thread using concept of Work Managers.
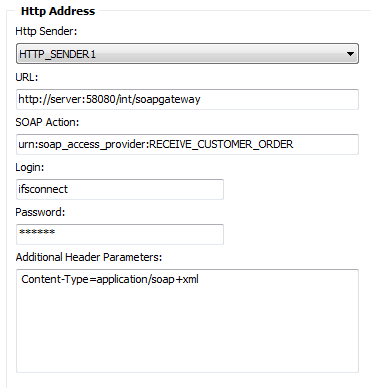
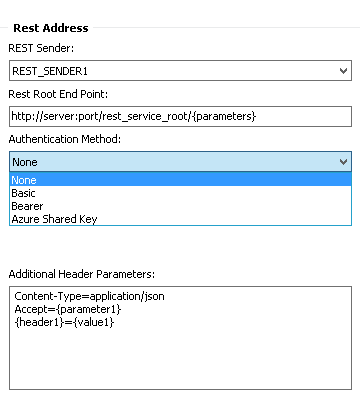
<parameter>=<value>,
one parameter definition per line. You can use a number of
placeholders in the header parameter specification, both in parameter
name and value.ssl:.ssl:TrustStoreFile - path to external trust storessl:TrustStorePwd - external trust store passwordssl:TrustStoreType - type of the external trust store, default is
JKSssl:KeyStoreId - ID of keystore with client certificatessl:KeyStoreFile - path to external client keystoressl:KeyStorePwd - external client keystore passwordssl:KeyStoreType - type of the external client keystore, default is
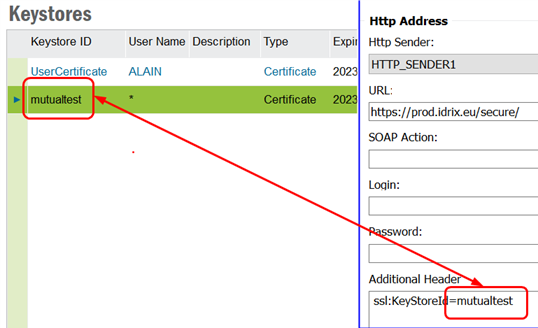
PKCS12Mutual Authentication
Some HTTPS servers may require the client (i.e. HTTP Sender) to present
themselves with own certificate. If the URL above points to this type of
server you have to supply the HTTP Sender with a keysore containing your
client certificate.
If not already done, import your certificate to IFS
Applications using the
Keystores feature in Solution Manager. Note
that the
certificate has to be stored with Keystore ID, not as User Certificate (User
Name will be '*').
Then specify the keystore ID using the parameter ssl:KeyStoreId. If using
this parameter you don't need to specify any external client key store.
Note: As passwords to external key stores are given
in clear text, all above specified ssl options, except ssl:KeyStoreId,
shouldn't be used in a production environment. With other words the only
option that may be used in production, when server requires mutual
authentication, is ssl:KeyStoreId.
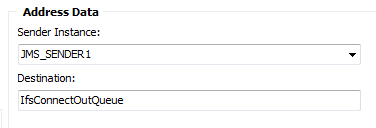
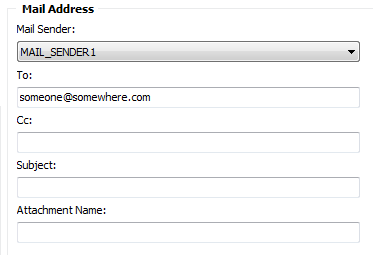
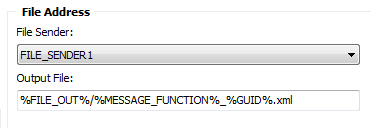
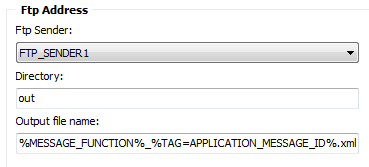
Choose sender instance from the drop-down list.
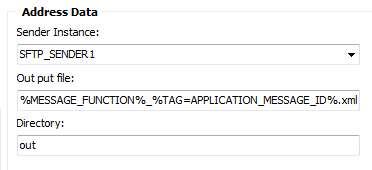
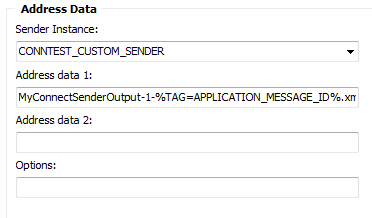
In those cases the file path or name is given it is possible to use
placeholders on form %<PLACEHOLDER>%. Those are as
follow (if not explicitly specified placeholder can be used by all File, Ftp,
Sftp and Mail readers):
yyyyMMdd_HHmmss_z.Following placeholders correspond to values of view attributes with the same names taken from the current Application Message:
<attribute_name>.
The attribute is searched first in the current Application Message, then, if
not found, in the output document after transformation and finally, if still
not found, in the input document. The list of available placeholders is also shown in a tool tip message for respective field.
If you select the node Solution Manager/Integration/IFS Connect/Routing Rules
you can see a list of available rules. When you select the tab Inbound
all available inbound rules will be listed. Tab Outbound will list
all available outbound rules. On each rule you can select Show Details
in the context menu to see the details of the selected rule.
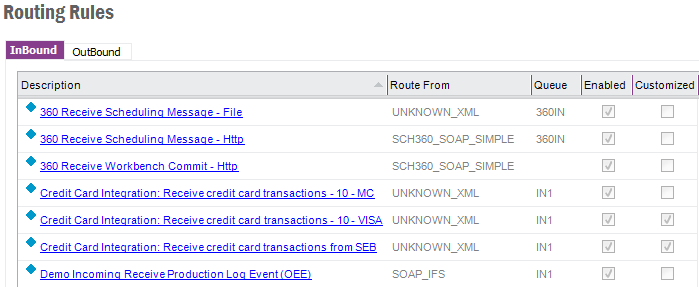
To create a new rule select correct tab (Inbound or Outbound) and press feature
toolbar button Create New. This will open up a detail form of a new
rule with some default values. Set values there as required and press Save
button to add the new rule.
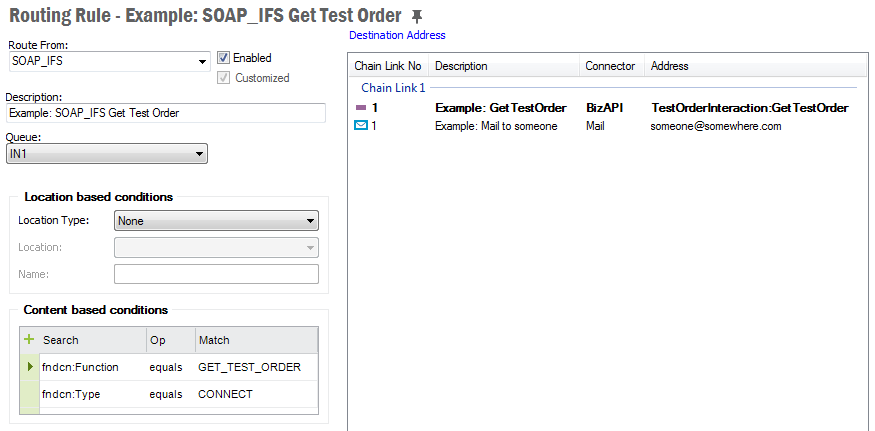
Inbound Routing Rule example. The only difference between Inbound and
Outbound Routing Rule form is the lack of section for Location based conditions
in the second one.
The identification of an inbound message is done by looking at the attribute value of a node of an xml file or any string in a non xml file. The Route From defines the format of the file i.e. whether the file is an xml file, xml file with an envelop or non xml file. The default values in the drop down are
- NONE_XML - the message is identified by a string in the file, if not binary (no content based routing can be performed for binary messages).
- UNKNOWN_XML - the message is identified by one or several xml nodes in a file that lacks an envelope.
- SOAP_IFS - the message is identified according to the content of the IFS defined soap envelope.
- SOAP_SIMPLE
- Additional SOAP envelopes that can be defined in the system.
You may use any other envelop that is defined in the IFS Connect configuration.
For outbound message distinguish from where the message is sent. The options in the list of values are:
- APPLICATION_MESSAGE - the message is from IFS Application and is concerning for a business flow. Normally a message produced by a BizApi.
- REPORT - used for routing the Report Designer type reports.
Note: It's important to give the rule a unique description so you can see what it is. Many rules may be defined in an operational system and this method of documenting them is very important.
Enabled or Disabled.
Defines if the rule has been customized or not.
Defines routing parameters on the values provided from the different transport connectors, e.g. file name given by the file connector, mail subject etc. See Routing from Name or Location for location base routing parameters.
Defines the search paths in the message. See Inbound Routing or Outbound Routing about the routing parameters.
Shows a list of all Destination Addresses grouped in address chain links. A Destination Address defines a destination where the message is to be sent if all of the the conditions match.
To add or remove one or more addresses to/from you rule click on the Destination Address link.

The click event will popup a dialog box with list of all available destination addresses. Just check/uncheck the check box next to address you want to add/remove to/from your rule. Addresses already present on the rule are default checked when the dialogue box pops up. Press OK when done.
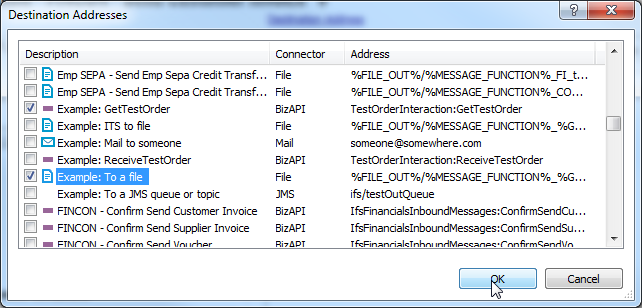
Assign proper address chain link number to each address by editing in the
Chain Link No column. If there are several
addresses in the same chain link, one must be defined as main address. Main
address is shown in bold.
To set or change main address choose
Set as Main Address from the RMB menu on the address you will define as main.

Example of address chain with three chain links (address groups):

Post/Invoke_Outbound_BizAPI methods in
PL/SQL.With the message routing client, you can test route rules and destination addresses.
All destination addresses other than BizApi or PL/SQL addresses can be tested in the detail
window. Open an address and click Test toolbar button to open a test
window.
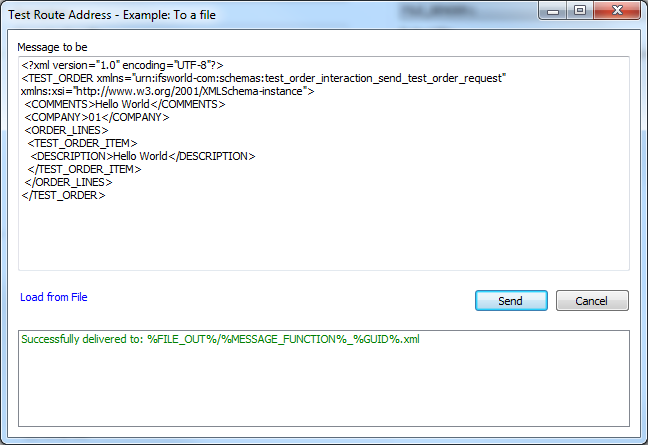
Type a message or load from a file and press Send. The result status
will be displayed in the bottom window.
Open an inbound routing rule and click Test Content Condition
from the RMB menu.
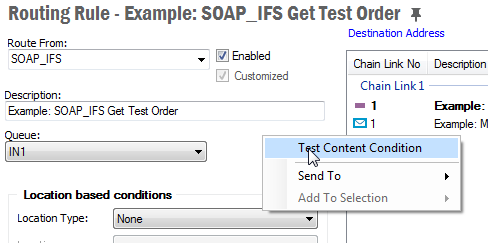
This will open an Open File Dialog to select the input message for
the route rule. When a file is selected, it will be matched with the current routing
rule. The result will be displayed in separate window. This functionality can be
used to check whether a particular message matches a selected inbound routing rule.
Note: This test functionality doesn't match location based conditions.
In the overview form of Inbound/Outbound routing rules you can check whether
a message matches any rule available in the system. Click Test Rules
from RMB menu. This will open a separate test window.
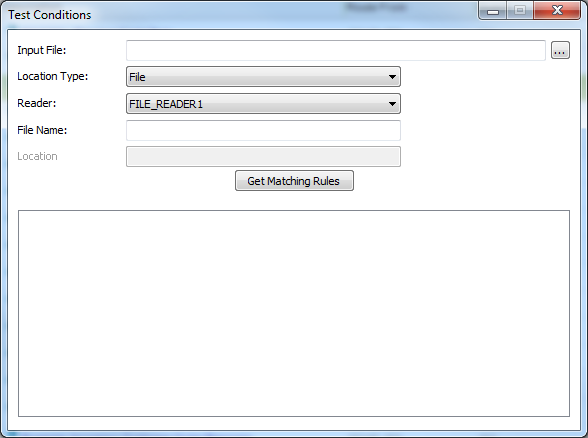
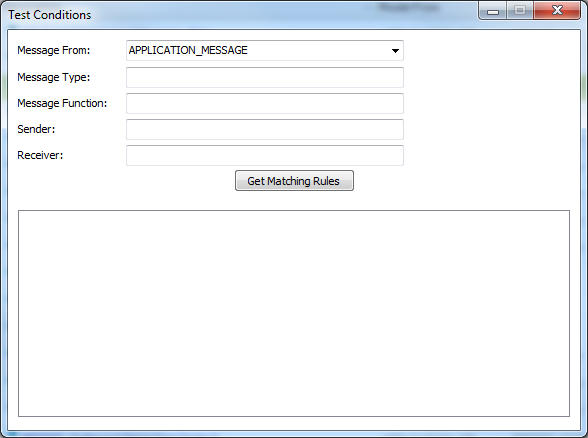
Enter the necessary details values and click Get Matching Rules.
The result will be displayed in the bottom pane. If there are more than one matching
rule, the selected rule will be highlighted in boldface.
A number of Routing Addresses and Routing Rules is automatically installed on fresh installation of IFS Applications. Those addresses and rules can be however customized by the customer. Therefore it is important to determinate if a particular rule or address has been customized on system upgrade on patch delivery and upgrade only non-customized ones with new versions that may be delivered from IFS.
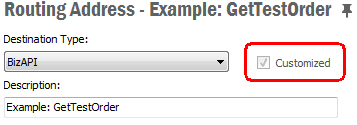
A check box labeled Customized is present on both Routing Rules and
Routing
Addresses forms. The flag is automatically set on any modification done to the
actual address or rule:

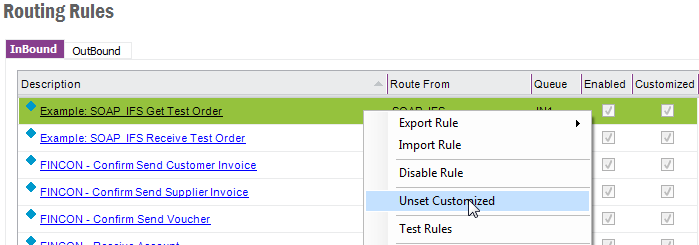
The value of the flag can be however toggled in overview mode using RMB
methods Set Customized and Unset Customized:
Note:
On upgrade from IFS Applications 9 or earlier, where the
Customized flag was not present, the flag for all binary values is
remained unset making it possible to update even modified values. This is
because of backward compatibility. It
is impossible to determinate if a value has been customized or not, but the
installation/upgrade process in earlier versions of IFS Applications
has always overridden the current value. For
customized values the flag has to be set manually to prevent them
from being overridden.
