Configuring Azure AD as a Brokered Identity Provider in IFS IAM
IFS IAM authenticates with OpenID Connect External Identity Providers as Identity Brokering. This helps to provide a user-centric, centralized way to manage identities for security domains.
This document describes how to Configure Azure Active Directory as a Brokered Identity Provider in IFS IAM.
Prerequisites
- Azure Active Directory Tenant
1. Create a new Idp Configuration in Solution Manager.
Navigate to Solution Manager > Users and Permissions > Identity and Access Manager > IAM Identity Providers > IAM Identity Providers
Create a new Identity Provider.
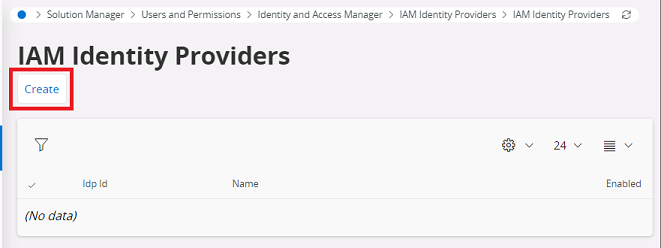
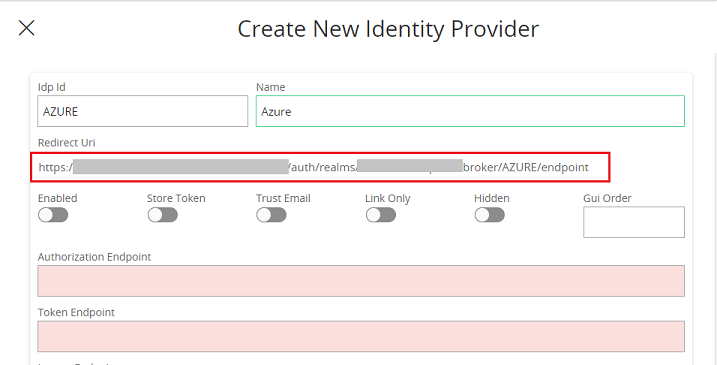
IdP ID – Use any name without spaces.
Name – This is used on the login page. Give a meaningful name.
Copy the Redirect URL – You need this redirect URL to register the app in Azure AD.
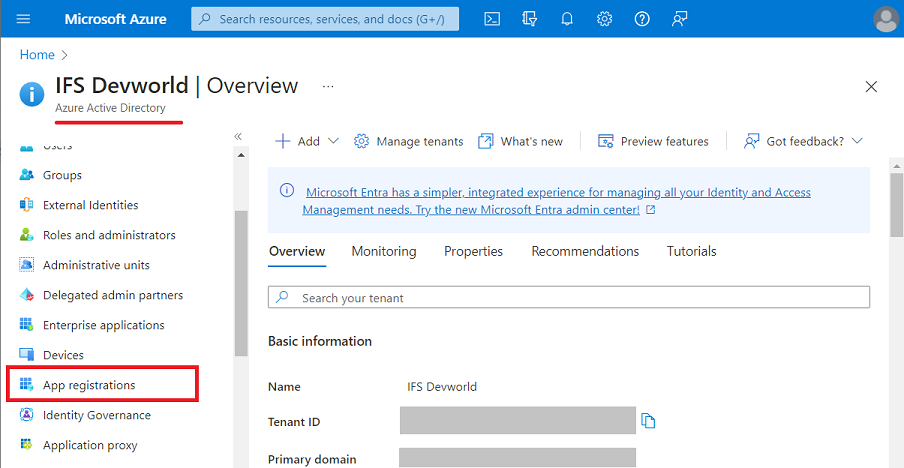
2. Register App in Azure AD (Active Directory) Tenant
Login to Azure Portal and navigate to Azure Active Directory > App Registration.
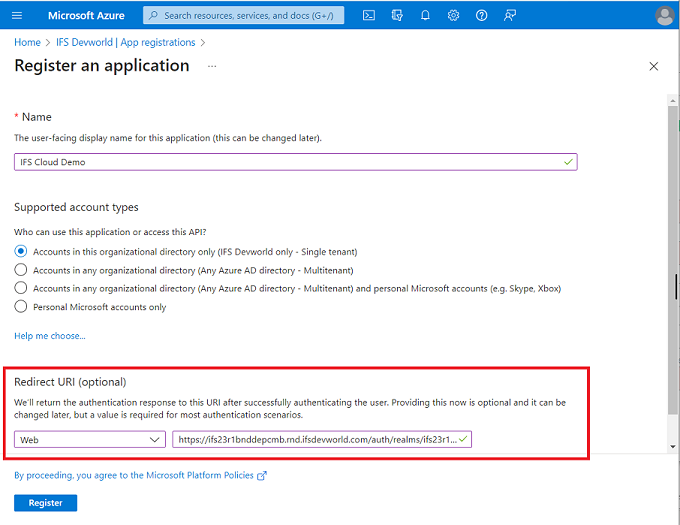
Use New registration and Fill out the information.
Name – User Preferred name.
Redirect URL – Paste URL from Step 1.
3. Configure Endpoints in the Idp Configuration page
Select Endpoints in the newly created application.
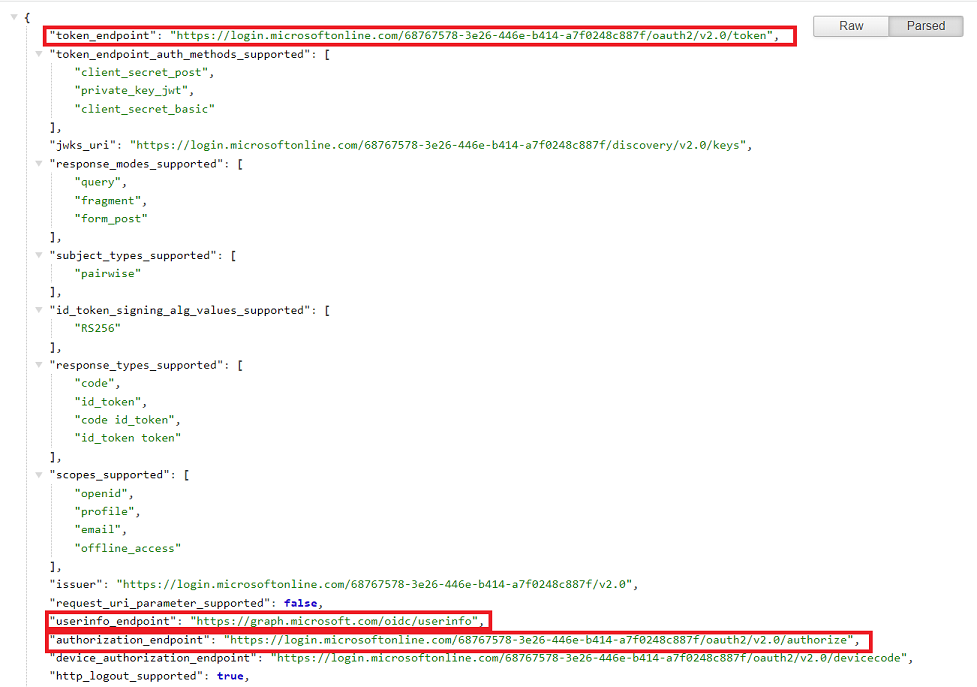
Now you will see all the endpoints needed.

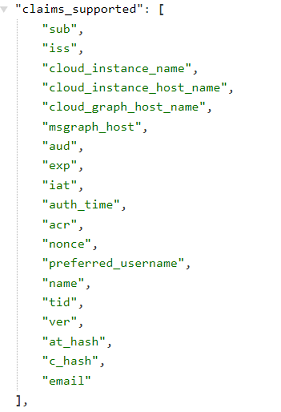
Step 1: IFS needs an authentication endpoint, a token endpoint, and a user info endpoint from here. You may directly use the first two endpoints displayed on this page. If you open the OpenID metadata document (copy and open in a new tab) you can get all three endpoints from there.
Step 2:
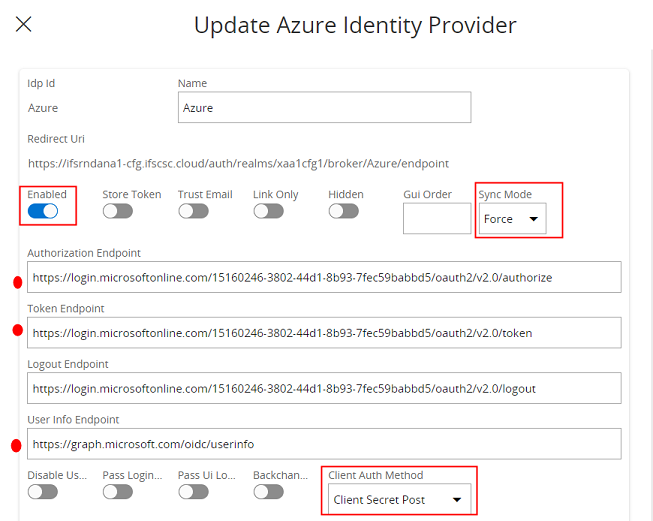
Step 3: Copy the highlighted endpoints to the newly created Identity Provider Configuration in Solution Manager.
- When configuring Azure AD, the User info endpoint is mandatory. (User info endpoint is not marked as a mandatory field because it is not needed for some other external IDPs such as ADFS (Active Directory Federation Services).
- Select the Client Auth Method as the Client Secret Post or your external IDP supported Client Auth Method mentioned in the OpenID metadata document.
- Choose your preferred Sync Method. ( This determines the method to sync user details. If Import is chosen, the user details will only be imported at first login, but not updated if changed. If Force is chosen, the user details will be imported at first login and updated when changed.)
- Enable the Identity Provider as shown below.
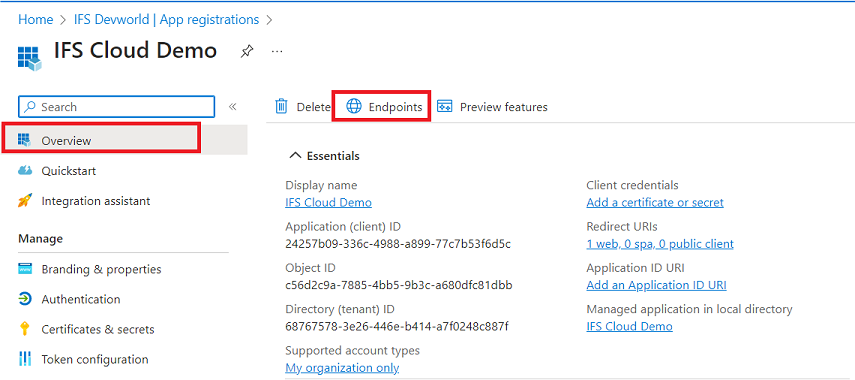
4. Add the Client ID and Client Secret
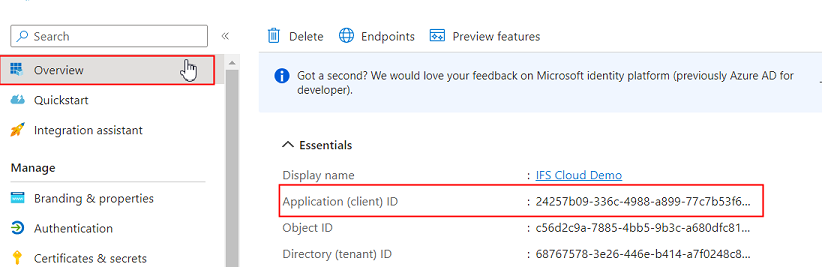
From the overview page in Azure App registration copy the client ID (Application ID) to the Idp Configuration, Client ID field in Solution Manager.
Next set the Client Secret.
Go to Clients & Secrets in Azure and create a new secret.

Copy the generated secret to the Client Secret field in Solution Manager.
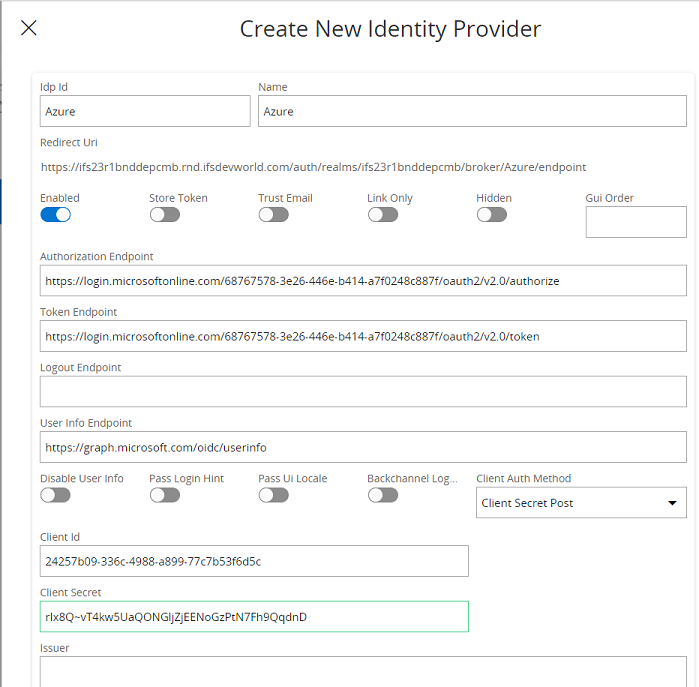
Finally, Save the configuration in Solution Manager.
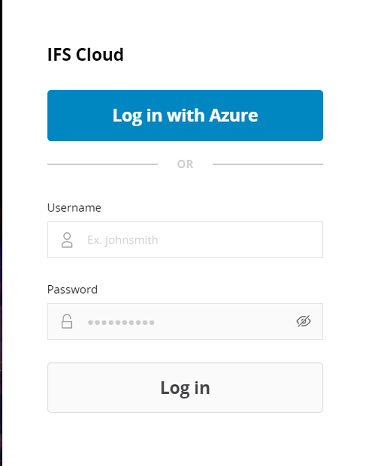
Log out from the application. You will see a new Option to Login with Azure AD now.
Attribute Mapping (Adding an optional claim)
By default, identity brokering uses the email as your Directory ID. If you use something else other than the email, you can use an attribute mapper to change the default settings.
For more information on configuring optional claims please refer to: Configure optional claims
Adding an attribute mapper
If you are using Attribute Mappers, you must remove the User Info endpoint from the IDP configurations.
- Navigate to the Idp Attribute Mapper.
- Create a new mapper.
- Give any value to the name.
- Give the correct active directory attribute that you use for Directory ID (Username) for Claim.

The Supported claims are listed in the OpenID metadata document.
By doing this, you can log in with something other than the email.