Adding Entities
Adding Entities of type Standard, Custom or Query to existing pages and Creating New Pages using these Entities can be done in IFS Cloud.
How to add an Entity to an existing Projection or Create a New Projection using an Entity
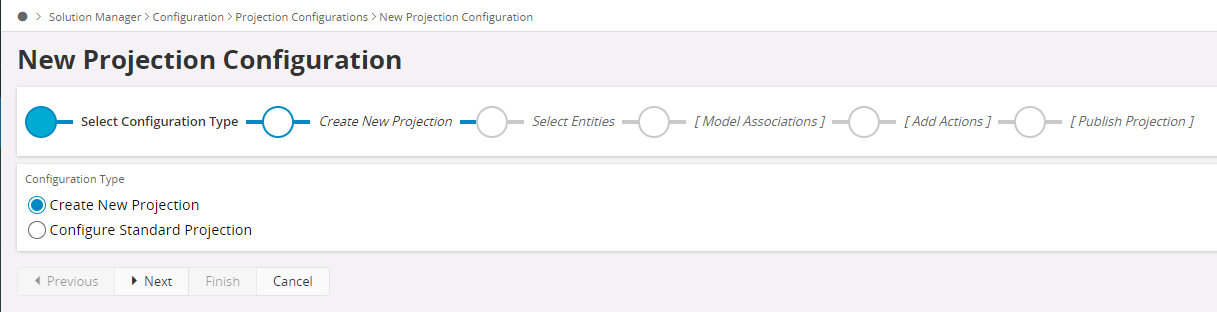
- Go to the New Projection Configuration assistant in Solution Manager > Configuration > Projection Configurations > New Projection Configuration. Select Configuration Type** step allows the user to decide whether to create a New Projection or to Configure a standard Projection. By default "Create New Projection" is selected.
- Create New Projection step is to add the basic information for the New Custom Projection. Add the Custom Projection Name, Category and Description. Choose a value from "Category" drop down. Set category depending on the purpose with the Projection: which application it should be available in.
Below are the available options.
| Option | Description |
|---|---|
| Users | Makes the Projection available in the Main (Business to Employee, B2E) application. |
| External B2B | Makes the Projection available in the Business to Business (B2B) application. |
| Integration | Makes the Projection available for integration purposes, for external systems to be integrated with IFS Cloud. |
| Users & External B2B | Makes the Projection available for both B2E and B2B application. |
- Select Entities step is where Custom Entities, Standard Entities or Query Entities can be added to the New Projection or an existing Projection. The Entities to be connected are selected from Entity Name list of values. Operations Allowed will give the option to add Read, Create, Update, and Delete operations for the Entities to the New Projection or the Standard Projection.
It can be decided to either approve the Entity at this step or modify the entity after creating the New Projection.
Note: For Standard Entities and Query Entities, only Read operation will be allowed under Operations Allowed.
-
Model Associationsstep is used to set up associations: add Entity Associations and Entity Association key mapping. (Optional Step - refer to the Entity Associations)
-
Add actions step enables you to add Custom Actions to a Page. Custom Actions provide the possibility to expose PL/SQL methods in IFS Cloud through IFS Cloud Web Pages. To learn more about Custom Actions refer Custom Actions & Custom Commands.
-
Publish is the last step of setting up a new Projection. The Projection can be published either at this step or later after the Projection has been created.
-
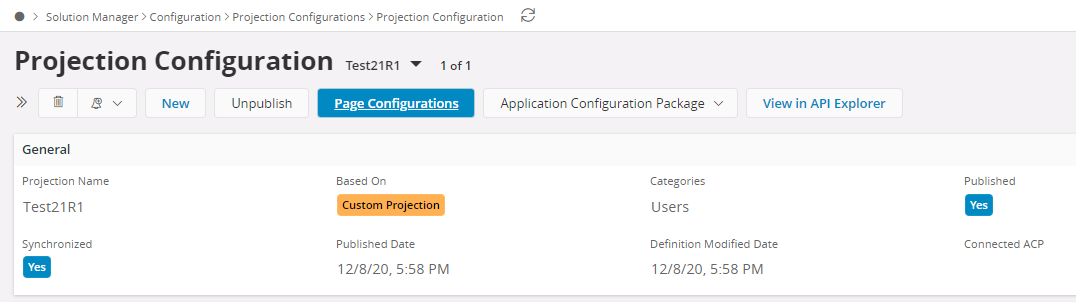
Finishing the assistant will direct to the Projection Configuration detail page where the user can see all the details
Create a Custom Page from a Configured Projection
Now the created Projection can be used to create a Custom Page. A page can be designed in mainly two ways, either as an Overview page where a List of Records is shown or as a Detail page where only a single record is shown at a time. For the overview page we can simply use a list to show all records. For the details we need a Selector to be used to iterate to all the records and then corresponding Group or other element which will show the data. Below is how we can create these pages.
-
Once the user is navigated to the Created Projection, then the Page Configurations command will be available so the user can create a Custom Page for the relevant Custom Projection from here.
-
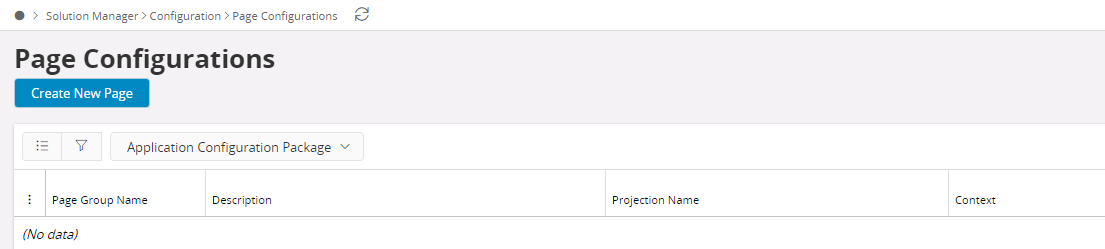
Clicking the Page Configurations button will direct to the Page Configurations overview page, which lists down all Pages associated with the selected Projection. For a newly created projection, the records will be empty.
-
In that page, clicking the Create New Page will open up a pane where you can give a Page name as well as the Projection on which you want to base the new Custom Page on.
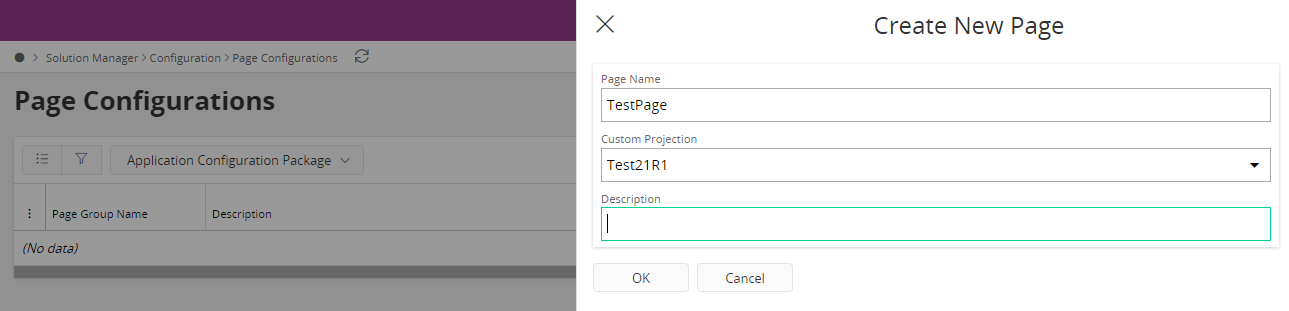
-
Once the OK button is clicked a new Custom Page will be created and will be published automatically.
Using the ** Page Designer,** this Custom Page can now be configured with the required fields in underlying Entity. Below follows an example.
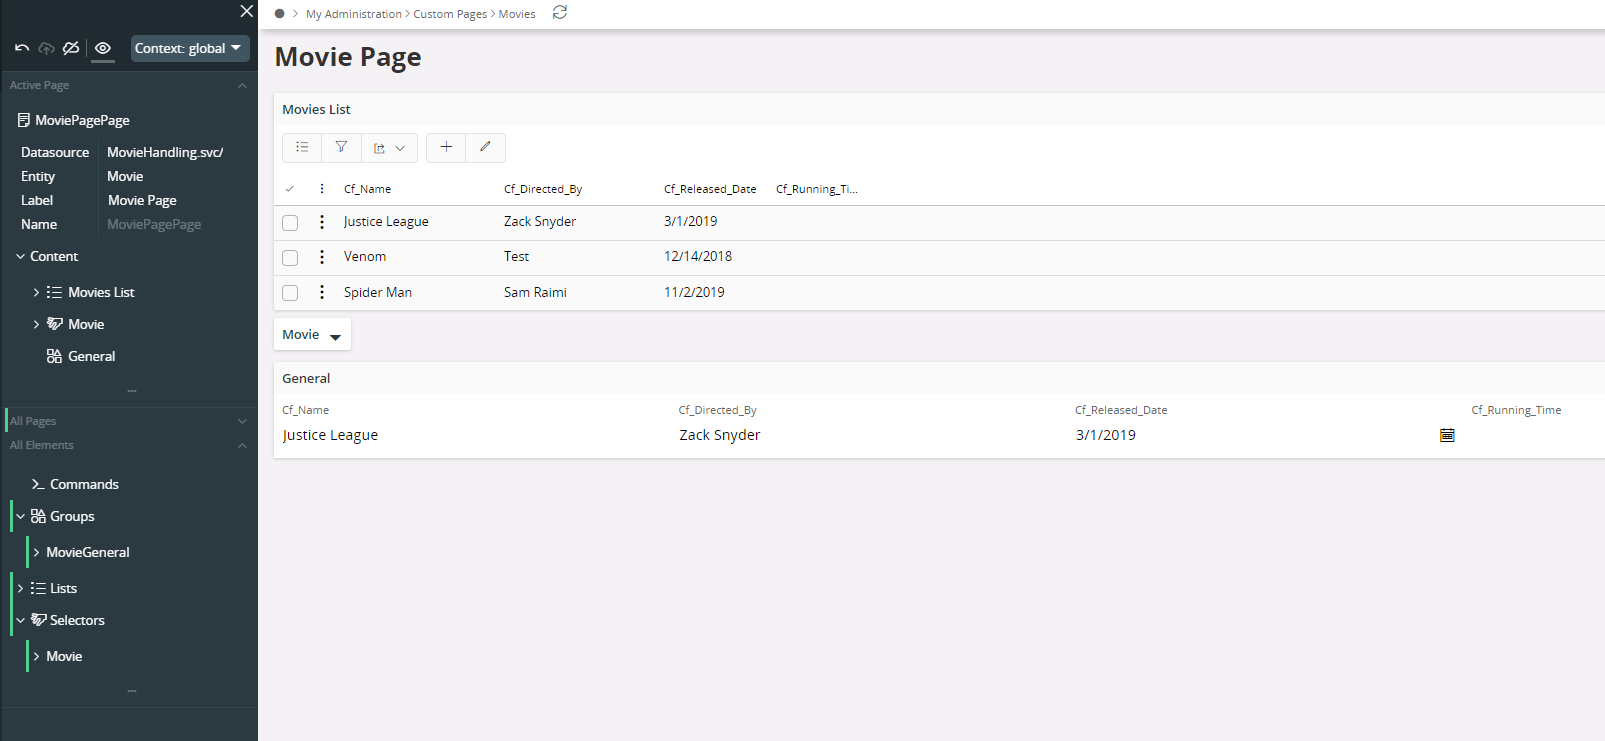
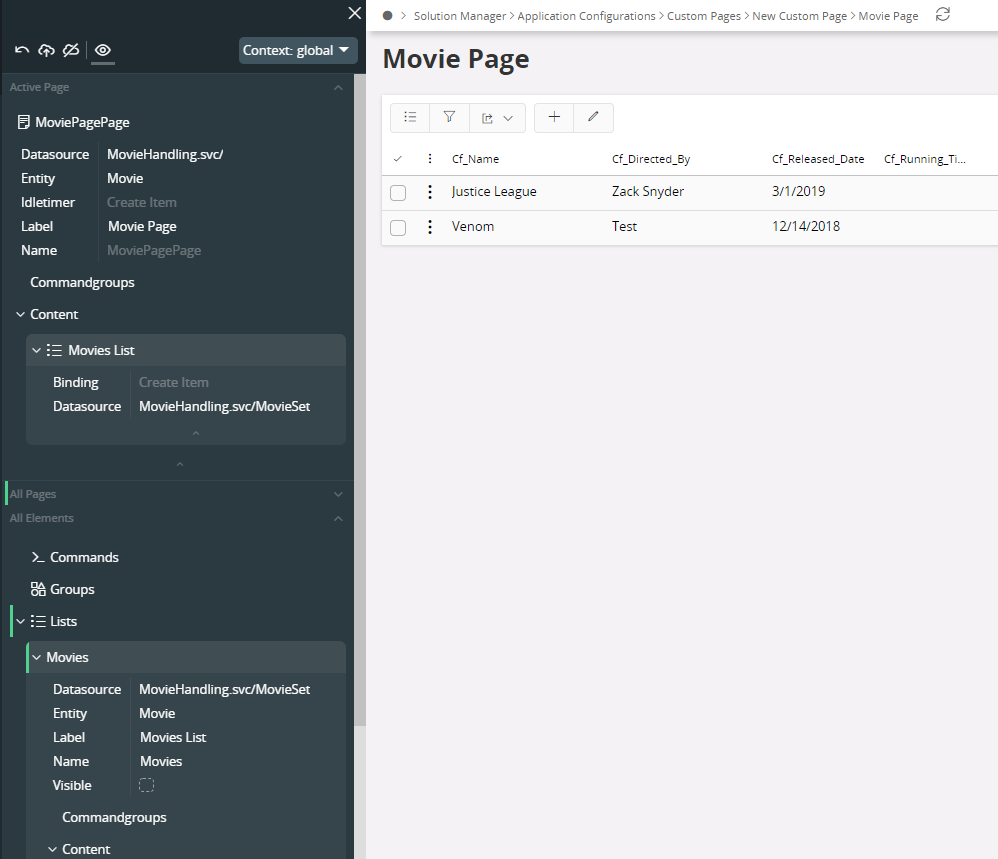
Adding page elements to a Custom Page with the Page Designer
The new page element needs to be added to the All Elements before it is added to the page content. In this example, a List, a Selector and a Group is added to the Custom Page. The steps are the same for adding new elements.
Add a List
- In the All Elements section: add a new List. Set Name, set Datasource and add Fields to the List.
- In the Active Page section: add the new List to Content. Set the Datasource.
- Save.
Add a Selector The page's main Selector is what is used to navigate to all the records on the page. The Selector will be shown in the top of the page near the title, and also on the navigator pane. The page's Selector must be the first item in the page content.
- In the All Elements section: add a new Selector. For the new Selector, set Datasource and add Fields as content to the Selector.
- In the Active Page section: add the new Selector to Content. Set the Datasource.
- Save.
Add a Group
- In the All Elements section: add a new Group. For the new Group: set Name, Datasource and add Fields as content to the Group.
- In the Active Page section: add the new Group to Content. Set the Datasource.
- Save.