Query Designer Capabilities
- Selecting Entities and Attributes
- Filters
- Sorting
- Alias
- Joins
- Aggregation
- Alternative/Non-base Views
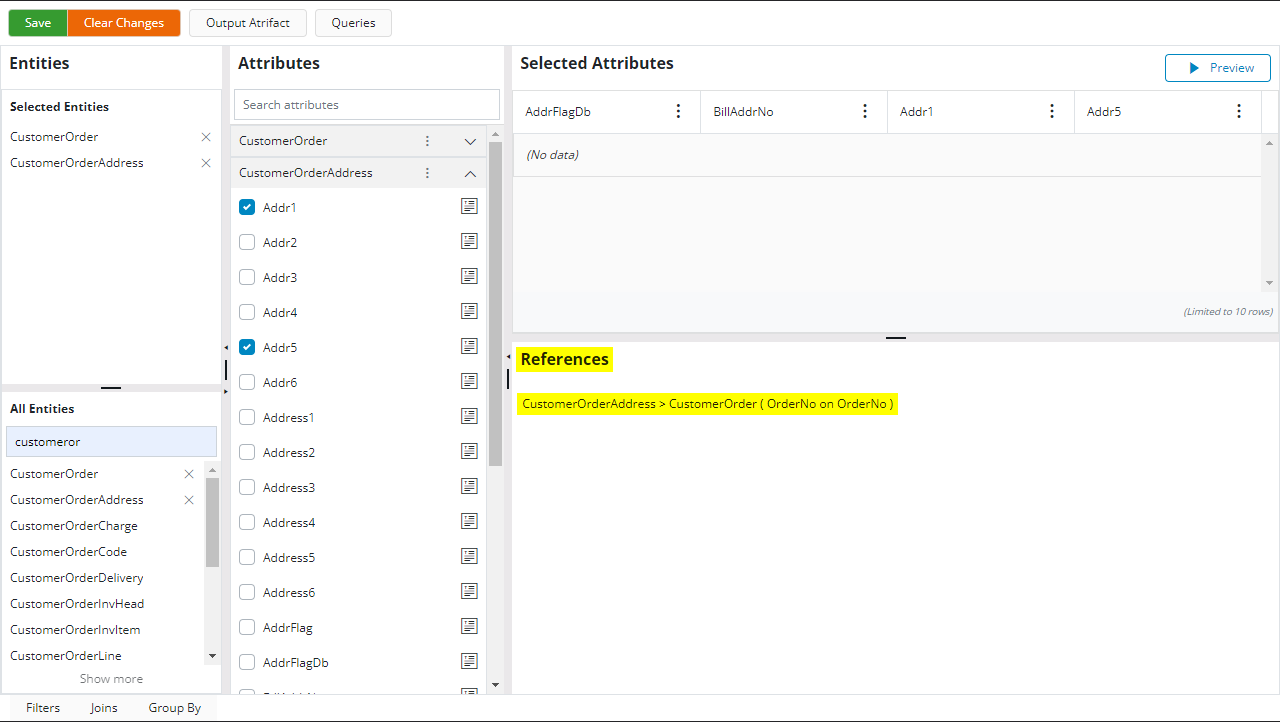
Selecting Entities and Attributes
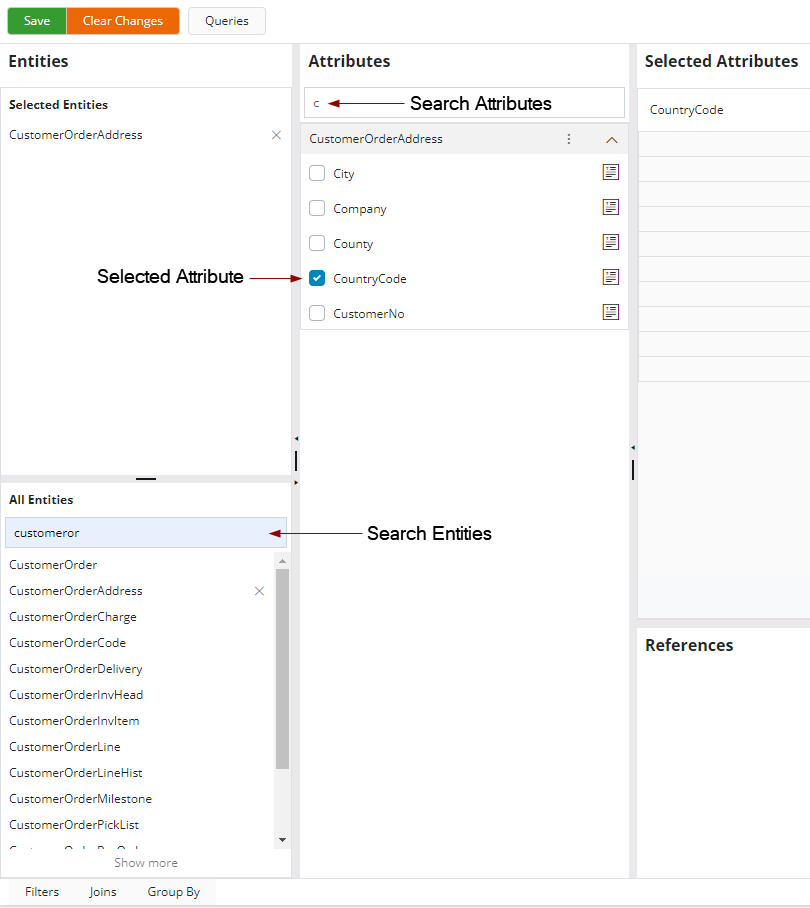
Adding an entity to the query can be done through the entities Pane on the Query Designer. To select an entity simply click on the entity name listed in the All Entities pane.
To search an entity, type in the search phrase on Search entities text field and press enter. This will search the first 25 entities where the entity name starts with the search phrase. If the entity you search for is not listed within the search result try clicking on Show more button at the bottom of the list.
After selecting an entity, the Query Designer will display all the attributes of the entity in the Attributes pane. Expand the relevant entity to see the attributes by clicking on ▼ icon next to the entity name. The data type of each attribute is indicated right next to the attribute name. To select an attribute click on the attribute name or the checkbox. Selected Attributes are indicated by the checkmark to the left of the attribute name.
Users also can search for attributes by typing the attribute name in Search attributes text field.
Selected Attributes can be deselected by clicking on the attribute name. The checkmark will be removed indicating the attribute is no longer used in the query.
To remove a selected entity, find the entity either in the Selected Entities pane or the All Entities pane and click on the [X] button next to the entity name. This action will remove every information related to the entity from the query.
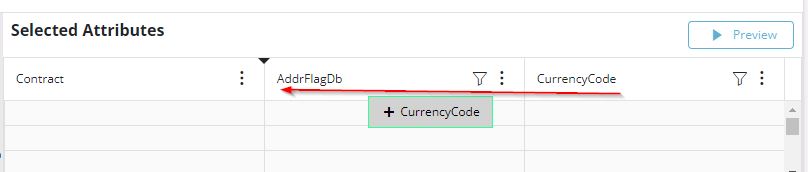
Users can reorder the Selected Attributes by dragging and dropping them to the new location within the Selected Attributes pane.
Filters
Basic Filters
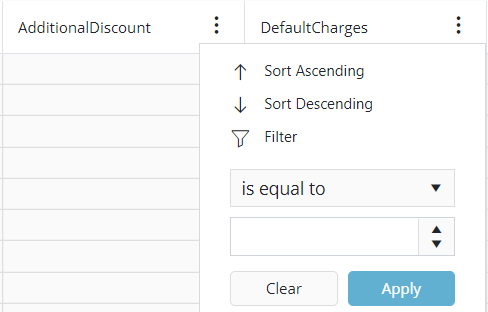
A basic filter can be applied to any Selected Attributes. Click on the menu button of the attribute in the Selected Attributes pane. Select Filter menu. Based on the datatype of the attribute a list of supported filter conditions and an input field will be presented. Select the required condition and the value. Click on Apply. The filter is now applied to the attribute and it will be indicated by an icon next to the attribute name in the Selected Attributes pane.
 |
 |
|---|---|
| Filter menu for Text Attribute | Filter menu for Numerical Attribute |
 |
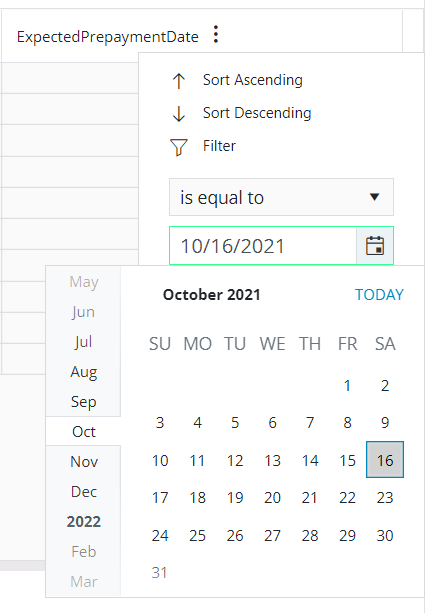 |
| Filter menu for Boolean Attribute | Filter menu for Date/Time Attribute |
Basic filters can be applied to any number of Selected Attributes at the individual attribute level. Each condition will be joined with an AND operator.
Filter Pane
The filter pane allows the user to create advanced filters. To open/close the filter pane, click on the Filter button at the bottom of the Query Designer.
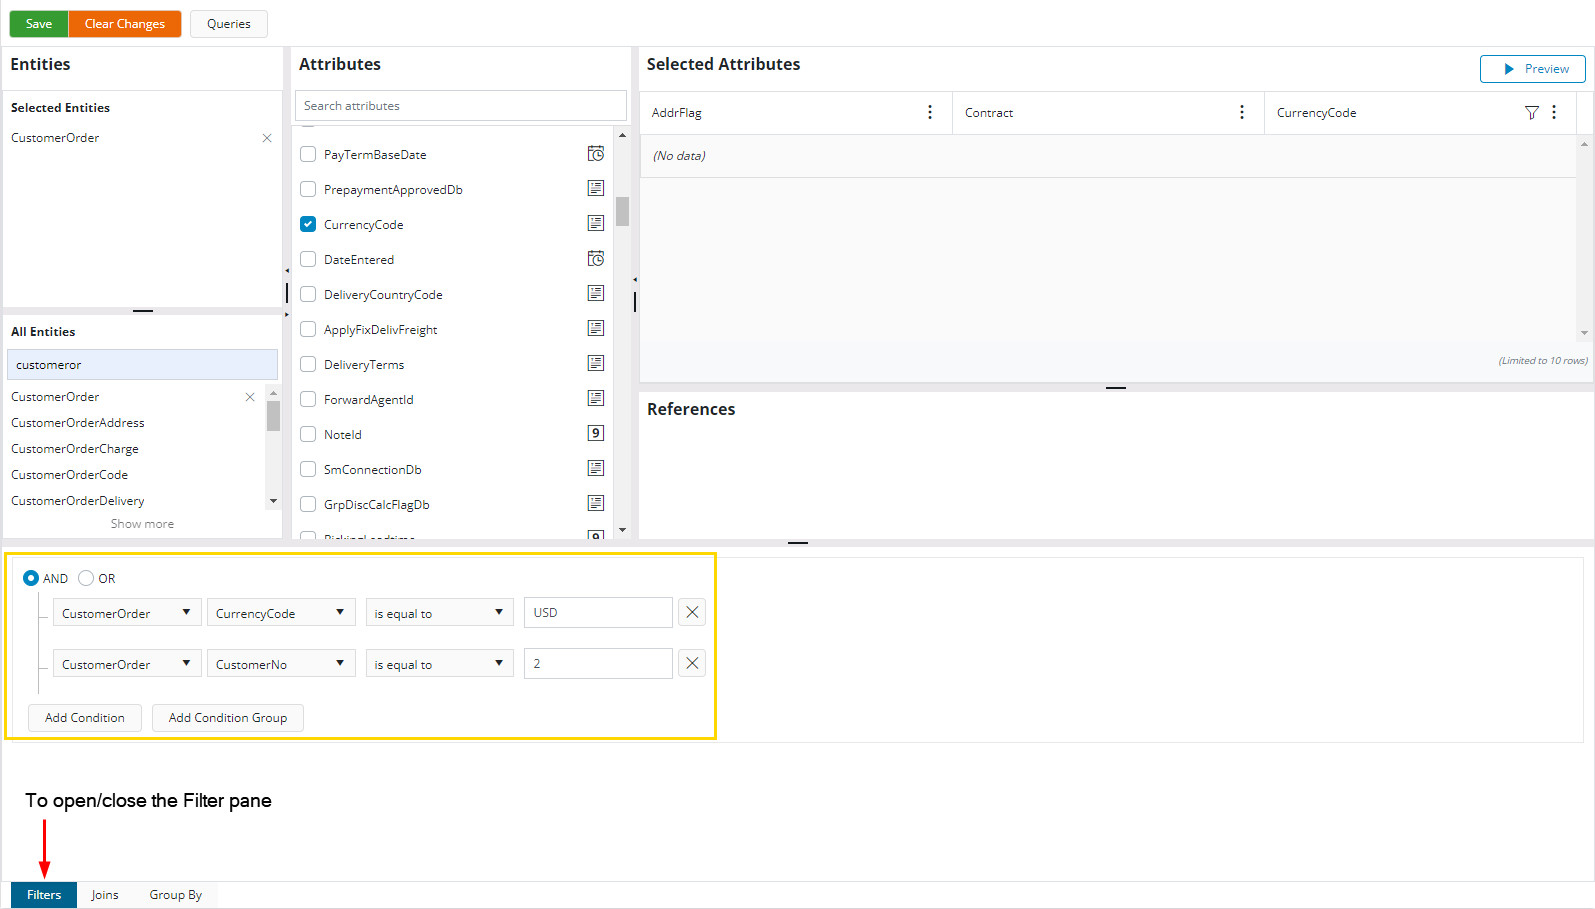
To create a filter using the Filter pane, click on the Add Condition or Add Condition Group button. The Add Condition Group button can be used to create more complex filters by creating nested filter conditions within another Condition Group.

The four inputs in a filter condition are as follows,
1. The first dropdown box will list all the entities selected into the current query.
2. After selecting the entity from the first dropdown, the second dropdown will display all the attributes of the selected entity.
3. Based on the data type of the selected attribute the third dropdown will display a list of supported conditional operators
4. The fourth input box will be displayed after selecting the filter operator. This input box will be different based on the data type of the selected attribute and the selected filter operator.
After selecting all three values for the dropdown of the filter condition, enter the value to be filtered into the input field.
To remove a filter condition, click on the [X] button next to the filter condition.
Users can select either logical AND or logical OR as the logical operator of the filters by clicking on the radio button on the top of the Filter pane.
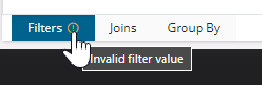
The Query Designer will not allow the user to add more conditions or condition groups if there are incomplete filter conditions and, it will warn the user. These warnings will be visible on the Filter pane button on the bottom of the Query Designer even if the Filter pane is closed. To see more details of the warning, hover over the (i) icon.
Note:
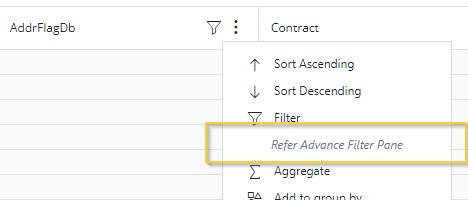
- Filter conditions created in the Selected Attributes pane are also displayed and can be modified in the Filter pane.
- If the filter conditions created in the Filter pane are too complex, the Basic Filters option will be disabled in the Selected Attributes pane.
- The query cannot be previewed or saved if Filter pane warnings exist. To preview or save the query, either remove or complete the erroneous filter condition.
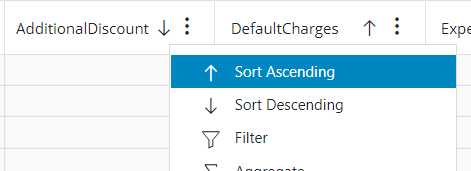
Sorting
The query can be sorted by one or more Selected Attributes. To do so, click on the menu button of the selected attribute in the Selected Attributes pane and select the sorting direction. Repeating the same will toggle the action. The sorting direction will be indicated on the Attributes pane next to the relevant attribute and the Selected Attributes pane.
Alias
To set an alias to a selected attribute click on the menu button next to the relevant attribute's name in the Selected Attributes pane. Click on Alias. Type in the alias and click Apply. The alias will be displayed on the Selected Attributes pane as well as on the Attributes pane. The original attribute name will also be visible next to the alias.
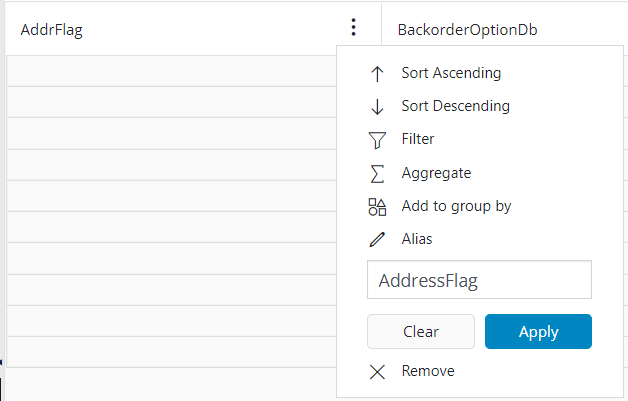

Note: Only letters, numbers and, underscore ( _ ) are allowed
Joins
The Query Designer has the capability of joining entities automatically based on the reference details. When a user selects more than one entity, the Query Designer will look for all the reference details with previously selected entities and add them into the join details. The references being used will be displayed in the References pane.
In case there are multiple reference details found, the Query Designer will prompt the user to select the reference to be used in their query.

If the selected entity does not have any reference with previously selected entities, the Query Designer will prompt for the user confirmation to keep the entity or remove it.
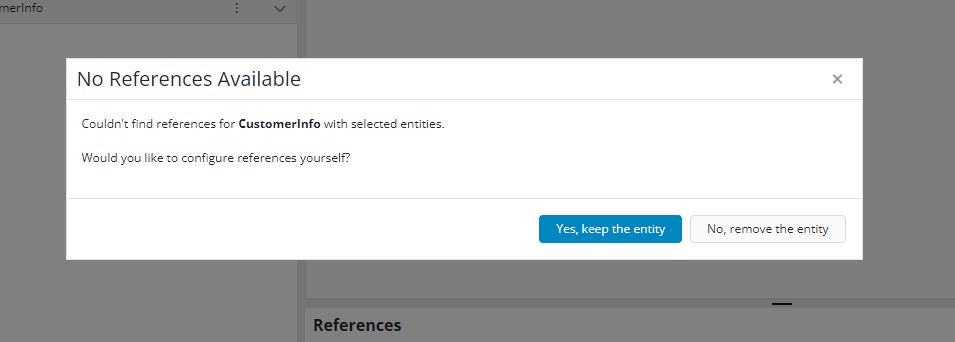
To add the entity into the Query Designer and manually configure the Join conditions, click on Yes, keep the entity button. Otherwise, click on No, remove the entity to remove it from the query.
Join Pane
The Join pane allows the user to modify the entity joining conditions. Moreover, it enables the user to add entities that do not have predefined reference information into the query.
In the Join pane, each row represents an individual join condition between two entities selected into the query. Users can modify these conditions as needed.
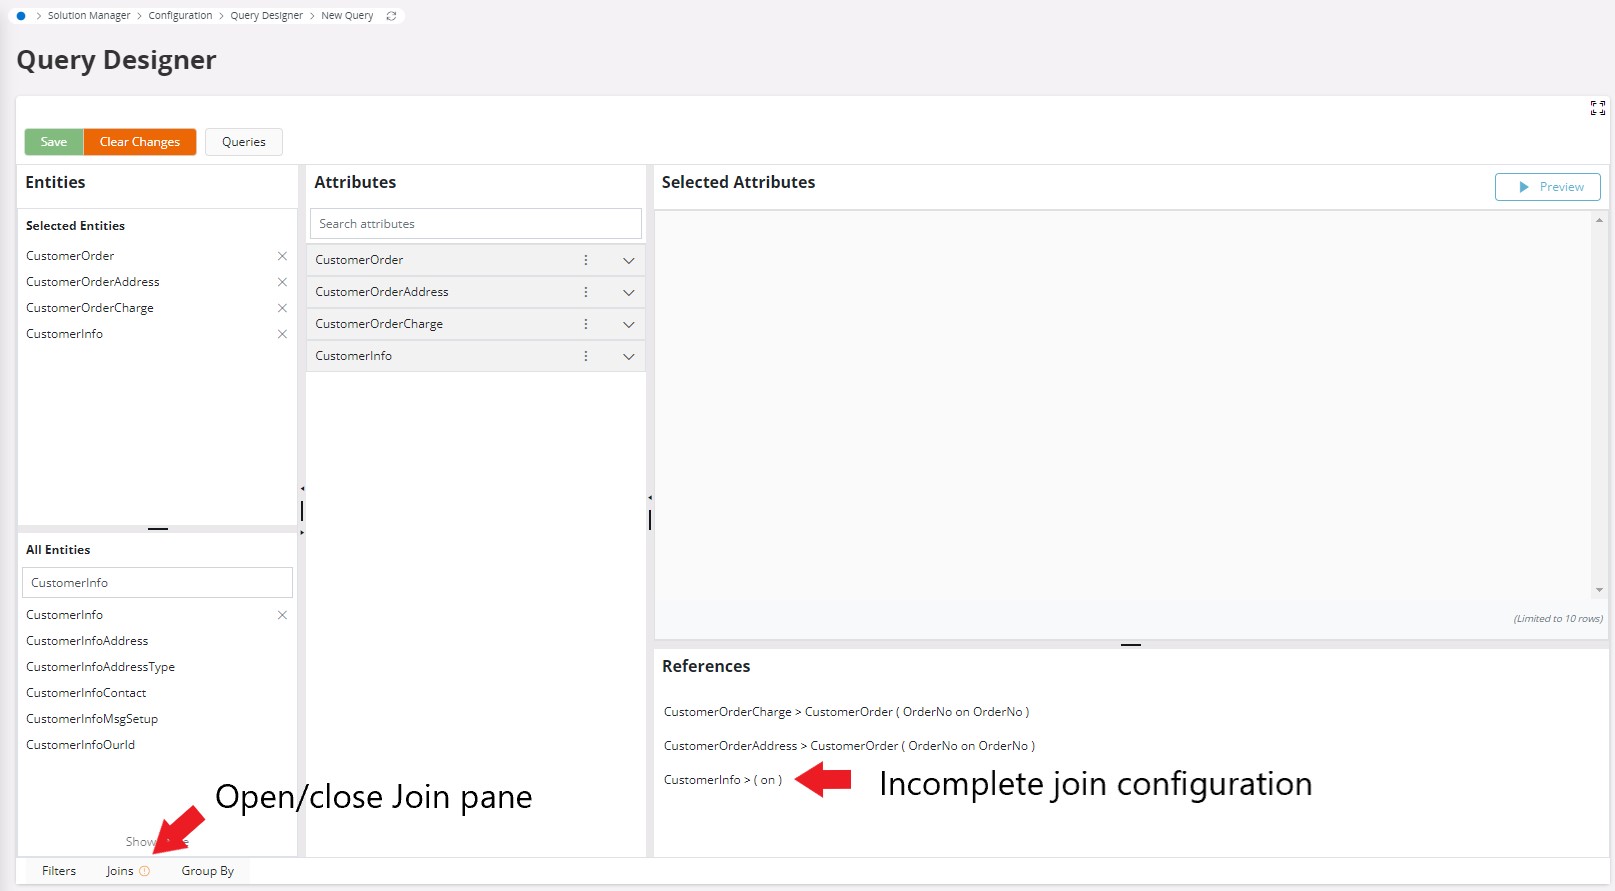
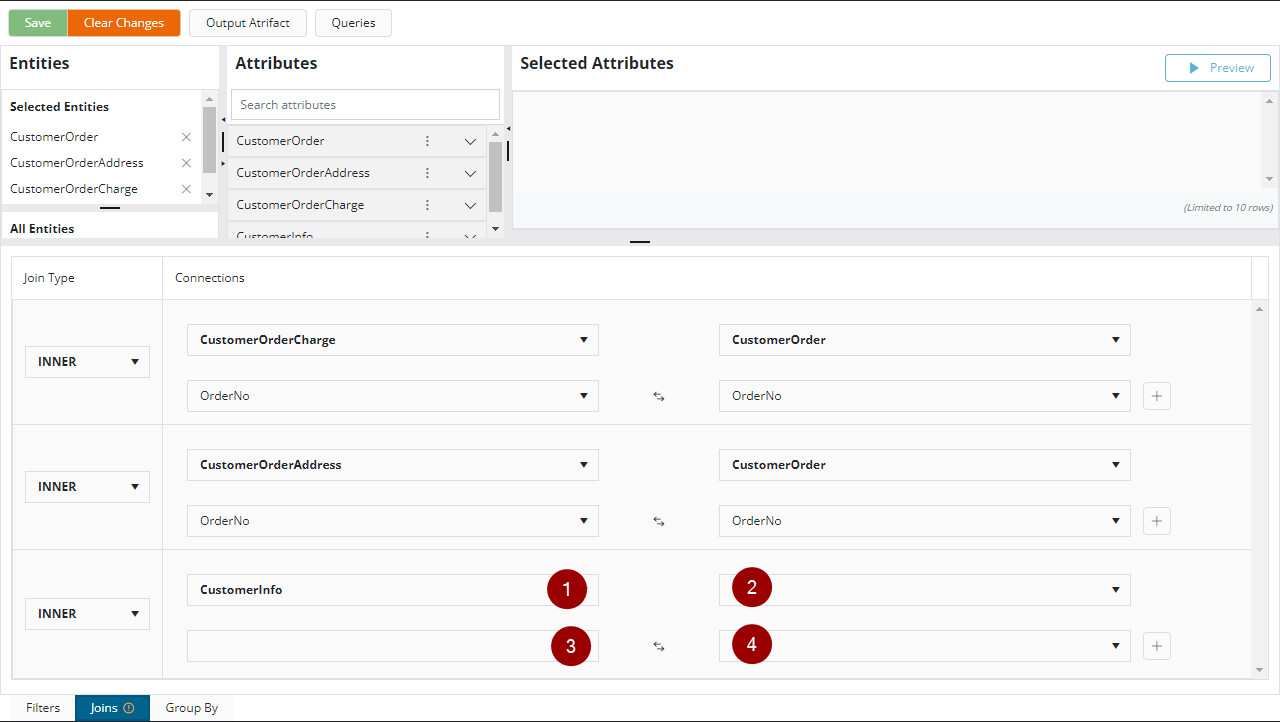
To configure an incomplete join configuration, the user must select an entity from the 2nd dropdown to join with (in this case) CustomerInfo entity. Then using the 3rd and 4th dropdowns, the user must select the attributes from each entity that should be used in the join configuration.
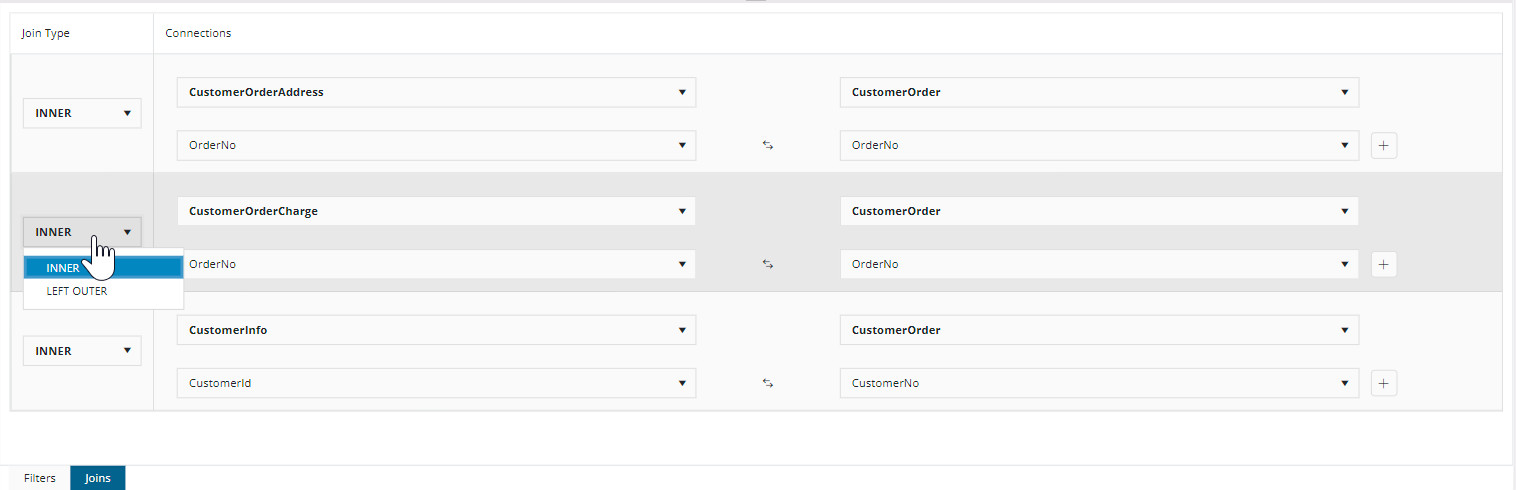
By default, the Query Designer creates INNER joins. To change this to a LEFT OUTER join, use the Join Type dropdowns.
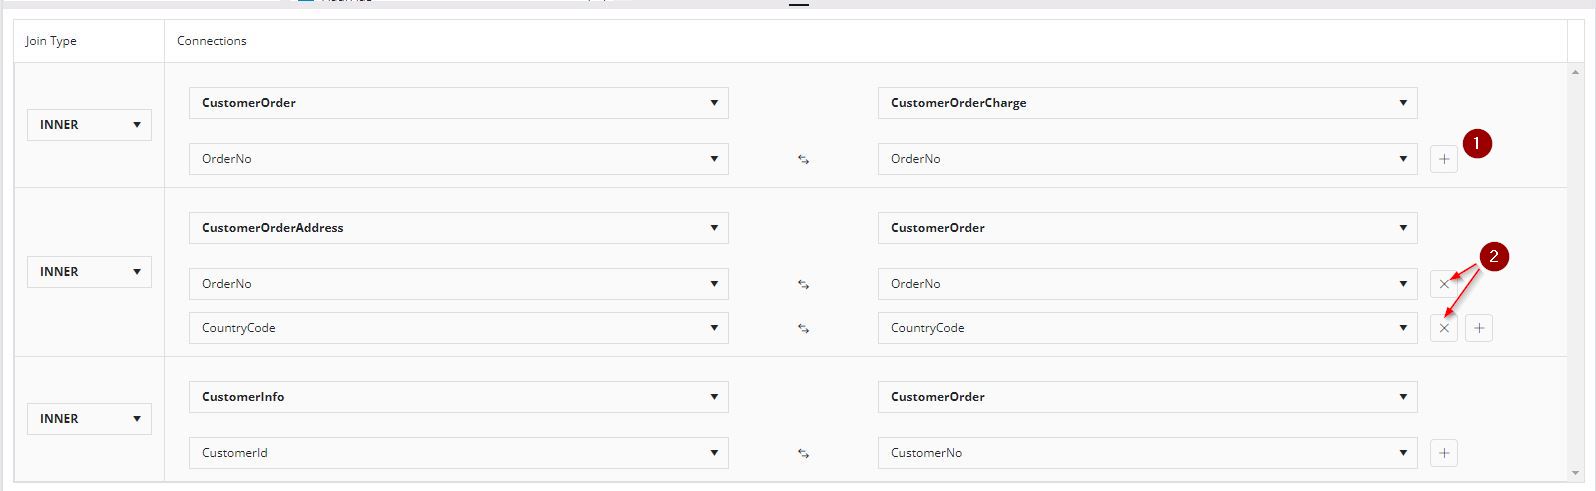
Using the [+] button (1) next to the attributes dropdowns, the user can add more attribute combinations into the join configuration. To remove an attribute pair from a join configuration click on the [X] button (2) next to the relevant attributes pair.
The Query Designer will warn the user if there are incomplete join configurations. The query cannot be previewed or saved if Join pane warnings exist. To preview or save the query, either remove or complete the erroneous join condition.
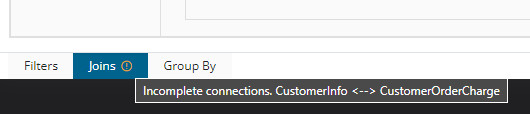
When an entity is removed from the query, join information related to the removing entity will also be removed from the query.
Aggregation
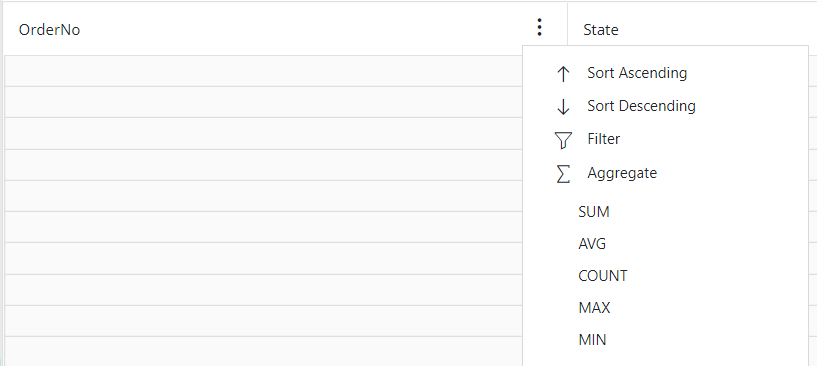
To apply aggregation to a selected attribute, click on the menu button next to the relevant attribute's name in the Selected Attributes pane. Click on Aggregate and select the required aggregation function.
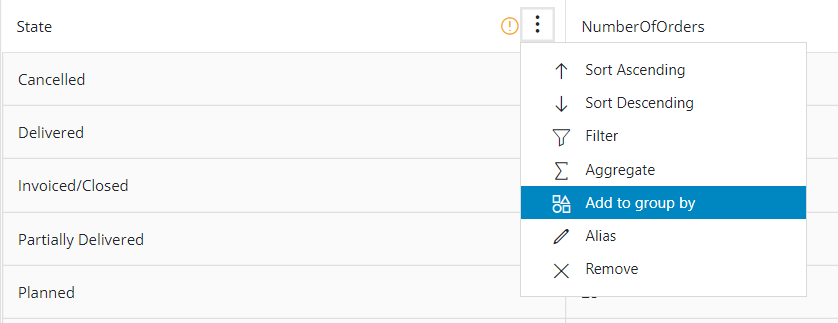
If the query has multiple attributes, the Query Designer will indicate that the query should be grouped by the other attributes. To do so, click on the menu button of the same attribute and click on Add to group by.

Users can further modify the attributes in Group By using the advance Group By pane.
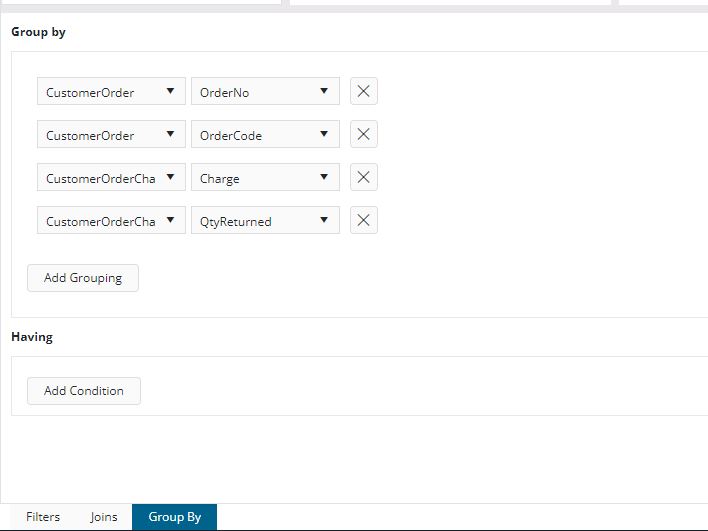
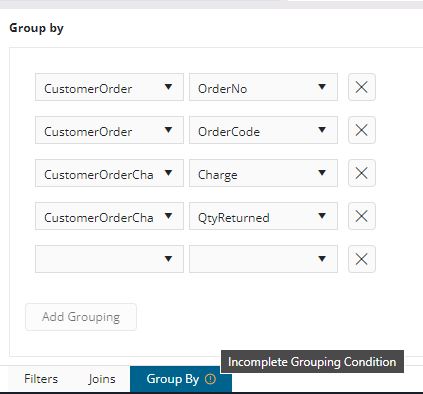
To group the result by an attribute, click on the Add Grouping button. An empty grouping rule will be created. Fill in the rule by selecting the entity and the attribute of the selected entity.
A grouping rule can be removed by clicking the [X] button next to the rule.
The query designer will warn the user if the grouping rules are incomplete and/or if the required attributes are not selected into the Group By.
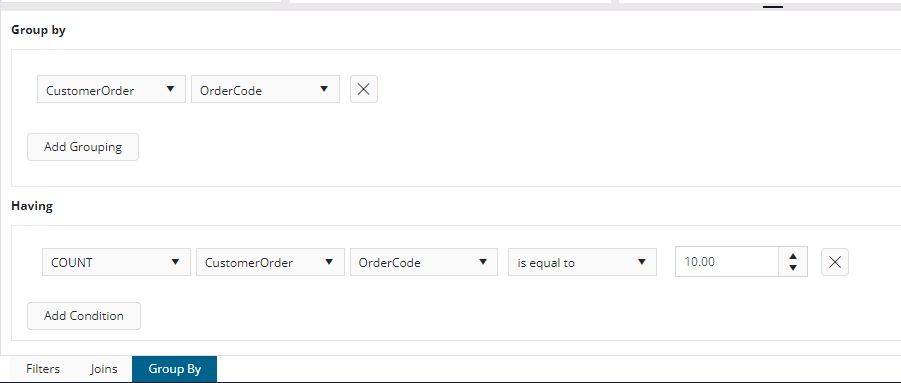
Furthermore, users can filter the aggregate queries using the Having conditions. This feature will be enabled only after creating a Group By condition. To access it, open the Group By advance pane. After completing a Group By condition Having pane will be visible.
Creating Having conditions is similar to creating Advance Filter rules, the only difference being the having conditions are created using aggregation functions.
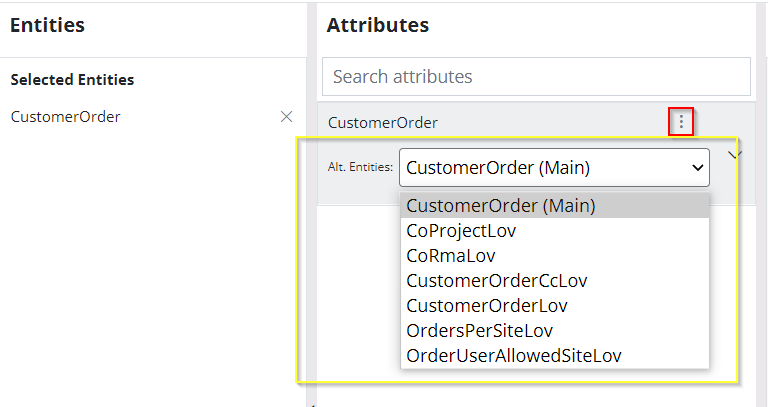
Alternative/Non-base Views
The Query Designer sets the base view by default when an entity is selected. To change to a non-base (alternative) view of a selected entity, click on the menu button next to the entity name in the Attributes pane. A list of non-base views will be displayed. The base view is marked with "(Main)". Select the required non-base view from the list. The attribute list will be updated with the attributes of the selected non-base view.