Font Transformations
Should we really document this? Will it be possible to run this tool today.
A font may comprise of different styles and weights. Styles could range between normal and italic while weight can be either normal or bold. Although most fonts do support both variations of styles and weights there maybe some fonts that come in one single style and weight. MS Gothic and MS Mincho are a couple of examples of such font families. If you want to use different variations (bold, italic, bold-italic) of these fonts then it is possible to create your own fonts.
To be able to create your own font file (ttf) with the preferred style/ weight one needs to use a font editing tool which allows you to transform the glyphs from one style/weight to another.
Note: This guide was prepared using Font Creator 5.0. The current version is 6.5. The flow is basically the same, but properties have moved between tabs and the bold script is available directly in the Glyph Transformer as an option.
Preparations
The font editing tool that we will be using for this purpose is the "Font Creator 5.0" provided by High Logic technologies. You can visit their web site at http://www.high-logic.com/index.html. It is recommended that you purchase this product at http://www.high-logic.com/register.html and install the tool on to your machine. For further information on how to install "Font Creator 5.0" visit their online user manual at http://www.high-logic.com/fontcreator/manual/ .
Once the Font Creator has been successfully installed in your machine, we can begin our work to create fonts of different styles and weights.
Transforming a font from Regular to Bold
When transforming a font from a Regular to Bold one needs to perform two tasks. First, we must transform the glyphs of the regular font to bold. Secondly, we must change the font type of the true type file to bold. The following steps describe the steps to create a MS UI Gothic Bold from a given MS UI Gothic Regular font.
To transform glyphs from Regular to Bold:
- Start the Font Creator tool. Open the font file (.ttf) containing the Regular font. In this case msuigothic.ttf.
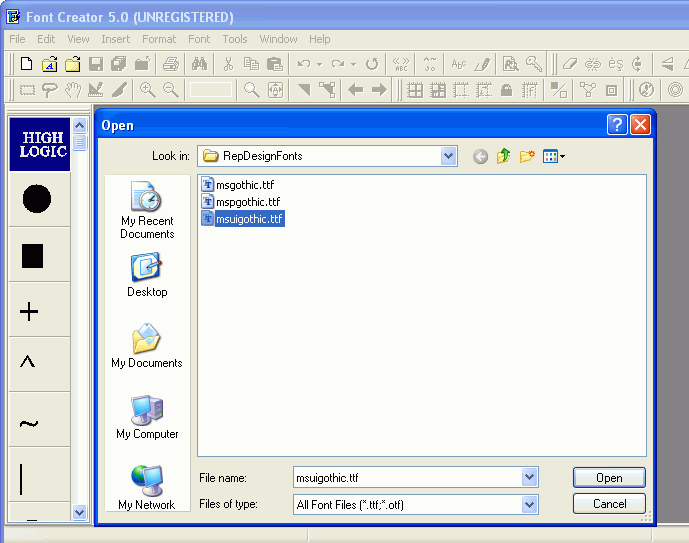
If the font you are using is from a True Type Collection (.ttc), select **Tools**, **Extract from TTC** menu option. This wizard will help you to extract the font file you require from the true type collection.
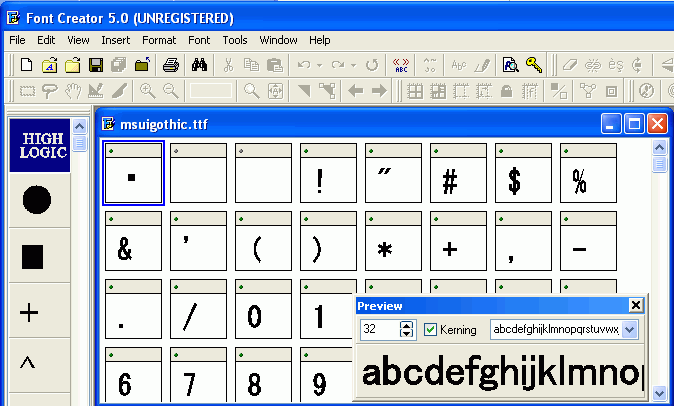
Once you have opened the font file, all the glyphs that are contained in the font will be displayed in a glyph overview as shown below:
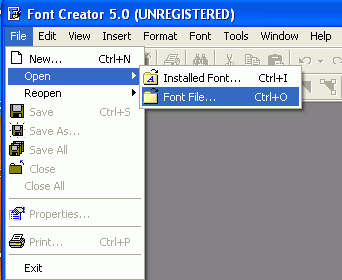
 2. Now, to start the Transformer Wizard select the menu option Glyph Transformer from the Tools menu.
![]() 3. In the Transform Wizard dialog, click on the Open script
3. In the Transform Wizard dialog, click on the Open script ![]() button.
button.
![]()
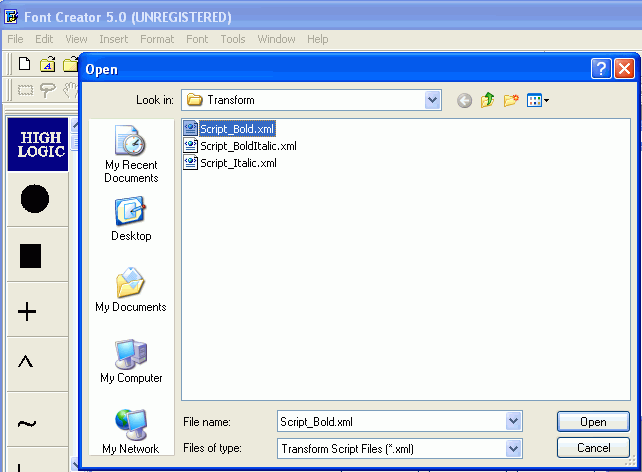
This will list down a set of available scripts: bold, italic and bold-italic for you to choose from. Select **Script\_Bold.xml** and press **Ok** on the browser window. See below.
 4. Back in the Transform Wizard dialog, set the Bold settings Horizontal and Vertical to the custom values as depicted below.
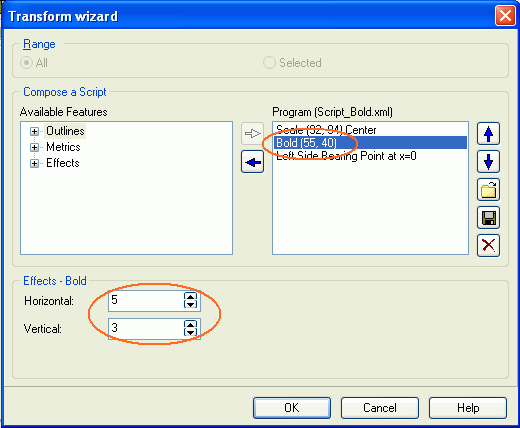 Once the values are set, click the Ok button to execute the script. This step will transform all glyphs contained in the Regular font to Bold based on the horizontal and vertical values specified. These values can be altered to get the best look and feel.
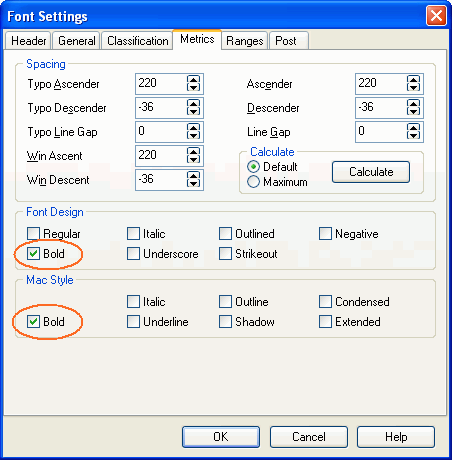
When the transformation is complete, the next step is to change the font type in the ttf from Regular to Bold. To change font type you need to change the following settings.
- Select Settings from the Format menu. Go to the Metrics tab. Set Mac Style to Bold and Font Design to Bold.
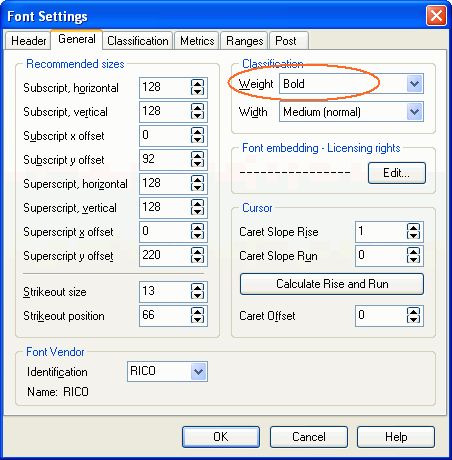
- In the General tab set the Classification Weight to Bold.
 3. In the Classification tab set the Weight to Bold.
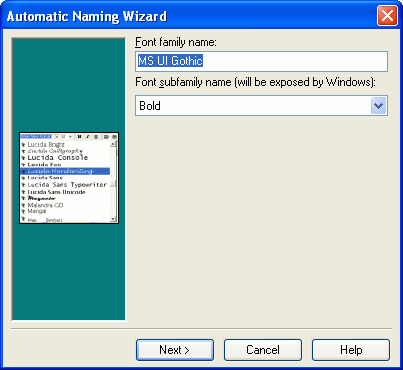
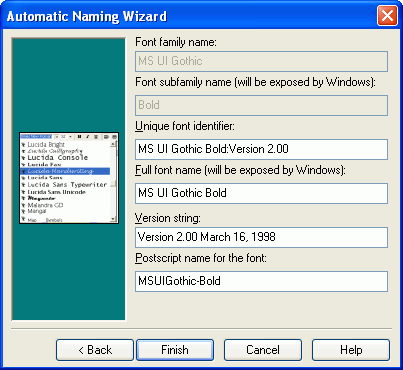
 4. Change the Font subfamily name. This can be done through the AutoNaming feature listed under the Tools menu. Follow the wizard and you will be guided through the steps.
 5. Save the new font file. Select File, Save as and save the new ttf file with a name of your choice, for example msuigothicbd.ttf. You are now ready to use the transformed MS UI Gothic Bold font in your reports. Include the msuigothicbd.ttf in Report Designer tool and in runtime as specified in Working with Fonts section and test the newly created font.
Transforming a font from Regular to Italic
This process is very similar to that of Regular to Bold transformation. However, there are few additional steps to be done before and after we perform the Regular to Italic transformation. This is to help retain certain characteristics of the original font during the transformation process.
- Open the font file (.ttf) containing the Regular font using the Font Creator tool. We will be using MS UI Gothic for this example as well. If the font you are using is from a True Type Collection (.ttc), select Tools, Extract from TTC menu option. This wizard will help you to extract the font file you require from the true type collection.
- From the Glyph Overview window select all glyphs and copy to Clipboard. Go to Edit menu and choose Select All. Copy the glyphs using Control C or select Copy from Edit menu.
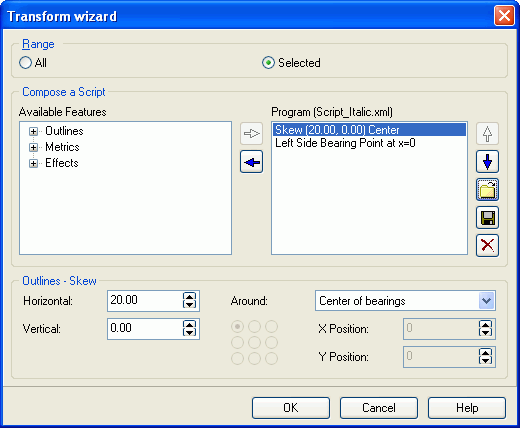
- Apply the italic transformation: Start the Transformer Wizard by selecting the menu option Glyph Transformer from the Tools menu.
- In the Transform Wizard dialog, click the Open script
 button. From the available scripts select Script_Italic.xml and click Ok on the browser window.
 - Click Ok on the Transform Wizard dialog to execute the script.
- Once the transformation process is complete, select Paste special from Edit menu. In the dialog select the check box for Glyph Metrics and clear the other check boxes. Click Ok to continue.
- To get the best results, use the Validate feature from the Font menu. The validation process will repair any known problems that may have occurred during the glyph transformation.
Now you have completed the task of transforming all glyphs from Regular to Italic. Next step is to change the font type defined in the ttf from Regular to Italic. To set the correct font type change the following settings.
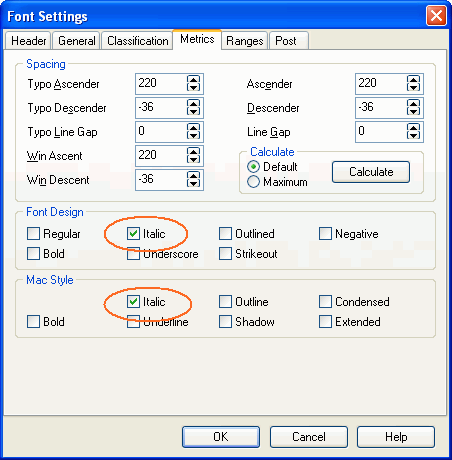
- Select Settings from the Format menu. Go to the Metrics tab. Set Mac Style and Font Design to Italic.
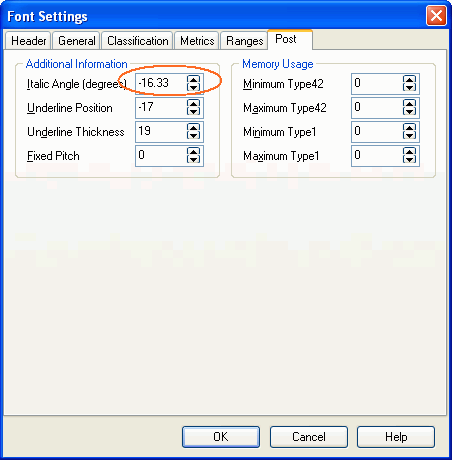
 2. From the Post tab, set Italic Angel to a minus value (e.g. -16.33)
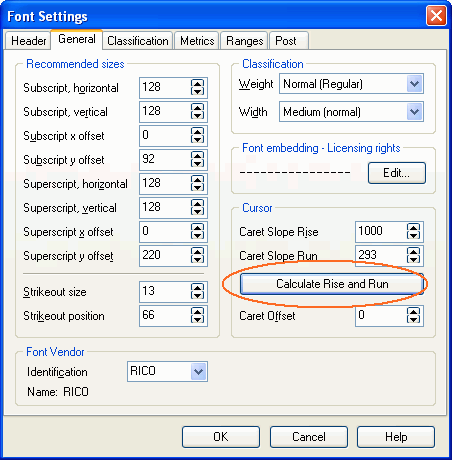
 3. Select the General tab and set Caret Slope values by clicking the Calculate Rise and Run button.
 4. Change the Font subfamily name. This can be done through the AutoNaming feature listed under the Tools menu.
5. Save the transformed font file as msuigothicit.ttf for instance and you are ready to use the font in report layouts. To read more on how to include additional fonts in Report Designer tool and in runtime see Fonts.
4. Change the Font subfamily name. This can be done through the AutoNaming feature listed under the Tools menu.
5. Save the transformed font file as msuigothicit.ttf for instance and you are ready to use the font in report layouts. To read more on how to include additional fonts in Report Designer tool and in runtime see Fonts.