Export/Import Migration Definition
Importing and exporting migration jobs helps to transport the same migration job in different IFS Installations. It is not necessary to create the same job manually in another IFS Installation. Users can Export the migration job from one environment and import to another environment.
There are predefined migration jobs called FNDMIG_IMPORT and FNDMIG_EXPORT are there to serve the purpose.
Exporting
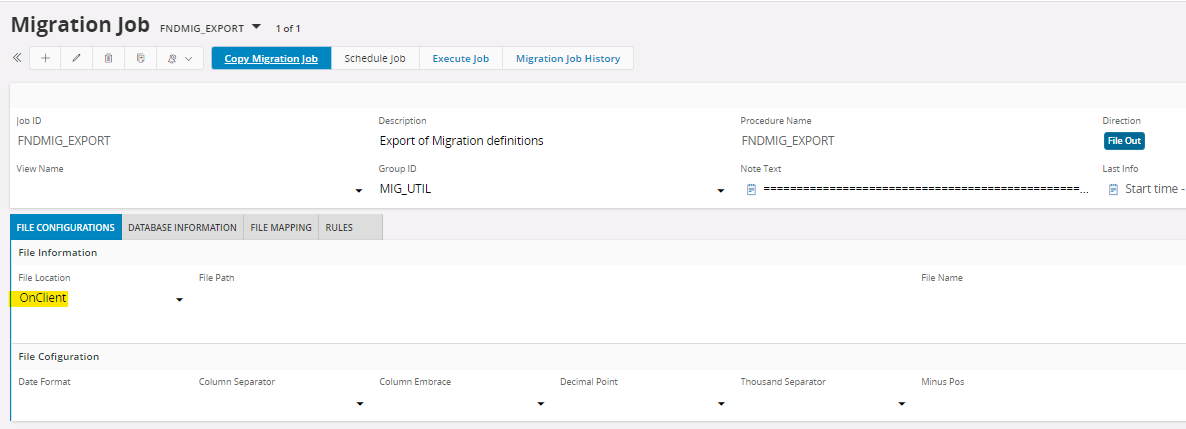
For Exporting, we use FNDMIG_EXPORT job. This is a predefined Migration job and possible to customized too.
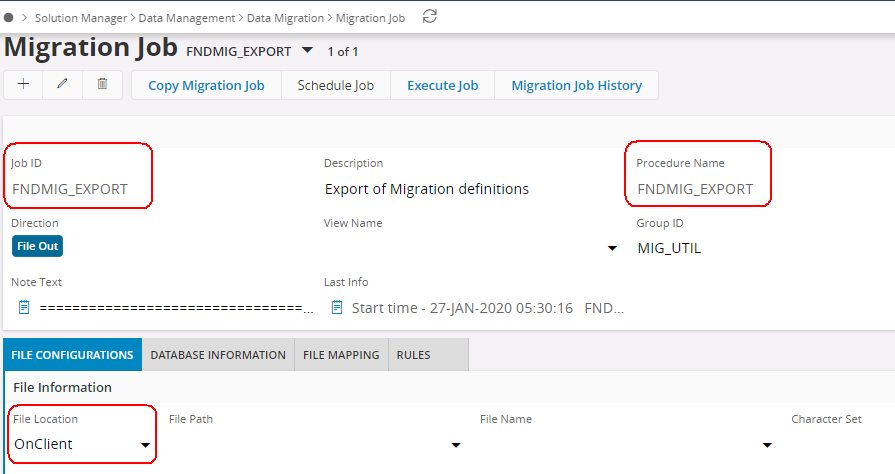
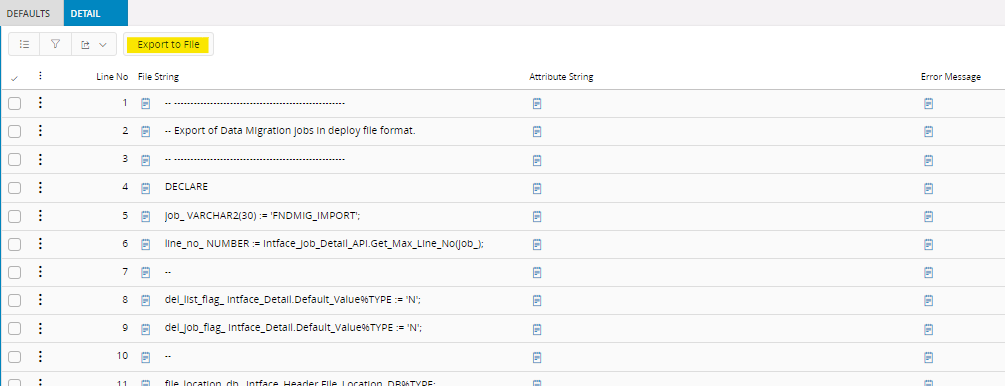
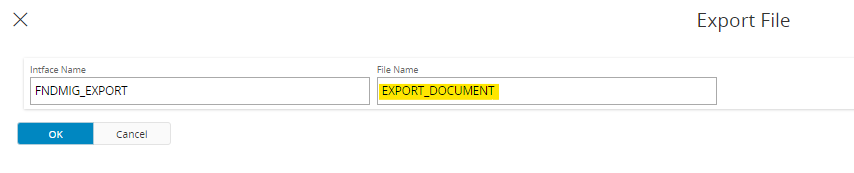
When File Location = OnClient the export data will be loaded into the File String column in the Detail tab. Select Export to File... in the context menu to write the export data to a file on the client. File Configuration settings is not used for export files.
When File Location = OnServer the export data will be written to the location specified in File Path/File Name. If Character Set is not specified export files will be created in the database character set.
NOTE. If the export file is created in a Unicode encoding the file will not contain any byte order mark (BOM). If the file is opened in an editor the absence of a BOM may cause the editor to display national characters wrong.
You may also use wildcard in File Name on the FNDMIG_EXPORT job, f.ex. *.ins.
When you export a job, the filename will be <JOB_ID>.ins. If you export a whole group then each jobs will be written to a server-file with the same naming-convention.
Export format
There are two export file formats.
- The first format is a Data Migration internal format that can only be imported by the Data Migration client.
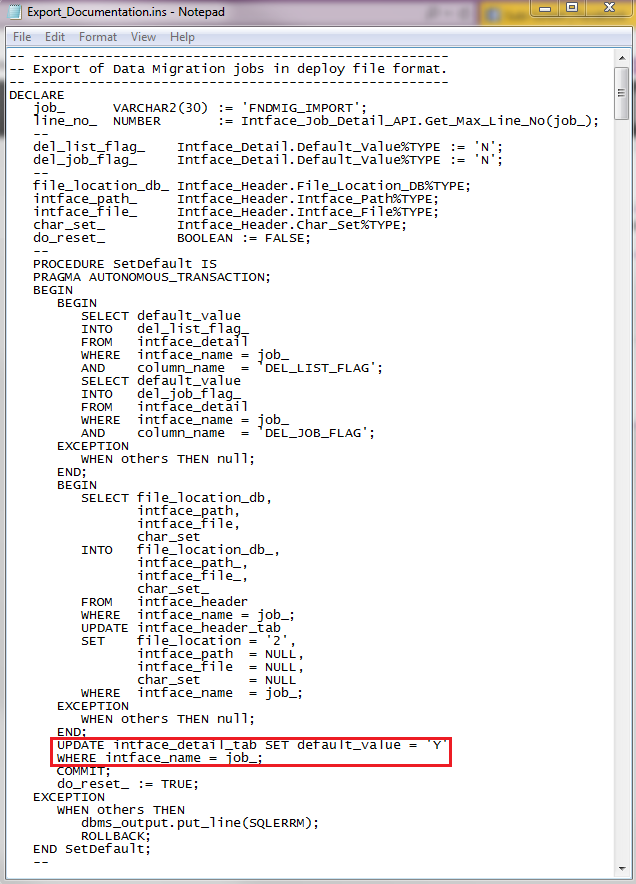
- The second format is a PL/SQL block that can be imported by any SQL tool. This format can not be imported by the Data Migration client. These file is useful when Data Migration jobs should be installed during installation of IFS Cloud. The file can be stored together with other ins-files in a delivery.
The rule DEPLOYFILE is used to configure which export file format should be created. When rule DEPLOYFILE = Inactiv e the internal Data Migration format is created and when rule DEPLOYFILE = Active the PL/SQL format is created.

Export parameters
The export job has two parameters, INTFACE_NAME and EXP_LIST_FLAG.
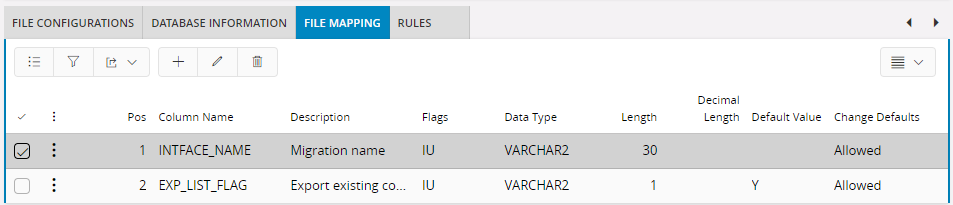
The parameter INTFACE_NAME is the name of a job, a list of job names or a sql expression that evaluates to a list of job names, that are going to be exported. The export process will query the database for jobs to be exported with the statement SELECT intface NAME FROM intface_header WHERE <default where>.The Default Where value can be any string that is valid in the select statement.
If the parameter EXP_LIST_FLAG = Y any conversion list used by the exported job(s) will be included in the export file.
Start Exporting
To start exporting a migration job, you have two options.
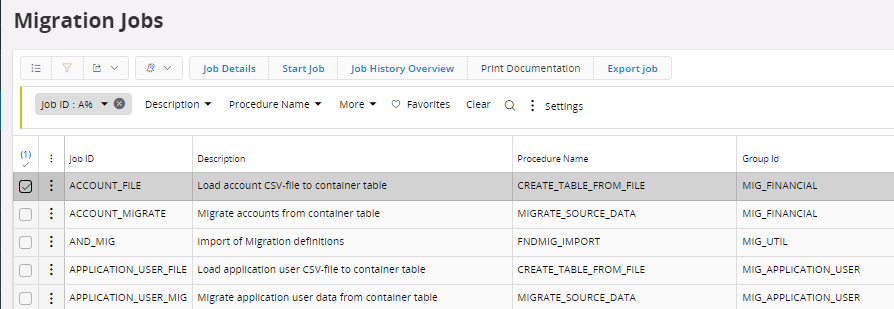
- Select a job in the Migration Jobs window and select Export Job.
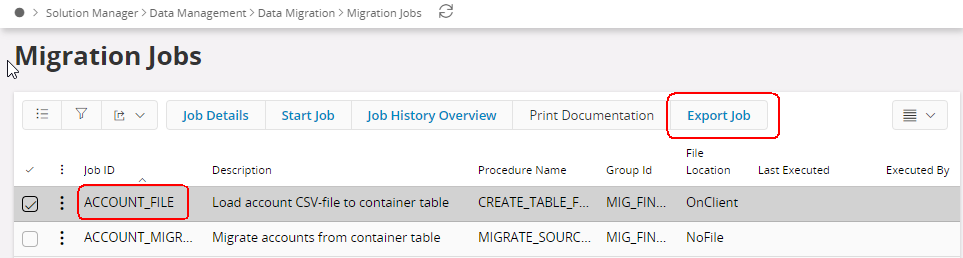
This will invoke the FNDMIG_EXPORT job.
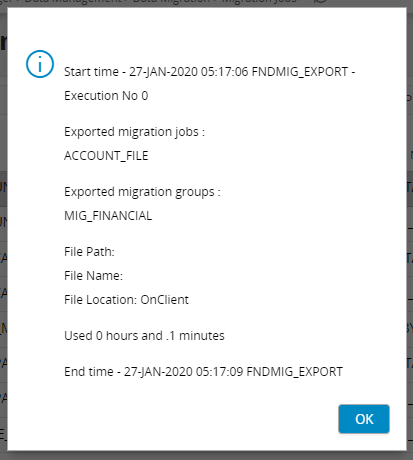
Depending on the file location specified in the job, results will be write to a file or displayed in the Execute Job Window.
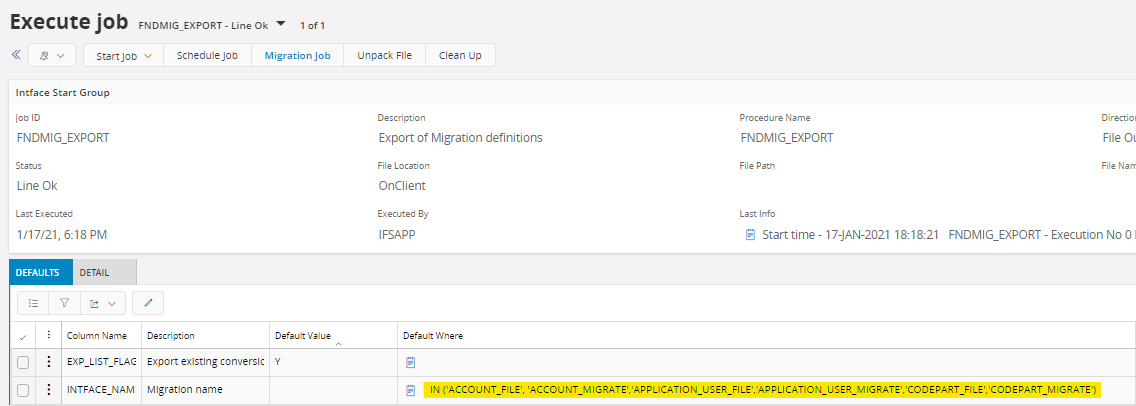
- Export can also be started from the Execute Job window like any other Data Migration job. This gives more control on the jobover to the user.
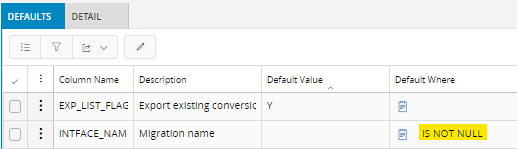
Query the FNDMIG_EXPORT job in the Execute Job form. Edit the condition in the Default Where column. The Default Where value can be any valid query condition that will fit into the statement SELECT intface NAME FROM intface_header WHERE <default where>.
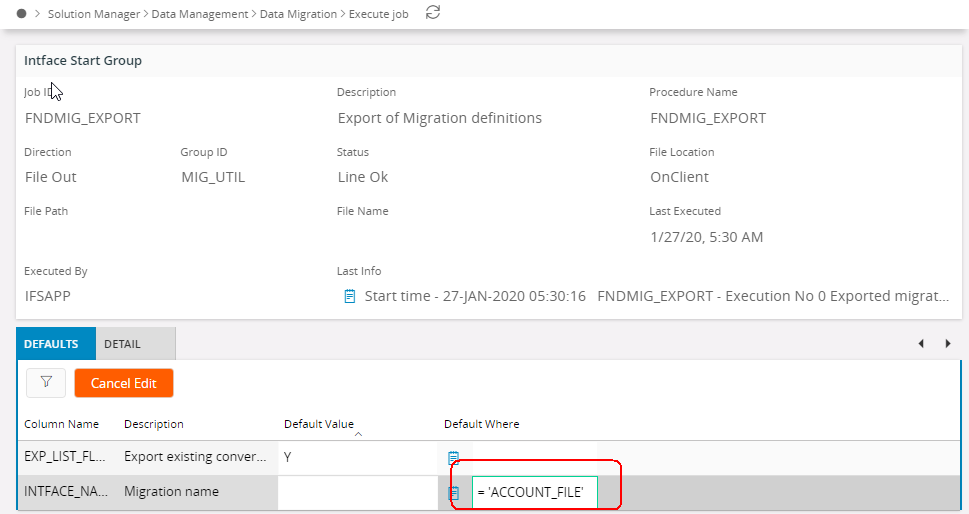
From here you can decide either you export a single job or multiple. change the Default Where of the INTFACE_NAME parameter accordingly.
Users Of Default Where
- Single Job

- The condition in the Default Where column can contain a list of jobs.

- Export all jobs belonging to a group.

- Export all jobs.

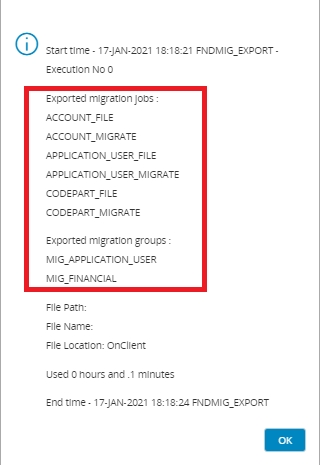
Execute the FNDMIG_EXPORT job. Depending on the File Location, it will load the data or save a file. So now you have exported file(s) with migration job(s) that can be used to import in a different environment.
Export many jobs
It is possible to create an export file containing many Data Migration jobs.
The condition in the Default Where column can contain a list of jobs.
Export all jobs belonging to a group.

Export all jobs.
Export to client folder
When File Location = OnClient the export data will be loaded into theFile String column in the Detail tab. SelectExport to File... in the context menu to write the export data to a file on the client. File Configuration settings is not used for export files.
and enter a file name in the Save As dialog.

Importing
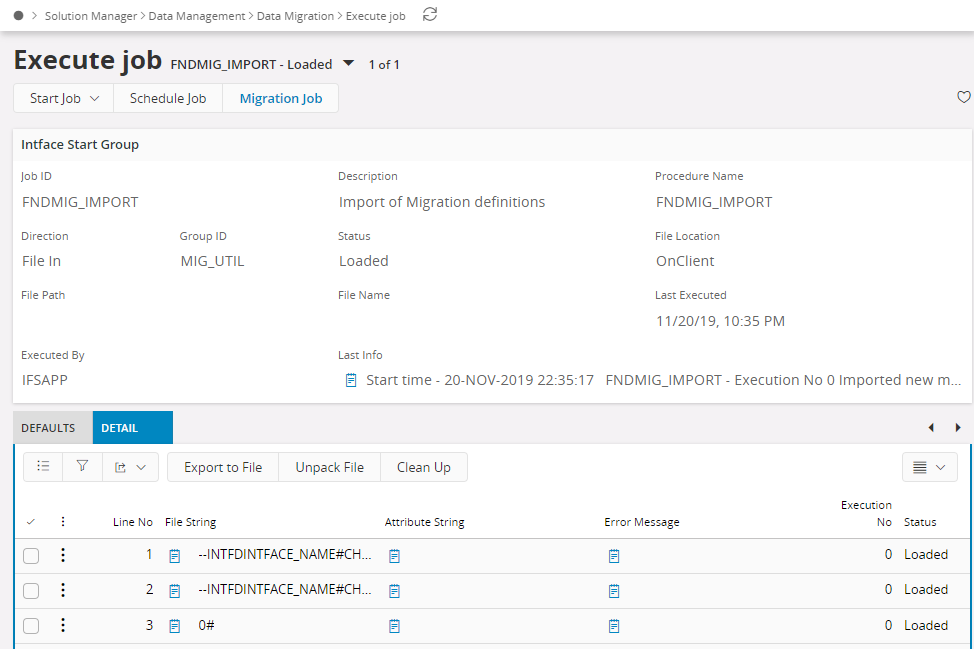
For Importing, we use FNDMIG_IMPORT job. This is a predefined Migration job and possible to customized too.
parameters
The import job has two parameters, DEL_JOB_FLAG and DEL_LIST_FLAG.

If the parameter DEL_JOB_FLAG = Y the import will overwrite an already existing job. If the parameter DEL_JOB_FLAG = N no import will take place if the job already exist.
If the parameter DEL_LIST_FLAG = Y the import will overwrite an already existing conversion list. If the parameter DEL_LIST_FLAG = N no import will take place if the conversion list already exist.
Both Onclient and OnServer file locations supports for this.
File Location = OnClient in the Migration Jobwindow. Load file to details tab in Execute Job form before executing the job.
File Location = OnServer and set File Path and File Name to appropriate values in the Migration Job form.
Execute the job. A message will displayed after execution. If successfull, you can query for the job in Migration Jobs Form.
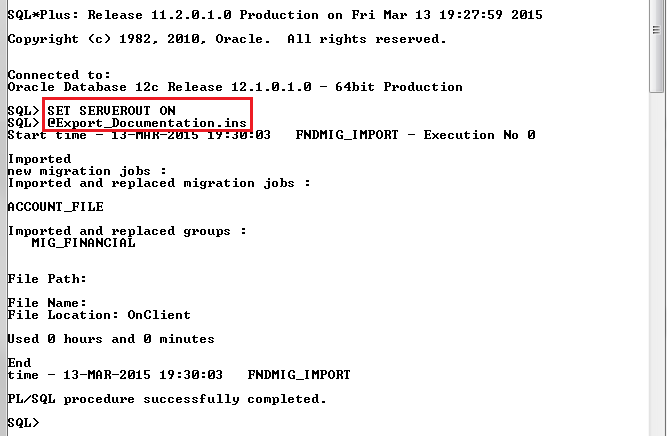
Import with a SQL tool
To be able to import an export file in a SQL tool the file must have been created with the Rule DEPLOYFILE = Active.
NOTE. When an export file is imported this way the two parameters, DEL_JOB_FLAG and DEL_LIST_FLAG is set to Y during the import. The import will overwrite any existing job with the same name as a job in the export file.
During the import some values in the database that must be changed are saved before the process starts and restored when the process ends.