User Defined Account Configuration
Users who want to manage their own data catalog SaaS service (Microsoft Purview instance) can use page "User Defined Account". Enabling user defined account can be done as follows.
-
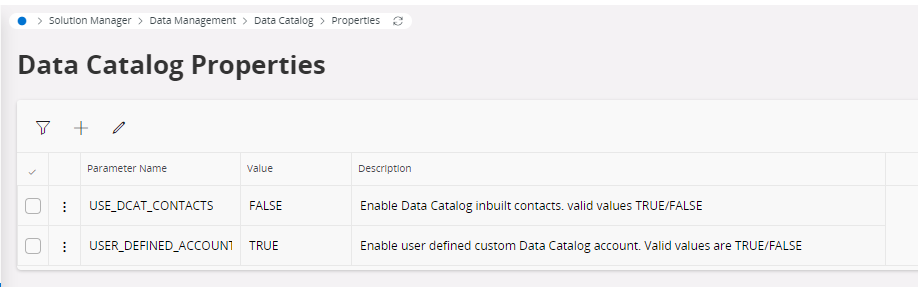
Enable user defined account from "Data Catalog Properties"
-
Navigate to Solution Manager > Data Management > Data Catalog > Properties
-
Change value of the property USER_DEFINED_ACCOUNT to TRUE
-
-
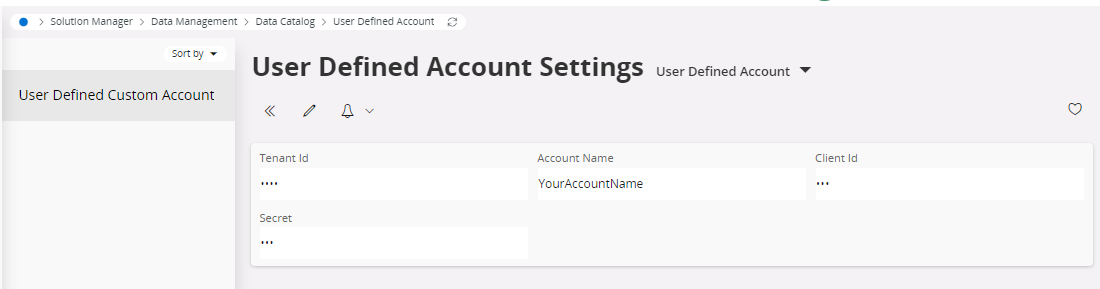
Navigate to "User Defined Account" page and provide connection secrets
-
Navigate to Solution Manager > Data Management > Data Catalog > User Defined Account
-
Update values for connection parameters. Note that only one account is allowed to be connected to particular IFS instance
-
Tenant Id: Azure tenant id where data catalog service (Microsoft Azure Purview) is created.
- Account Name: Microsoft Azure Purview account name.
- Client Id: Azure App Registration (Service Principal) client id where Purview is Authorized.
- Secret: secret value created for above client
-
-
Update IFS Connect configuration
- Users need to update data catalog IFS Connect routing address manually. Or they can create new routing address similar to one provided by default. Change the routing address DCAT_PUBLISH details as follows.
- Field "Client Id": Replace value with Azure service principal client id used in step 2.
- Field "Secret": Replace value with client secret used in step 2
- Field "Token Endpoint": Replace string {tenant-id} with Azure tenant id used in step 2 (Default value is https://login.microsoftonline.com/{tenant-id}/oauth2/token)
- Users need to update data catalog IFS Connect routing address manually. Or they can create new routing address similar to one provided by default. Change the routing address DCAT_PUBLISH details as follows.