Building Master Detail Associations
A projection can contain associations between entities, and it is also possible to configure associations, between existing standard as well as, to or between custom entities. In a page configuration association can be visualized in a master detail layout.
Typical master detail layout constructs that are List/Table of details, One-to-one detail view and One-to-many detail view
Prerequisites
For the different layout examples below, a small number of custom items are needed.
Custom entity - For the examples below we assume that we have a shared central custom entity called Extras. This custom entity has only a couple of simple string type, persisted attributes. Id, Description, Extra1, Extra2, Extra3. The idea here is that the Extras entity is a type of generic entity that can be used to extend existing standard entities. For a more practical example, one could imagine this to be a custom address entity. See Create Custom Entity for details on, how to create a custom entity.
Projection Configuration - To create the association between entities and to make it available to a client a projection configuration is needed. In this scenario the custom "Extras" entity is to be associated to the "PersonInfo" entity and displayed on the "Person" page "...main/ifsapplications/web/page/Person/Form". See Entity Associations for details on, how to create an entity association.
- Create a projection configuration for the standard projection "PersonHandling".
- Add entity "Extras" to the projection, set "Operations Allowed" to "Read; Create; Update; Delete".
- Create an entity association "ExtrasAssoc" between "PersonInfo" and "Extras".
- Add key mapping for the association between "PersonId" and "Cf_Id".
List of details
One of the most typical master detail relationships is a master with a list of detail records. A useful layout when the user should get a quick overview of the existing detail records.
-
Navigate to the "Customer" page "...main/ifsapplications/web/page/Person/Form", and open the Page Designer
-
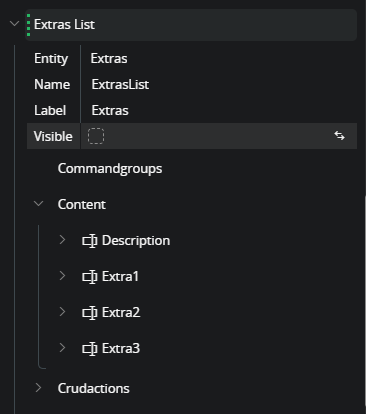
Create a list element "Extras List" and create the "Crudactions" object. No need to set any detail attributes on the object as default will be everything enabled according to the entity.
-
In the content array of the active page "Form", add a reference to the "Extras List" element.
-
Disable the preview, to prevent preview updates during next steps. If this is not done a runtime error is thrown when the Binding object is created below. Turning of the preview during the creation of the bindings is a workaround for this issue.
-
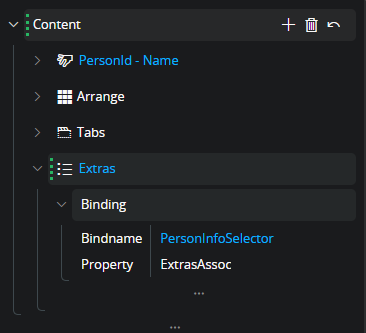
Create the "Binding" object on the list reference, Set "Bindname" to "PersonInfoSelector" and property to "ExtrasAssoc".
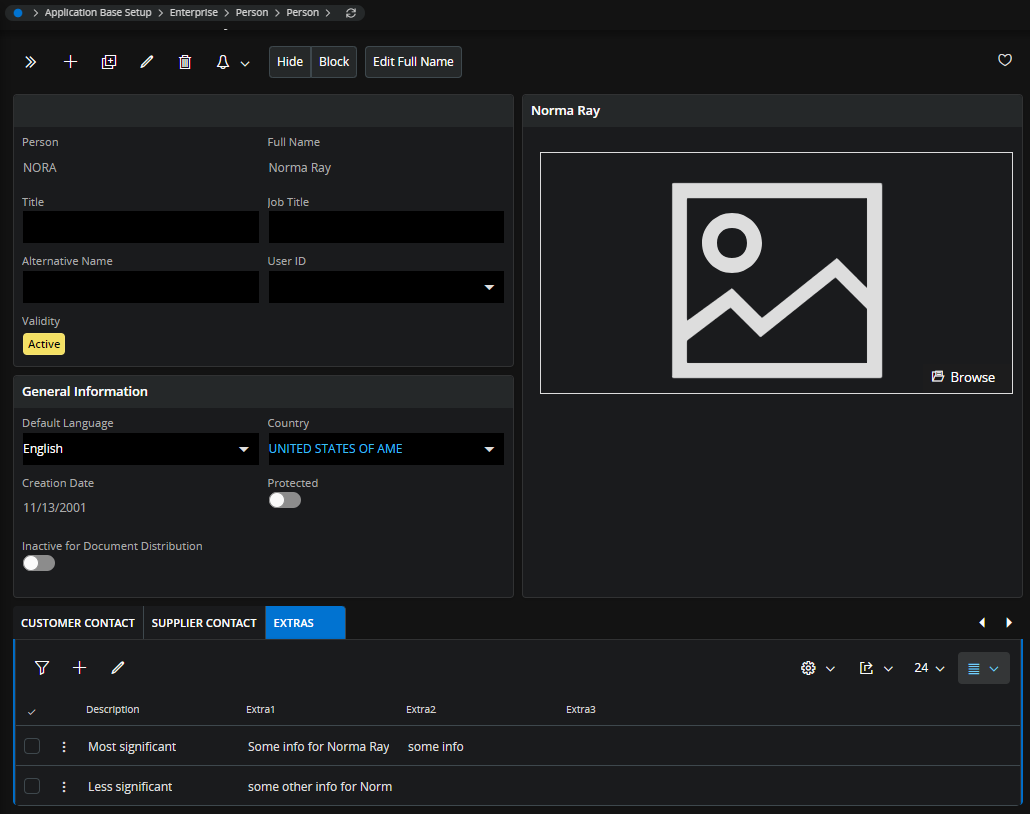
Now the page will populate the list of detail records that belong to the currently selected person.
One-to-one detail view
Adding detail information from an associated entity in a one-to-one relation is done by using a singleton. This is because the association itself is an array and could contain many extras record for every customer id. In this case the singleton works as a record selector without any selection capabilities, it assumes that there is just one record in the relation. The singleton simply provides the detail (group) binding with a single record from an array.
-
Navigate to the "Customer" page "...main/ifsapplications/web/page/Person/Form", and open the Page Designer
-
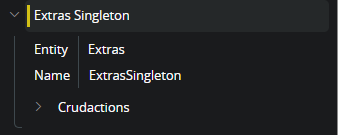
Create a singleton element "Extras Singleton" and create the "Crudactions" object. No need to set any detail attributes on the object as default will be everything enabled according to the entity.
-
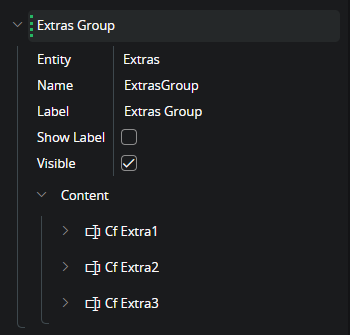
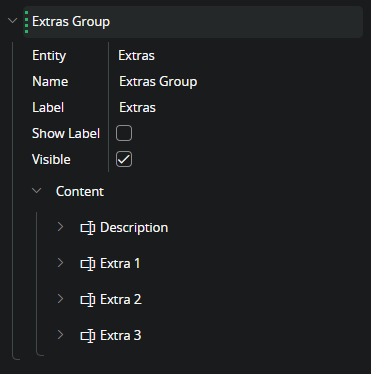
Create a group "Extras Group"
-
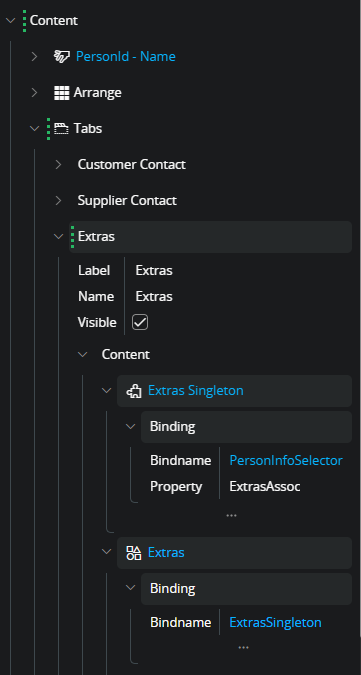
In the content array of the active page "Form", add a new tab "Extras" to the tab container.
-
Disable the preview, to prevent preview updates during next steps. If this is not done a runtime error is thrown when the Binding object is created below. Turning of the preview during the creation of the bindings is a workaround for this issue.
-
In the content array of the "Extras" tab add a singleton reference to the "Extras Singleton"
-
Expand optional attributes for the singleton reference and create the "Binding" object. Set "Bindname" to "PersonInfoSelector" and property to "ExtrasAssoc".
-
In the content array of the Extras tab, add a group reference to the "Extras Group".
-
Bind the group to the singleton by setting "Bindname" to "ExtrasSingleton" while property is omitted. The configuration should now look something like this.
-
Save the configuration and enable the preview again to see the result.
At this point the layout should contain the tab that allows the user to switch between the "Our id at customer" and "Extras" information. Because the singleton has the "Crudactions" object created, extras can be added, edited, and deleted from any person.

One-to-many detail view
Adding detail information from an associated entity in a one-to-many relation must be done using a Record Selector. This is because the association itself is an array and one cannot bind an array directly to a group of field. The Record Selector handles the array of existing records, let the user select and provides the bound element with the current selected record.
-
Navigate to the Customer page "...main/ifsapplications/web/page/Person/Form", and open the Page Designer
-
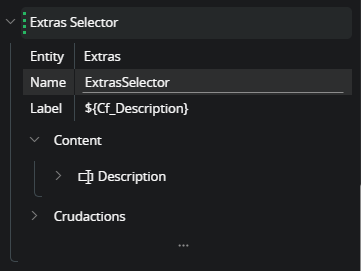
Create a selector element "Extras Selector" and create the "Crudactions" object. No need to set any detail attributes on the object as default will be everything enabled according to the entity.
-
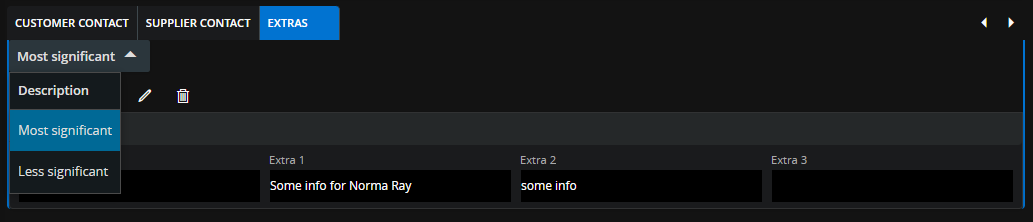
Set selector label to list the description field, this will be the value that the user selects against.
-
Create a group "Extras Group"
-
Follow step 4-10 from the "One to one relation" example with the difference that the selector is used instead of the singleton from that example.
The layout now contains an extras tab where the user can create several Extras records which then can be selected one by one from the record selector.