SCIM Configuration Example - Okta
This describes how to set up User and Group provisioning from Okta to an IFS Cloud installation using SCIM. Not all Identity Managers work the same way, but a similar setup is required regardless of provider. IFS Cloud implements SCIM by exposing endpoints that the Identity Manager communicates with. Only the main endpoint needs to be added to the Okta provisioning configuration. The correct sub-endpoint is selected automatically based on the type of request made from Okta (Get, Create, Update, Delete).
Note: Setting this up with a Cloud service requires a secondary/external URL for your system to be enabled. This can be disregarded if using a service or application running on-premise.
Process Overview
Setting up provisioning with SCIM requires a few preparations. These steps give an overview of the process as a whole.
- Make sure the IFS_IAM client is enabled. This is not enabled by default in a fresh installation.
This can be done in Solution Manager > IAM Clients page. - Create a new Service User. This user must be created with the Identity as IFSSCIM and Directory ID as SERVICE-ACCOUNT-IFS_SCIM. Identity and Description can be configured as you like. User Type must be set to Service User.
- Grant the Service User the correct permissions. Go to the User Permissions tab and press Grant Permission Sets. Search for and grant the permission set FND_SCIM_ADMIN.
- Generate a new SCIM Offline Token to be used for the Admin Credentials. This is done on the SCIM Access Manager page.
- Use an existing application in Okta that supports SCIM provisioning (SAML/SWA), or create a new application from which to provision users. Alternatively, use the SCIM 2.0 Test App (OAuth Bearer Token), found by navigating to Browse App Catalog and searching for it.
- Add the SCIM connector base URL and the token generated in step 4 to the provisioning integration.
- Enable Create / Update / Deactivate Users in the "To App" settings.
- Add a custom attribute mapper in the Profile Editor. This is a mandatory step, provisioning will not work until it is completed. See "Enabling App Settings and Custom Attribute Mapping" below.
Group Provisioning process
- Once the initial configuration of the Okta App is complete, assign the groups in the group directory that are to be provisioned to the Okta App.
- Navigate to the Okta App and open the Push Groups tab. Find the groups by name and choose Create Group as the push action.
- When a group is provisioned without errors, it will be displayed as active.
Configuring SCIM provisioning in Okta
The configuration differs depending on the type of application used. This section is split into two paths. Use the one that matches your application: SAML/SWA, or the SCIM 2.0 Test App (OAuth Bearer Token).
Option A: SAML/SWA
Navigate to the General tab of your application. Edit your App Settings to enable SCIM provisioning.
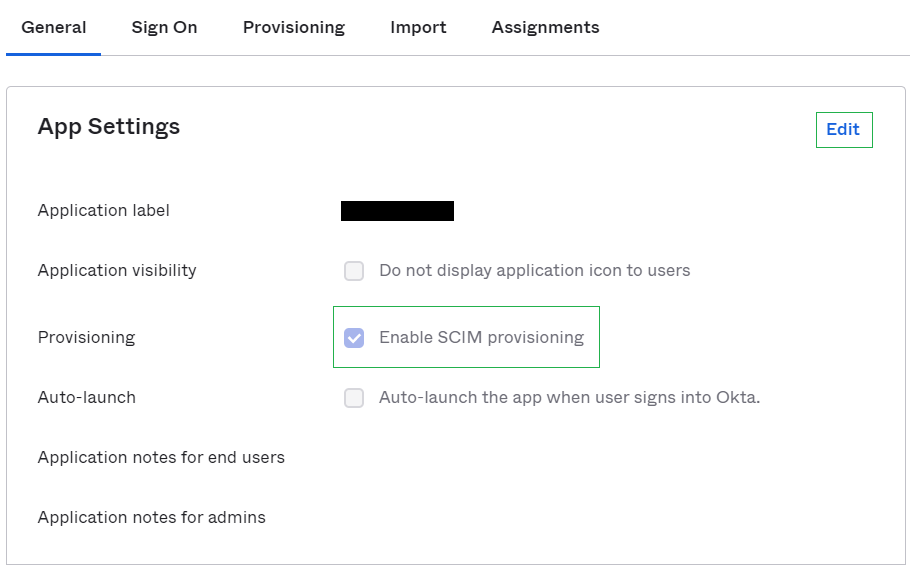
Select Provision User Accounts to begin setting up User provisioning, then select Edit Provisioning in the top menu of the next page. Set Provisioning Mode to Automatic. Expand Admin Credentials. The two fields, Tenant URL and Secret Token, will appear.
A new Provisioning tab becomes visible. Navigate to it and click Edit.
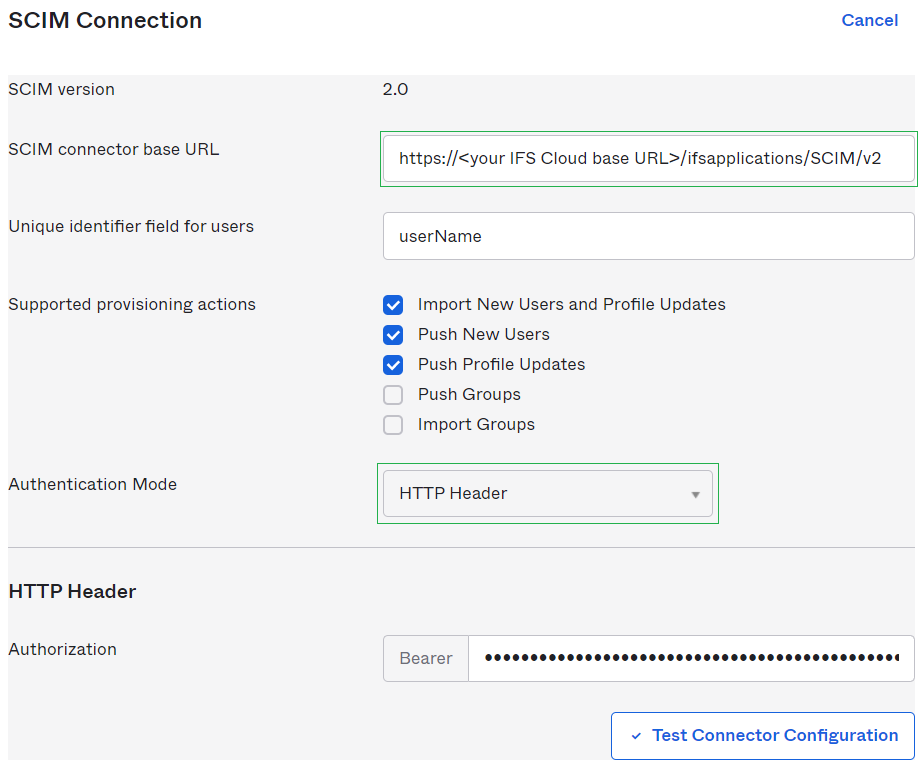
In SCIM connector base URL, enter the main endpoint of IFS SCIM. If Okta is running as an external service, use the external/secondary URL. Read more about configuring a secondary or external URL.
Set Unique identifier field for users to userName.
Select the actions to use for provisioning. Group provisioning is not supported for this application type. Leave those fields unchecked.
Set Authentication Mode to HTTP Header. For Authorization, use an Offline Token (a refresh token that does not expire unless revoked) rather than a normal access token, since normal tokens expire shortly after being issued. Offline Tokens are generated on the SCIM Access Manager page in IFS Cloud. Paste the generated token into the Authorization field.
Test the connection to confirm the information entered is valid. A successful test shows a pop-up confirming the connector is configured correctly. Close the window and click Save.
Continue to Enabling App Settings and Custom Attribute Mapping once this is complete.
Option B: SCIM 2.0 Test App (OAuth Bearer Token)
The steps below reflect the current Okta admin console layout for setting up the SCIM 2.0 Test App (OAuth Bearer Token) application.
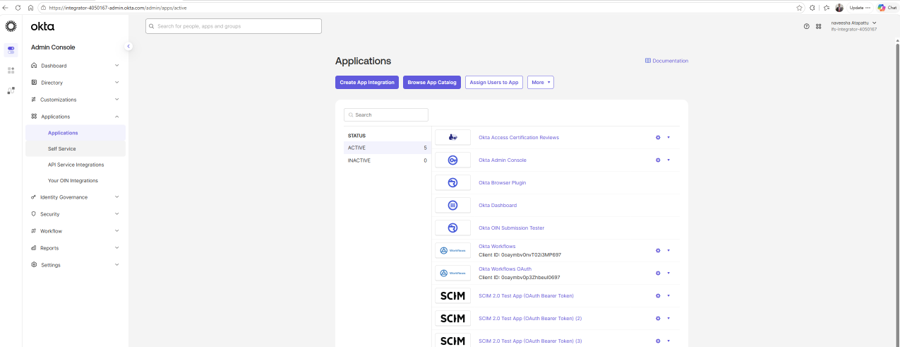
Open the App Catalog. In the Okta Admin Console, go to Applications → Applications, then click Browse App Catalog. This takes you to Okta's full list of pre-built app integrations, which includes the SCIM test apps.
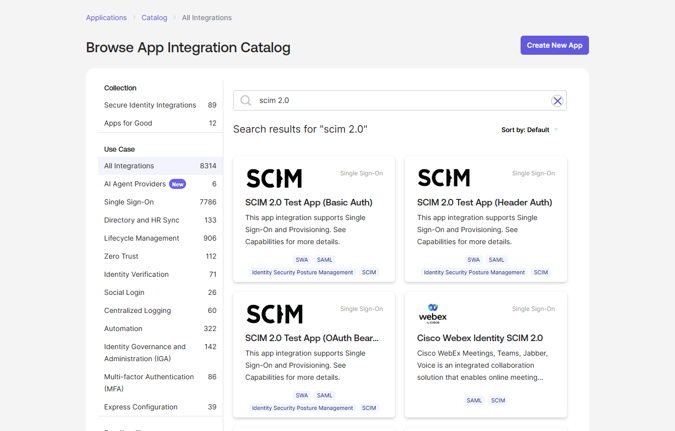
Find and select the correct app. Search for "scim 2.0". Several similarly named apps will appear: Basic Auth, Header Auth, and OAuth Bearer Token. Select SCIM 2.0 Test App (OAuth Bearer Token) specifically. Choosing the wrong variant here is the most common source of misconfiguration, since each uses a different authentication method and request style.
Add the integration. On the app's overview page, click Add Integration to begin adding this app instance to your Okta org.
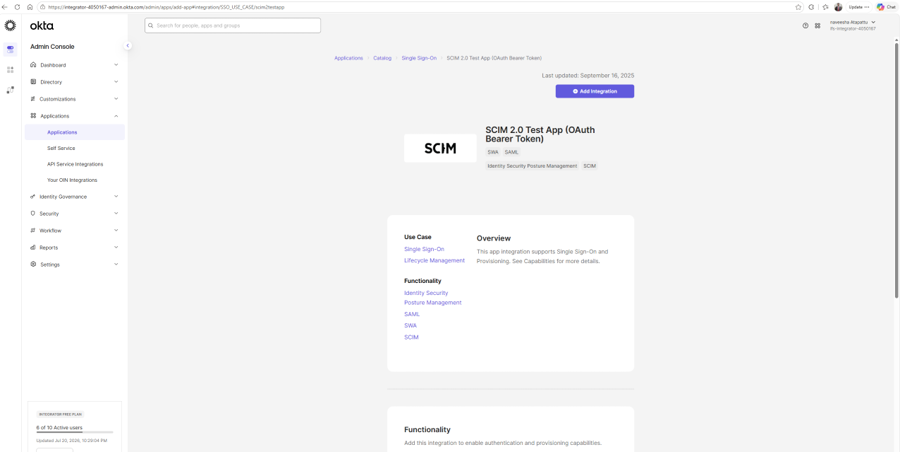
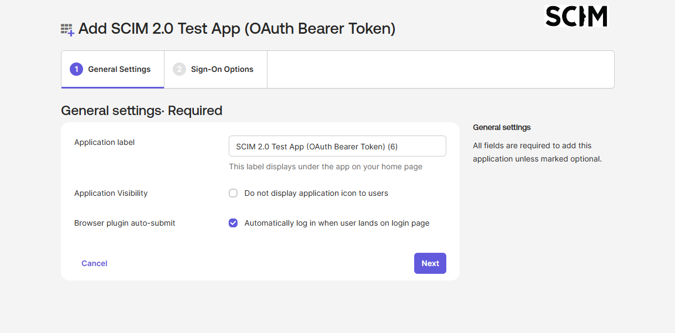
General Settings. The first setup tab lets you rename the app label or restrict its visibility. No changes are required here for a standard IFS Cloud setup: click Next to continue.
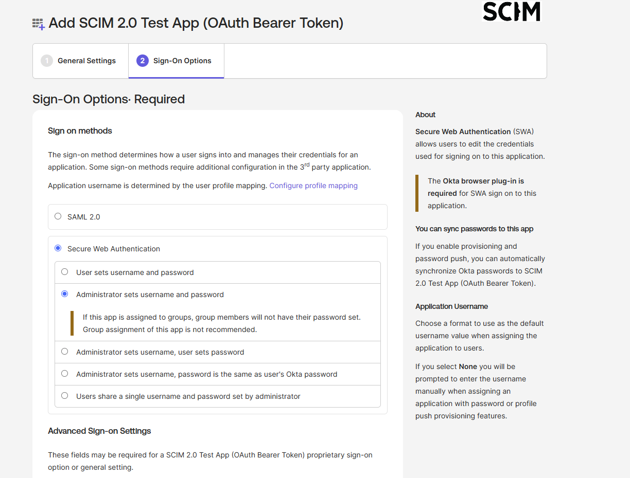
Sign-On Options. Select Secure Web Authentication (SWA) as the sign-on method, then choose Administrator sets username and password. This means Okta administrators manage the credentials centrally rather than end users, which is the expected setup for a service-to-service SCIM connection.
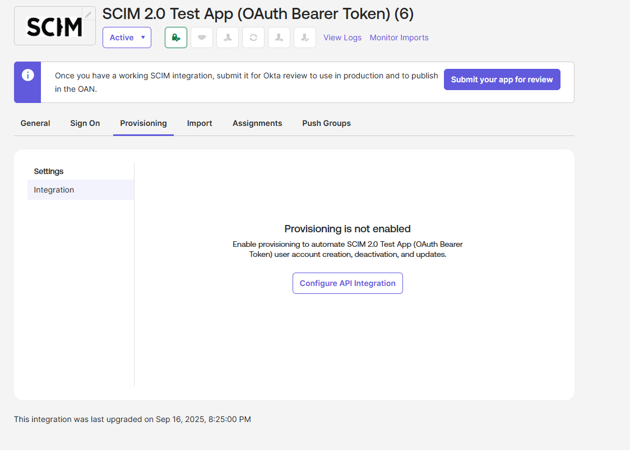
Open Provisioning. Once the app has been created, open its Provisioning tab. Provisioning is disabled by default, so click Configure API Integration to enable it and reveal the credential fields.
Enter SCIM credentials and save. Tick Enable API integration, then fill in the fields below:
SCIM 2.0 Base Url: the main IFS Cloud SCIM endpoint (the external/secondary URL, if this is a cloud-hosted environment).
OAuth Bearer Token: the Offline Token generated from the SCIM Access Manager page in IFS Cloud. This is a long-lived refresh token, so it will not expire the way a normal short-lived access token would.
Tick Import Groups if group provisioning is required, then click Save.
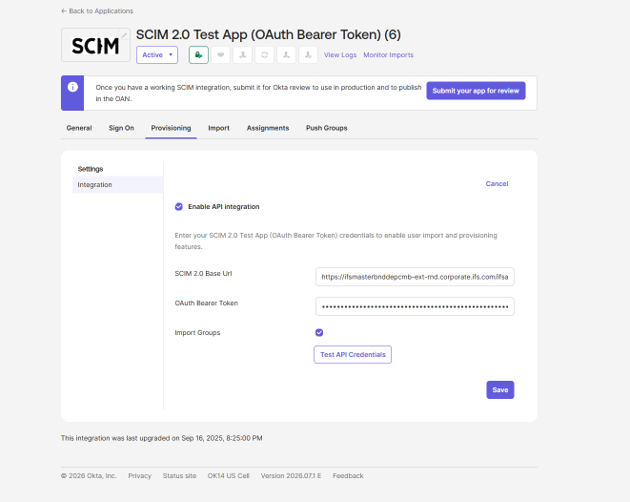
Verify the connection. Before saving or immediately after, if the option only appears post-save. Use Test API Credentials to confirm Okta can reach the IFS Cloud SCIM endpoint with the token provided. A successful test confirms the URL and token are both valid before you move on to attribute mapping and enabling Create/Update/Deactivate actions.
Continue to "Enabling App Settings and Custom Attribute Mapping" below once this is complete.
Enabling App Settings and Custom Attribute Mapping
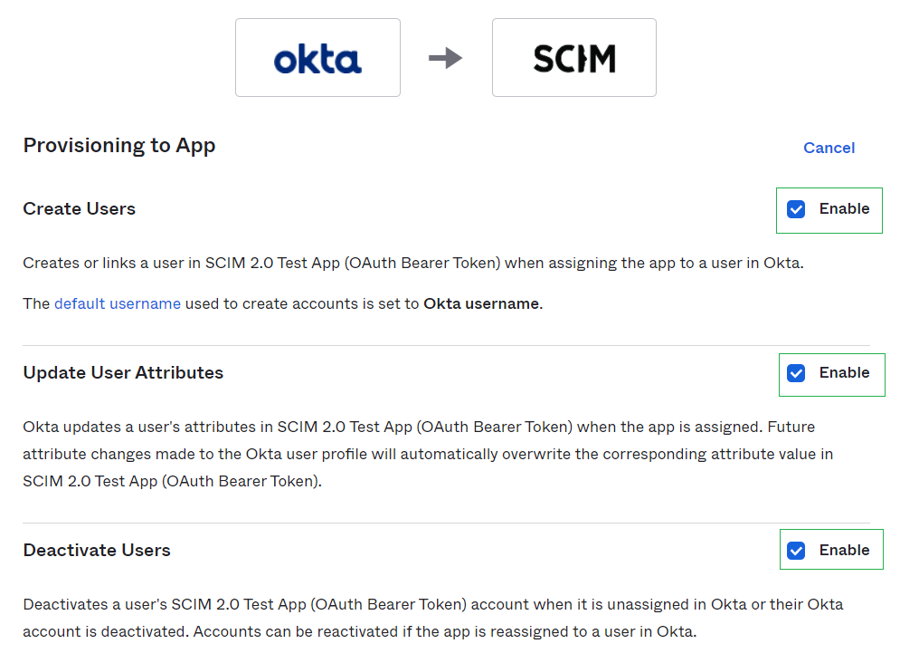
Once the base connection to the IFS SCIM API has been configured, for either application type above, continue by enabling the To App settings.
Click Edit and select the provisioning settings you want to enable. Click Save once you have selected your desired options.
Custom Attribute Mapping
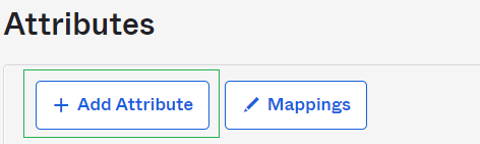
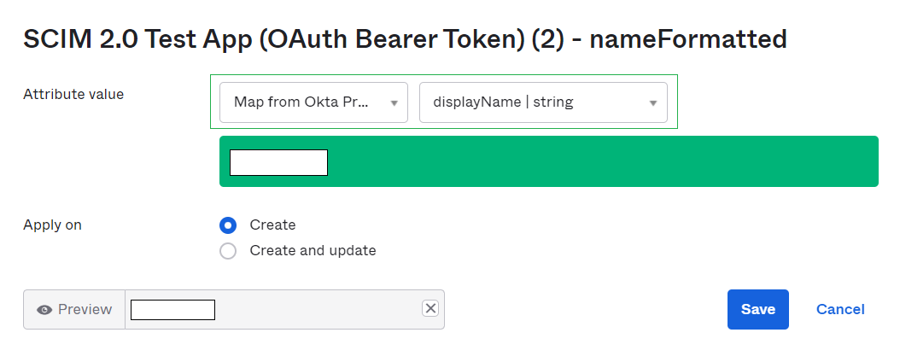
Scroll down further in the To App tab of Provisioning. Click Go to Profile Editor to navigate to the attribute mapper. Here you can edit the mapping of attributes. A new custom mapper is required to map one of the mandatory fields of the IFS SCIM integration. Click + Add Attribute.
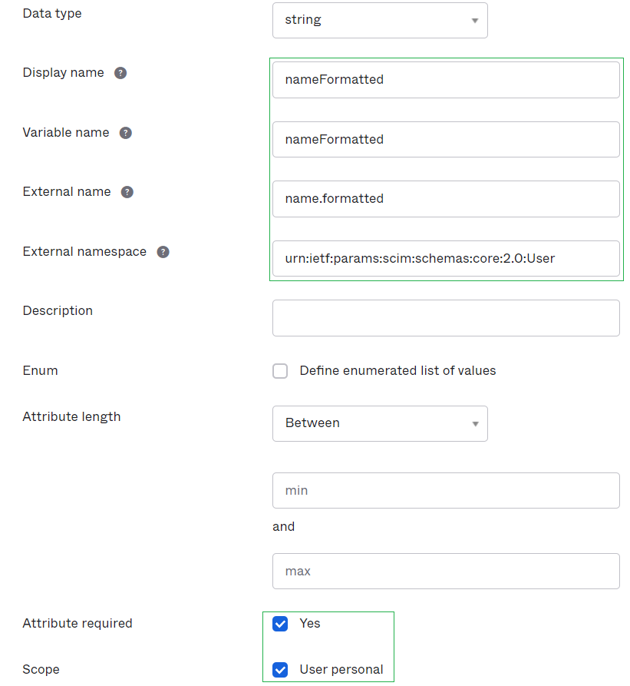
Add a mapper for formatted name (the name.formatted SCIM attribute). Configure the attribute as shown below.
Once the mapper has been added, navigate back to the To App page in the Provisioning tab of your application. Scroll down to find the new attribute that was added but is not yet mapped. Click the edit button for that attribute.
The application is now ready to provision users from Okta to your IFS Cloud Application.