Setting up IFS Time Clock (TIMCLO)
This document describes how to set up IFS Time Clock in a Terminal Device (PC/Tablet).
Prerequisites
- Before setting up Time Clock, you need to have IFS Cloud installed.
- IFS Time Clock is a web application and it runs in a Terminal Device (PC/Tablet).
- Google Chrome or Microsoft Edge Chromium browser should be installed in the Terminal Device.
- Basic data setup in the IFS Cloud should be completed ( Human Capital Management > HCM Services > Time Management > Time Management Setting > Time Clock ).
- It is recommended to enforce the security on the Terminal Device (PC/Tablet) in a way that the Terminal Device cannot be manipulated.
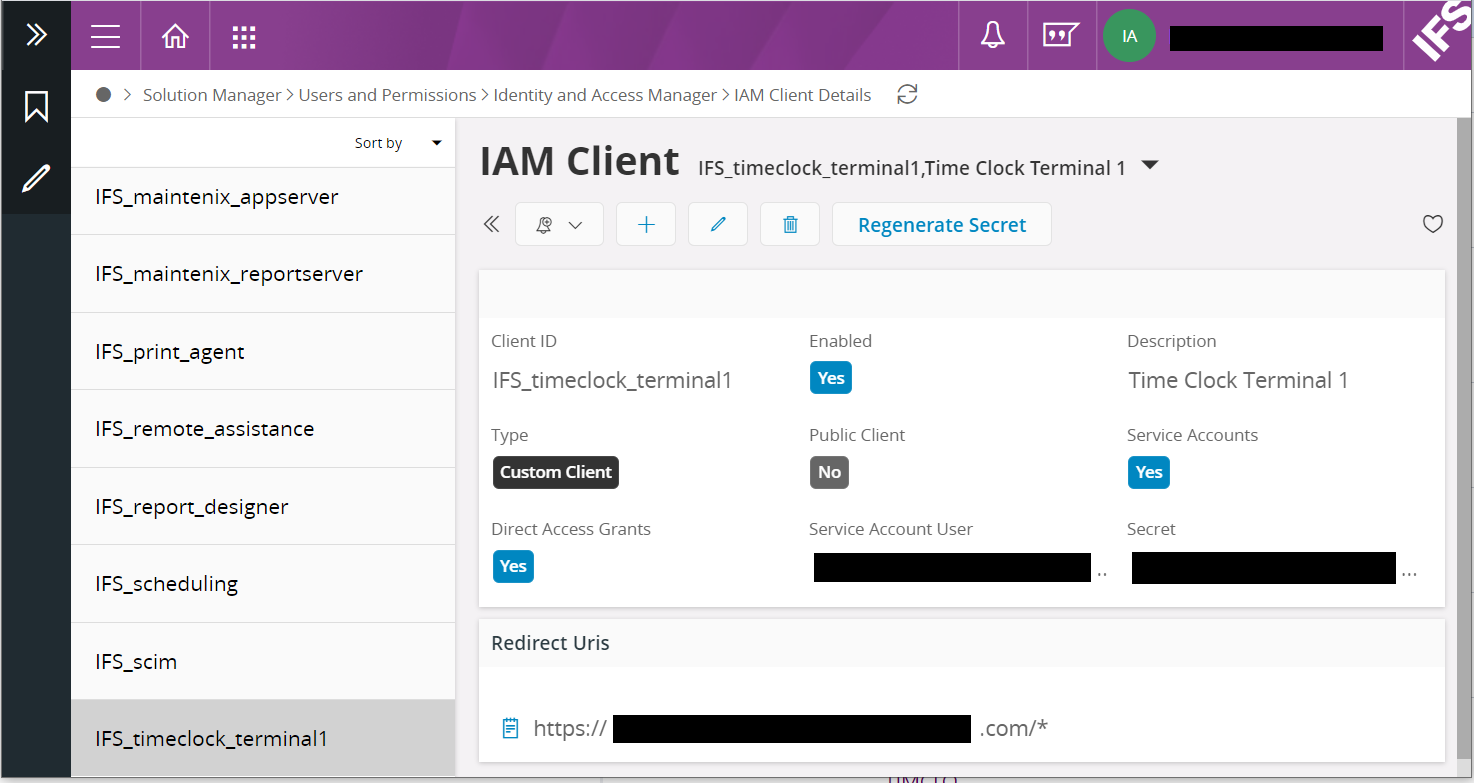
IAM Client Creation
There should be an IAM Client per Time Clock Terminal.
- Create a new IAM Client from Solution Manager > Users and Permissions > Identity and Access Manager > IAM Client Details.
- IAM client should be Enabled and Service Accounts should be switched on.
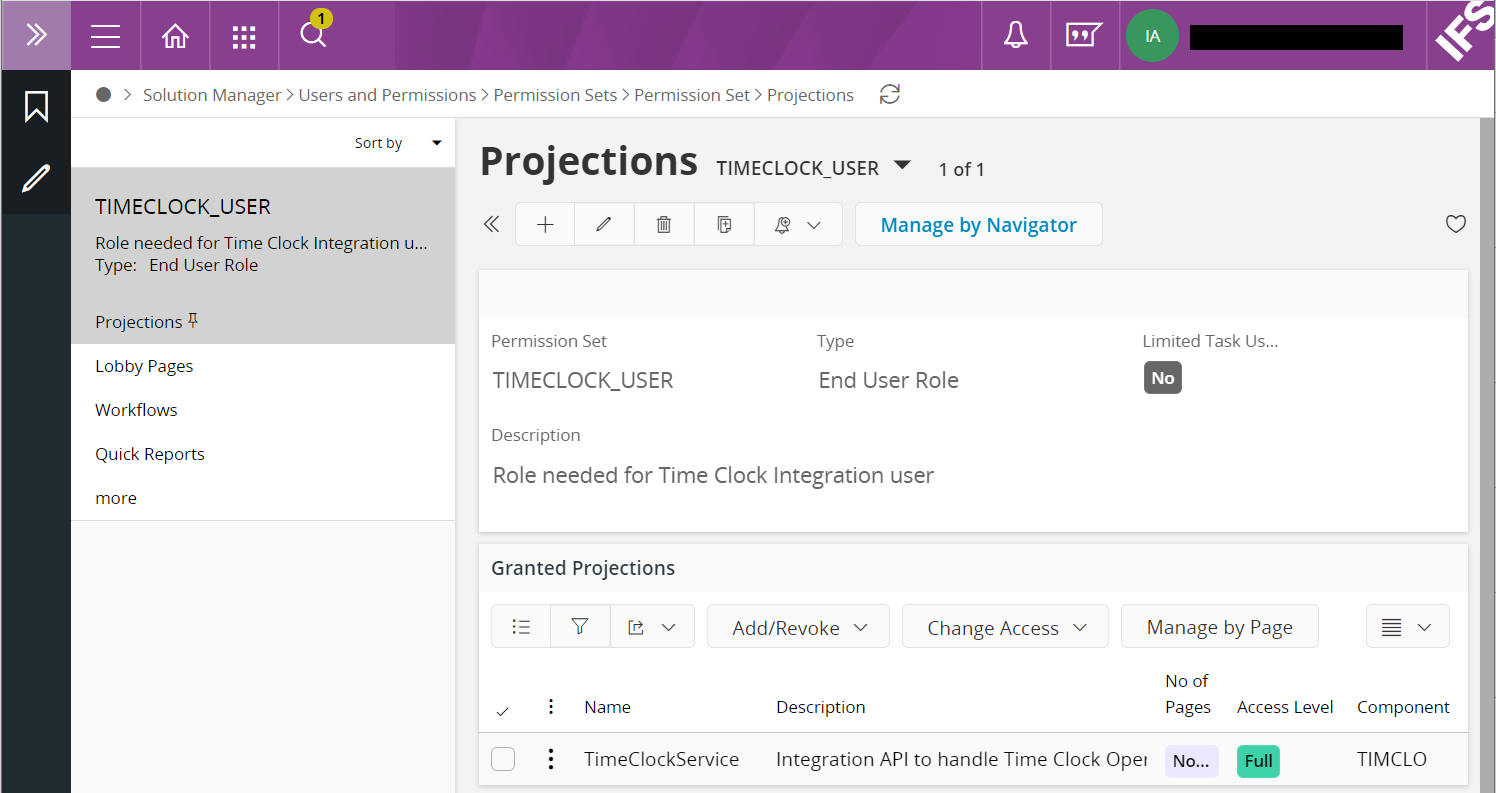
Permission Set
There is a predefined Permission Set for IFS Time Clock. This Permission Set should be granted to the Users created under the User Creation step.
- TIMECLOCK_USER - Used to grant access to TimeClockService projection
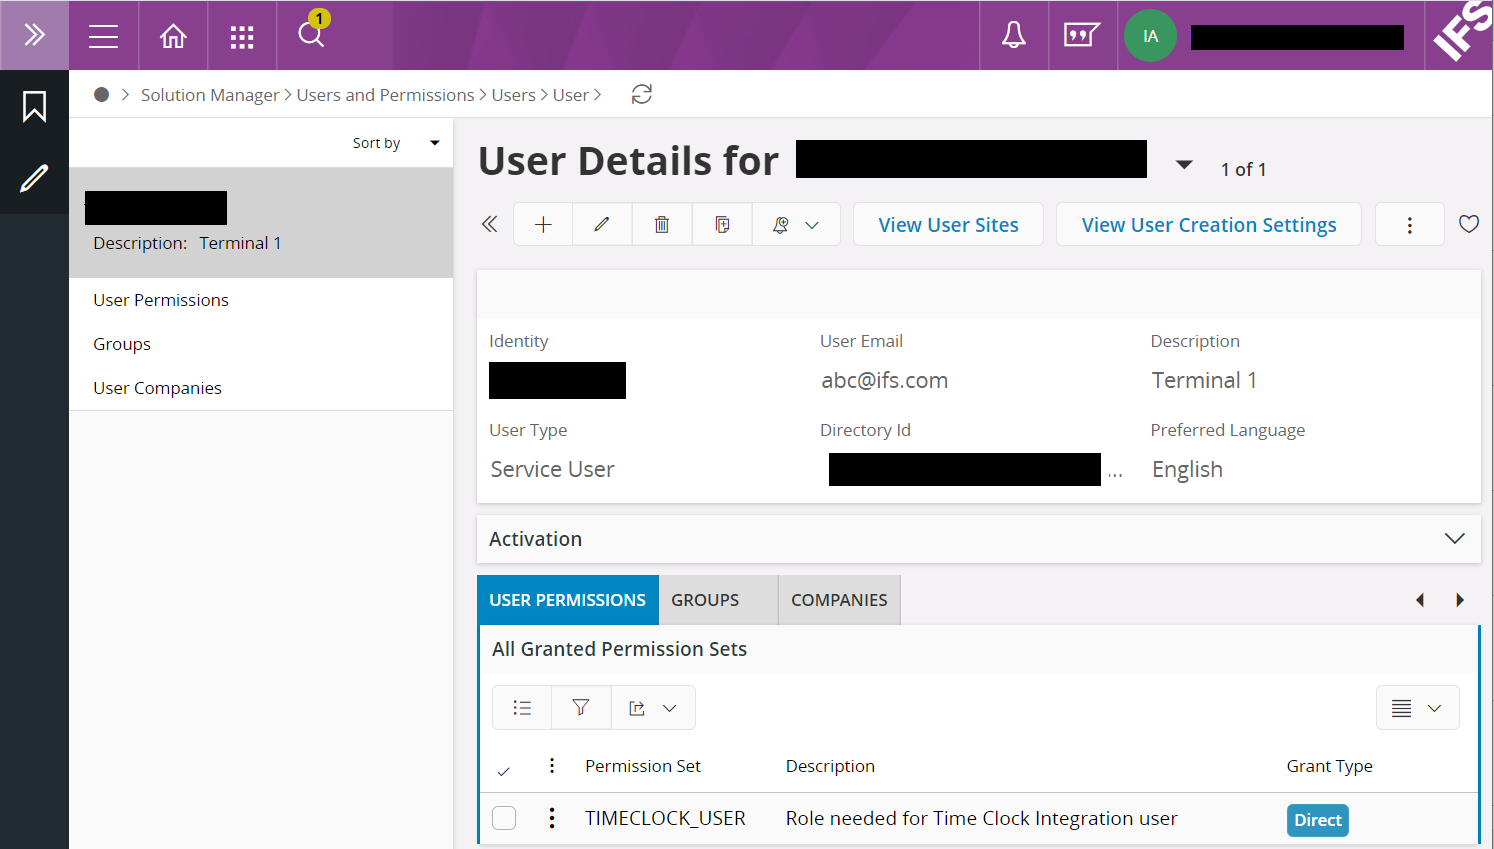
User and Person Creation
A User and a Person need to be created and connected to the IAM Client created in the step IAM Client Creation. And the Permission Set mentioned in the Permission Set step needs to be assigned to the newly created User.
-
A new User can be created from Solution Manager > Users and Permissions > Users > User.
-
User and IAM Client need to be connected by adding the Service Account User of the IAM Client (mentioned in the step IAM Client Creation) into the Directory ID field in the User.
- Select User Type as Service User.
- Enable the Create Person toggle to create a person together with the User (both the User and the Person will have the same ID).
- Grant the Predefined Permission Set mentioned in the step Permission Set to the newly created User.
- NOTE: This user cannot be used for login into IFS Cloud.
Giving Company and Organization Access
- Created User needs to have access to the relevant Companies.
- Add the User to the required Companies from Accounting Rules > User Related Data > Users Per Company.
- Created User needs to have access to the required Organizations.
- Give Person Access (to the newly created User) from Human Capital Management > HCM Services > Organization Management > Graphical Organization Structure.
Launch IFS Time Clock
- Navigate to the Add-ons page of the IFS Cloud (e.g. <IFS Cloud System URL>/timclo/landing-page/add-on.html ).
- Click on Launch IFS Time Clock.
- Enter the newly created Client ID and generated Secret from IAM Client Creation step.
Setting up Auto Start
-
Create shortcut which starts IFS Time Clock each time the Terminal Device is started . - Enter following data while creating the shortcut in Windows: - Start in: directory where the web browser is installed - Target: "<Browser exe>" --kiosk <IFS Cloud System URL>/timclo/ - Google Chrome: "C:\Users\<user_id>\AppData\Local\Google\Chrome\Application\chrome.exe" --kiosk <IFS Cloud System URL>/timclo/ - Microsoft Edge Chromium: "C:\Program Files (x86)\Microsoft\Edge\Application\msedge.exe" --kiosk <IFS Cloud System URL>/timclo/
- Similarly, the auto start can be setup in Linux/Ubuntu as well.
- Google Chrome: google-chrome --kiosk <IFS Cloud System URL>/timclo/
- Microsoft Edge Chromium: chromium-browser --kiosk <IFS Cloud System URL>/timclo/
- Similarly, the auto start can be setup in Linux/Ubuntu as well.
-
Switch off any power saving options in the Terminal Device i.e. automatic hibernation or sleep.