Create Azure Resources for Self Hosted Advanced Analytics
This section guides you through the provisioning and configuration of the Azure resources in the customer tenant which are required to set up Advanced Analytics.
Disclaimer
Please note that this is a guideline, and the setup will still need to be verified by your company security board to ensure your company standards and policies have been adhered to. IFS takes no responsibility for any data breach for any artifact hosted outside of the IFS domain.
Prerequisites
- An Azure Subscription in the customer tenant
- Privileges to create a Power BI Workspace
- Privileges to link workspaces to the Power BI Embedded Capacity
- In case of reports that are running in live connection to Azure Analysis Services (AAS) mode, a configured AAS.
Create a Service Principal
Follow the steps below to create a service principal.
Note
Azure is not a service maintained by IFS, the steps may have since changed. When in doubt, please refer to the documentation on Microsoft Learn.
-
First, you should navigate to the App Registrations page on the Azure Portal.
-
Then, click on New Registration.
-
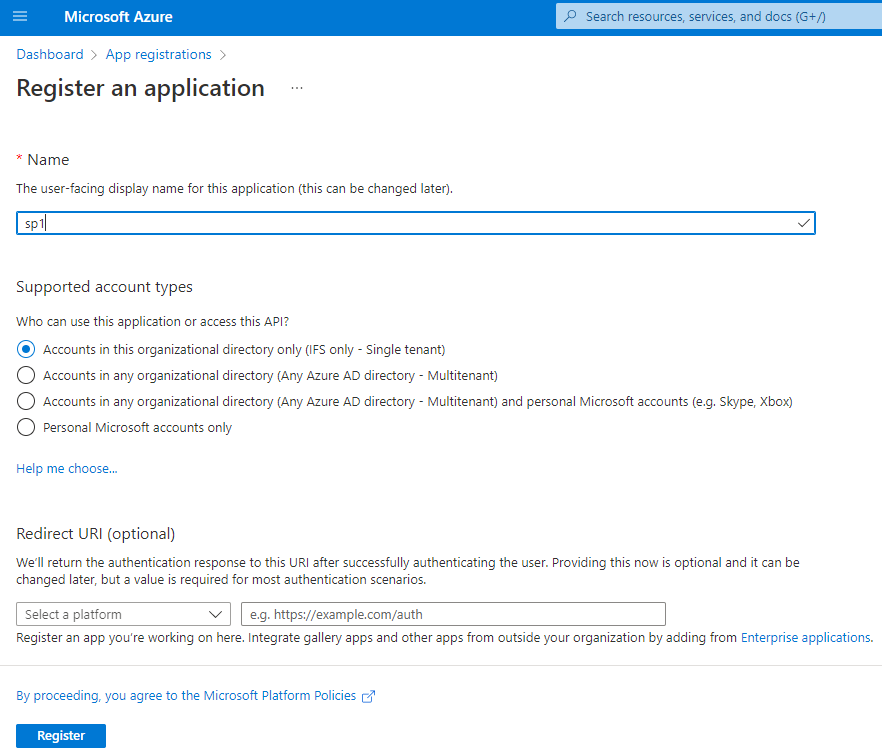
Now, you should fill in the following form displayed.
-
Finally, click on the Register button.
-
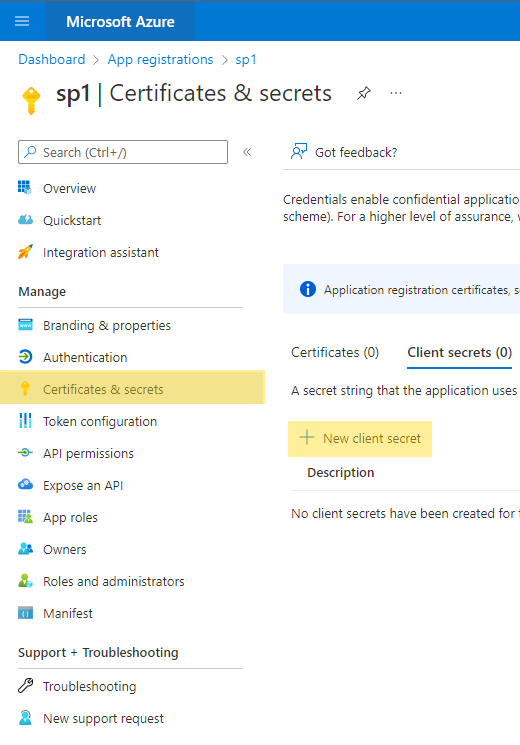
Once the App Registration is completed, click on Certificates & secrets.
-
Click on New client secret.
-
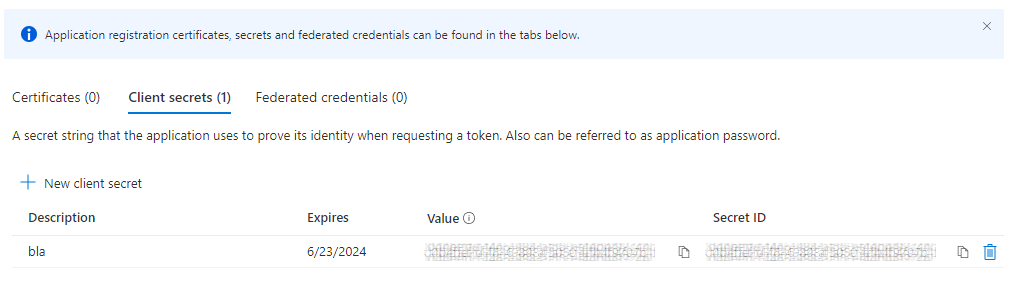
Fill in the required information.
Note
Remember to save the secret information as it must be submitted to IFS.
Note
If you intend to create Power BI reports using a live connection to AAS, this Service Principal must be given access to all required resources on the AAS instance.
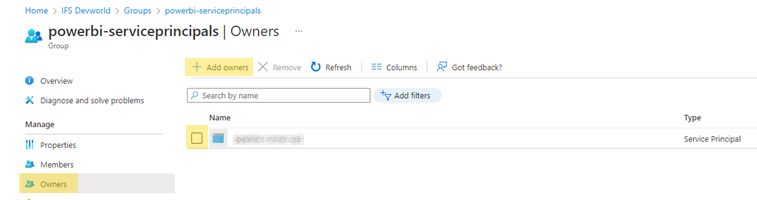
Create a group that will be allowed to call the Power BI APIs
This group contains the Service Principal you created in the section above.
-
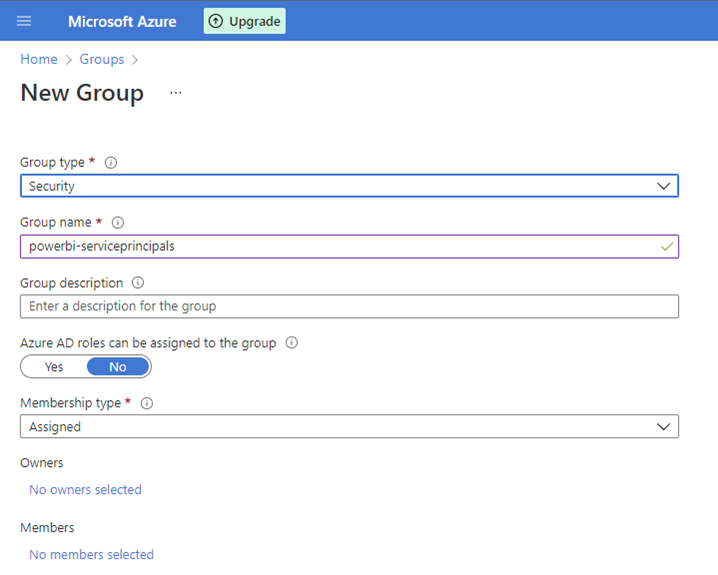
Navigate to the Groups page on the Azure Portal.
-
Select New Group.
-
Fill in the form displayed below.
-
Add the Service Principal from the previous step to the owners of this group. Then this can be used to add additional users/service principals.
Add the new group to the list of groups that are allowed to use the Power BI APIs
-
Navigate to the Admin portal of Power BI.
-
In Developer settings, enable the setting that says Allow service principals to use Power BI APIs.
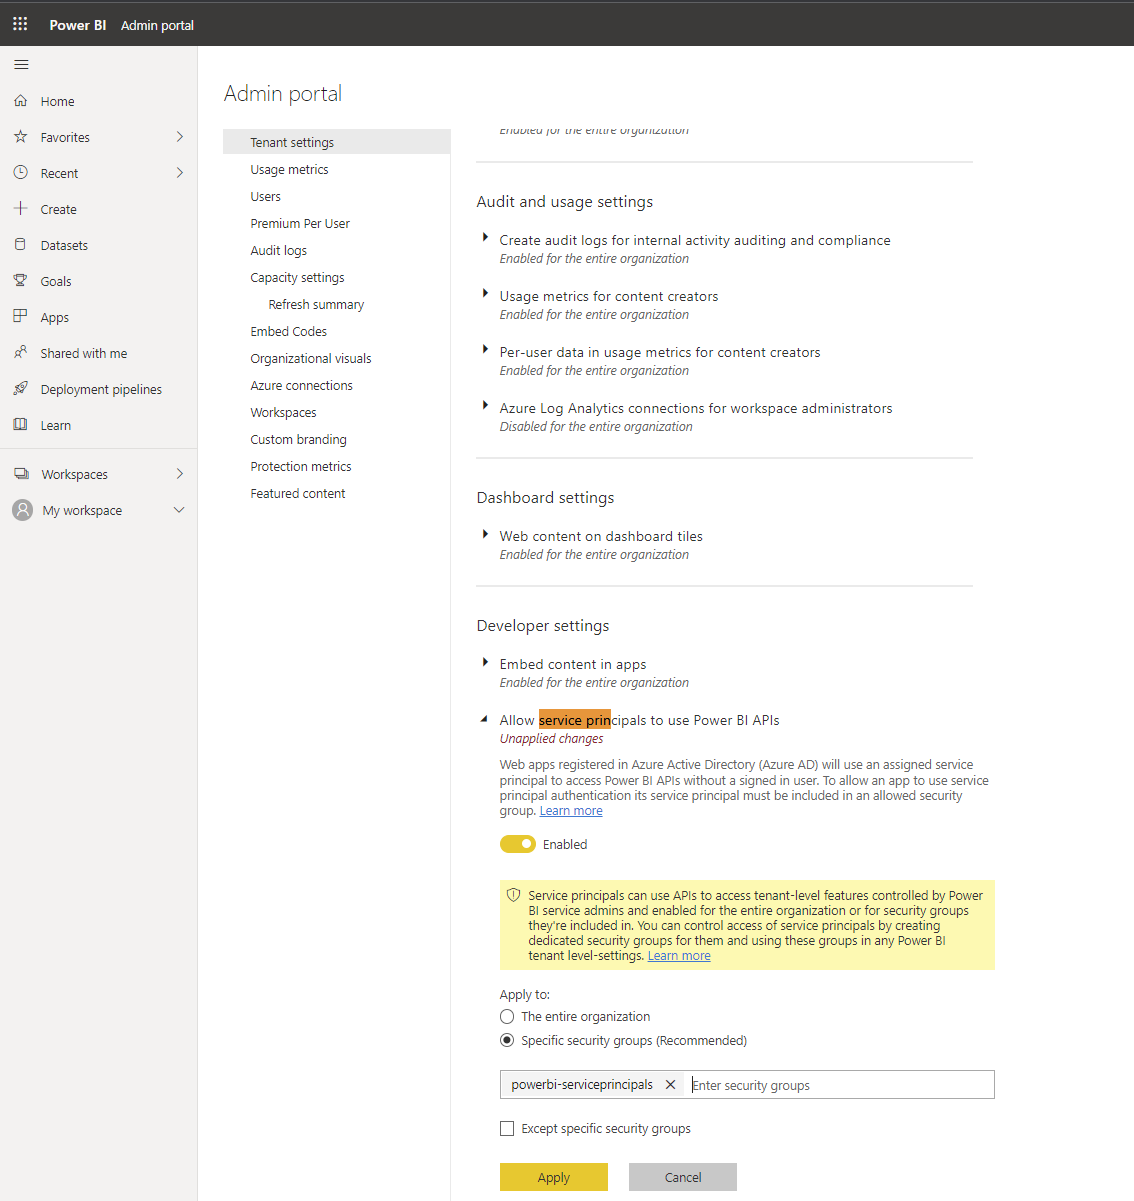
-
From the radio buttons, select Specific security groups.
-
Add the group created in the section above.
-
Finally, click on the Apply button.
Create a Power BI-embedded Capacity
Follow the steps below to create a Power BI Embedded Capacity.
Note
Azure is not a service maintained by IFS, the steps may have since changed. When in doubt, please refer to the documentation on Microsoft Learn.
-
Navigate to the Power BI Embedded page on the Azure Portal.
-
Fill out the following form.
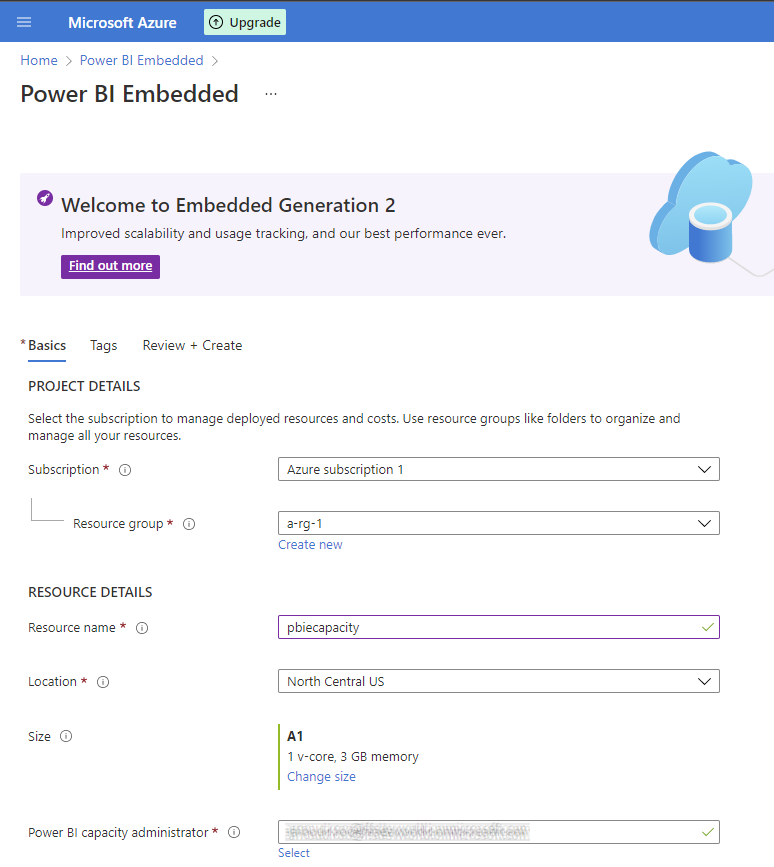
-
Finally, click on the Review + Create button.
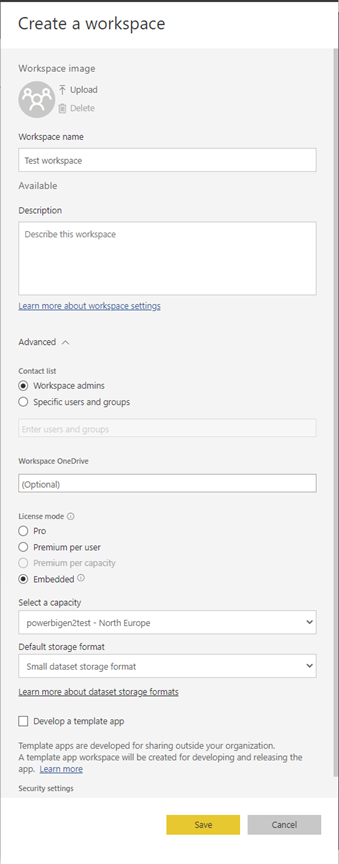
Create a new Power BI Workspace
-
Go to Power BI.
-
Expand workspaces.
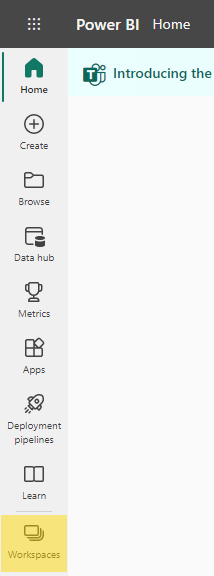
-
At the bottom of the expanded menu, click the New workspace button.

-
Provide a name for the new workspace.
-
Click on the Advanced button.
-
For the License mode, select Embedded.
-
Specify the Power BI Embedded capacity created in the previous section.
-
Click on the Save button.
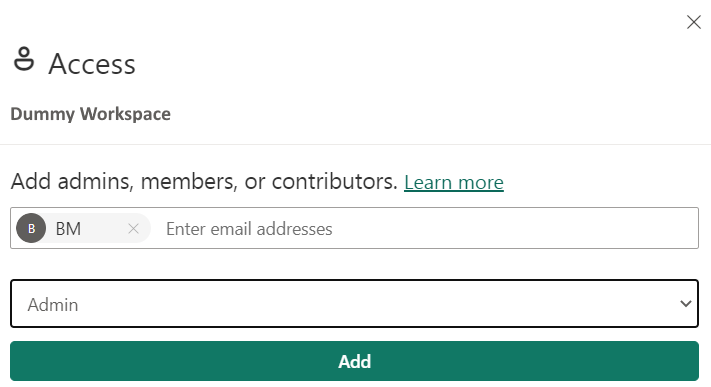
Give the Service Principal Access to the Workspace
-
Go to Power BI.
-
Open the workspace that was created using the steps outlined in the section above.
-
Click on the Access tab.

-
Type the name of the Service Principal created in the section above.
-
Select Admin as role.
-
Finally, click on the Add button.