Developing IFS Project Integration to Microsoft Project (PRJMSP)
This document gives instructions that is needed for the Microsoft Project Integration developments.
When to use this information:
Use this page when you do bug fixes in the integration or future enhancements.
Contents
Prerequisites
Following prerequisites needs to be installed in development machine according to work with the MSP add- in.
-
Install Microsoft Visual Studio 2019. If you select custom option during the installation, make sure to include Microsoft Visual Studio 2010 tools for office.
-
Install Microsoft Visual Studio Installer Projects, Visual Studio extension from here. This is needed if you expect to create MSI setup.
-
Microsoft Project 2016 (Professional or Standard edition) or Microsoft Project Pro for Office 365.
-
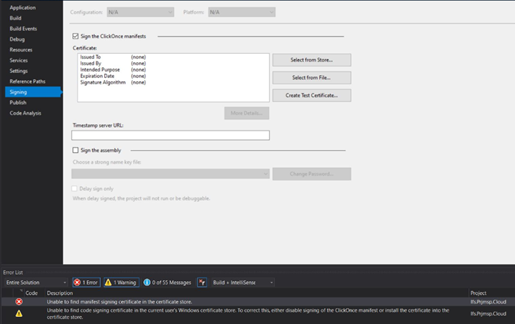
If you get a compilation error saying "Unable to find manifest signing certificate in the certificate store." right click on Ifs.Prjmsp.Cloud then select properties and then create a test certificate.
Source File
Check out the PRJMSP component.
Code Corrections
- Open Ifs.Prjmsp.Cloud.sln solution inside prjmsp\source\prjmsp\client\Ifs.Prjmsp.2013 folder.
- You can find the common form controls and logic inside Ifs.Application.Prjmsp project. Modify any code according to the requirement and build the solution.
Provide Support for Translations
If the code correction needs a change in the language files update the Base xml file which will be sending to the Translation agency.
Testing Microsoft Project Integration Add-In
After you have done the code corrections you can test the add-in by running the Ifs.Prjmsp.Cloud.sln solution.
Handling Translations
If you need to check any translation issues you need to follow below steps.
-
Log in to Translation environment.
-
Copy the relevant translated xml to a local folder.
-
Go to prjmsp\XTR-Tool\exe and execute XTR.exe

-
Enter, xml files copied local folder as Source Path & "\prjmsp\source\prjmsp\client\Ifs.Prjmsp.2013\Ifs.Prjmsp.2013\Properties" folder as destination path. Press enter.
-
All language specific .resx filles will be generated in destination folder.
-
Commit new & modified .resx files.
-
Run the Ifs.Prjmsp.Cloud.sln and test the add-in.
Building VSTO setup
-
Open Ifs.Prjmsp.Cloud.sln solution inside prjmsp\source\prjmsp\client\Ifs.Prjmsp.2013 folder.
-
Change The Version number in following places.
- Properties of Ifs.Prjmsp.Cloud Project-->Application-->Assembly information
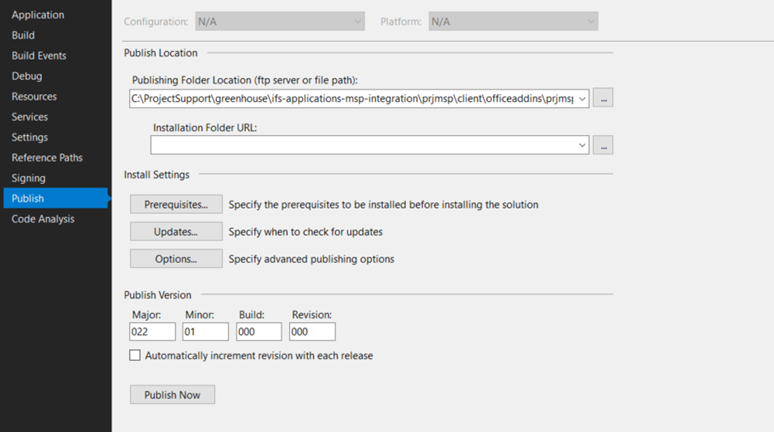
- Properties of Ifs.Prjmsp.Cloud Project-->publish-->Publish Version
- Properties of Ifs.Application.Prjmsp Project-->Application-->Assembly information
-
Publish Solution to prjmsp\client\officeaddins\prjmspofficeaddin
-
Contact the technical representative to load the PFX file and sign the VSTO setup.
Building MSI package
-
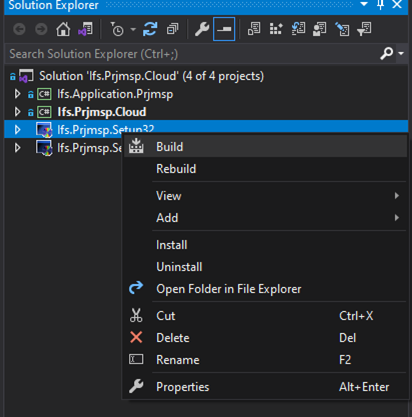
Open Ifs.Prjmsp.Cloud.sln solution inside prjmsp\source\prjmsp\client\Ifs.Prjmsp.2013 folder and you will see 2 projects (Ifs.Prjmsp.Setup32 and Ifs.Prjmsp.Setup64)
-
Build both Ifs.Prjmsp.Setup32 and Ifs.Prjmsp.Setup64 projects.
-
MSI file will generated into the relevant folder as below (Ex; For the 32bit project the MSI will be generated in prjmsp\source\prjmsp\client\Ifs.Prjmsp.2013\Ifs.Prjmsp.Setup32\Debug folder).
Folder Hierarchy
The folder structure shown below is used inside the client folder in order to overcome the translation issues.
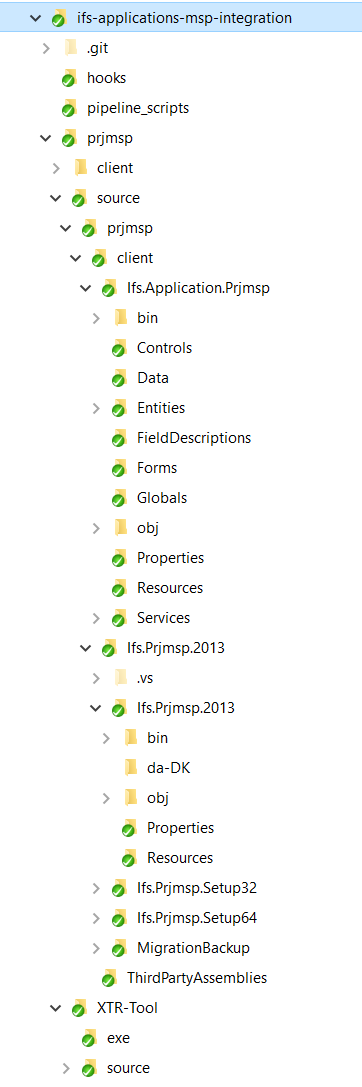
Two separate solutions were used:
-
Ifs.Application.Prjmsp
All the forms, business logic, data, and utility classes were placed inside this. IFS Application Forms project template was used to create project.
-
Ifs.Prjmsp.2013
Ifs.Application.Prjmsp was referenced to the Ifs.Prjmsp to make it easy for debugging and code corrections.
Translation Support
As mentioned above all the forms and business logic which needs translations support is placed inside Ifs.Application.Prjmsp.
Working with Fictive Language
To enable fictive language support
- Open Microsoft Project, Go to IFS Cloud tab
- Ctrl + Shift and click Settings. In the Settings screen you will see the check box "Check Localization", Check this and apply the settings (This check box will be not there when you click Settings option without Ctrl + Shift)
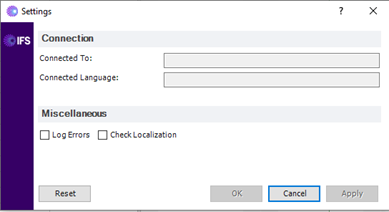
-
Re-start Microsoft Project. Now you will see that the fictive language is in operation.
-
To remove fictive language support, do the reverse.
Versioning
The version of any given Office Add-In will be its deployment version, where each version number will have a clear meaning.
Each deployment version includes:
-
Major: Target IFS Cloud Version Release Year
-
Minor: Release Version
-
Build: Service Update Number
-
Revision: Reserved for internal development and customizations
For example: 22.01.001.000
- 22.x.x.x Target IFS Cloud Version Release Year
- x.01.x.x Release Version
- x.x.001.x Service Update 1
- x.x.x.000 Internal version 000
The third (Build) and fourth (Revision) digits require further information:
- Build (Service Update Number): It should be lifted incrementally (+1) every time when we release a service update. This number may also be used internally during the development/testing process, bearing in mind that, when service update is delivered, the Build number should be lifted, and the Revision number should be reset to 0.
- Revision (Customization version): It should mainly be used for Consulting to indicate a customization. For instance, a version number 22.001.000.000 would indicate a CORE release, whilst a version number 22.001.000.002 would reflect a release with 2 customizations.
Security
In the IFS Solution Manager, ensure following projections are added to the permission-set "MSP_INTEGRATION" to run the MSP Integration.
- ActivityClassAssignmentIntegration
- ActivityClassIntegration
- ActivityClassValIntegration
- ActivityDependencyIntegration
- ActivityIntegration
- ActivityResourceAssignmentIntegration
- MspIntegration
- ProjectIntegration
- ResourceCostIntegration
- ResourceIntegration
- SubProjectIntegration
- WorkTimeCalendarBasicDataService
To grant this permission set, only add the new permission-set to the users that should be allowed access.
FAQ
-
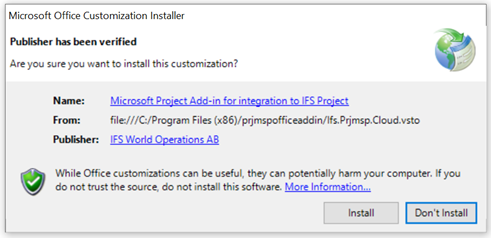
Unless a customization has been done, setup is signed with a valid R & D certificate. If you get warning saying "Unknown Publisher" and does not proceed with the application, install *Digicert* Intermediate certificate in the end user machine.
Below is an image of a setup is signed with a Valid certificate. Observe the Publisher is shown as "IFS World Operations AB"