IFS Data Migration Excel Add-in
This document describes how to install the Data Migration Excel Add-in in a computer.
Prerequisites
-
The 64-bit version of Office 2016 or a later version.
-
Excel 2016 or a later version of the Office client, if you are testing or running an Office Add-in specifically for this Office desktop clients.
| office version | state |
|---|---|
| office on web | supported.Exception : Office on the web will not open in Internet Explorer. |
| Mac(ios) and Android | supported. |
| Office 2013 | Not supported. |
| non-subscription Office 2021 or later (Windows 10, 11) | supported. |
| Office 2016 Perpetual (professional or higher) | supported. |
| Office 2019 Perpetual (professional or higher) | supported. |
| Office 2021 Perpetual (professional or higher) | supported. |
| non-subscription Office 2013 to Office 2019 (Windows 7, 8.1, 10, 11) | Not supported. |
| Office 365 Semi-Annual Channel (Office 365 ProPlus) | supported. |
| office 365 mso (semi annual Enterprise) | supported. |
more information: https://docs.microsoft.com/en-us/office/dev/add-ins/concepts/browsers-used-by-office-web-add-ins
(combinations that has browser as Internet Explorer 11 are not supported platforms)
Installation
Data Migration Microsoft Excel Add-in can be installed in multiple ways. Excel Add-In is a Microsoft Office Add-in and recommends installing in following methods.
- Microsoft 365 admin center
- SharePoint catalog
- Sideloading
More information at Microsoft documentation: https://learn.microsoft.com/en-us/office/dev/add-ins/publish/publish
Installing Data Migration Excel Add-in requires generating a Office Add-In manifest XML file. Following section describe how to generate a Office Add-In manifest XML from IFS Cloud Web. This manifest file can be used to publish Data Migration Excel Add-In in all deployment methods described above.
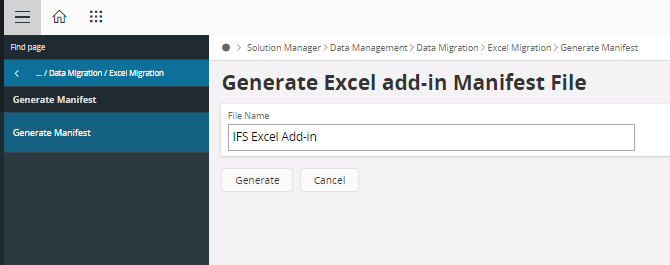
- Go to Solution Manager >> Data Management >> Data Migration >> Excel Migration >> Generate Manifest, to Generate the Manifest of IFS Excel Add-in.
- Save the file in any name (default name: IFS Excel Add-in.xml)
NOTE: this page is only visible to users with FND_ADMIN permission set.
Sideloading
Sideloading is a way of deploying Data Migration Excel Add-in in absence of SharePoint or Microsoft 365 admin center. Please read Microsoft Documentation for more information.
Authentication of the Excel Add-In functionalities follows standards of IFS Cloud Web. Following describe how a user can use sideloading to publish Excel Add-in.
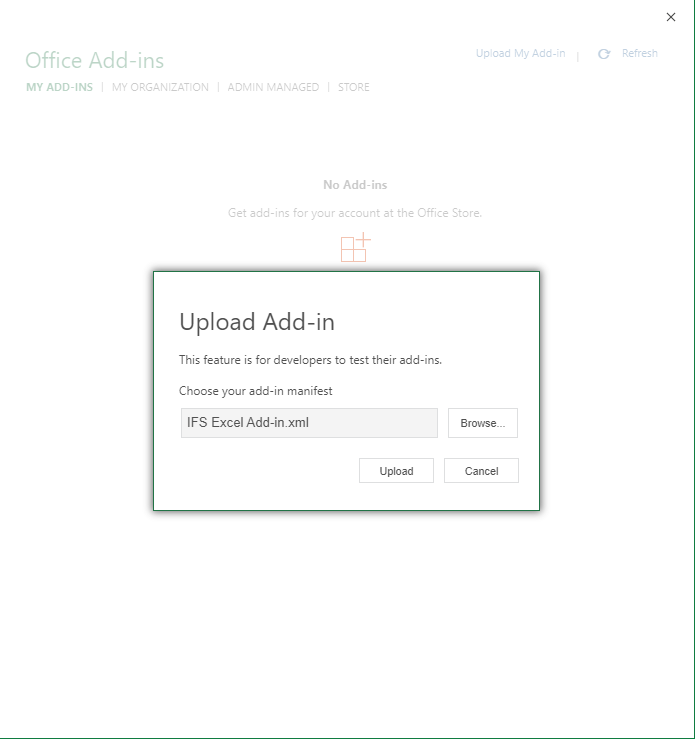
Upload My Add-in to Excel for the web:
Note: Following option is only visible when the user has admin privileges and in web clients.
- Navigate to Insert >> My Add-ins >> Upload My Add-in and upload the relevant xml file.
Upload as Shared Folder for Microsoft Excel
- Go to MS Excel, File >> Options >> Trust Center >> Trust Center Settings >> Trusted Add-in Catalogs.
- Add Catalog Url to the shared Manifest location.
- Check Show in Menu option and Save changes.
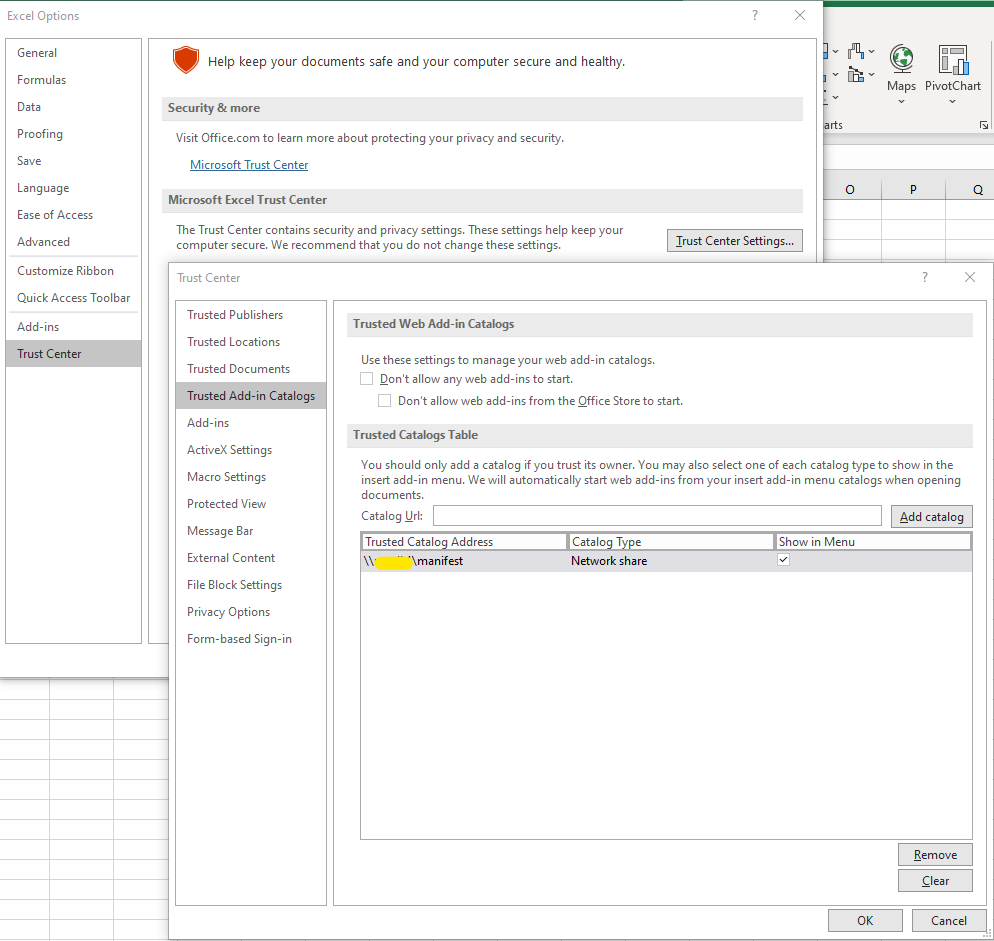
- Restart MS Excel application Navigate to Insert >> My Add-ins >> SHARED FOLDER the IFS Excel Add-in will be loaded.

- Go to MS Excel, File >> Options >> Trust Center >> Trust Center Settings >> Trusted Add-in Catalogs.
Versioning
The version of any given Office Add-In will be as follows,
For example: 21.2.0.2
- 21.2 - Major Release Number
- 0 - SU Number
- 2 - Internal Build Number
Security
When a excel migration job is created a projection will be created to expose data to the excel client. In order to access the migration job for a particular user, the projection should be assigned to a permission set where user has grants. The projection name will be created using the migration job name and appending a suffix MigjobHandling in pascal case.
eg: - Migration job = INVOICE_ITEM_TEST - Projection name = InvoiceItemTestMigjobHandling
Adding Projection to Permission Set
-
Navigate to page Solution Manager >> Users and Permissions >> Permission Sets >> Grant Projections To Permission Sets
-
Find and add the Excel Migration projection created to the list

-
Next, find and add the permission set where the projection should be assigned.
Note: a projection can be granted to multiple permission sets

4. When finished, the created projection is granted to permission set(s) to access.
5. Following the same steps above add the projection 'ExcelAddinHandling' to the same permission set.
Uninstalling
Please follow Microsoft documentation for details on uninstalling Data Migration Excel Add-In web app. Following describes uninstalling Excel Add-In for Sideloaded app.
- For Office web client go to internet options and clear all cookies related to excel, clear browsing cache and refresh web client.
- For Office desktop clients clear all contents in folder
C:\Users\<username>\AppData\Local\Microsoft\Office\16.0\Wefand restart MS Excel.