How to configure and map appearance
To use Appearance Designer the Projection AppearanceConfiguration needs to be granted to the user.
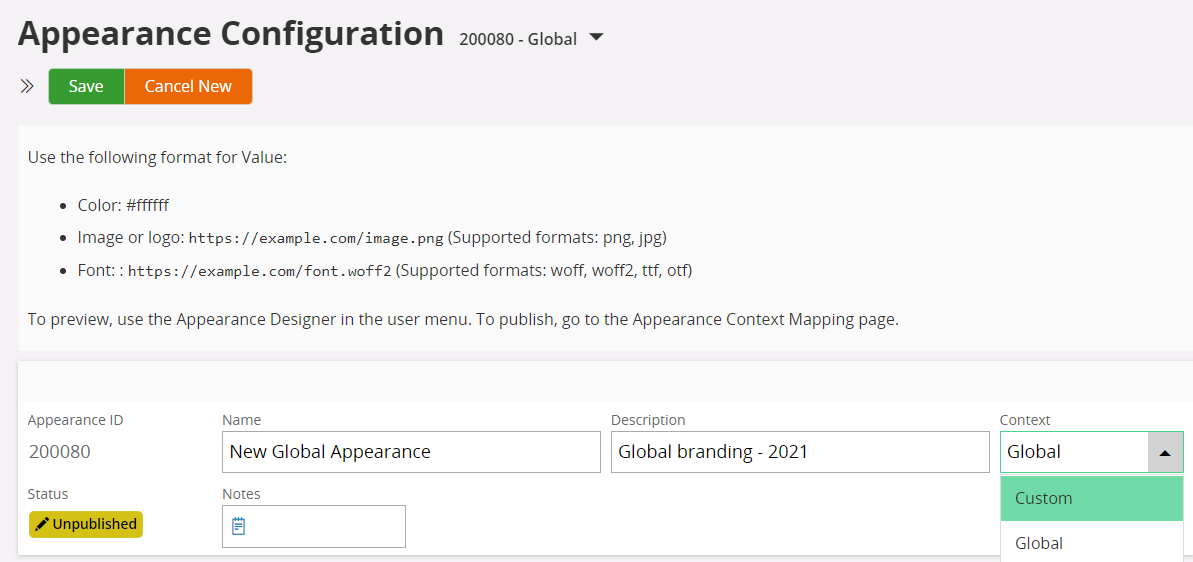
Create a new Appearance in the Appearance Configuration page. Set the context to ‘Global’ or ‘Custom’. On save, the Appearance will be created in ‘Unpublished’ state.
App Menu> Appearance Designer > Appearance Configuration

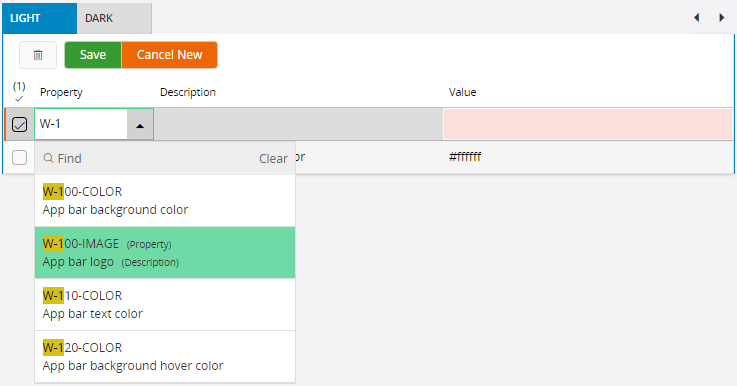
Set Appearance Properties for each theme: Light and Dark.
Start on the Light theme. Add a new line. Select a ‘Property’ to configure. Enter the overriding ‘Value’ or Select a resource and save.

Hint: For Dark theme you can copy the values from the Light theme (Copy Light Properties) or start from scratch.

Read more about Appearance Properties here.
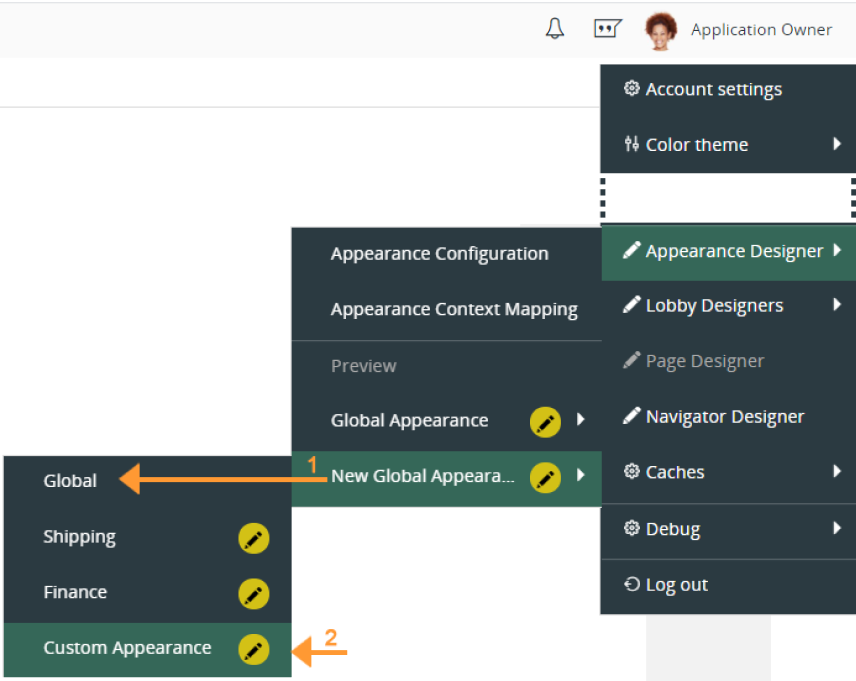
Use the preview option to test the effects of the Appearance.
App Menu> Appearance Designer > Preview: select Global Appearance> select Custom Appearance

- Preview Global Appearance only.
- Preview Custom Appearance on top Global Appearance.
The Appearance being previewed is indicated on the info band.

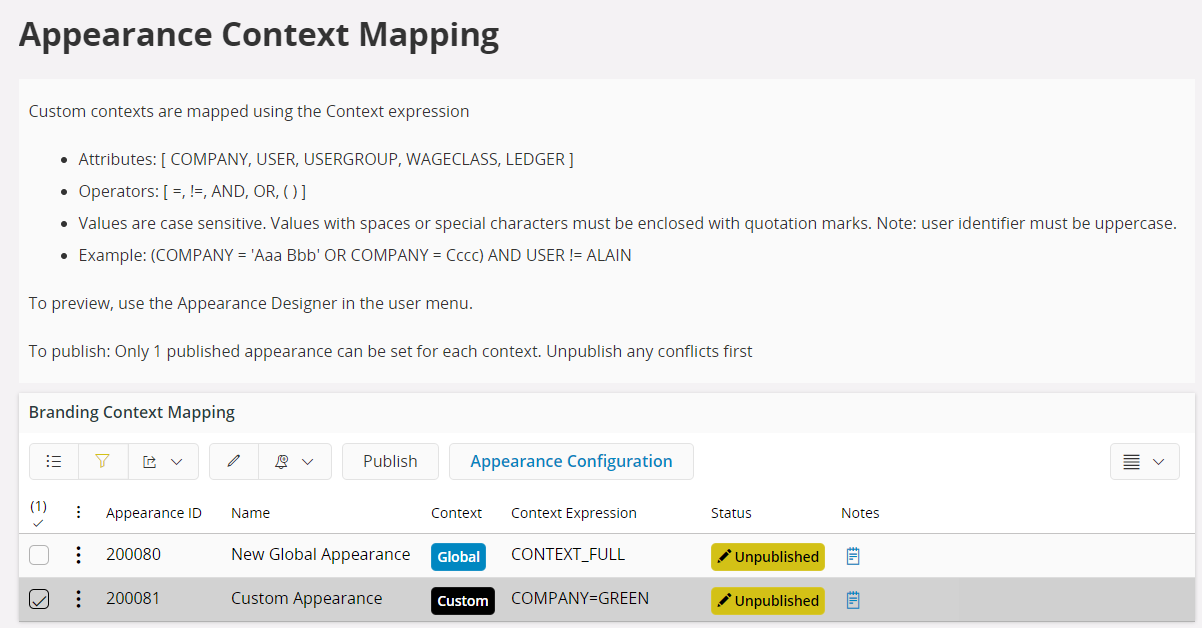
Appearances are mapped using the ‘Context Expression’ in the Appearance Context Mapping page.
App Menu> Appearance Designer > Appearance Context Mapping

When the mapping is set up, ‘Publish’ the Appearance for the changes to take effect in the environment.
To replace a published Appearance with another Appearance, the Appearance to be replaced needs to be unpublished, before the replacement Appearance can be published. For larger changes it is recommended to create a copy, make the changes and then switch the Appearances by changing the statuses of the new and original.
Hint: Use ‘Notes’ column to keep track of Appearance versions,