Working with Environments
Related Pages
- Environments created from a topic branch
- Extending Environment Lifespan
- Accessing the Database to Troubleshoot
Overview
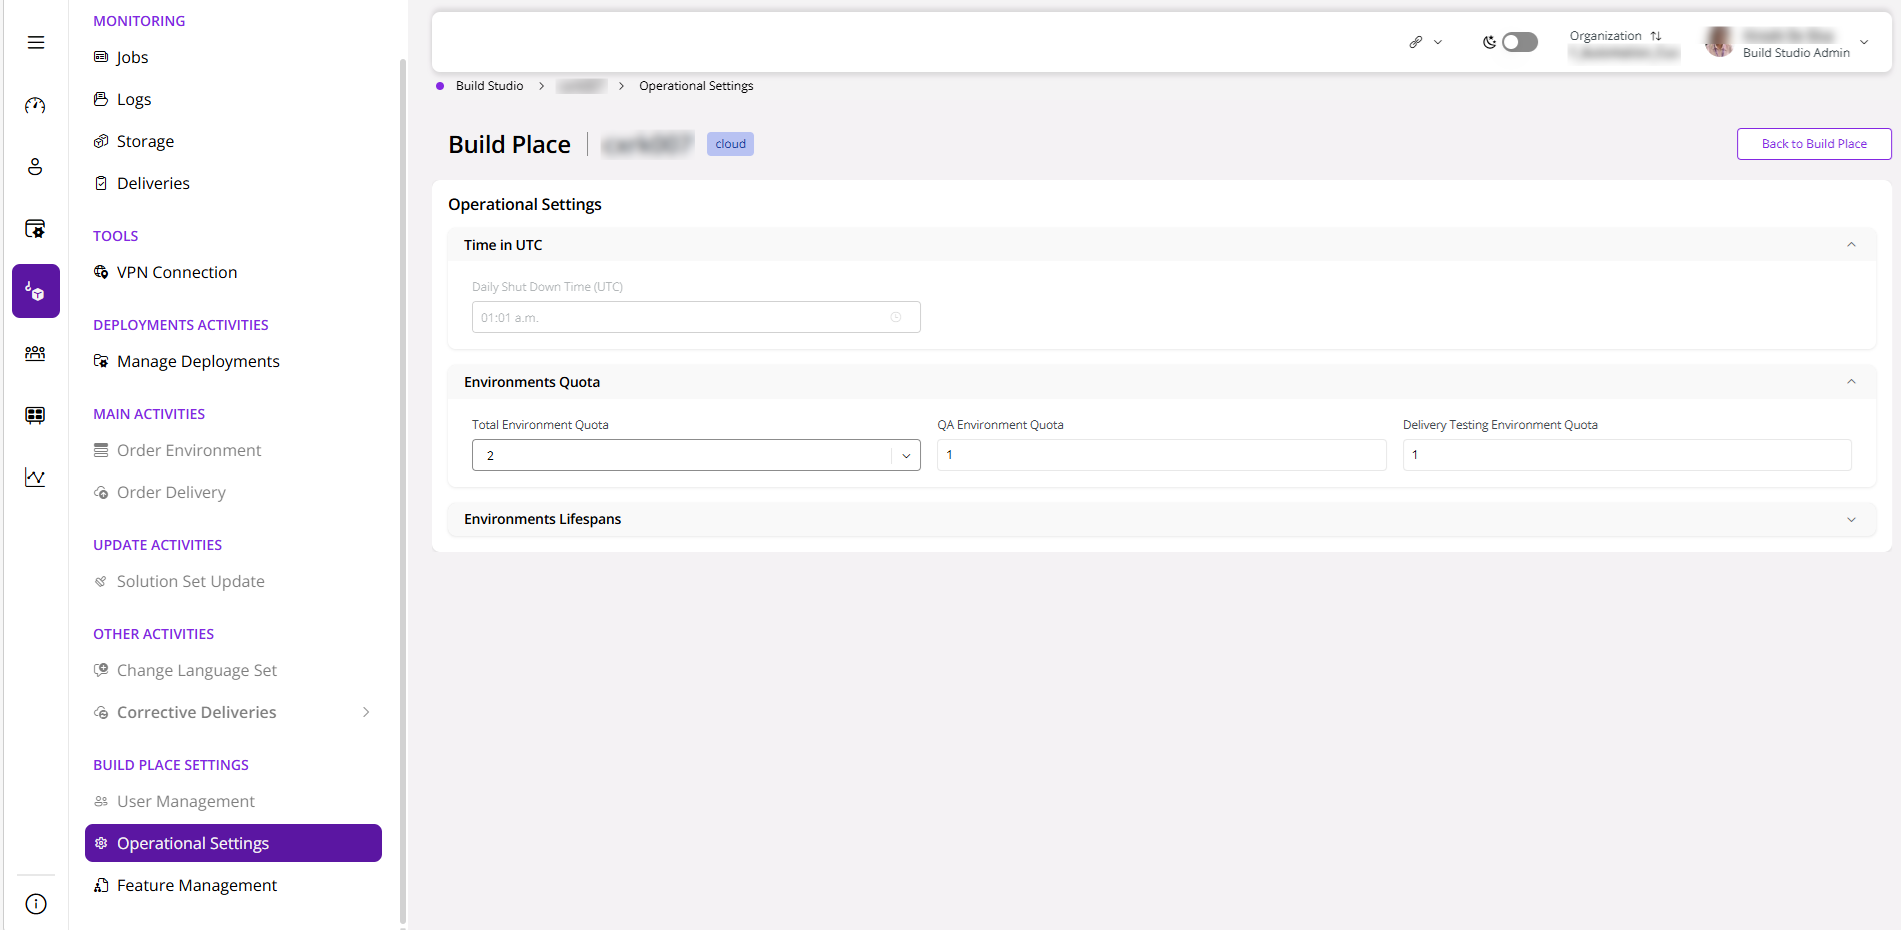
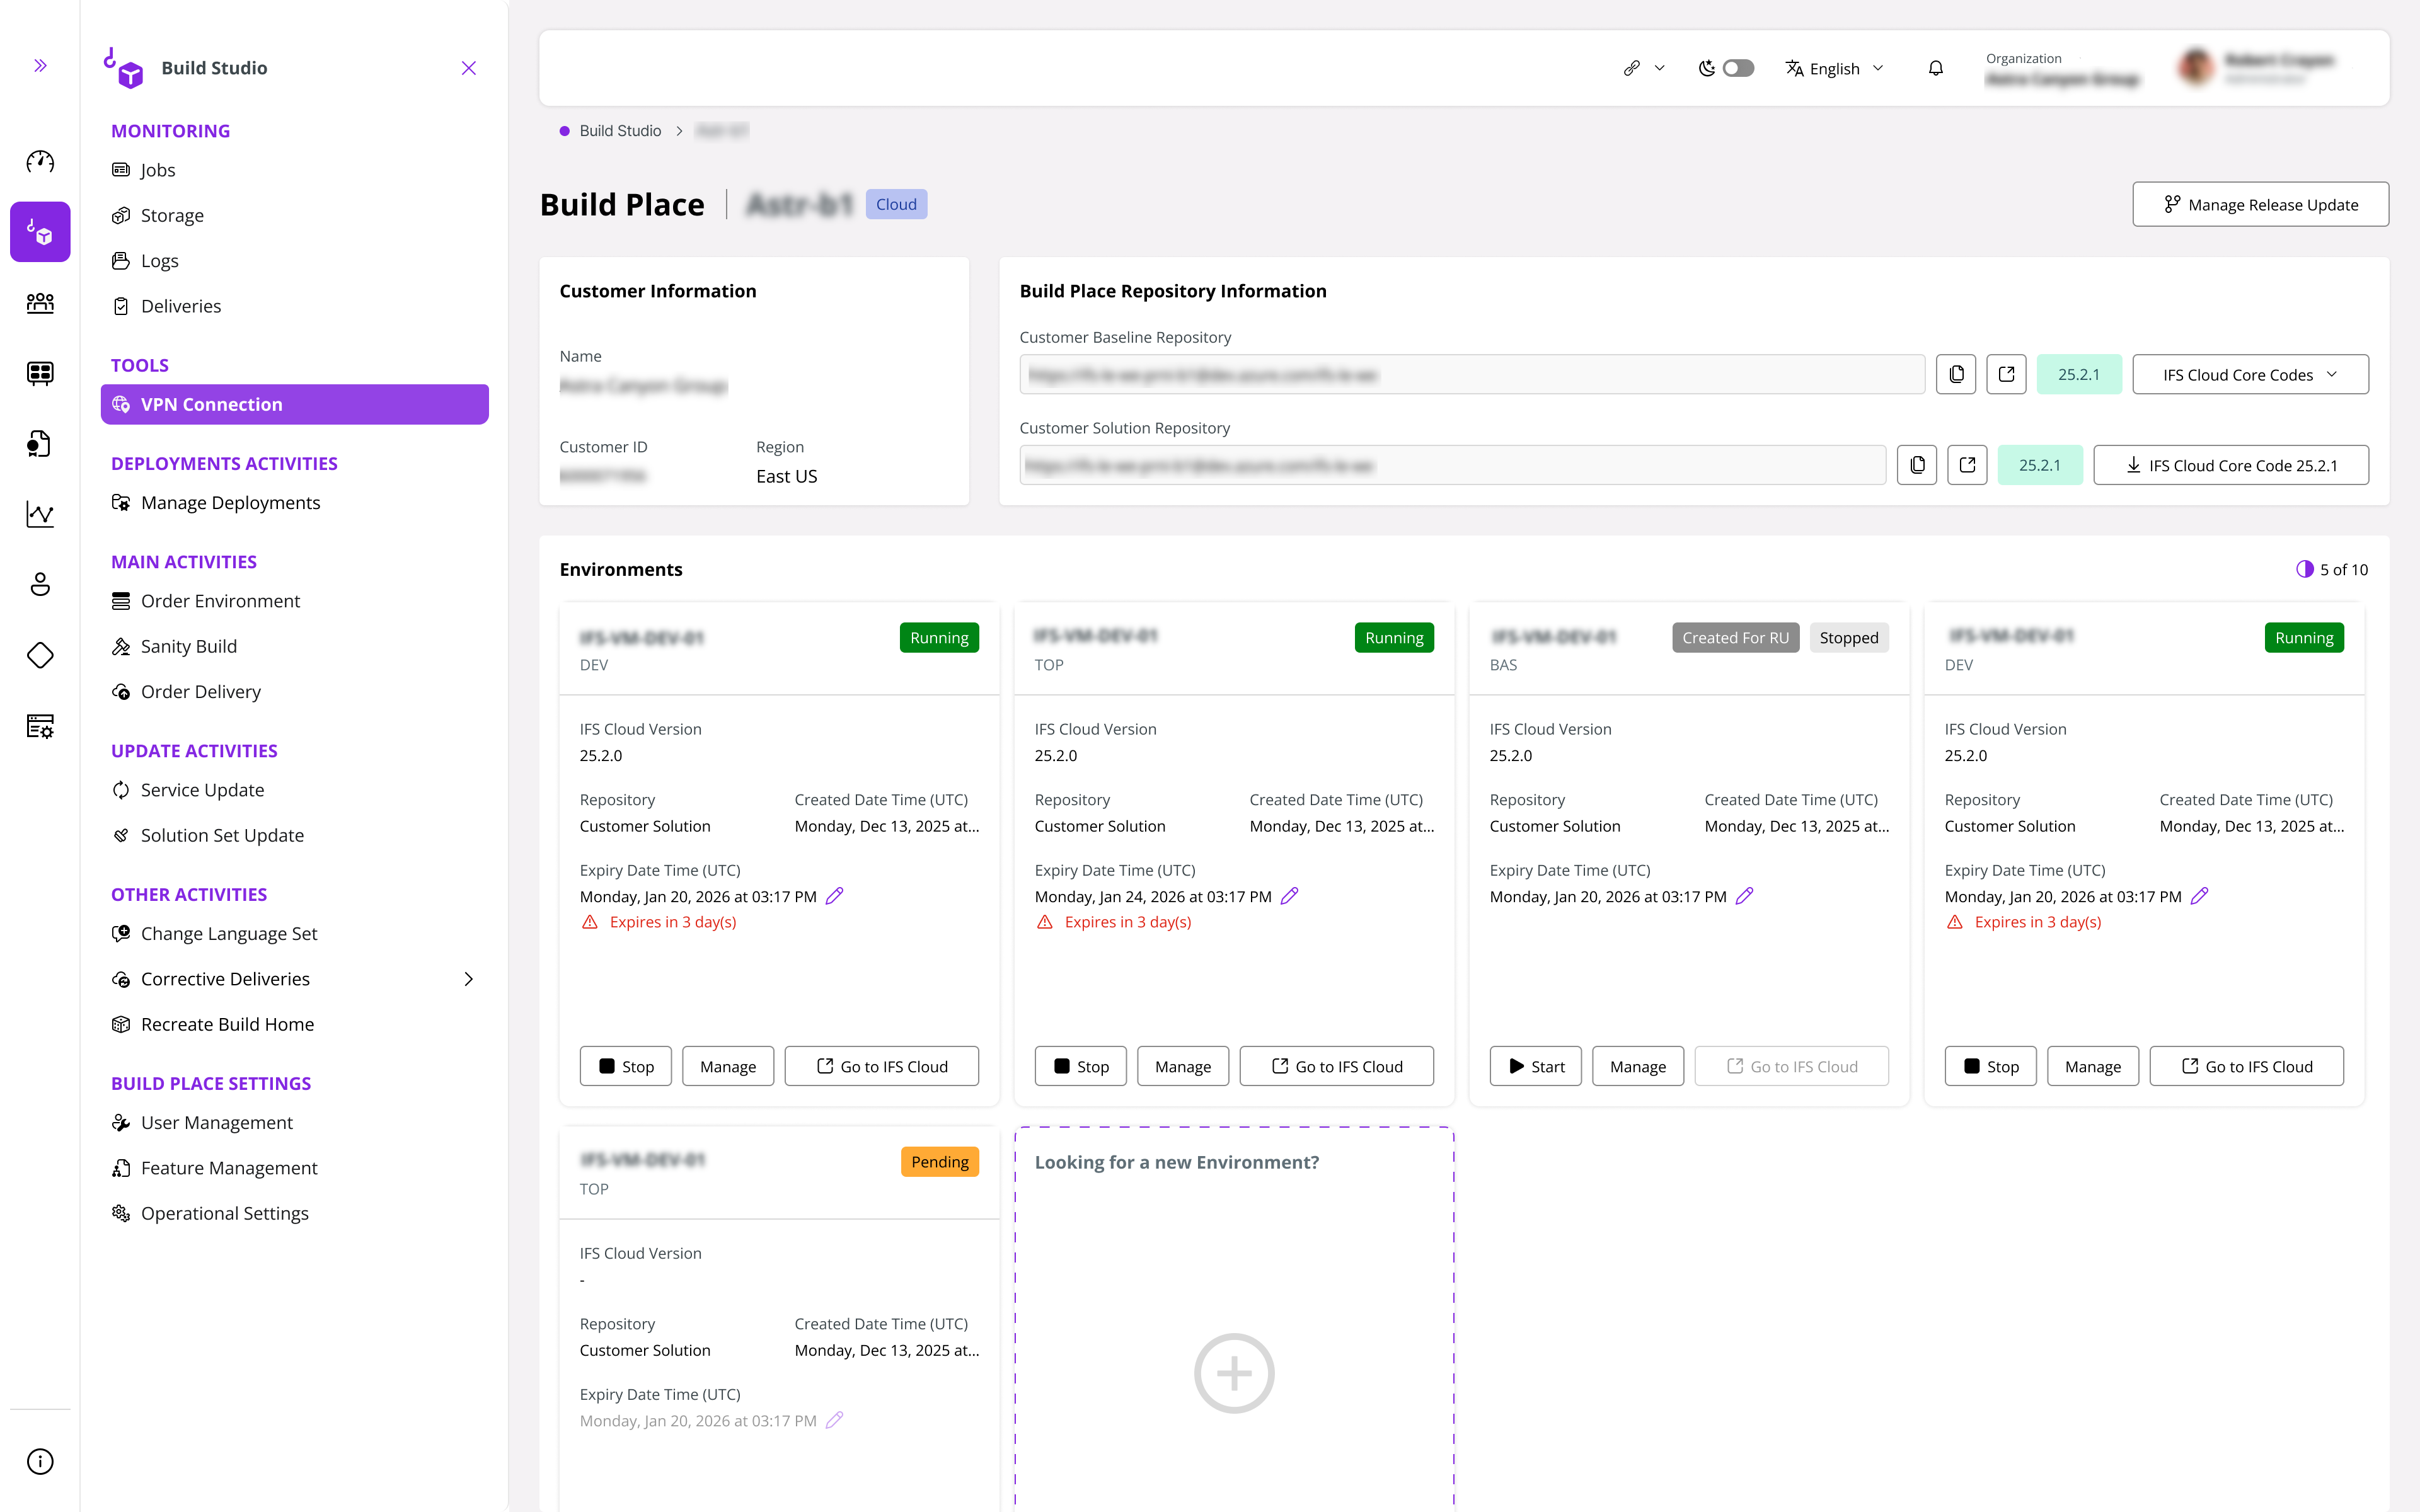
There are different types of environments available in a Build Place. A Build Place is offered a quota of 2 environments. However, if there is a requirement for additional environments, customers can purchase a maximum of up to 6 environments (in 2 blocks). Furthermore, a limit applies to the number of environments of each type that can be ordered at a time. These quotas can be seen under the Operational Settings in a Build Place.
Customers can purchase additional Build Place environments at the time of onboarding or anytime after onboarding. The process of activating additional environments is mentioned below;
New IFS Cloud customer who purchase additional Build Place environments at the time of onboarding
1) The sales team fills out the onboarding form and additional environments also be specified in the same form.
2) The completed form is emailed to the IFS onboarding team.
3) IFS onboarding team will first create the Build Place initialization request in SNOW.
4) Once the Build Place is activated, the IFS onboarding team will log in to the Build Studio of the Lifecycle Experience Center and increase the Build Place Environment count.
Existing IFS Cloud Build Place customers who purchase additional environments.
The sales team selects the number of environments from the Global Price List (GPL)
Send the request to the The IFS onboarding team.
The IFS onboarding team will log in to the Lifecycle Experience Center and increase the Build Place environment count.
Environment Types
| Environment Type | Built From | Purpose | Maximum per Build Place | Default Lifespan | Extendable Up to |
| DEV | Master branch of customer solution repository | These environments can be ordered based on the last successful build on the master and can be used by developers to directly deploy code during development | No limit | 30 days | Up to 45 days |
| QAS | Master branch of customer solution repository | This environment type can be ordered based on the last successful build on the master and can be used to verify the code available in the master before a delivery is created | 1 | 7 days | Up to 45 days |
| TOP | Topic branch of customer solution repository | This environment can be ordered based on a given topic branch and can be used to verify a functionality developed on a particular branch before it is merged to master | No limit | 7 days | Up to 45 days |
| DEL | Master branch of customer solution repository | This environment is created to verify a created delivery. This environment is created based on a previously created delivery and a stable sanity tag in the master which is the delivery candidate | 1 | 7 days | Up to 45 days |
| BAS | Master branch of customer baseline repository | This environment can be ordered from a specific service update tag in the master branch of the baseline repository. This is intended to be used when investigating support issues to identify whether a particular issue is available in the baseline code or not. | No limit | 7 days | Up to 45 days |
For more information on environment lifespan extension please refer this section.
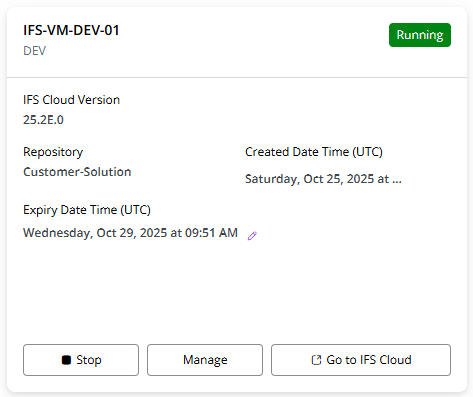
Environment Details
The environment card view in a Build Place is shown below.

Click Manage to view the expanded environment card view.
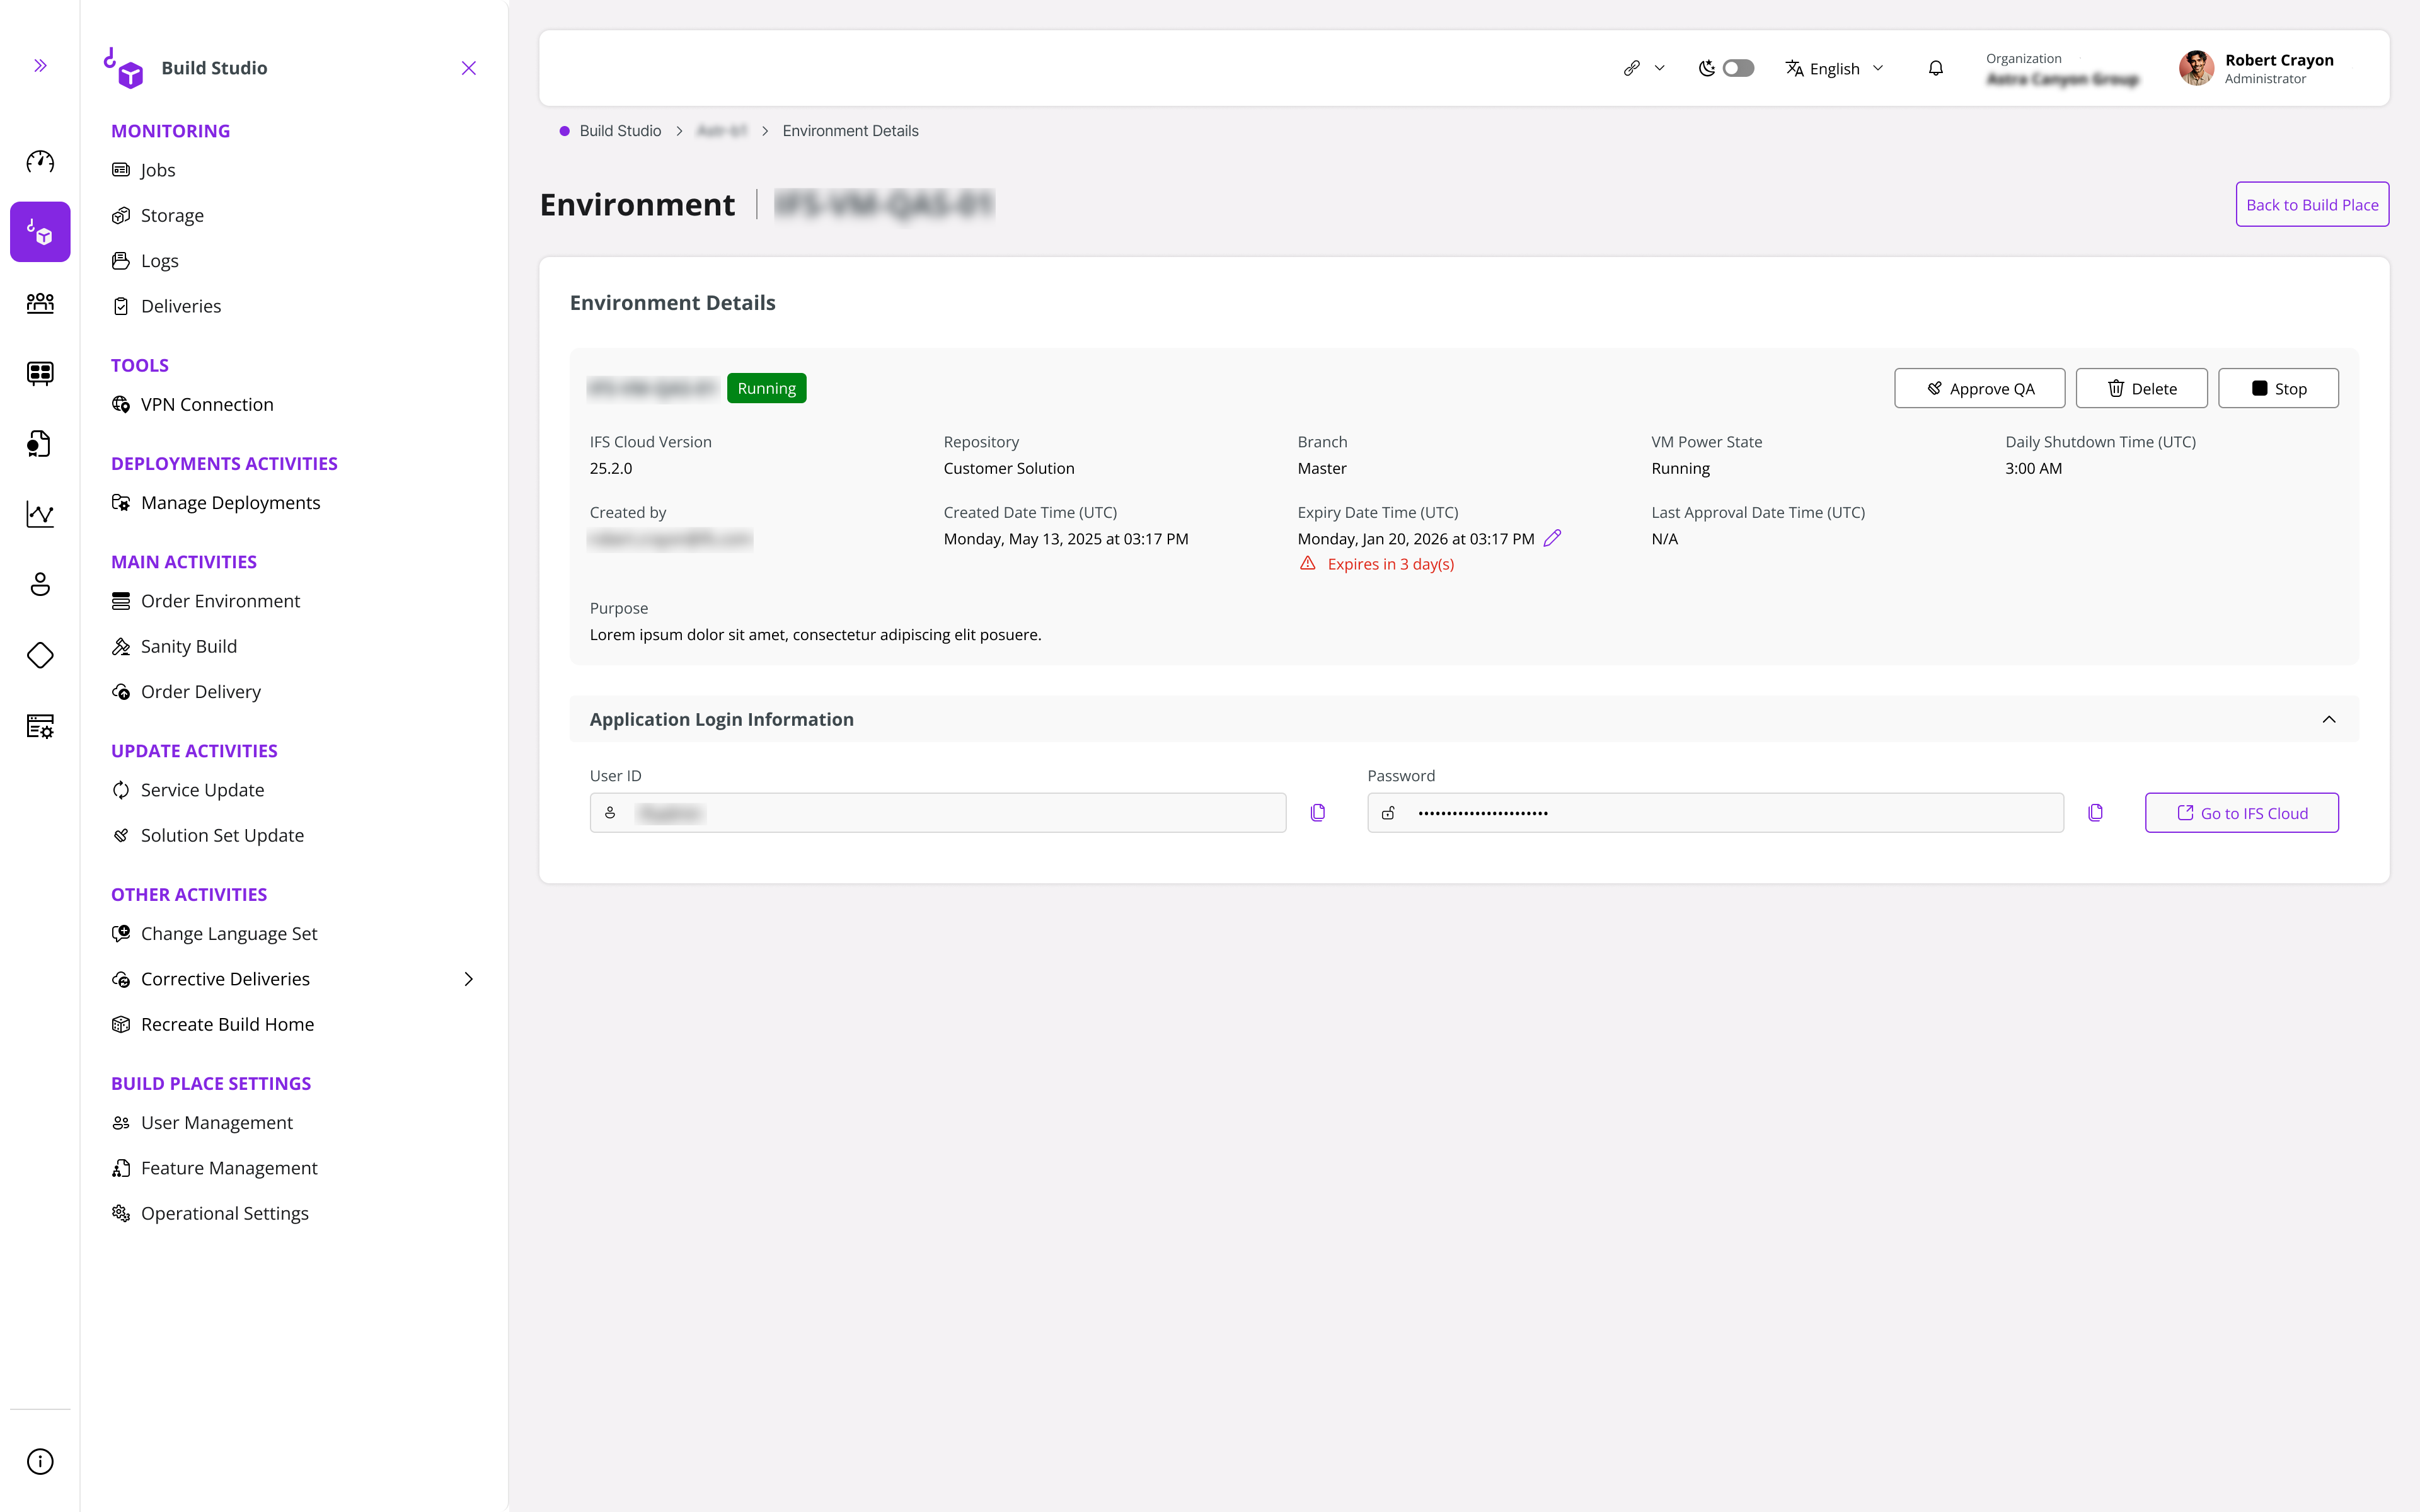
The following labels describe the details of the environment card view:
| Label | Description | Value(s) |
| Repository | Repository name for development | Customer Solution or Customer Baseline |
| Branch | Branch name for development | Master branch or Topic branch name |
| Created By | The person who ordered the environment | Email ID of the user |
| VM Power State | Current power status of the VM | Running or Stopped |
| Daily Shutdown Time | Daily environment shutdown time | Time in UTC |
| Created Date Time | Environment creation date & time | Time in UTC |
| Expiry Date Time | Environment expiry date & time | Time in UTC |
| Purpose | Purpose of creating the environment | Any text input that is entered at the time of environment ordering |
| IFS Cloud Version | The version from which the environment was created | Service Update Version |
Note: VM could be up and running although environment creation is still in progress.
The following sections in the card can be used to access different components of the environment:
| Section | Description |
| Application Information | Includes the link to the environment's database, IFS application and the ifsapp credentials for accessing them. You can navigate to the application via "Go to IFS Cloud" button. |
| IFSSYS DB Information | This information is only included for a dev environment. The credentials can be used to set up the development environment for service layer developments, container developments, Java development, etc in the IFS Developer Studio. |
Expiry of Environments
All environments ordered for a Build Place have a default lifespan based on the environment type as indicated in the environment types table above. This information is also available as read-only under Build Place Settings. The lifespan of an environment can also be extended up to 45 days as required. Once the lifespan is reached and the environment has expired, the environment will be deleted automatically.

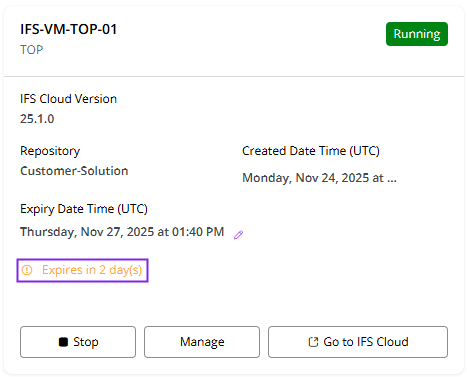
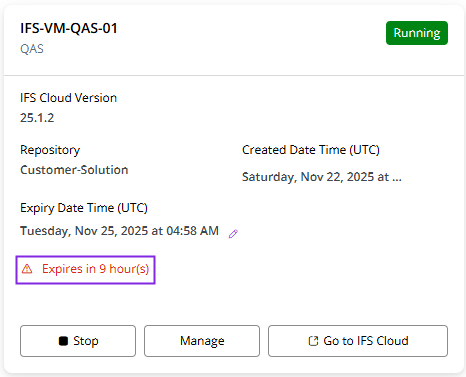
When an environment is ordered, its expiry date (in UTC time) is set based on the creation date and the lifespan of the environment type. This date is displayed on the environment card as shown below.
When there are only 3 days (72 hours) or less remaining for the environment to expire, a yellow indicator appears on the environment card. Hovering over the indicator displays the tooltip showing the number of hours remaining before the environment expires.
When there are only 24 hours or less for an environment to expire, the indicator will turn red. Once the expiry date is passed, the environment will be automatically deleted by the hourly scheduled job that runs for a Build Place.
Daily Scheduled Shutdown of Environments
All environments in a Build Place will undergo a daily shutdown. This is done to reduce the amount of utilized resources.
The Daily Environment Shutdown Time can be set and viewed on the Build Place Settings page. This schedule is applicable to all environments ordered for the Build Place.
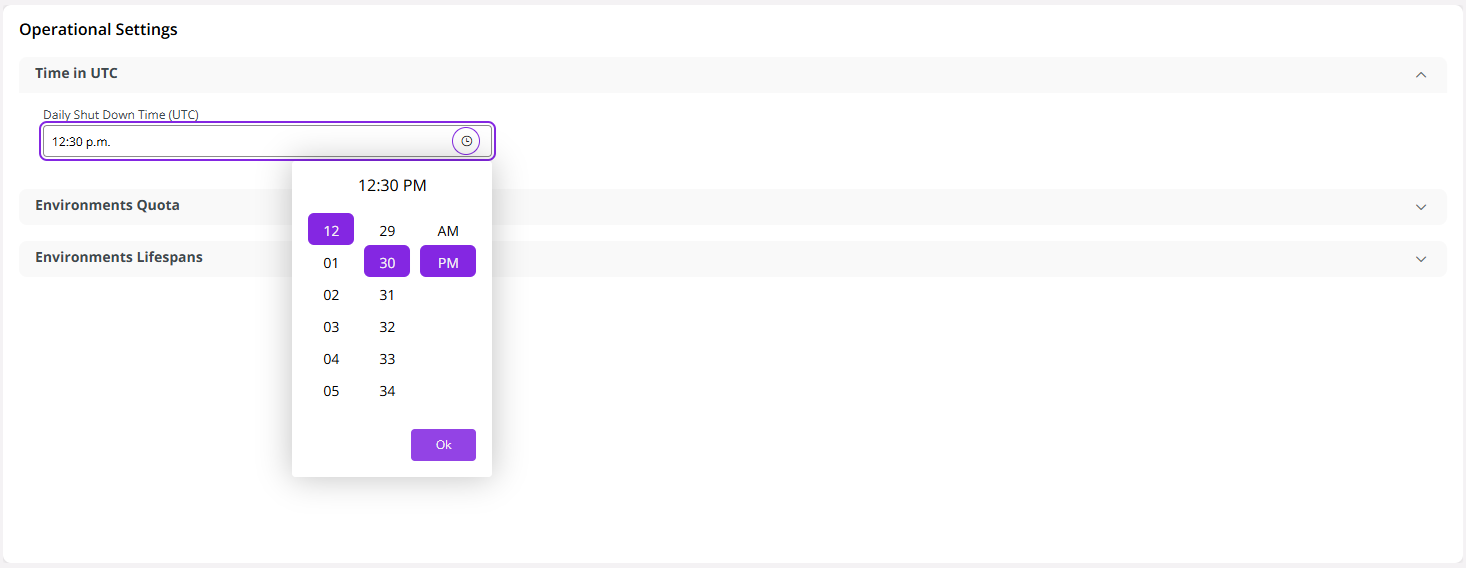
When an environment is ordered, the daily shutdown time at the time of ordering will be applicable for it and can be seen on the environment card. If the shutdown time is changed, the new schedule is only applied to the newly ordered environments whilst the old environments follow the previous schedule.

Once the daily shutdown time is passed, the environments are automatically shutdown by the hourly scheduled job that runs for a Build Place. When the scheduled job is in progress, the VM and the namespace related to the environment will begin to shutdown. The environment status will change from Running to Stopping.

Once the scheduled shutdown job is completed, the environment status will change from Stopping to Stopped. In this state, the database and application of the environment will be accessible. Further, the Start button will re-appear on the environment card view.

Important
The Build Place shutdown scheduler is an hourly operation. When the shut down operation triggers, it will check two variables:
- Environments that are scheduled to shutdown within the last 2 hours
- Environments that are in the 'Running' state
If both of the criteria mentioned above are fullfilled, the automation will shut down the environments. Therefore, it is highly recommended to change the scheduled shutdown time, if there are any BuildPlace operations planned closer to the scheduled shutdown time.
Manual Start of Environments
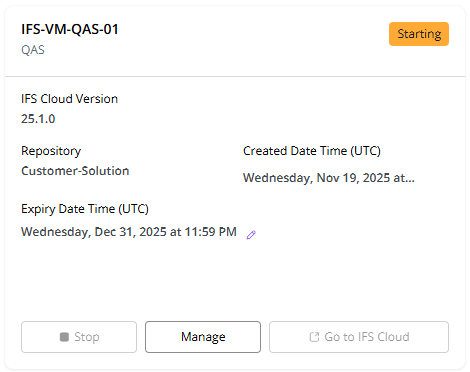
To restart the environment, click Start on the environment card. Then, the status of the environment will change from Stopped to Starting and a job record will be created with the status as pending.
Once the operation is completed, the environment will regain its original Running state and the job table record will be updated with the status as Completed. After the operation has been completed, the environment status will go back from Starting to Running and the job record will be updated with the status as Completed. Once this happens, the database and application of the environment will be accessible.
Manual Shutdown of Environments
It is also possible to manually shut down the environment by clicking Stop on the card. To indicate that the environment is in the process of shutting down, the status will display Stopping, and a job record will be created with the status as Pending.
Note: You may notice a slight increase in the time taken for the manual start, manual shutdown, and scheduled shutdown operations (approximately 5-20 minutes).
Once the shutdown operation is completed, the environment status will move to Stopped state and the Start button will re-appear on the environment card view.
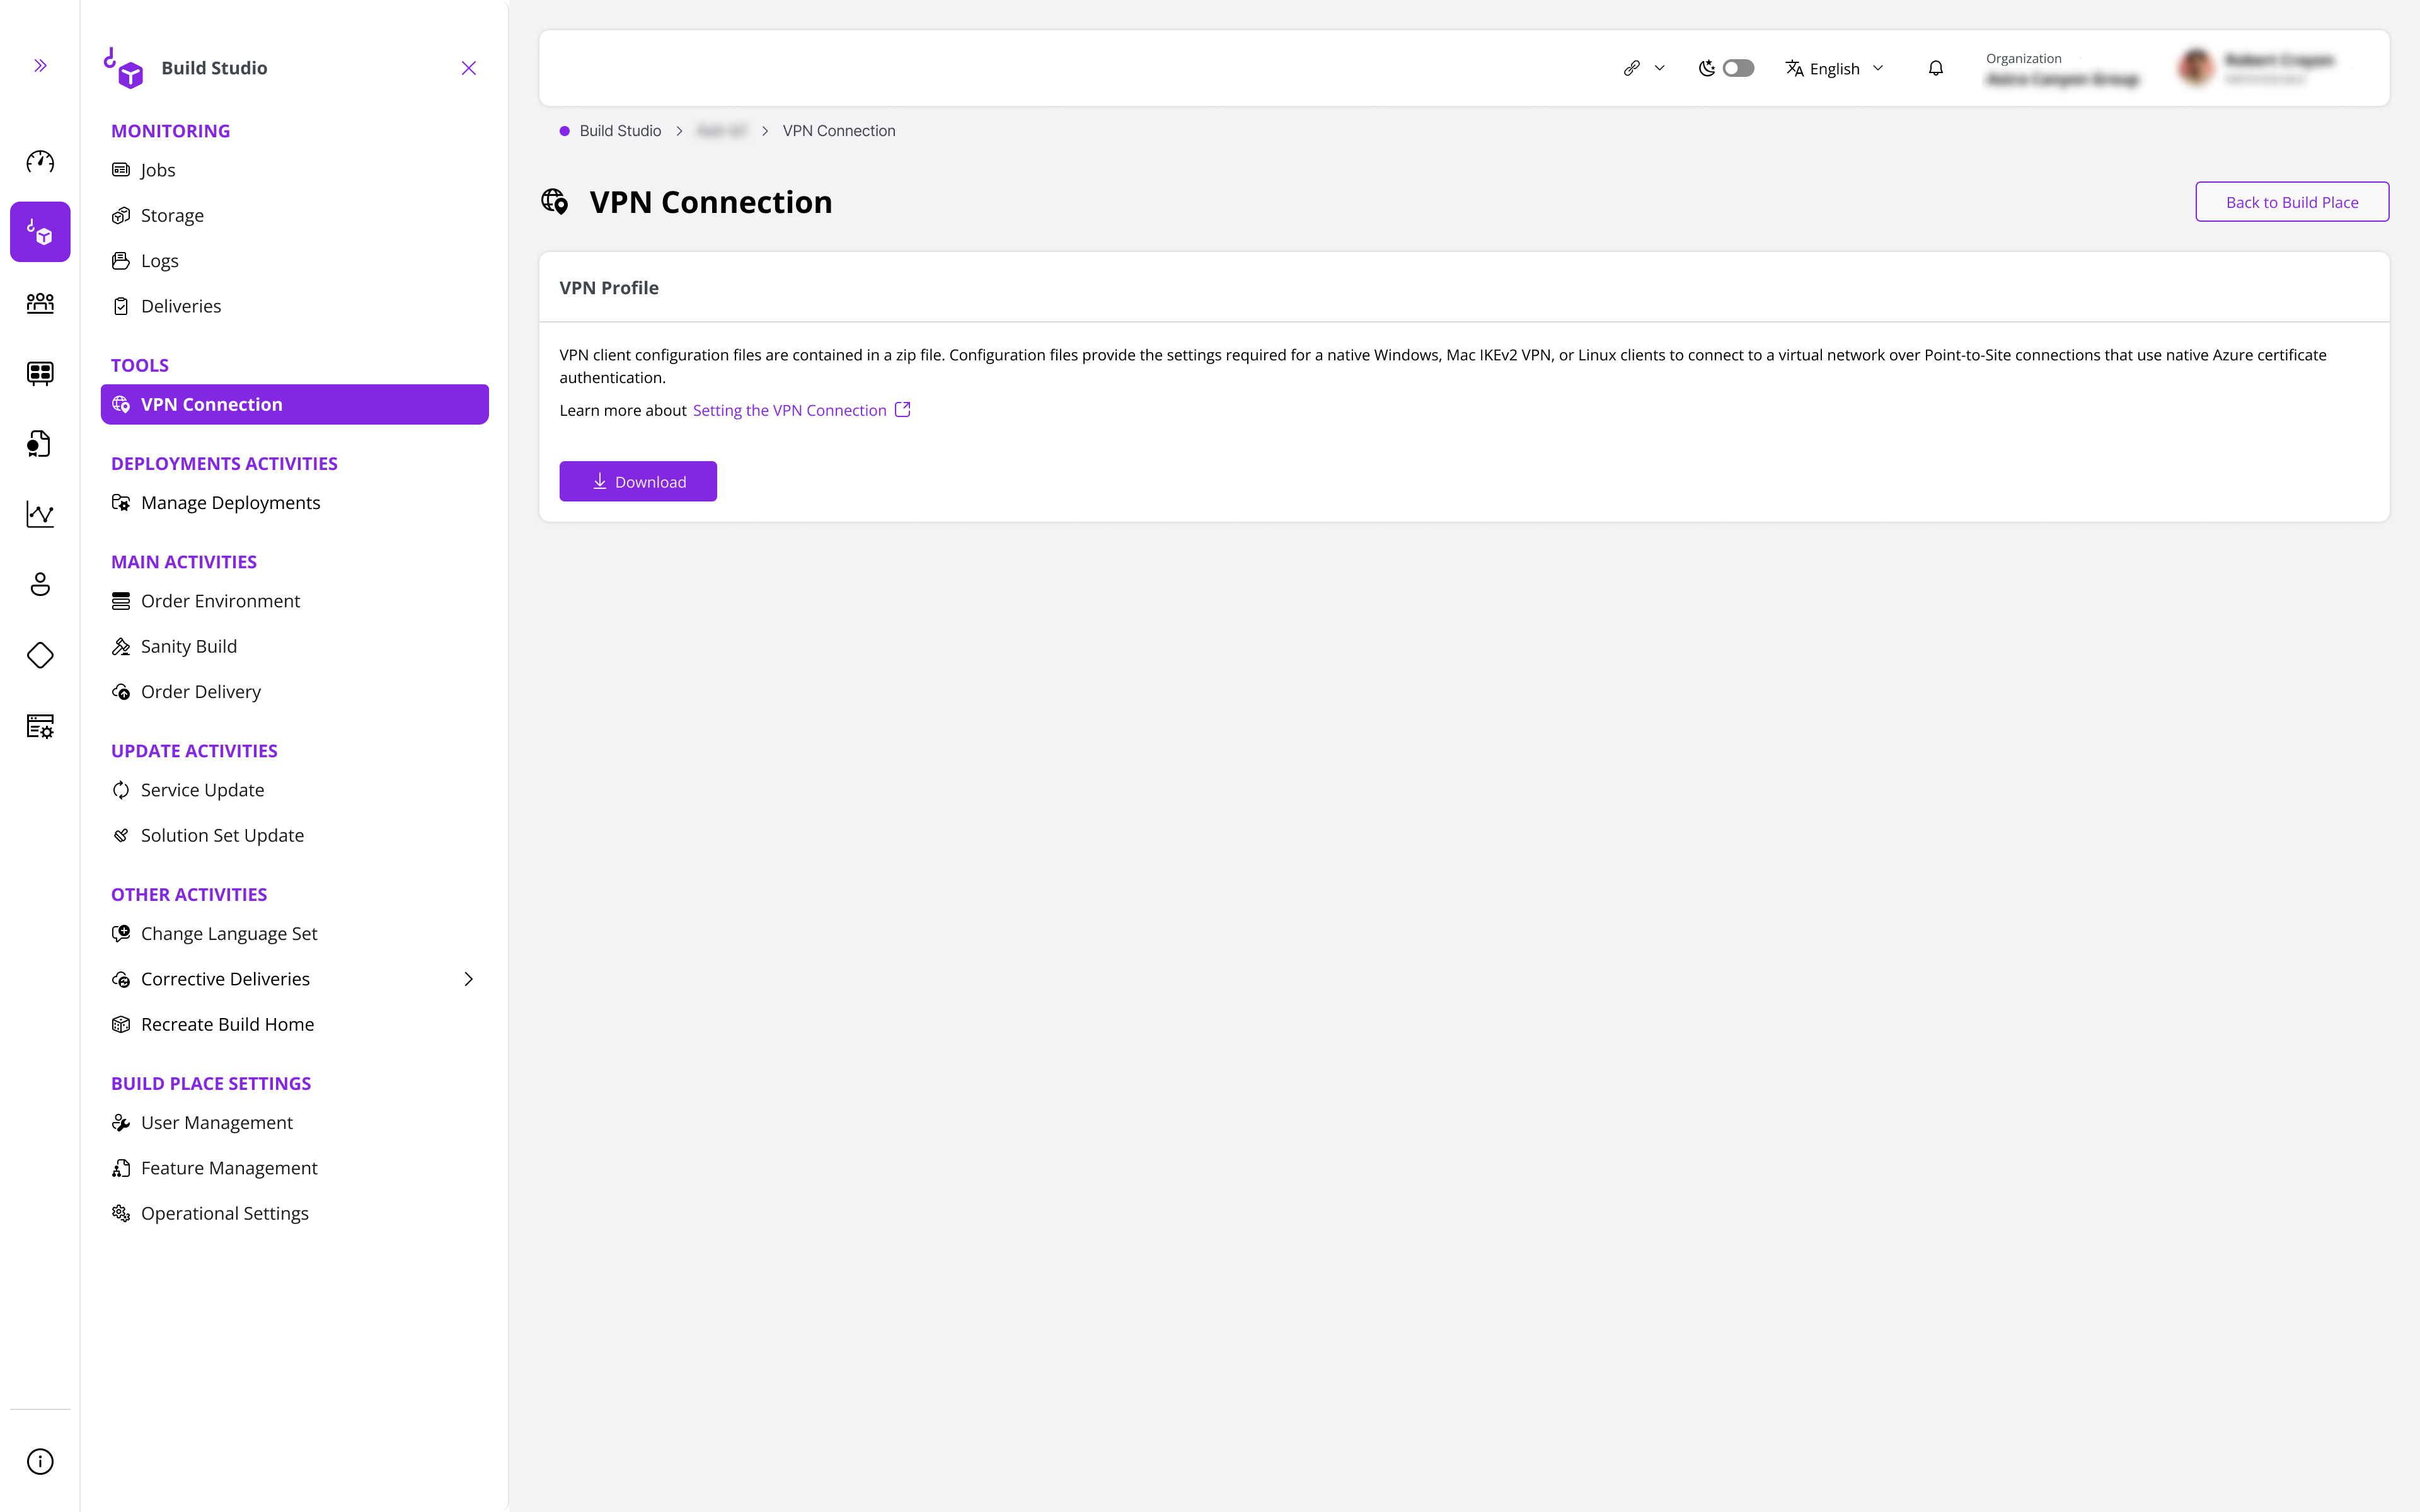
Configure Point-to-Site VPN on User Workstation
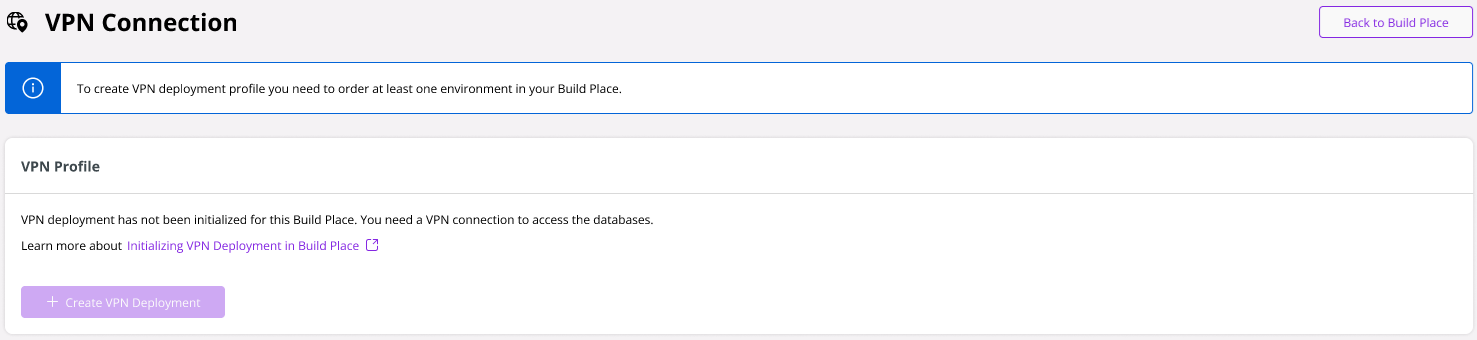
The point-to-site VPN connection is needed when connecting to any database of any of the Build Place environments or to access logs shared in the VM shared folder. To set up a VPN connection, go to the left sidebar and click VPN Connection under Tools.
The Create VPN Deployment button in the VPN Profile is disabled for a Build Place without environments. To provision a VPN, you must create at least one environment in your Build Place. Regardless of the status of the environment (pending, running, stopped, failed), the Create VPN Deployment remains enabled once an environment is ordered.
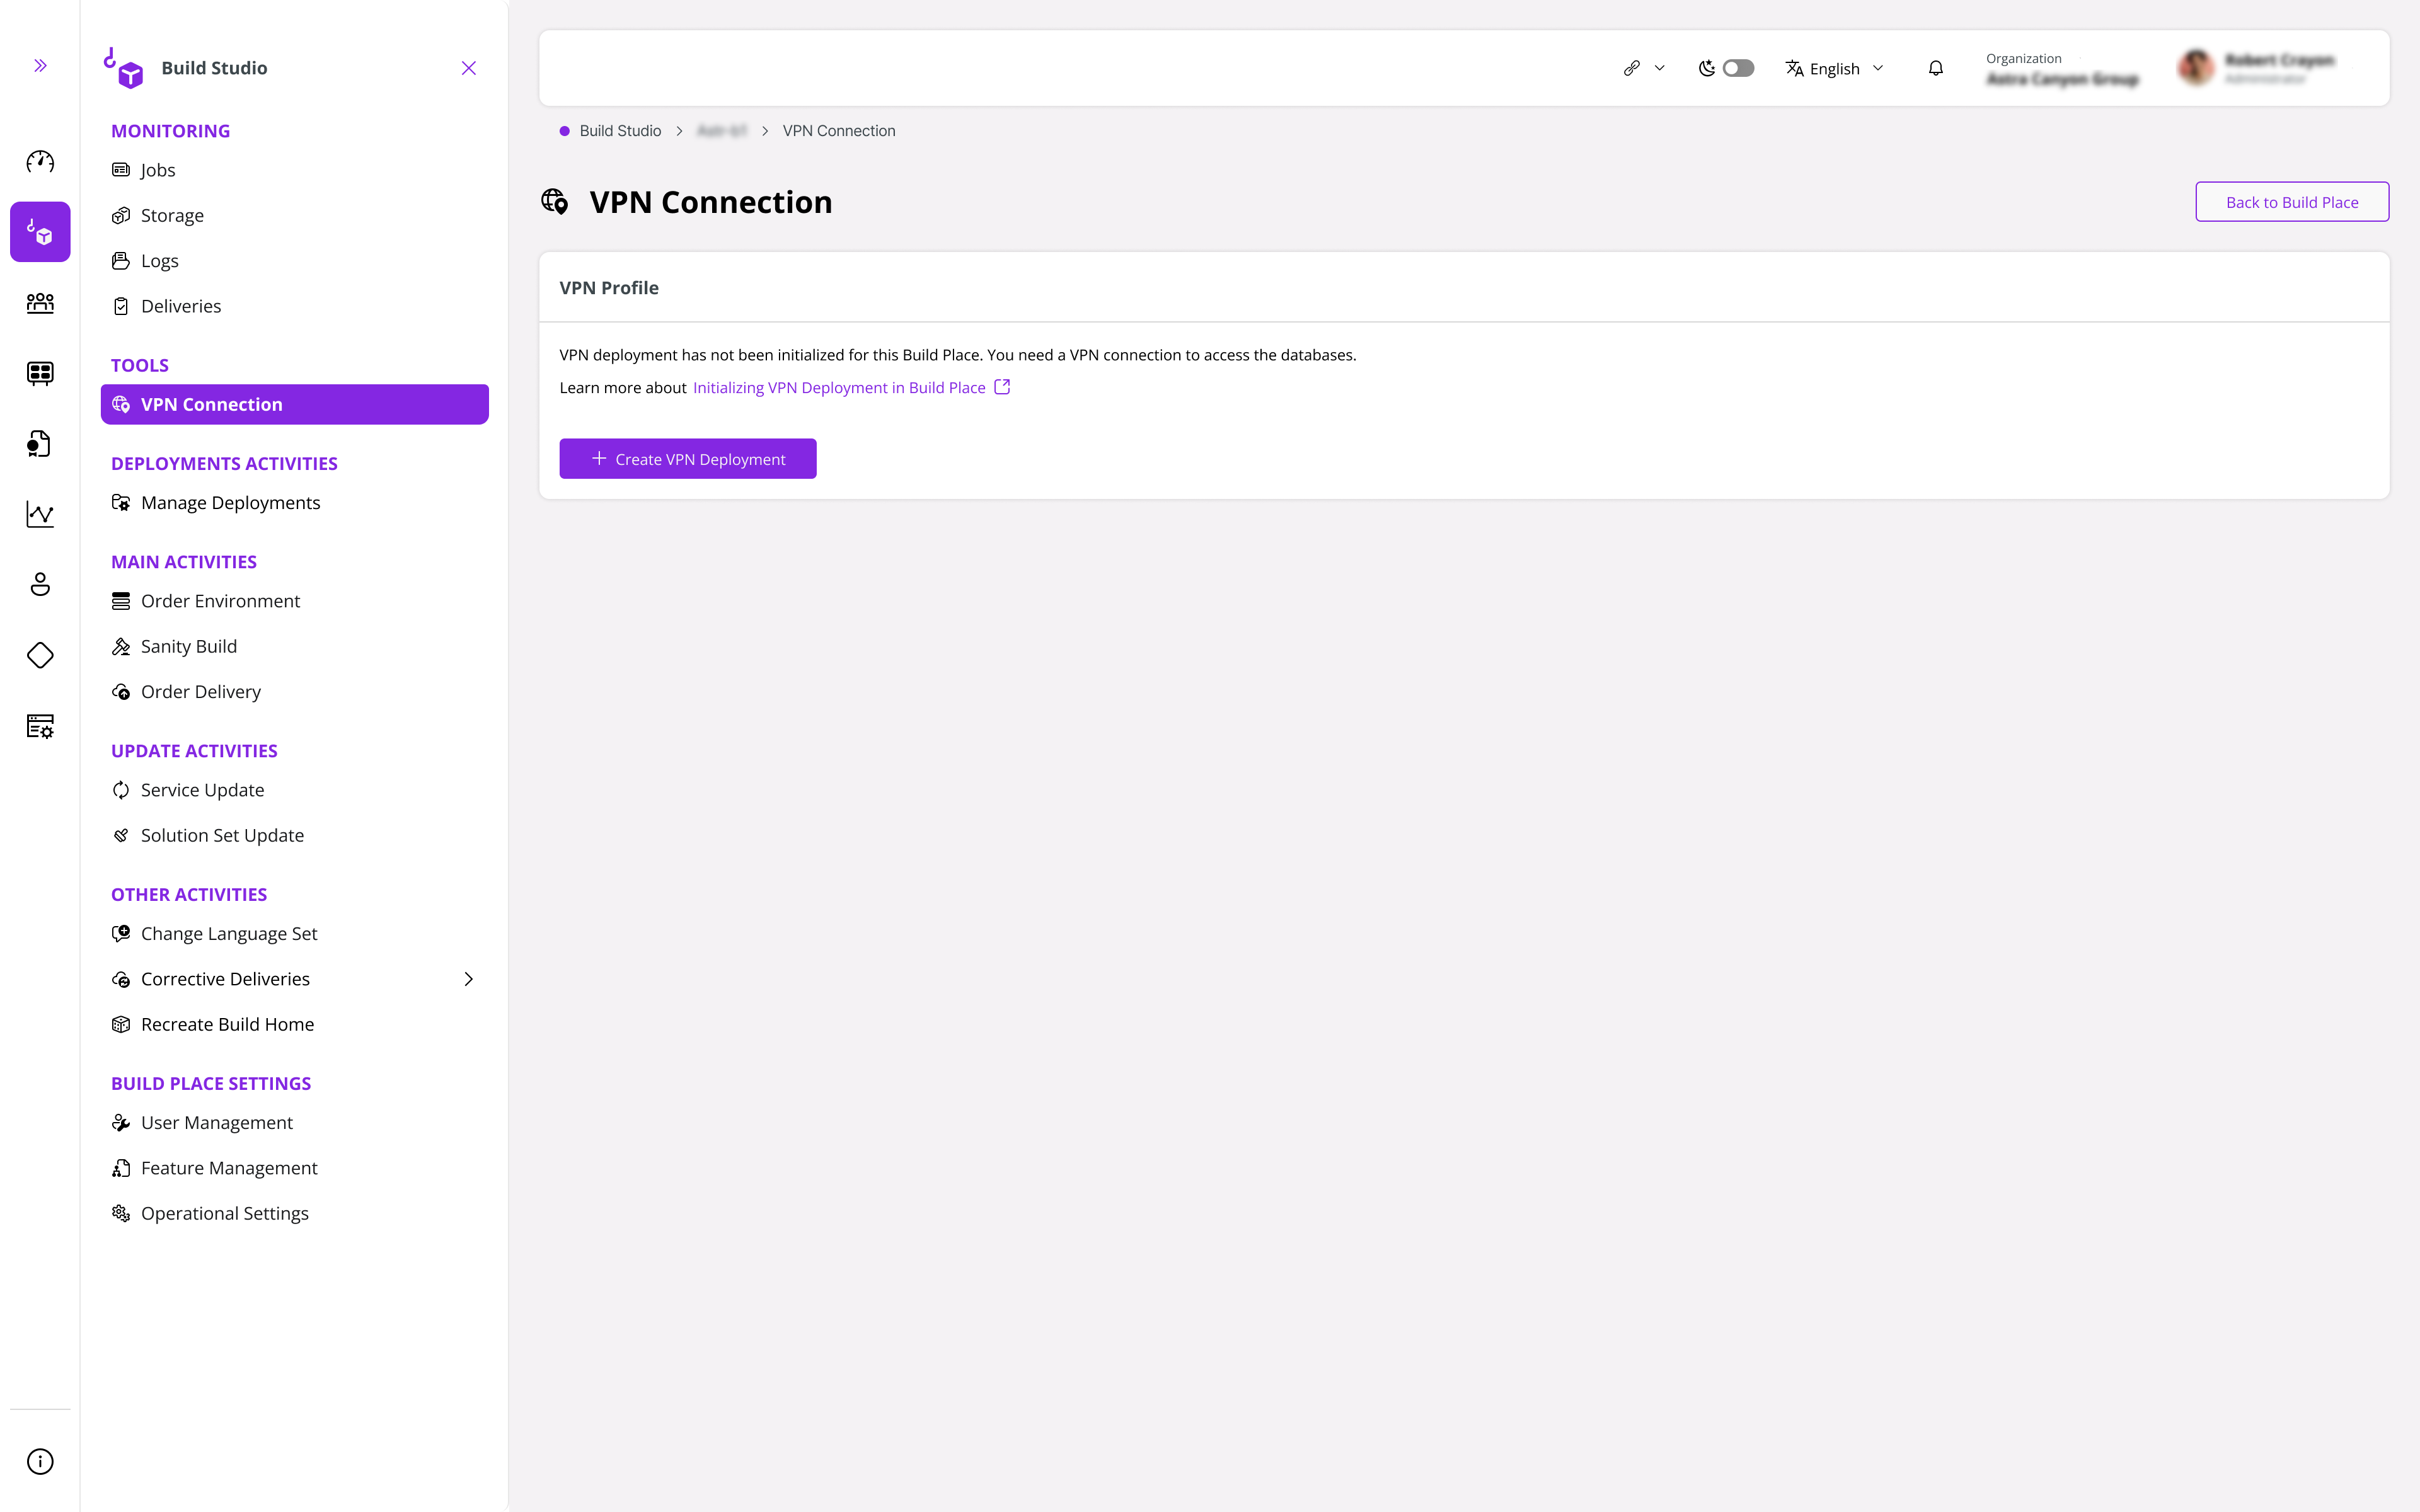
Once the environments are created, the Create VPN Deployment button will be enabled. Click Create VPN Deployment.
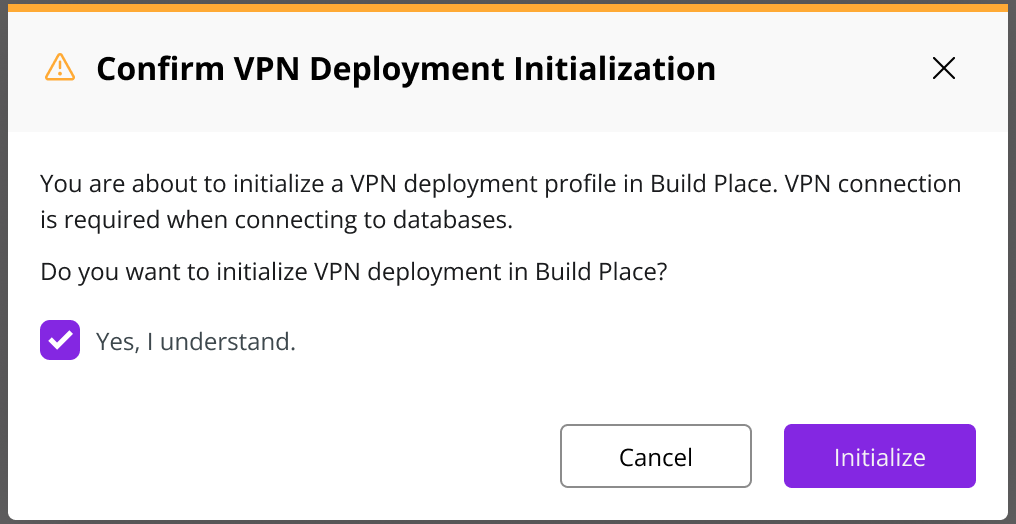
Next, Create VPN Deployment Initialization dialog pops up. Click Initialize to proceed.
Then, you should see a banner indicating the processing time and the status of the operation at the top of the Build Place view.
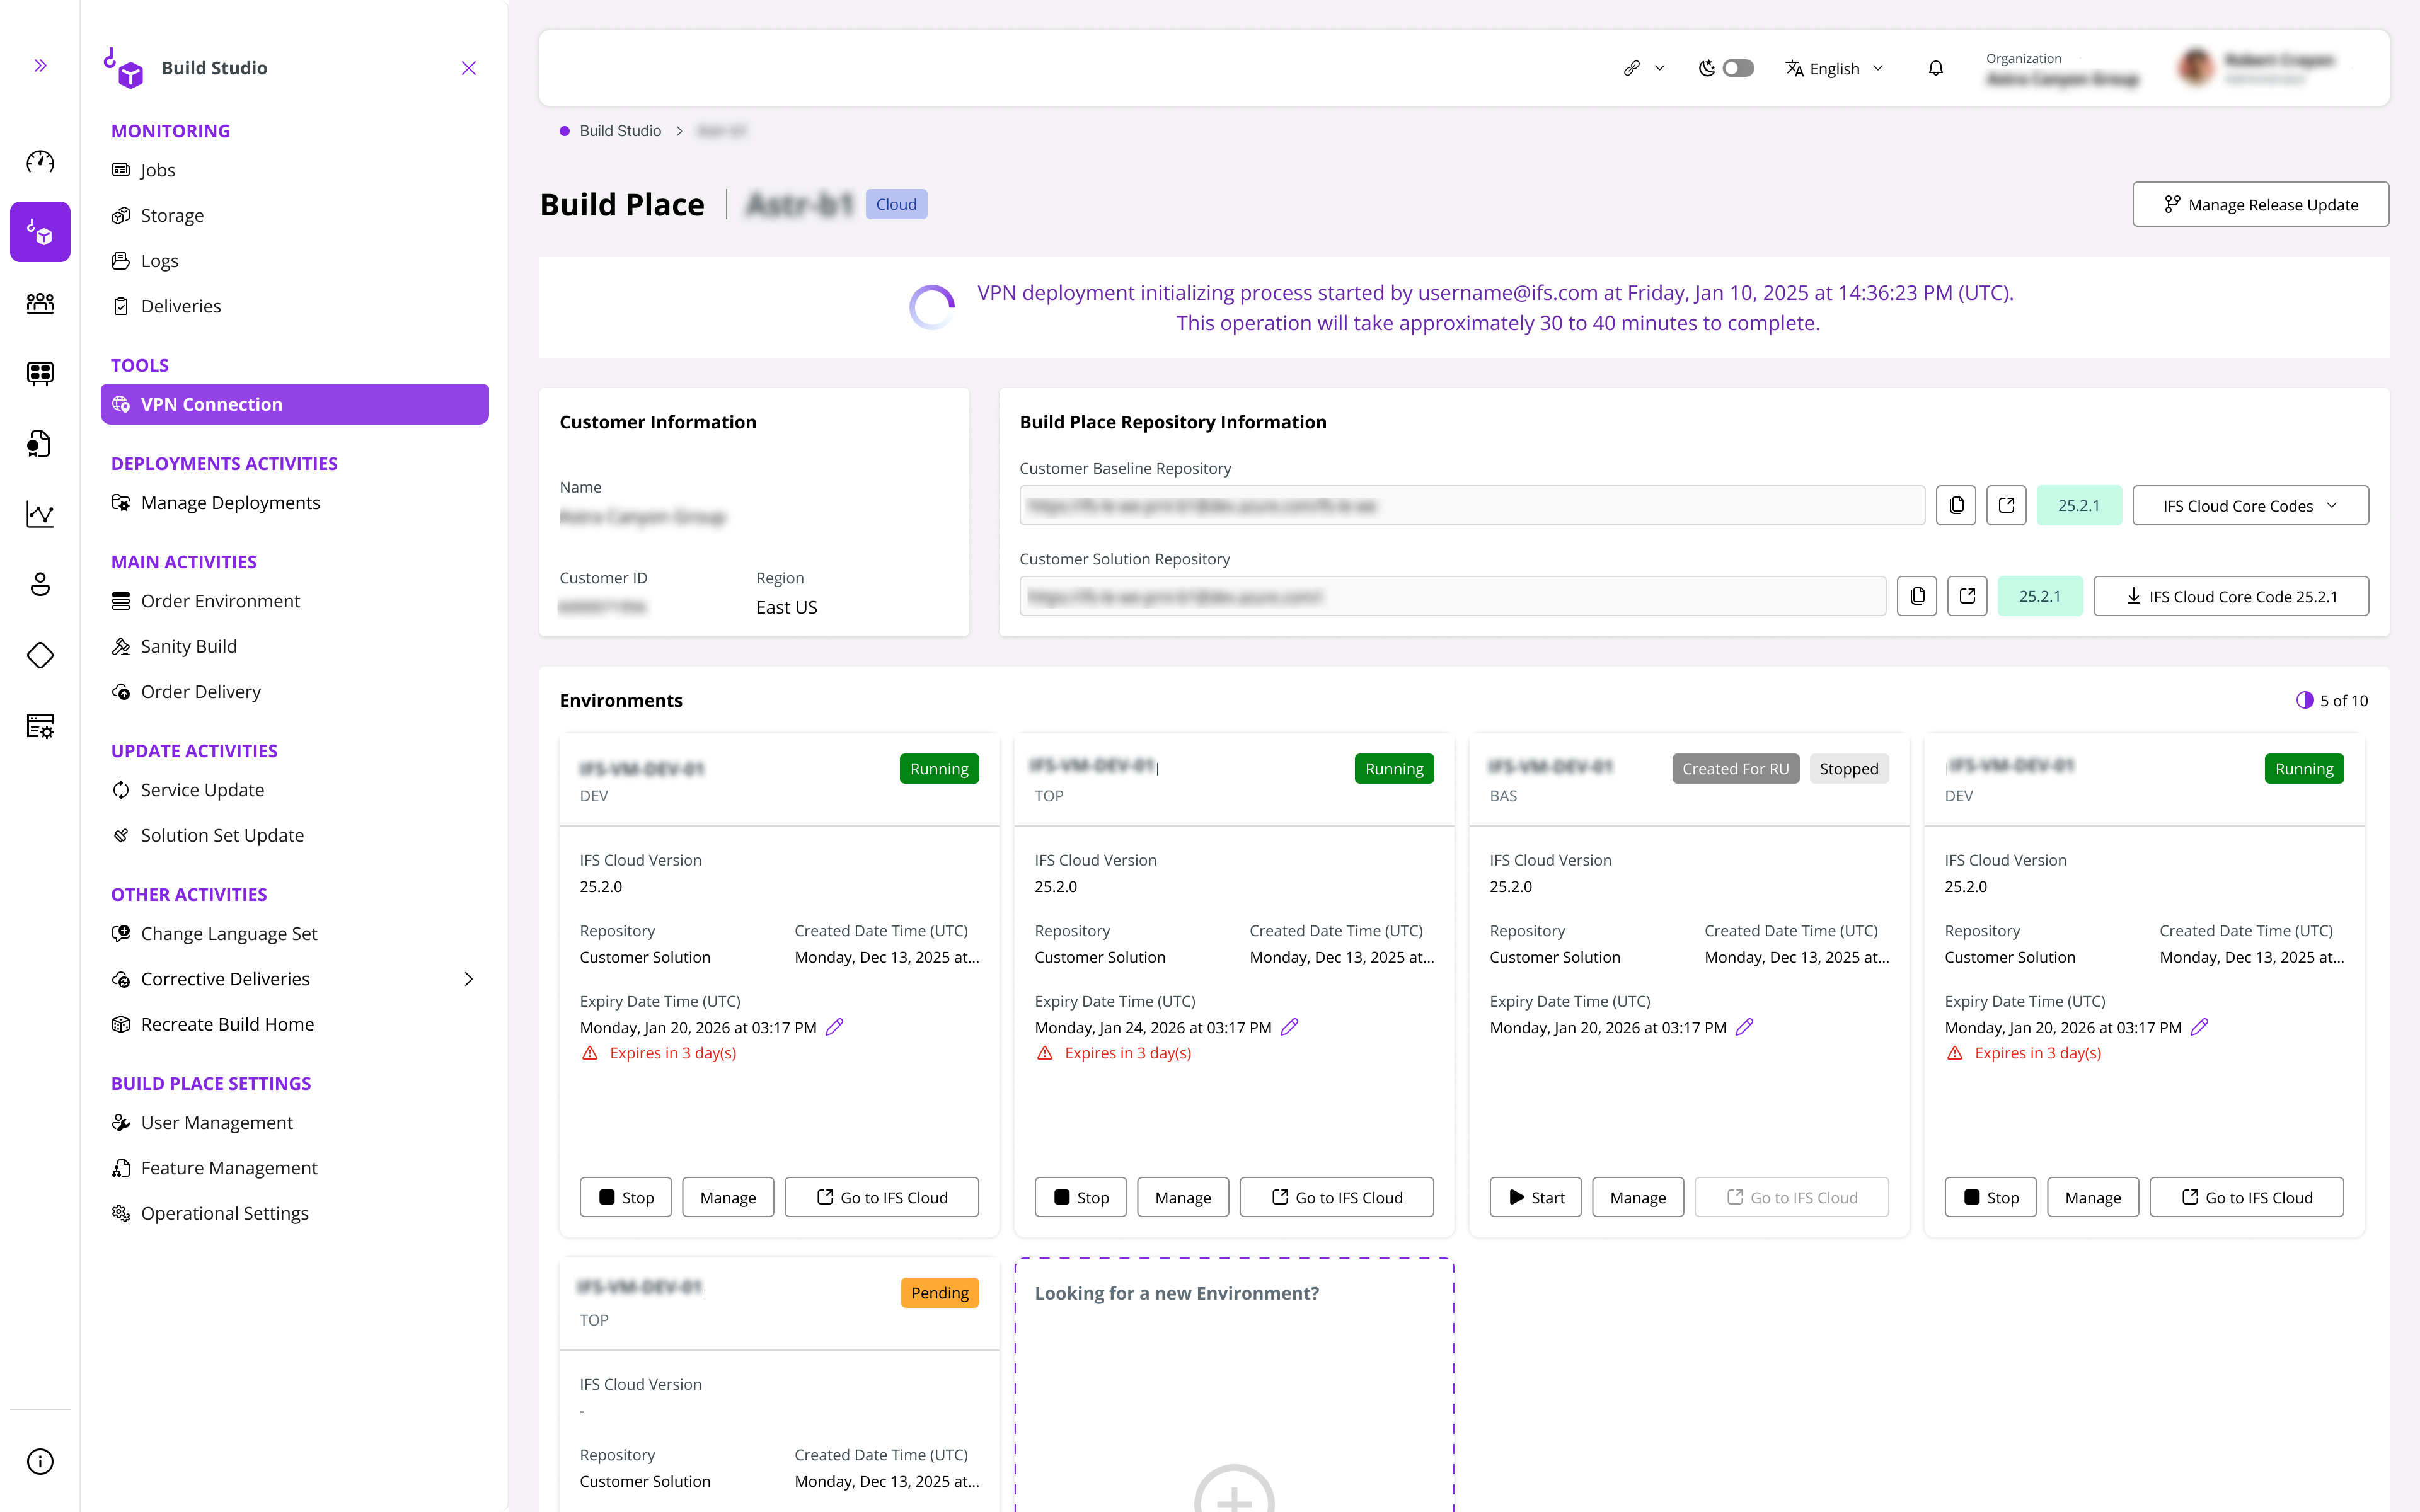
Once the VPN Deployment is successful, you should see the Download button in the VPN Profile.
Note
If the VPN remains inactive for 15 days, the connection will be terminated. To reconnect, you must provision it anew.
Incident Management Procedure for VPN Provisioning Failures
In the event that VPN provisioning is unsuccessful, an incident is automatically created in the ServiceNow platform to ensure timely resolution and proper tracking.
How to configure the developer machine for artifact connectivity
Note
It is only possible to have one active Point-to-site VPN connection at a time. To connect to a 2nd VPN connection, you will be asked to disconnect the existing connection. However, you can have multiple VPN configurations on the same workstation.
- Download the zip file which contains the configuration xml file from IFS Lifecycle Experience Center, for the respective Build Place you are working on.
- Search for the Azure VPN Client from your PC apps. If not available you can download it from here.
Note: Please note Windows 10 1809 or later is required for you to be able to download the Azure VPN Client
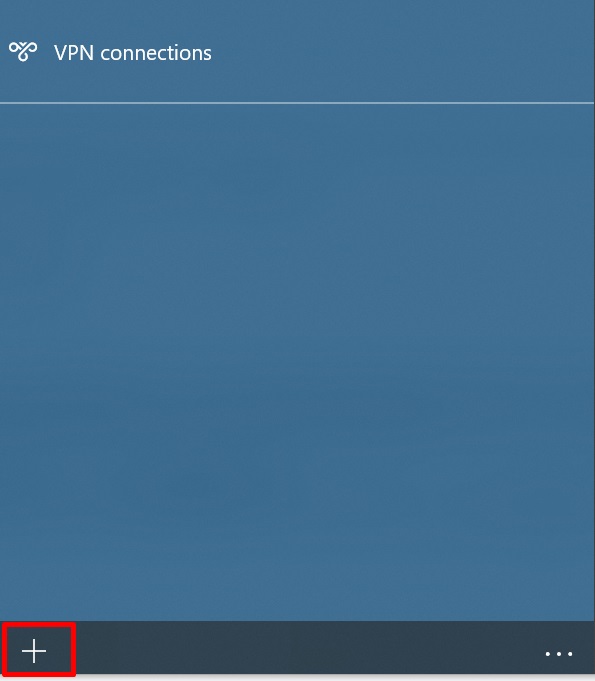
- Once installed, open the app and go to the option of adding a new vpn connection
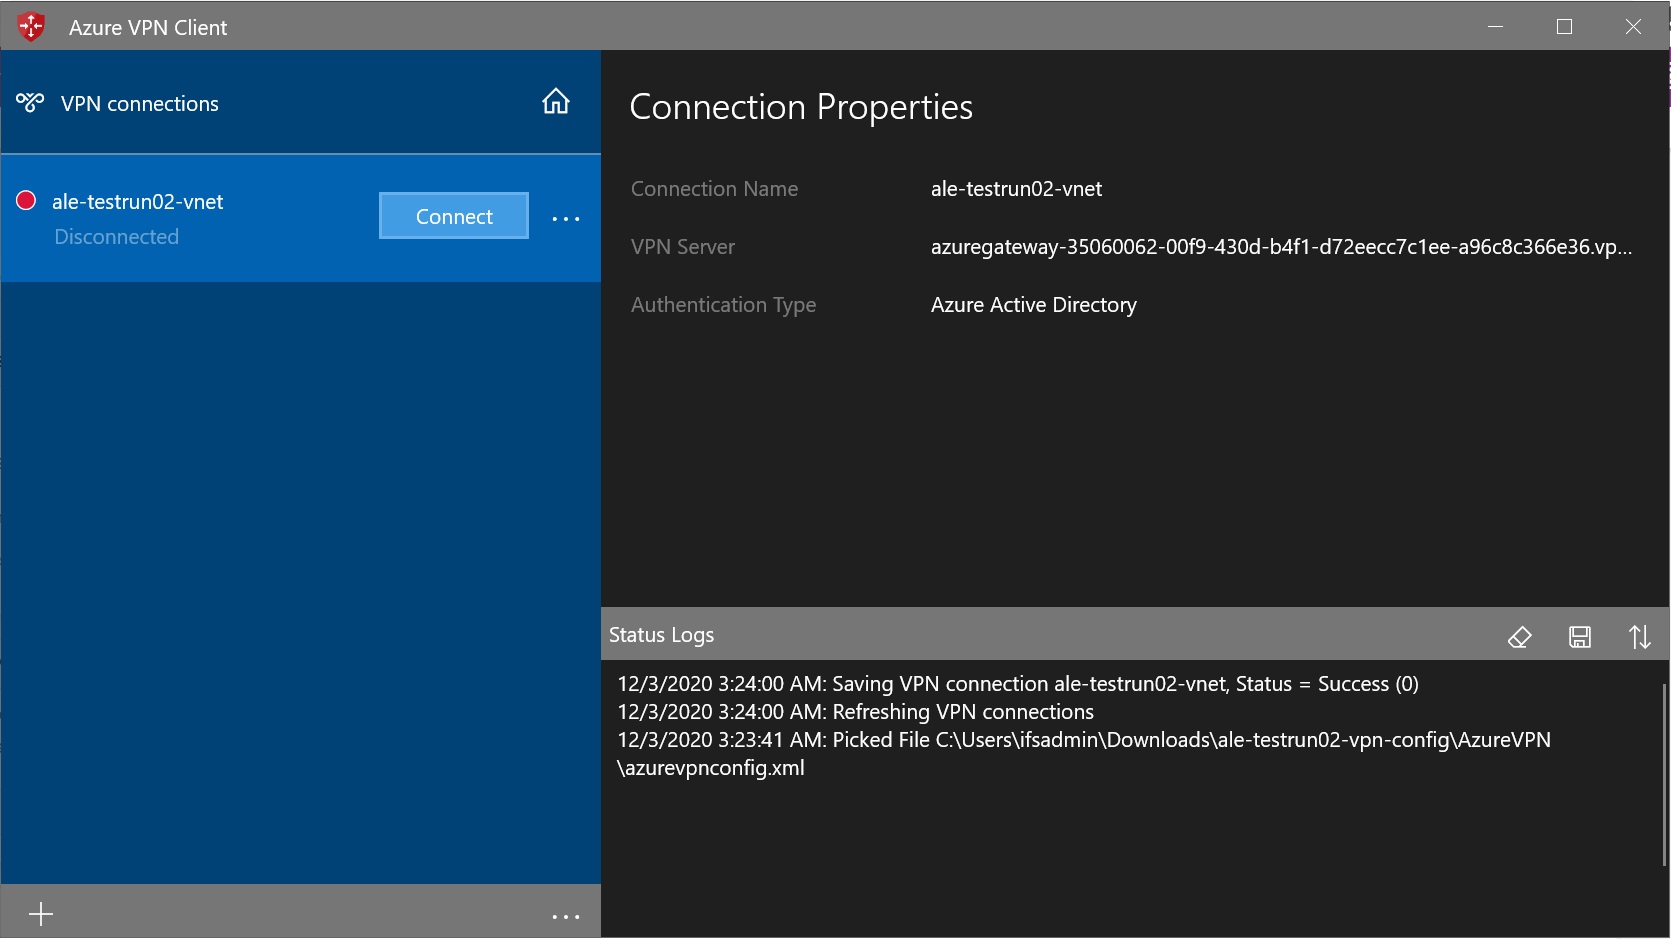
- Select the ‘Import’ Option and browse for the configuration xml file you downloaded in the initial step. (xml file inside 'AzureVPN' folder).
- You can change the connection name as you prefer and save the connection.
- Now you can connect to the VPN.
- You will be asked to login using the IFS Azure Acitve Directory credentials or will login seamlessly if you already have connected to the Azure Active Directory
Note: For External users who are connecting to the VPN via domains that are not registered with IFS, a message will pop up as below. To connect to the VPN,
- Unselect "Allow organization to manage my device" and
- Select "No, sign in to this app only"

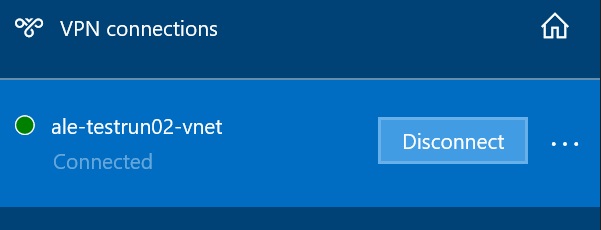
- Once connected to VPN, to check if the connection works you can login to the dev environment database in the build place using plsqldeveloper or IFS Developer Studio.
Automatic update of security Vulnerability patches and library updates to new environments
When a security vulnerability or a library update is identified in the IFS Cloud Middle Tier, a patch will be promptly deployed to the production as a service update. When a new environment is provisioned after the service update, these patches will automatically included in the middle tier. Consequently, the version of the "IFS Framework Service Update", "IFS Cloud Web version" and "IFS OData provider version" displayed in the "Settings" panel in IFS Cloud appear as the latest Service Update version despite you upgrading the Build Place to the service update.
 |
|---|
| Figure - IFS Cloud Setting Panel |
This ensures that your system remains up-to-date with the latest security enhancements and improvements.
Manual update of security Vulnerability patches and library updates to a Running Environment
When a security vulnerability or a library update is identified in the IFS Cloud Middle Tier, a patch will be promptly deployed to the production as a service update. Once the service update is deployed, patch will be manually included in the middle tier of running environments by the IFS support teams. Consequently, the version of the "IFS Framework Service Update", "IFS Cloud Web version" and "IFS OData provider version" displayed in the "Settings" panel in IFS Cloud appear as the latest Service Update version despite you upgrading the Build Place to the service update.
|
|---|
| Figure - IFS Cloud Setting Panel |
This ensures that your system remains up-to-date with the latest security enhancements and improvements.