Taking temporary fix for a defect in core file(s)
Overview
When a defect has been identified in core files after applying a service update or release update, the recommended process is to apply the next service update which includes the fix as well. However, there can be a scenario where the customer needs to apply the fix urgently due to the business urgency. This section explains the steps to follow in such scenario.
Applying the Fix to the customer solution repository
Clone customer-solution repository.
git clone <cutomization_repo_url>Change directory to the cloned folder.
cd customer-solutionCreate and checkout a topic branch
If defect was detected while applying a service update to the build place use the below command to create the topic branch based on master branchIf defect was detected while applying a release update or while applying service update in Release Studio use the below command to create the topic branch based on release-update branchgit checkout -b <topic_branch_name>git checkout -b <topic_branch_name> origin/release-updateFollow the steps below to commit the original file to the customer solution repository.
This is only applicable to the customers who has a version of the BuildPlace 22R2 and beyond when applying a service update.
Also, applicable to customers who are upgrading the version in the Release Studio to 22R2 and beyond or when applying a service update for 22R2 and beyond in the Release Studio.
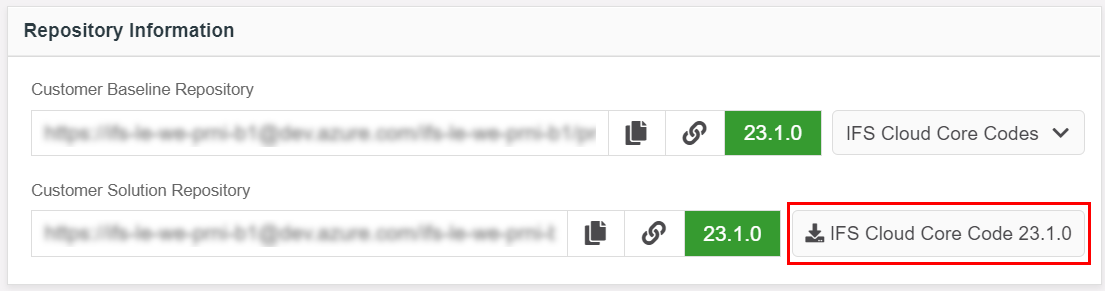
a. Download the core code zip file from Build Place/Release Studio. The name of the download button will contain the customer-solution repository version.
 |
|---|
| Figure 1.1 - Download Core Code |
b. Unzip it and find the original version of the core file(s) that needs to have the fix.
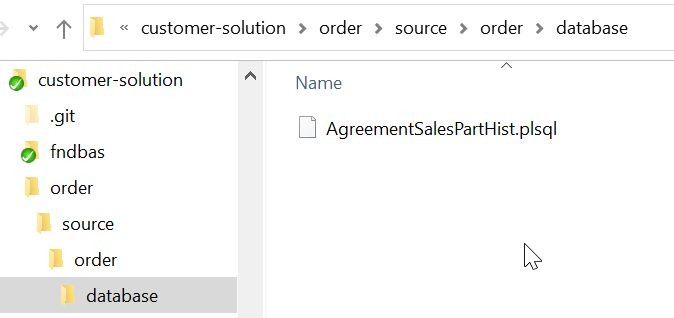
c. Create a directory structure similar to that of the above file(s) directory path, inside the cloned customization project folder.
 |
|---|
| Figure 1.2 - Folder Structure |
d. Add a copy of the downloaded file(s) which need to have the fix, to the directory structure created above.
e. Commit the original version of the files
git add .
git commit -m "commit_message"
Copy and replace the original version of the file(s) with the file(s) with having the fix (Make sure that file(s) contain only the required fix and does not include any other changes)
Commit the file(s) with the fix and push changes to the remote branch
git add .git commit -m "commit_message"git push origin <topic_branch_name>Create a Pull Request to merge the changes to the customer-solution repository master/release-update branch
Approve and merge the changes.
If the defect was detected while applying a 22.2 or higher release update or while applying 22.2 or higher service update in Release Studio:
After applying a fix to customer solution repository, it is required to verify whether there is a difference between the corresponding file in the baseline delivery tag and the head revision in the release-update branch.
If there are differences, correct version of the file will be picked for the release update delivery.
If no difference found, customer should do a dummy change (e.g.: Adding a new line) and commit and merge. This activity has to be done prior to ordering the sanity. This is to avoid picking files corresponds to release update version instead of the files with the fix when creating the delivery. Please follow below steps in such scenario,
- Checkout to the release-update branch and update the local git repository
git checkout release-update
git pull
- Get the list of changed files
git diff --name-only --diff-filter=ACMR <delivery tag> "./changed-files-list.txt" (e.g.: git diff --name-only --diff-filter=ACMR del-ifs-cloud-22.1.4-ncocu02-2.9.0-20230619T040143Z-OK > "./changed-files-list.txt")
Open the changed-files-list.txt file and check whether all the files commited for fixing the defect in core are listed.
If any file is not listed checkout to the topic branch. (If the previous topic branch is deleted, create a new topic branch and chekout to that topic branch)
git checkout <topic_branch_name>
Open each file that is not listed, in a text editor and add a new line.
Commit the file(s) with the fix and push changes to the remote branch
git add .
git commit -m "commit_message"
git push origin <topic_branch_name>
Create a Pull Request to merge the changes to the customer-solution repository release-update branch
Approve and merge the changes
Handling the core files commited when taking the next service update with the fix
Below steps explain how to remove the core files which contains the temporary fixes, from customer-solution repository when the fix has been released in the applying service update. Users can follow this as a part of the “Apply Service Update to Customer Solution Repository” .
Make sure the correct topic branch is checked out. This will be the topic branch created during “Create Topic Branch to Apply Service Update” step.

Figure 2.1 - Check the checked out branch Delete the core file which has the temporary fix, from the checked out local customer-solution repository's topic branch.
Stage and commit the changes with an appropriate commit message.
git add .git commit -m "<commit-message>"git push origin <branch-name>