Creating a New Page Model (Create Custom Page)
Custom Pages can be created in IFS Cloud. A Custom Page in IFS Cloud needs to be based on a Projection. How to create Projections and Custom Pages are explained below.
Below steps will explain the flow of creating a New Projection and how to use it to create a Custom Page.
- Go to New Projection Configuration assistant and configure the Projection. (Refer for more Information Projection Configurations)
Adding page elements to a Custom Page with the Page Designer
The new page element needs to be added to the All Elements before it is added to the page content. In this example, a List, a Selector and a Group is added to the Custom Page. The steps are the same for adding new elements.
Add a List
- In the All Elements section: add a new List. Set Name, set Datasource and add Fields to the List.
- In the Active Page section: add the new List to Content. Set the Datasource.
- Save.
- If the records needs to be filtered in the list depending on the Master Detail Relationships users can use Associations. (Refer how to configure Associations using Page Designer Building Master Detail Relationships)

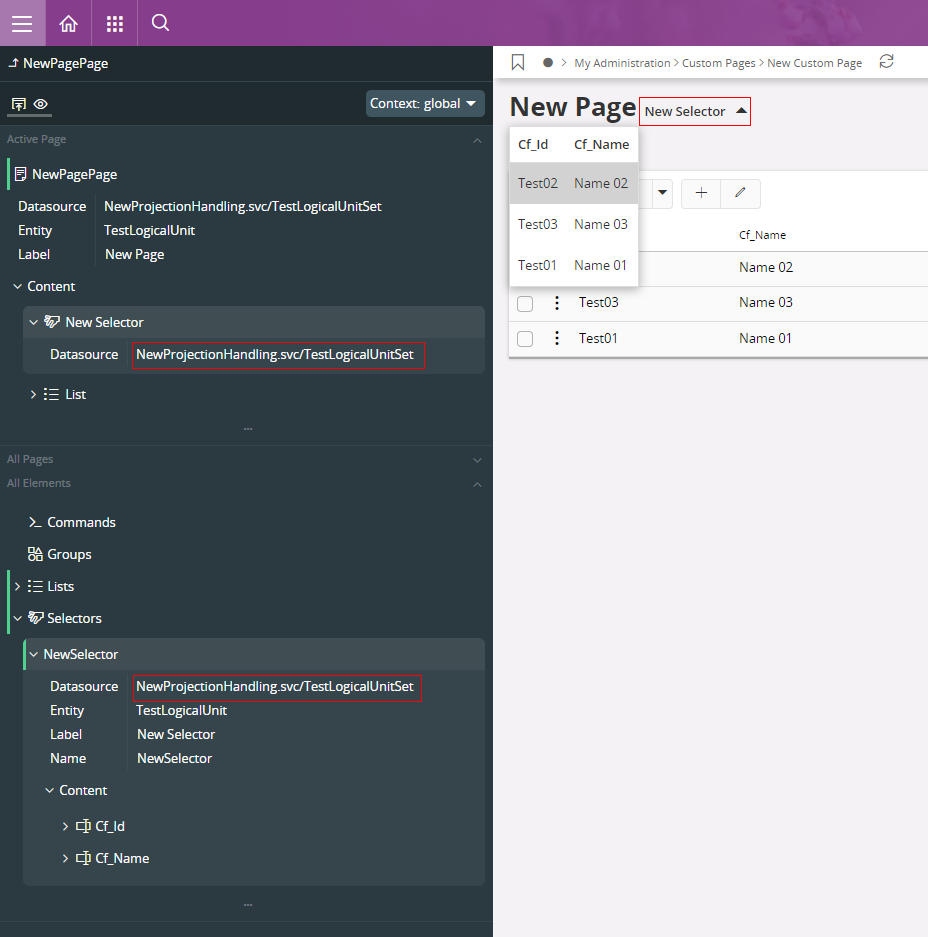
Add a Selector The page's main Selector is what is used to navigate to all the records on the page. The Selector will be shown in the top of the page near the title, and also on the navigator pane. The page's Selector must be the first item in the page content.
- In the All Elements section: add a new Selector. For the new Selector, set Datasource and add Fields as content to the Selector.
- In the Active Page section: add the new Selector to Content. Set the Datasource.
- Save.
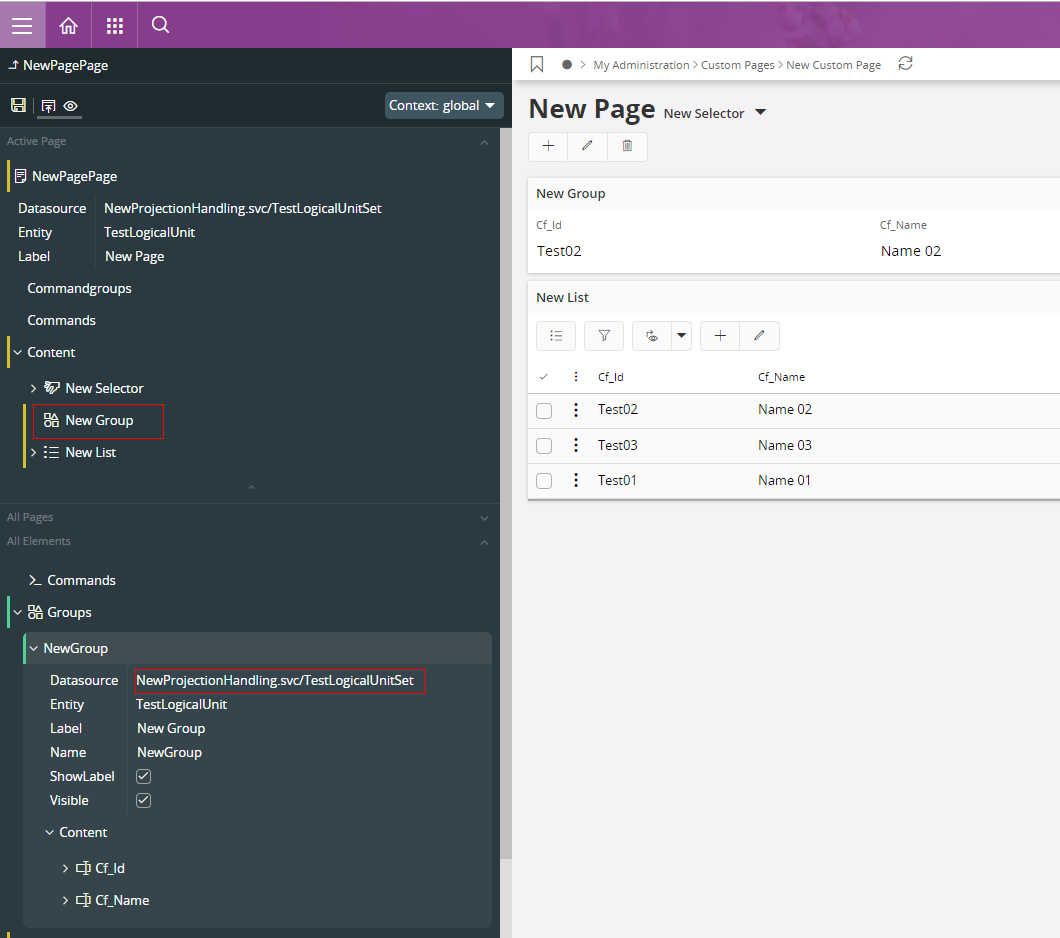
Add a Group
- In the All Elements section: add a new Group. For the new Group: set Name, Datasource and add Fields as content to the Group.
- In the Active Page section: add the new Group to Content. Set the Datasource.
- Save.