Analysis Models - Custom Config - Add TM View Column Example
This page provides one example how the Tabular framework in IFS Aurena client can be used to add a new column to a Dimension used in a Tabular Model by modifying the TM view.
The example assumes that it possible to add a new column without having to start by creating a customer attribute. This might be a rare case but the example can be seen an example of how Data Source related views, transformation views, can be modified using the framework.
Note: TM view means the view in a Tabular Data Source with the highest Order and it has the suffix "_TM". In most core Data Sources the name standard applies e.g., the view in a SQL Server/Azure SQL database that represents DIM_SITE has the name DIM_SITE_TM. This view is the view that act as a source for a tabular model table in Analysis services.
In this example the dimension DIM_SITE will be used.
The models used will be IFS_SALES.
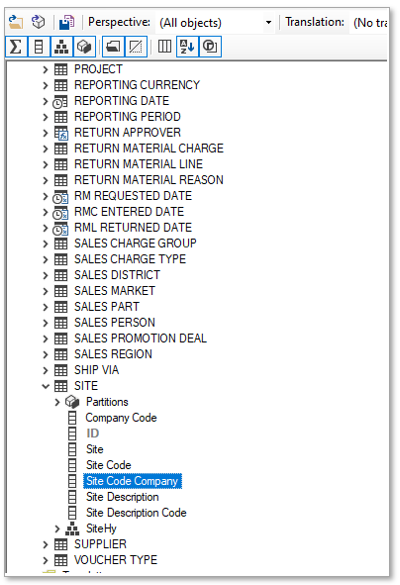
The requirement is to add a column to the TM view that has the name Site Code Company that is defined as CONTRACT + " - Company " + COMPANY. Column names are those existing in source view related to DIM_SITE.
Since all necessary columns needed to create the new column are available, we actually don't have to create a customer attribute on DIM_SITE; changing the Data Source related TM view is chosen instead.
Investigate how DIM_SITE is used in the model
Start by selecting IFS_SALES model in the Tabular Models overview page and navigate to the details page.
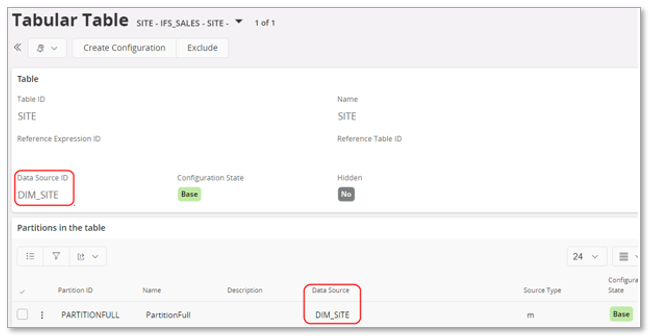
In the Table in the model group, search for Table ID=SITE, select the table and navigate to table details.
Looking at the first two groups, Table and Partitions in the table, it is clear that referenced Data Source ID=SITE.
In the Columns in the table group, all columns that we need are available but note that we don't have the same source column names as in the core dimension views.

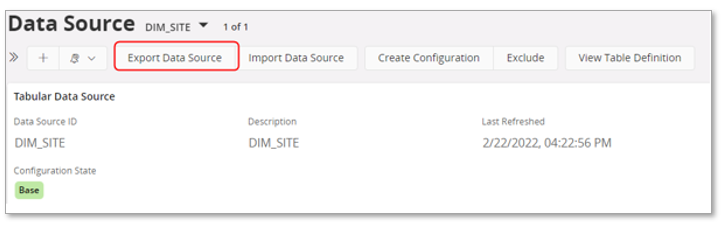
Next, navigate to Data Sources page and search for the referenced Data Source ID = DIM_SITE and lastly navigate to the details page.

In the details page, in the SQL Server Source Views group the view with the highest Order has the name DIM_SITE_TM. This is the view used as source for the table SITE in the tabular model. The view is often called the TM view or the front facing view.
The view with View ID=DIM_SITE_BI reads all columns from the staging table in the SQL Server/Azure SQL database.
The view with View ID=DIM_SITE_T_1 reads from DIM_SITE_BI and adds new columns, one be replacing CONTRACT with CODE.
Modifying TM View related to DIM_SITE
It is now clear that all necessary columns are available in the transformation views related to data source DIM_SITE. This means that don't have to take the long route to create a Custom Attribute, a modification to the TM view will be enough.
To do the modification, it of course works to create a configuration for the Data Source and then modify the TM view directly in Aurena.
An other option will however be used in this case.
In the Data Source page, use the command Export Data Source and select a destination folder and export the data source.
The exported file (DIM_SITE.xml) is an XML file and can be opened with any XML compatible editor. In this example Visual Studio is used.

Find where the view DIM_SITE_TM is defined and edit the definition by adding a the new column. Do not write string quotes, replace such occurrences with \' meaning that instead of the string ' - Company ', use \' - Company \'

Save the file.
Next use the command Import Data Source in the Data Source page to import the edited data source definition.
The Data Source has the status Dependent and the view DIM_SITE TM is the status Configured.

Deploy necessary database objects related to DIM_SITE
Changed objects have to be deployed to SQL Server/Azure SQL database. Only one view has been modified.
In the Tabular Models page, select IFS_SALES and use the command Deploy to SQL Server Db.
Make sure to toggle off all objects first and then to only focus on the view DIM_SITE_TM.
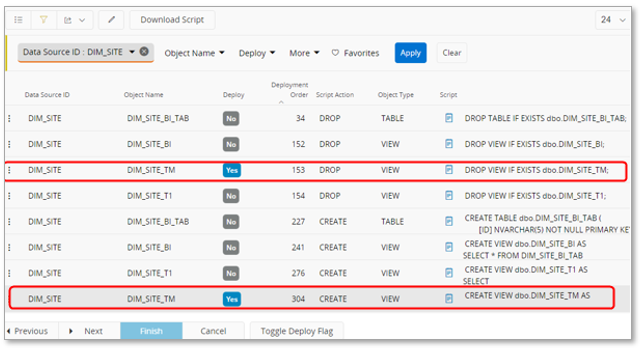
Continue to perform the deployment and end the assistant.
Add New Column to Target Model
So far, no changes have been done to the IFS_SALES model.
IFS Aurena will be used to add the new column:
- Source Column = Site Code Company
- Column ID = SITE_CODE_COMPANY
- Name = Site Code Company
First look up the model in the Tabular Models page and go to the details page.
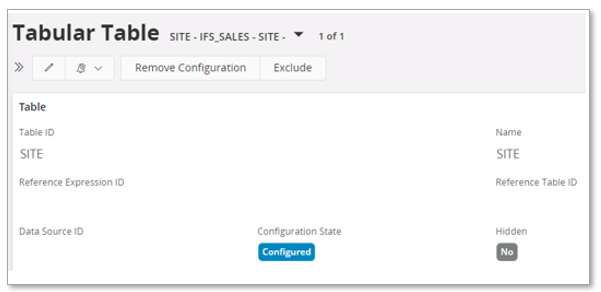
In the Tables in the model group, find table with Table ID=SITE and go to details.
In the header, use command Create Configuration to initiate the configuration of the table.
Add the new column.

Deploy the Tabular Model
The changed model needs to be deployed to Analysis Services.
Select the model in the Tabular Models page and use the command Deploy Tabular Model.
When running the assistant, an optional step making sure that the generated model contains the new column is to use the Download .bim command to download the model file and open it in Tabular Editor.
Process the Tabular Model
Now the model needs to be processed.
Select the model in the Tabular Models page.
Use the Process Tabular Model command.
Use Process Mode = Database and Process Type = Full

View the Tabular Model
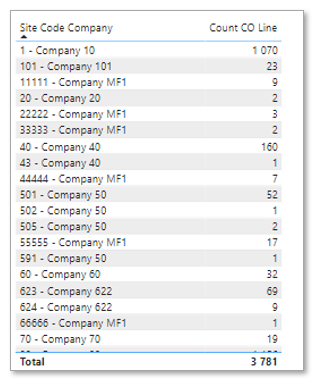
The last step will be to view the processed model and to make sure that the added column shows up as expected.
Power BI is used for this purpose.
Import Test
To be really sure that all changes have been made properly, it can be a good idea to perform a model import.
All mentioned actions will be done using the Tabular Models page or the Tabular Model page.
Import can be made using an existing model like IFS_SALES as the target. If this option is chosen it is a good idea to first export the current definition of the model to file. This is done be starting the Deploy Tabular Model assistant and sing the possibility to Download .bim. Once the model is downloaded the assistant can be closed.
Import should be done by using the model deployed in Analysis Services.
If the the existing IFS_SALES model (in Aurena) is used as target, the import should be successful and all configurations should be maintained. Use the command View Configurations to check the existing configurations.
Another option is to create a new tabular model in the Tabular Models page. Supply Model ID, Name and Description. Use this model as the target model and perform the import from Analysis Services. The import should be successful and all configurations should be defined correctly. Use the command View Configurations to check the existing configurations.