Dialog
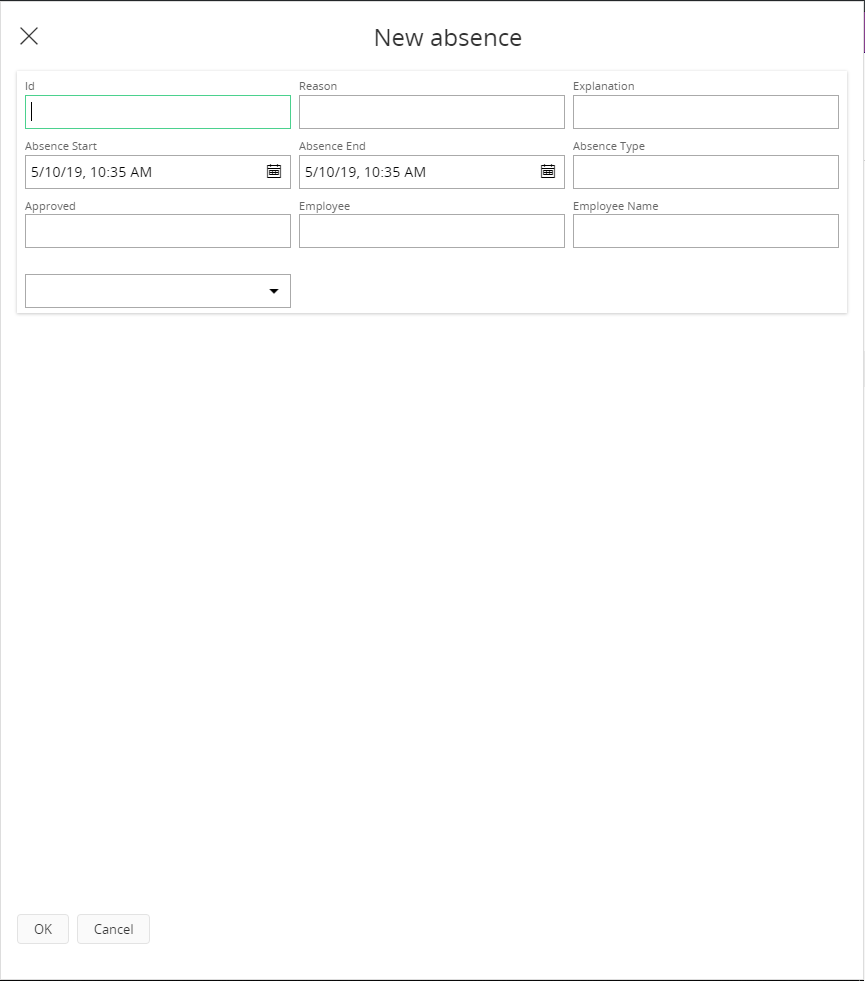
A dialog is a floating graphical control element, in the form of an overlay, and subordinated to the application's primary user interface. The overlay communicates information to the user and prompts for a response. It contains a title bar, with an option to close the dialog, and a content area.
The content area can, just like the page control, contain controls for the display of data, and user input. To trigger the control, the user has to interact with another control containing an execute declaration, referencing the dialog. As a modal dialog box, it then temporarily halts the flow.

Figure 1 - Dialog control
Variations
The dialog can vary based on the controls placement inside of its content area. In the sections below are the most common variations of the dialog highlighted.
User actions
As a final interaction with the dialog, the user can click on a command on the dialog. Standard and predefined commands are OK and Cancel. It is possible to override the standard commands, or create custom commands to finish the dialog.
As a rule, the dialog closes if the command exits with a value. To keep the dialog open after a click, it must exit with an empty value.
Common buttons used in dialogs are:
Apply button - Commits the action taken in the dialog (and keeps it open).
OK button - Commits the action taken in the dialog and closes it.
Cancel button - Cancels the action taken in the dialog and closes it.
Close button - Only closes the dialog. Typically, when the action is taken in the dialog/assistant it is directly committed when adding/removing records in a list, or by using other commands in the dialog/assistant.
Multiline field dialog
If the multiline feature is enabled in a field inside the content area, the field is by default displayed as a full width control. The height of the field can still be adjusted using the height property.
When to use
Use the dialog when a short and speedy interaction is necessary, to modify something on another page.
Note! Dialogs can only be launched from a page, not from the navigator.
A metaphor for opening a modal dialog is similar to opening a door and peeking into an adjacent room. Interactions need to be brief, and only affect objects in that adjacent room/page, not the room/page where the user is located.
If a user wishes to interact with many objects in another page, then it is probably more efficient to navigate to that page. If the dialog becomes long, with many fields, then consider using a page instead.
Users have diverse goals and contexts, which decide whether to implement an assistant, page or dialog. For example:
- The device the user perform the data entry on, such as a mobile device.
- The frequency the user performs specific actions with (which determines whether the interface is implemented as efficient or easy-to-recognize), etc.
Considerations
- From a technical perspective, modal dialogs require duplication of parts of the framework, increasing complexity and maintenance.
- From a user experience perspective, it is recommended that primary workflows are completed in the primary application window, while interactions with dialogs are short and speedy, affecting objects in another part of the application.
Use
- Short dialogs to reduce excise and unnecessary navigation to other pages, and to avoid loss of current context.
Avoid
- Long dialogs that require significant scrolling
- Dialogs that require opening another dialog
- Numerous commands in dialogs (consider a separate page/assistant instead).
Limitations
- Content cannot fit more than one multiline field control in a dialog, when using the default height.
- A dialog operates on a single structure.
How to use
To launch a dialog the following is required:
- A dialog definition
- A reference to the dialog, as part of another control's execute property.
The dialog displays data based on its input, and provides an output.
1. Initial control declaration
- Declare the dialog with a name, and an attachment to a data structure.
    //Generic declarative format
    dialog <dialog_name> for <structure_name> {
        ...
    }

    Example code - Define dialog control
    ------------------------------------
    dialog MyDialog for MyStructure {
    ...
    }
2. Header (optional)
- Declare a label to override the default value in title of the header.
    Example code - Declare label
    -------------------------
    dialog MyDialog for MyStructure {
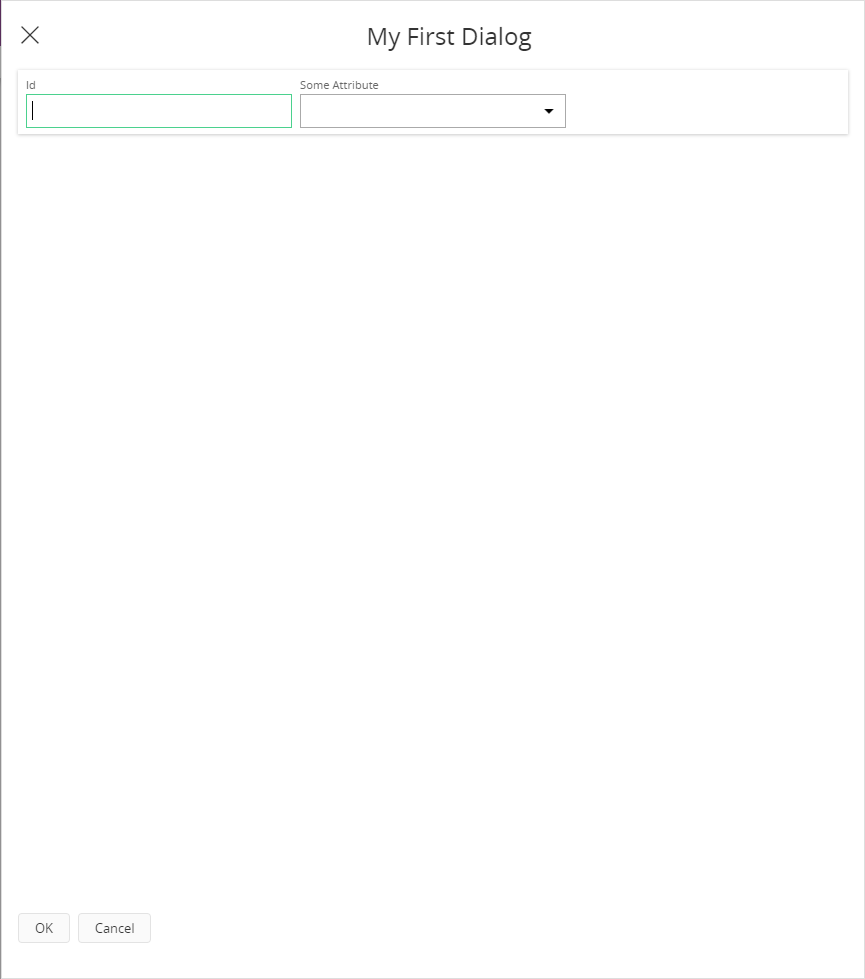
        label = "My First Dialog";
        ...
    }
3. Input & output
- Define the structure
MyStructurewith a key attributeId, and a secondary attributeSomeAttribute, for itsinputandoutput.
    Example code - Input/output of Dialog
    -------------------------
    dialog MyDialog for MyStructure {
        ...
        input(Id, SomeAttribute);
        output(Id, SomeAttribute);
        ...
    }
It is also possible to use a structure as input/output to the dialog. To do this declare the input/output with the keyword this.
    Example code - Input/output of Dialog
    -------------------------
    dialog MyDialog for MyStructure {
        ...
        input this;
        output(SomeAttribute);
        ...
    }
4. Content definition
- Fill the content area with child control(s) that enable the user to interact with the data. The example uses a group control, but other controls can also be used.
    Example code - Display data
    -------------------------
    dialog MyDialog for MyStructure {
        ...
        group MyGroup;
        ...
    }
5. Declare actions
- Provide the user with actions that enable a way forward when finished with the dialog interaction. The example uses two built-in default commands, Ok, and Cancel.
    Example code - Add actions
    -------------------------
    dialog MyDialog for MyStructure {
        ...
        command Ok;
        command Cancel;
    }
6. Reference the dialog
- Declare a reference to the dialog, as part of another control's execute property. Typically, a command that when executed opens the dialog. As it is required to specify a when section, that specifies the effect of dialog actions, we herein inform the dialog to exit when the user presses the 'Ok' button in the dialog.
    Example code - A command control triggering Dialog
    -------------------------
    command MyOpenDialogCommand {
        ...
        execute {
            dialog MyDialog {
                when OK {
                    exit;
                }
            }
        }
    }
(Optional step)
- Add a property that makes the command control operate on a single record (a context from which the input attributes can be retrieved).
    Example code - Specify a single record context
    -------------------------
    command MyOpenDialogCommand {
        ...
        mode = SingleRecord;
        ...
    }
(Optional step)
- Define the input and output attributes.
    Example code - Call dialog with input attributes
    -------------------------
    command MyOpenDialogCommand {
        ...
        execute {
            dialog EditAbsenceDialog(Id, SomeAttribute) into(Id, SomeAttribute) {
                when OK {
                    success("Dialog was successfully closed by pressing OK!");
                    exit;
                }
            }
        }
    }
    Example code - Call dialog with structure as input.
    -------------------------
    command MyOpenDialogCommand {
        variable VarData Structure(MyStructure);
        variable Result Text;
        execute {
            call GetData() into VarData;
            dialog EditAbsenceDialog(VarData) into(Result) {
                when OK {
                    success("Dialog was successfully closed by pressing OK!");
                    exit;
                }
            }
        }
    }
Keywords
for | this
Properties
Below is selection of the properties that can be used to customize the control listed. To discover the full selection, visit the Marble language developer documentation, use auto-complete in Developer Studio, or refer to the reference list containing all client properties.
label |
Example
client MyDialog;
component FNDTST;
layer Core;
projection MyDialog;

--------------------------------- FRAGMENTS ---------------------------------

----------------------------- NAVIGATOR ENTRIES -----------------------------

-------------------------------- MAIN PAGES ---------------------------------
page MyDialogPage {
   command OpenDialog;
}

--------------------------------- COMMANDS ----------------------------------
command OpenDialog {
   //label = "Open Dialog";
   mode = Global;
   execute {
      dialog MyDialog(SomeArgs) {
         when OK {
            exit;
         }
      }
   }
}

----------------------------- VISUAL COMPONENTS -----------------------------
dialog MyDialog for MyStructure {
   label = "My First Dialog";
   input(Id, SomeAttribute);

   group MyGroup;

   command Ok;
   command Cancel;
}

group MyGroup for MyStructure {
   field Id;
   field SomeAttribute;
}
Example 1 - Example of a standard dialog definition (client file).
projection MyDialog;
component FNDTST;
layer Core;
description "Projection for basic scenario using a dialog";
category Users;

--------------------------------- FRAGMENTS ---------------------------------

----------------------------- MAIN ENTRY POINTS -----------------------------

------------------------------ ENTITY DETAILS -------------------------------
structure MyStructure {
   attribute Id Text;
   attribute SomeAttribute Boolean;
}
Example 1 - Example of a standard dialog definition (projection file).

Figure 2 - Example of a standard dialog definition