Developing with IFS Developer Studio
Related Links
Prerequisites
- The following prerequisites must be met before you start developing using IFS Developer Studio;
- You should have Customer Solution Developer or Technician access to a cloud Build Place.
- IFS Developer Studio is downloaded and installed. The tool can be downloaded from IFS Developer Portal
- You have established an Azure VPN connection between your workstation and the development environment on a cloud Build Place.
- You have installed a GIT client on your workstation.
- You have created a topic branch for your development.
Prior to 22R2
Setting up the Local Development Environment
The following steps can be followed to set up a new customization project in Developer Studio.
- Create a directory structure on your local disk to save the project e.g.: D:\dev_home\ale-cust-x-dev
- Create the workspace directory to clone the components e.g: D:\dev_home\ale-cust-x-dev\workspace
- Clone your topic branch into workspace git clone <topic-branch-url> < D:/dev_home/ale-cust-x-dev/workspace>
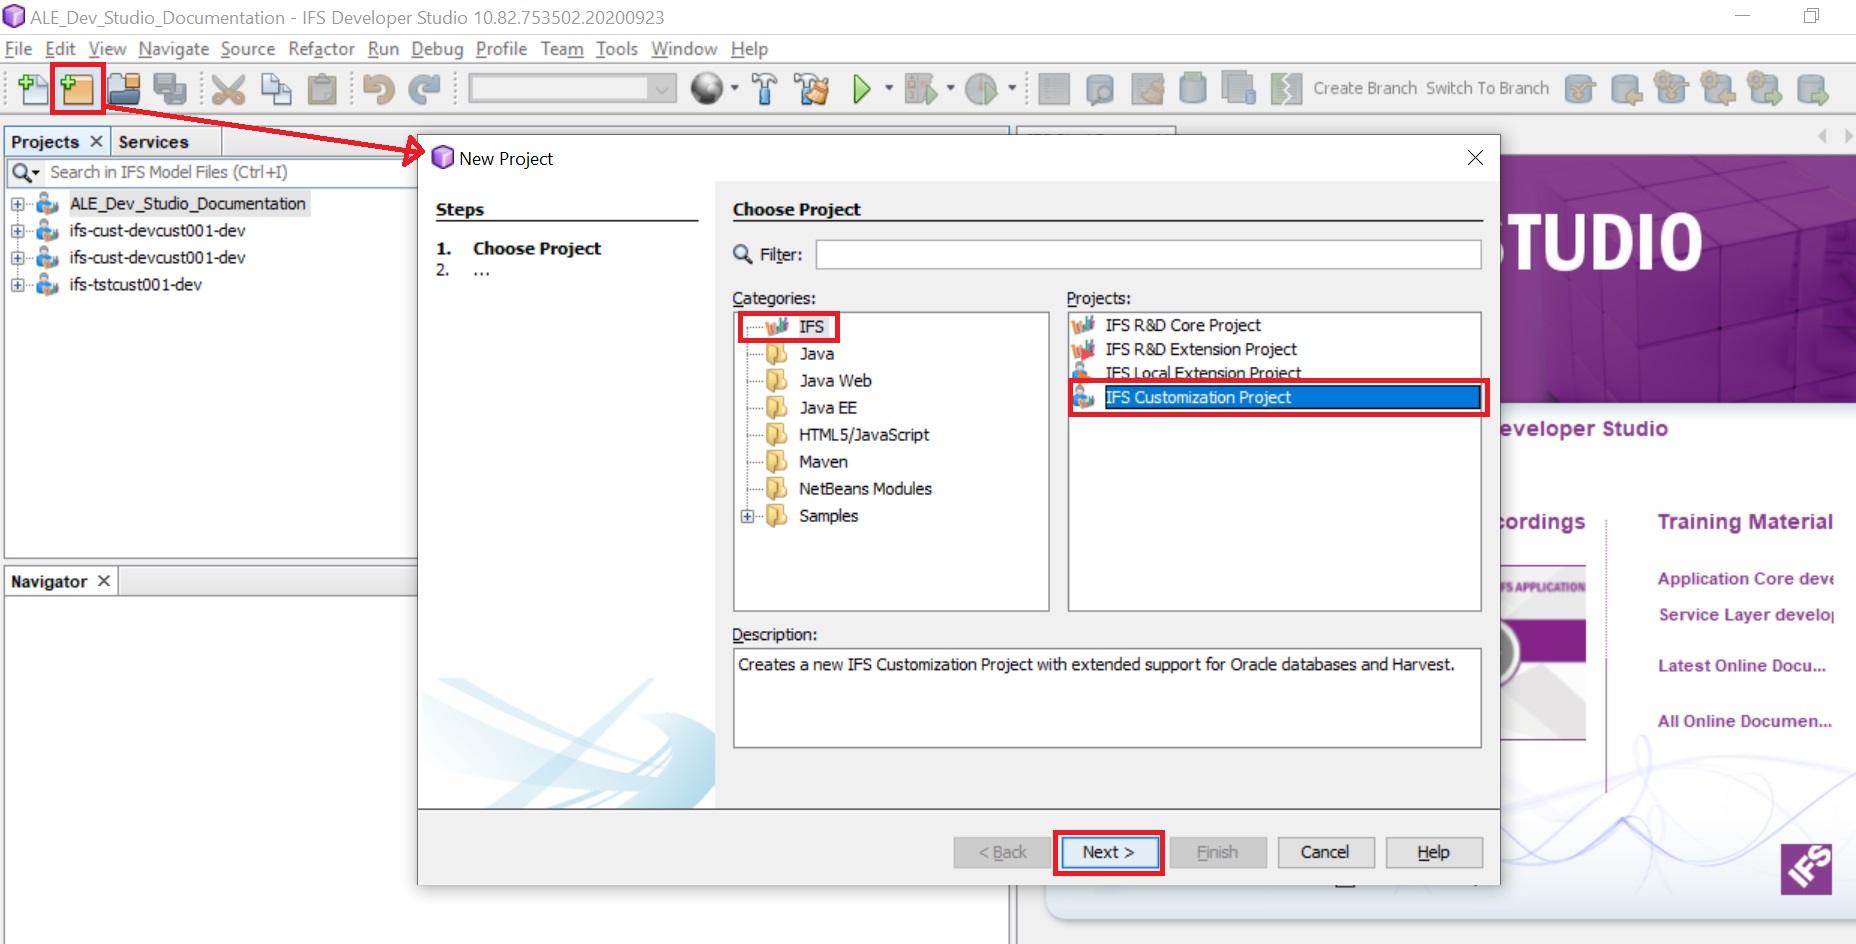
- Open ‘IFS Developer Studio’ and create new project [File -> New Project]
- Select ‘IFS’ from categories and
- ‘IFS Customization Project’ from Projects
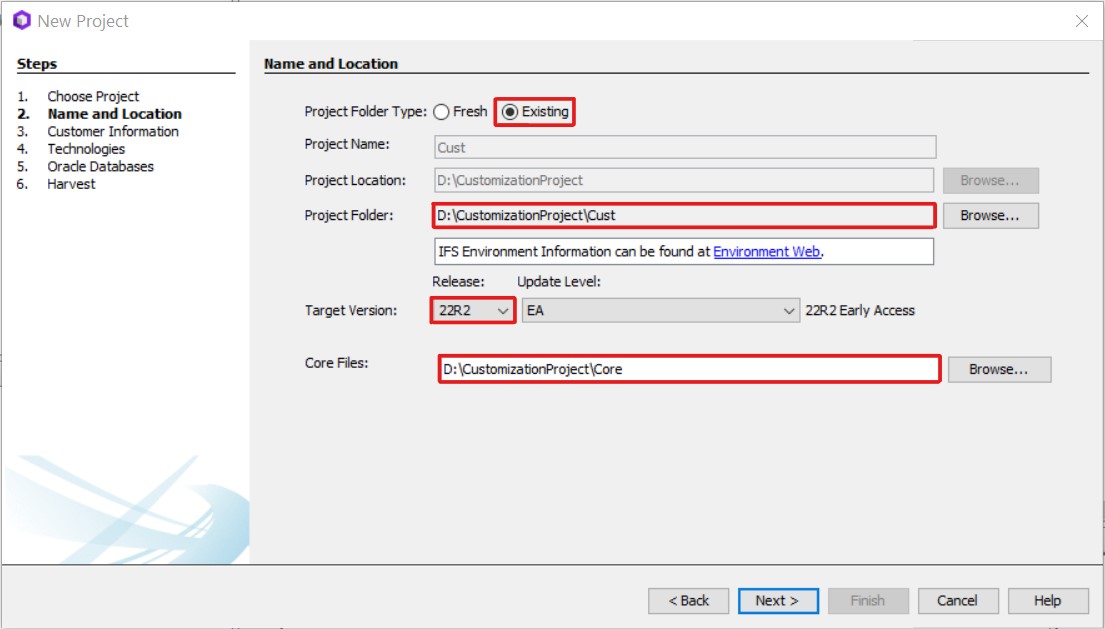
- Press ‘Next’ and select ‘Existing’ as project folder type.
- Select Project Folder and select 21R2 as the Target Version
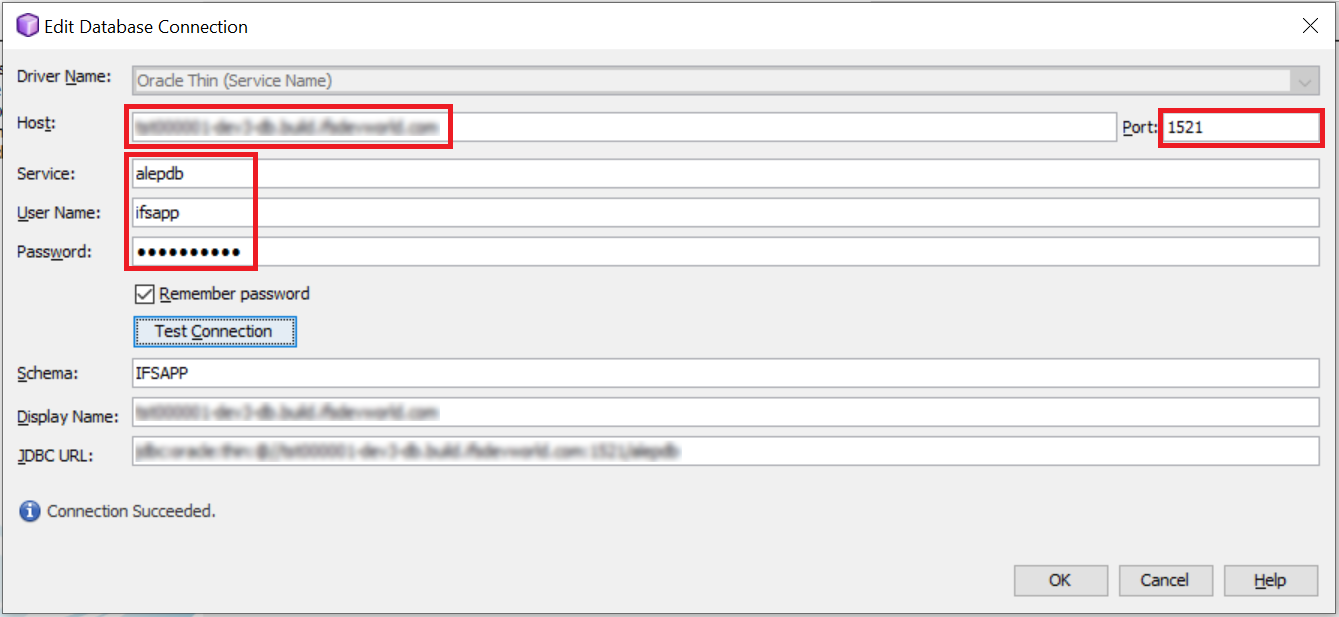
- Add a new database connection using the information available on the environment you are using in the IFS Lifecycle Experience Center.
- Set host as the database link of the created environment and use the port number as 1521.
- Enter service name, username and password. This information is available under the environment section in the IFS Lifecycle Experience Center.
- Complete the 'New Project' wizard and start developing customizations. Use ‘Generate and Deploy’ command to deploy database code to the remote database
22R2 & Beyond
Setting up the Local Development Environment
Working with Core-Cust Separated workspace is very similar to working with Build Home as done in IFS Applications 10.
Before starting to work in Developer Studio, the workspace has to be separated, the cust workspace should only contain customized files.
The following steps can be followed to set up a new customization project in Developer Studio.
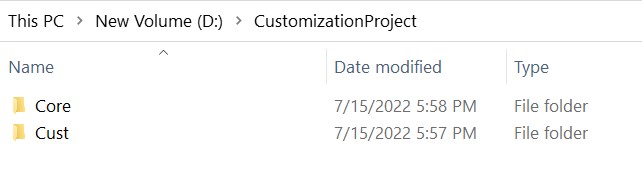
Create a directory structure on your local disk to save the project as shown in below image.
Note: You can give a preferred name for the folders. Core and Cust folders can be located in two different folders.
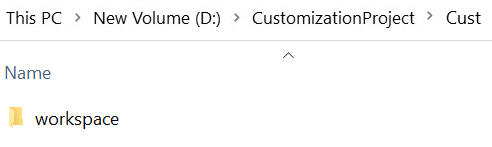
Create the "workspace" directory inside “Cust” folder to clone the components.
Note: The name of the folder inside "Cust" folder should be exactly "workspace". E.g: D:\CustomizationProject\Cust\workspace
Update or clone your customer solution repository into the 'workspace' folder and checkout the topic branch created for development purposes.
If the cloned customer-solution repository exist locally in the machine
- Checkout the master branch of the customer solution repository and update the master branch with the latest changes in the remote repository.
git checkout mastergit pull origin master- Checkout to the topic branch created for development purposes.
git checkout <topic-branch-name>git pull origin <topic-branch-name>If the cloned customer-solution repository does not exist locally in the machine
- Create a topic branch in azure repository.
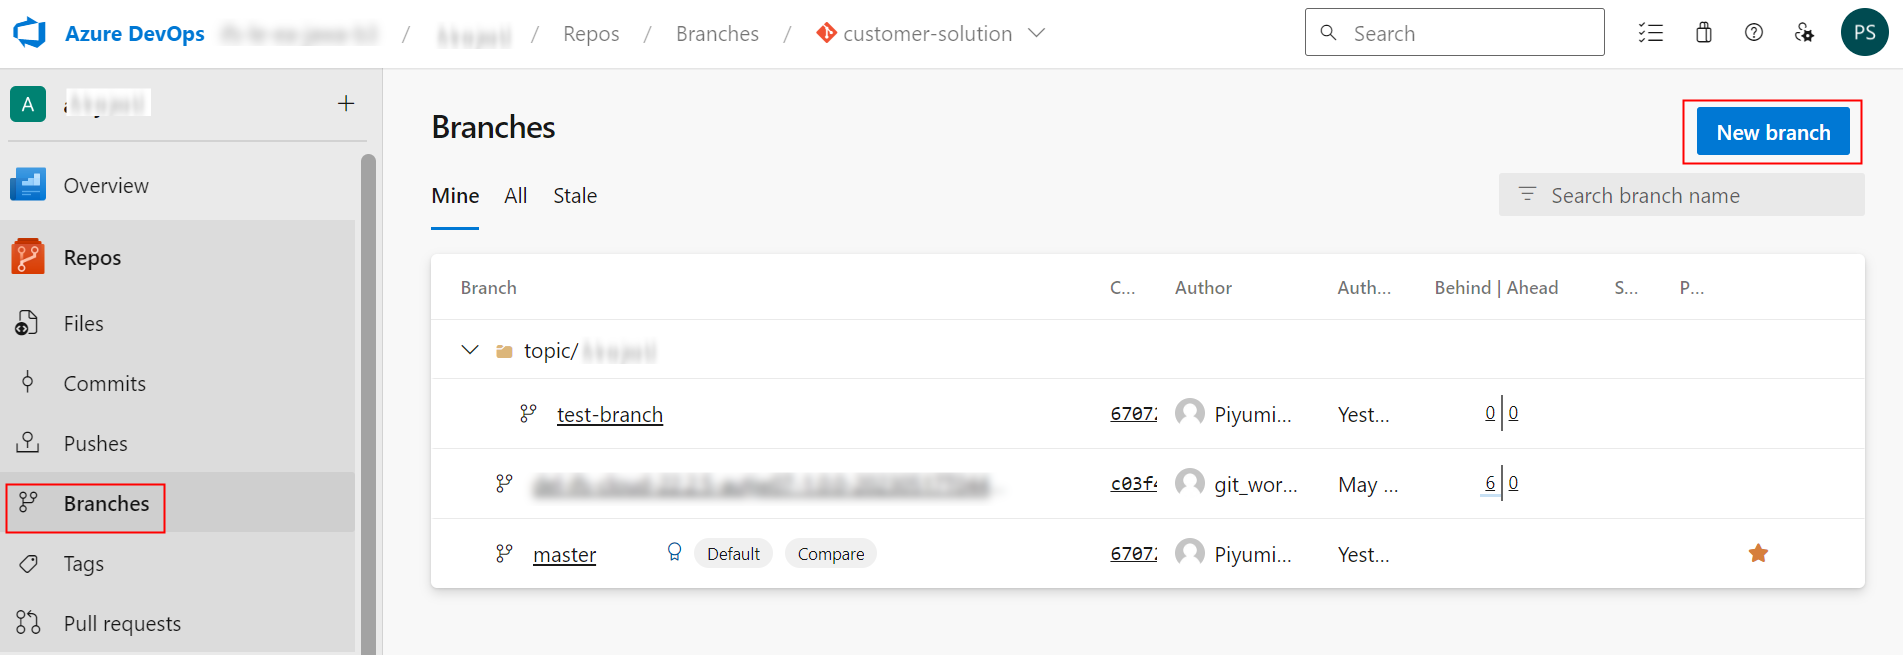
- Clone your topic branch of the customer solution repository into the 'workspace' folder. (Refer Naming Standards to use when working with GIT for the branch naming standard)
Eg:- git clone --branch topic/username/test --depth 1git clone --branch <topic-branch-name> --depth 1 <customer-solution-repo-url> <local path of the 'workspace' folder>D:/CustomizationProject/Cust/workspace - Change directory
cd customer-solutionRefer the following sections to read more about creating topic branches:
Download the core code zip file for the version that is to be applied to the customer solution repository from the 'IFS Cloud Core Codes' dropdown as shown below. This step is not mandatory if you have already downloaded and extracted the core files of the specific release to your local machine.
Note: During the release update process, core code corresponds to the new release can be downloaded via the dropdown shown in the screenshot below. Also the previous service update versions of the major release are also shown in the dropdown to be downloaded if required.

Note: Once the Release Update has been applied to the Customer Solution repository, the core code zip file of the version applied to the solution repository can be downloaded via the button shown in the screenshot below.

Next, the zip file can be extracted manually or can be left as it is to be extracted via the Developer Studio tool as shown in step 11.
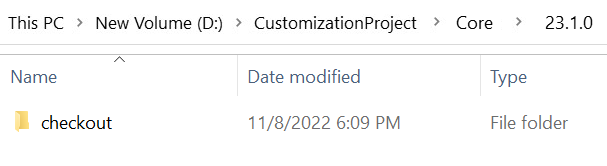
If the core code is extracted manually, move it to the 'Core' folder created in step 1. (E.g:- Folder path of the core files will be D:/CustomizationProject/Core/23.1.0/checkout)
Open ‘IFS Developer Studio’ and create new project [File -> New Project]
- Select ‘IFS’ from categories and
- ‘IFS Customization Project’ from Projects
Press ‘Next’ and select ‘Existing’ as project folder type.
Enter the folder path to the 'Cust' folder created in step 1 as the 'Project Folder'.
E.g: D:\CustomizationProject\Cust
Select '22R2' as the Target Version Release.
There will be an option called 'Core Files' for projects with Target Version Release '22R2'.
10.1. If the core files were not manually unzipped and you wish to unzip the files from within Developer Studio, follow the steps below:
a. Click on 'Browse' button next to the 'Core Files' field.
b. Select the core code zip file downloaded from the Lifecycle Experience Center (LEC). (Make sure the zip file is not inside the Core or Cust folders, as the tool will not allow to decompress files to a folder which is not empty).
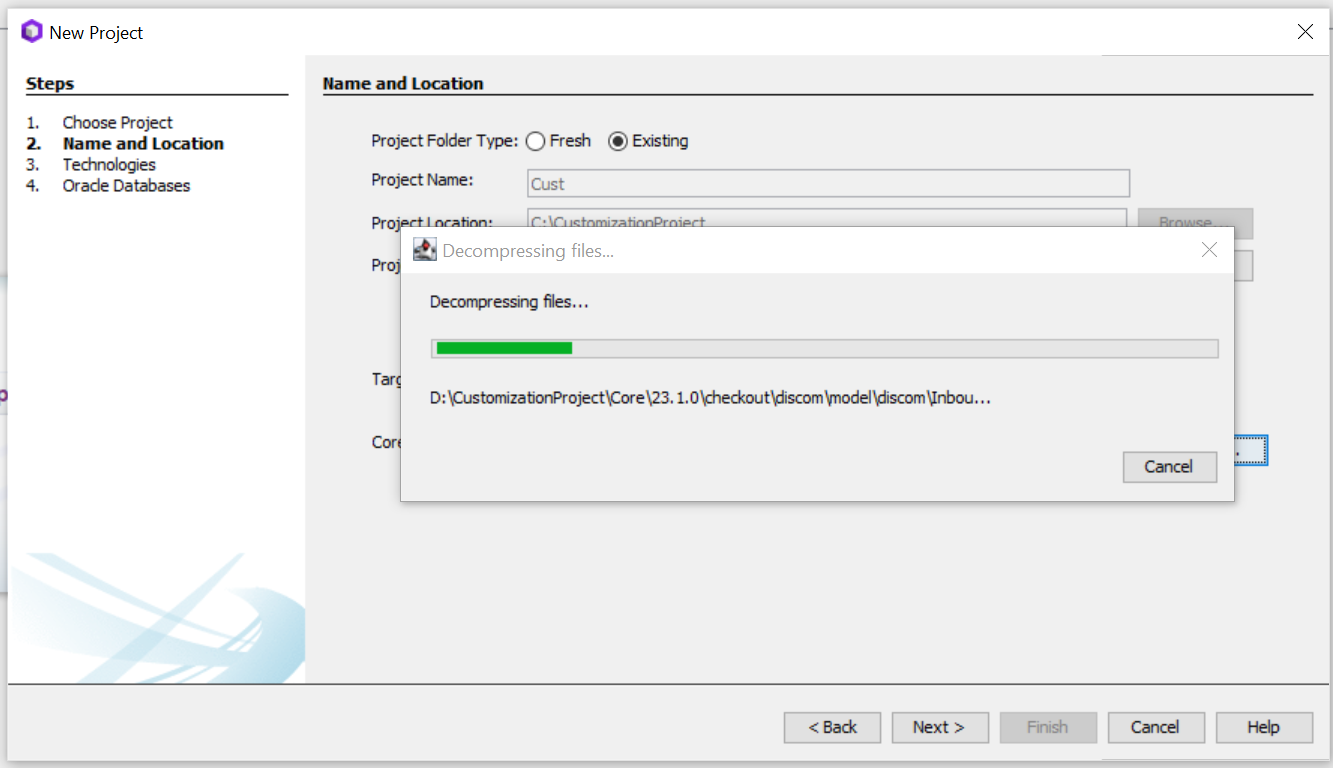
c. A dialog will be popped up asking for a confirmation to decompress the files.
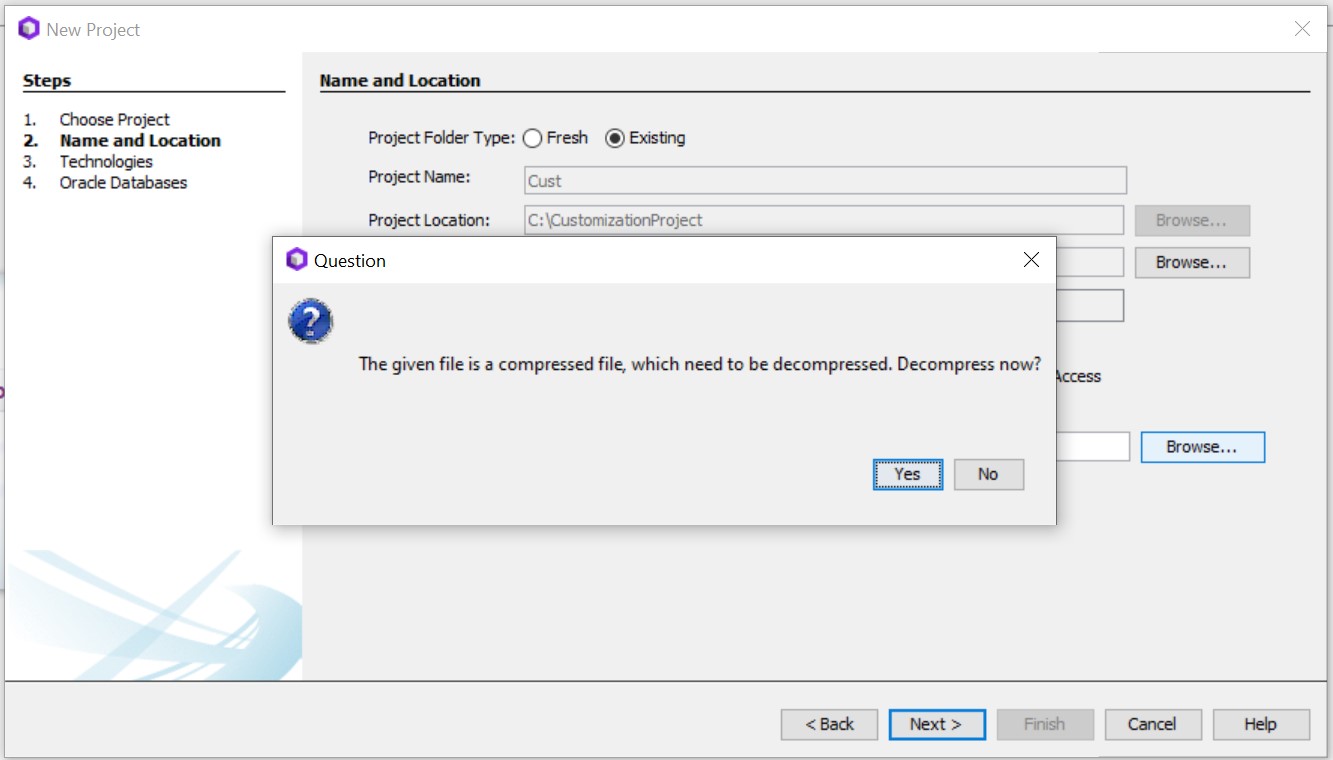
d. Click 'Yes' to unzip the files from the tool itself.
d. Click 'Yes' to unzip the files from the tool itself. e. Next, you need to point to the location the files needs to be extracted to. Select the 'Core' folder mentioned above as the location for the extracted files. The extracted core files will automatically be set to read-only when unzipping files from the tool.
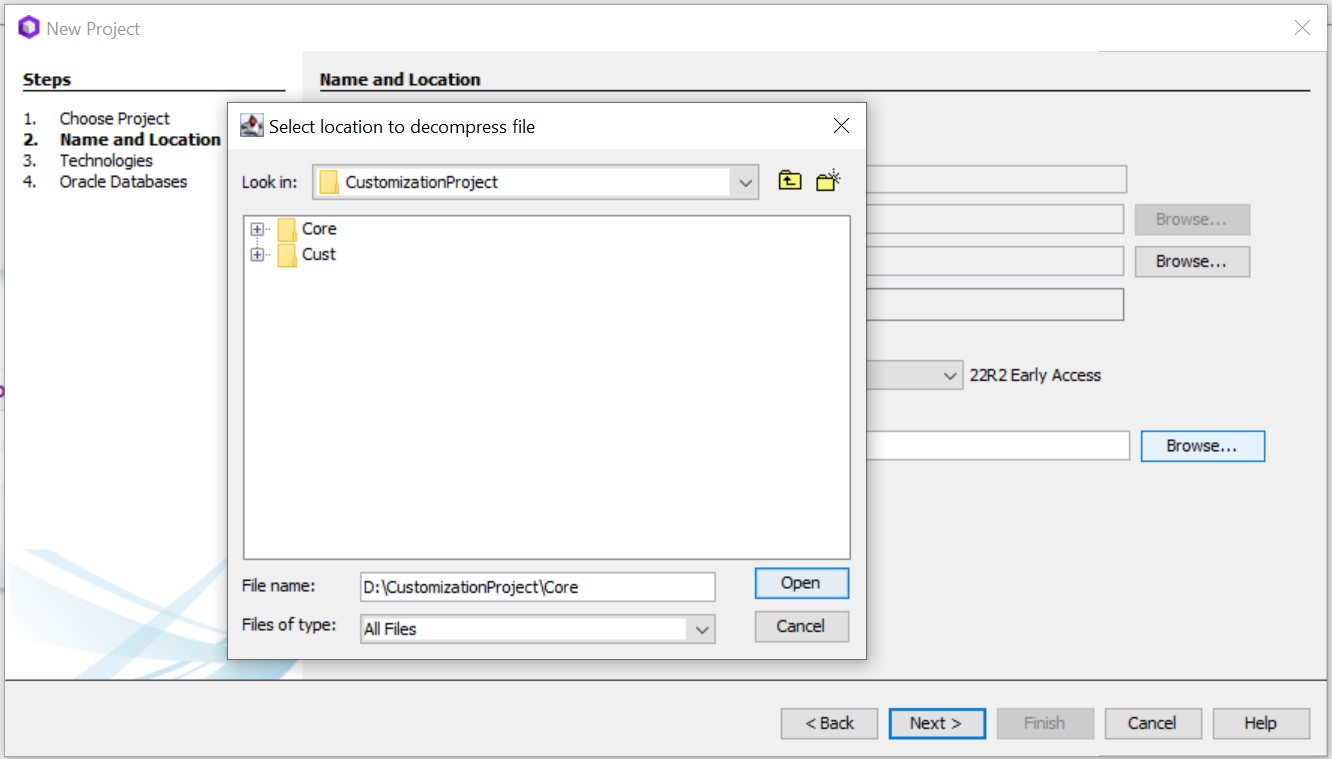
f. Click 'Open' to proceed with the extraction of files.
f. Click 'Open' to proceed with the extraction of files.
Note: Once the file decompression within Developer Studio is complete, there might be instances where the path of the 'Core Files' field in the New Project Wizard will differ from the one you set up earlier (E.g:- D:\CustomizationProject\Core). In such cases, make sure to change the folder path to ensure the file path is set correctly so that it will point to the 'Core' folder.
This is the path set to 'Core Files' field after decompression is completed:
 The path set to 'Core Files' field should be changed as follows:

10.2. If the core files were manually unzipped outside Developer Studio, follow the below steps to setup the Developer Studio project:
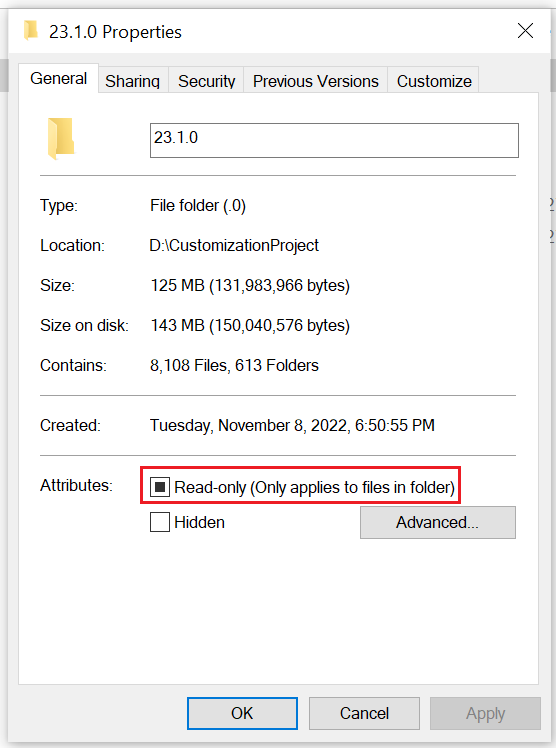
a. Ensure that the core files are extracted to the 'Core' folder created above.
b. It is highly recommended to make the extracted folder and its files “Read Only”, to ensure that accidental changes are not done to the core files.
c. Click on the 'Browse' button next to the 'Core Files' field and select the extracted core code folder.
Note: If the core files already exists for the release you are working with, you can point to those files instead of extracting the core files again, as those files are reusable for other projects too.
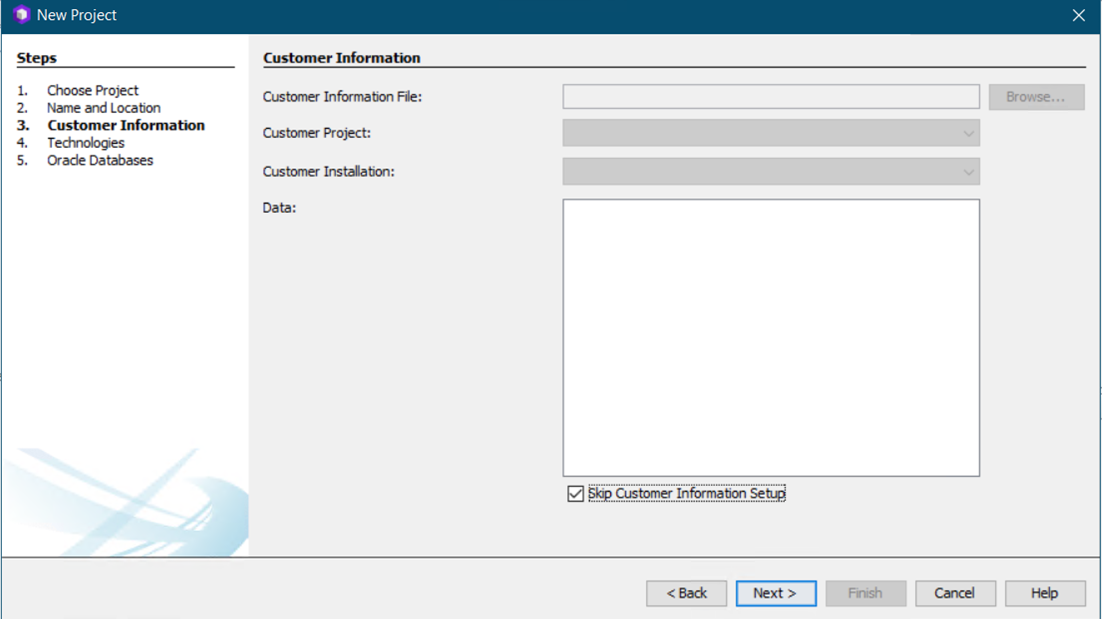
The next two screens for Customer Information and Technologies can be skipped or completed as required.

Add a new database connection using the information available on the environment you are using in the IFS Lifecycle Experience Center.
Set host as the database link of the created environment and use the port number as 1521.
Enter service name, username and password. This information is available under the environment section in the IFS Lifecycle Experience Center.
Complete the 'New Project' wizard and start developing customizations. Use ‘Generate and Deploy’ command to deploy database code to the remote database
With the core files set, you should be able to work with core files, just as with BuildHome in Apps10.
There will be a node called 'Core Files' at the bottom in the navigator, where the core files can be browsed, and "customize this" can be chosen on the file. The customized file will appear in the customized workspace, and you can work as normally done with customizations.
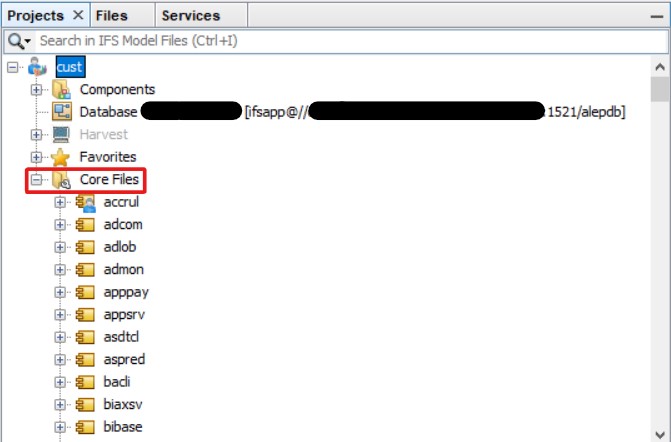
The core files folder is cached, and the cache is refreshed automatically if the folder data is changed. If for some reason this fails or a manual refresh is needed, it can be retriggered on the Core Files node.
Additional Notes
Layered customization vs non-layered customizations
Some files support layered customizations and the "customize this" option can be selected for these files and add the customized code in the separate file which is created.
Some files do not support layered customizations yet and if the Build Place is in 22R2 version or later, these files have to be copied from the core files location in to the customization project and changed in the copied source code.
Layers.ini file
Once the developer studio project has been set up, a "layers.ini" file will be automatically created in the "workspace" folder of the local repository directory.
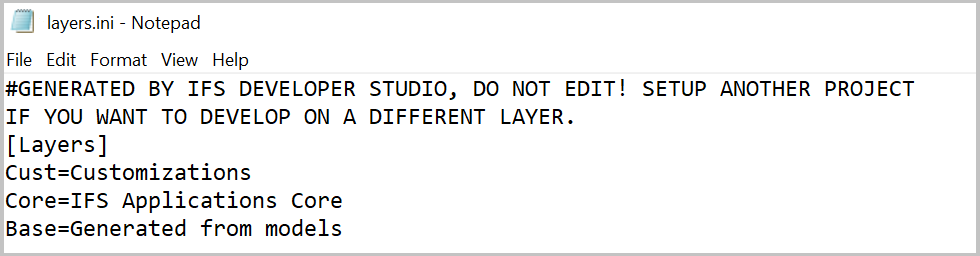
This layers.ini file must NOT be merged as a single commit to the master branch of the customer-solution repository as this will cause sanity build failure. In the event the layers.ini file needs to be committed to the master, it is recommended to commit it along with other customized files.