Master-Detail Reports with Detail Report Bands
If you have data with parent and child records, like invoices and their line items, this tutorial guides you to leverage those through nested Detail Report bands to create master-detail reports. This is perfect for visualizing hierarchical data structures when your data source has a master-detail relationship.
Get started: Create a new report or open an existing one.
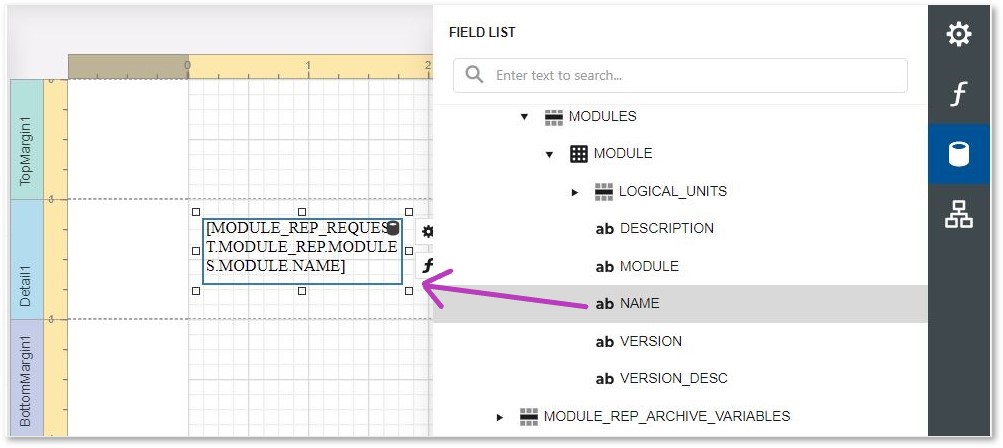
Drag the data fields you need from the Field List to the *Detail* area.
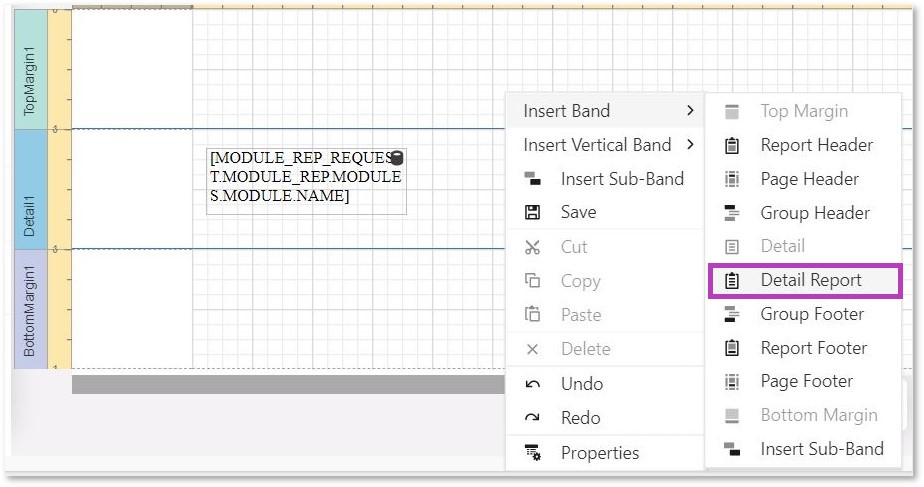
Right-click on the canvas and select Insert Band--> Detail Report to add a detail report band to the report.
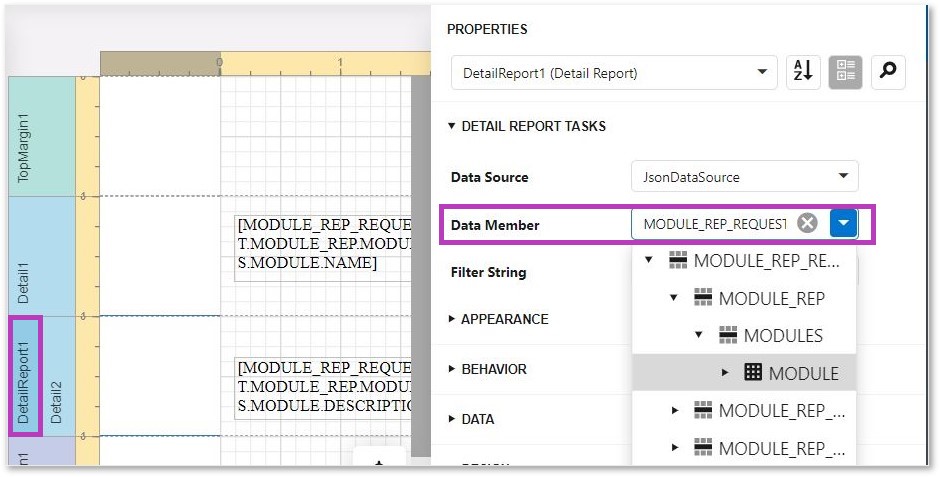
With your Detail Report band selected, find the Data Member property in the properties pane. In the Data Member drop-down list, choose the name of the master-detail relationship that establishes the link between this band and the broader report data.
To select multiple fields, hold down the CTRL key and click on each desired field individually. Alternatively, you can hold down the SHIFT key to select a range of consecutive fields as well.
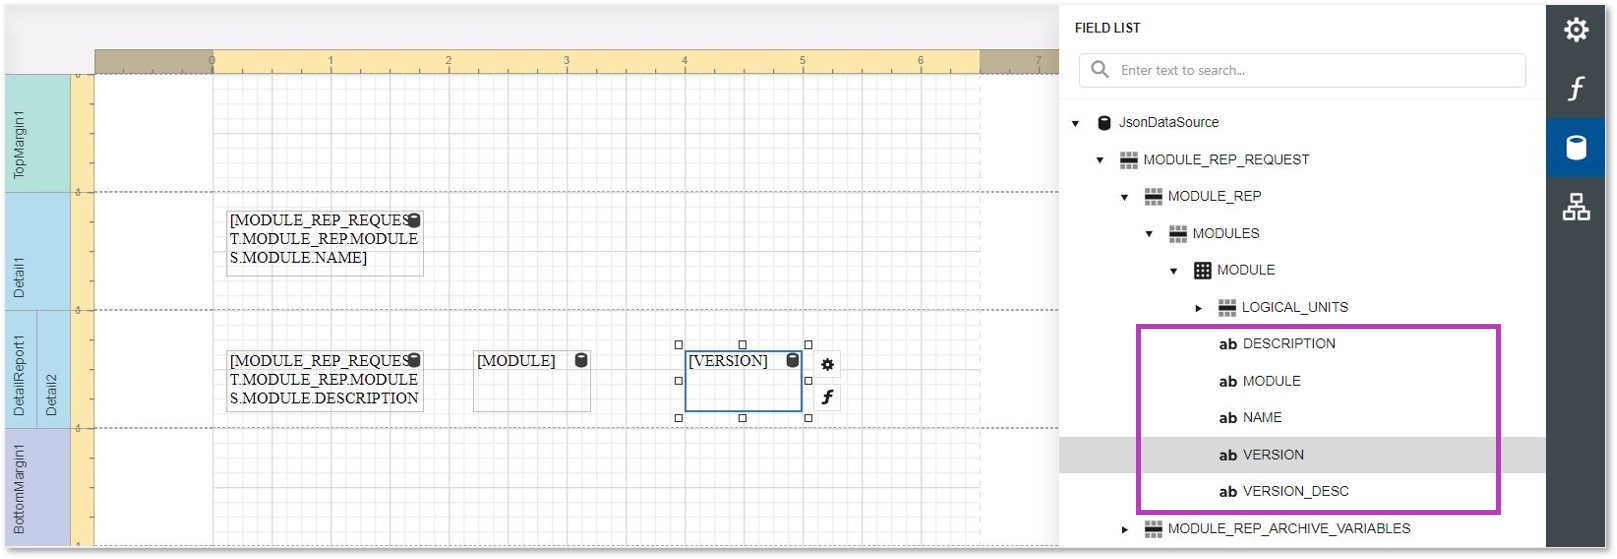
For a detailed report, drag fields from the category that matches to your master-detail relationship. This ensures your report displays all the relevant data. Otherwise, you might only see the first record from the detail table repeated for each master record.
Customize the visual style (fonts, colours, etc.) and formatting of data values (e.g., currency symbols, percentages) in your report as required.
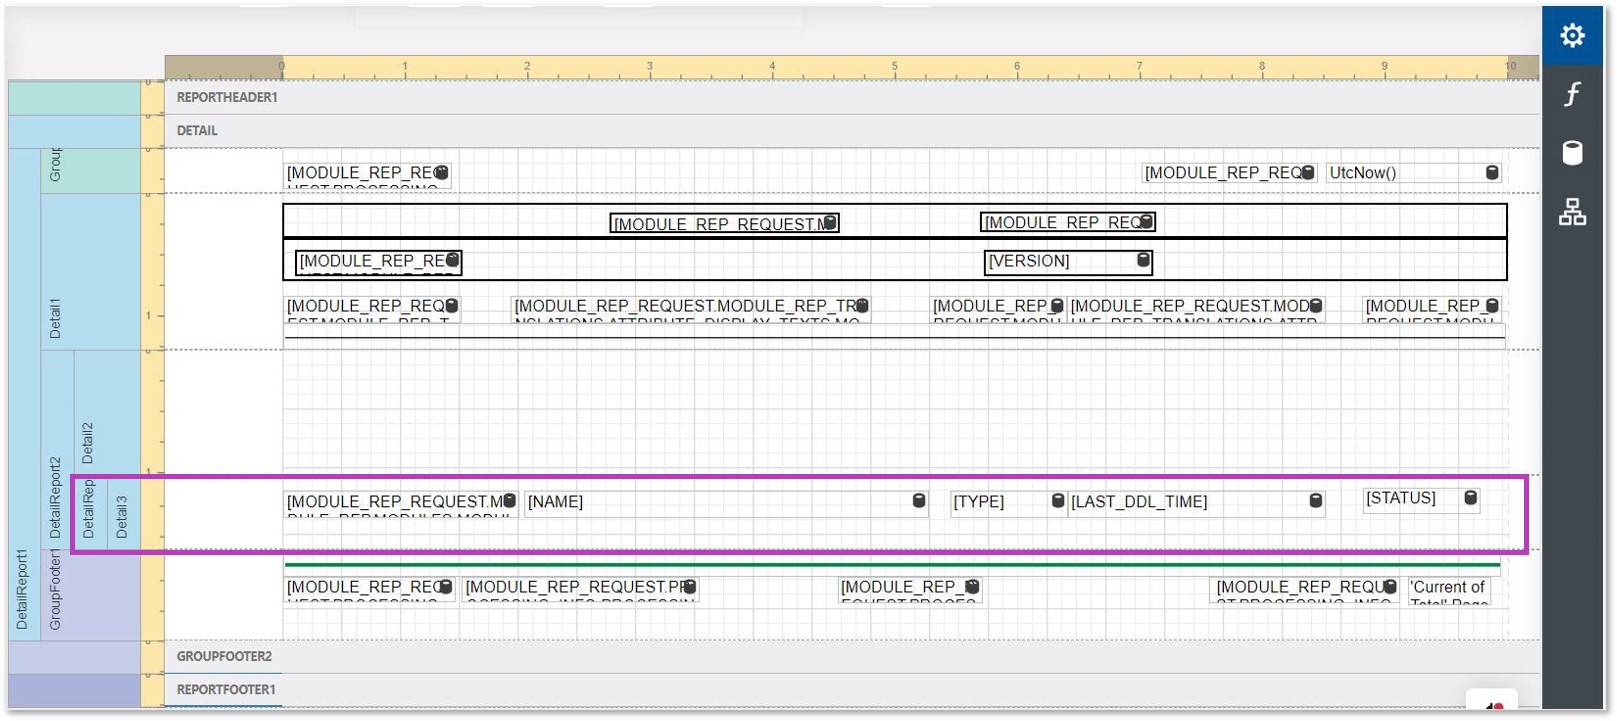
Refer to the following example to understand how the design & preview of the layout works in the master-detail report:
Design :
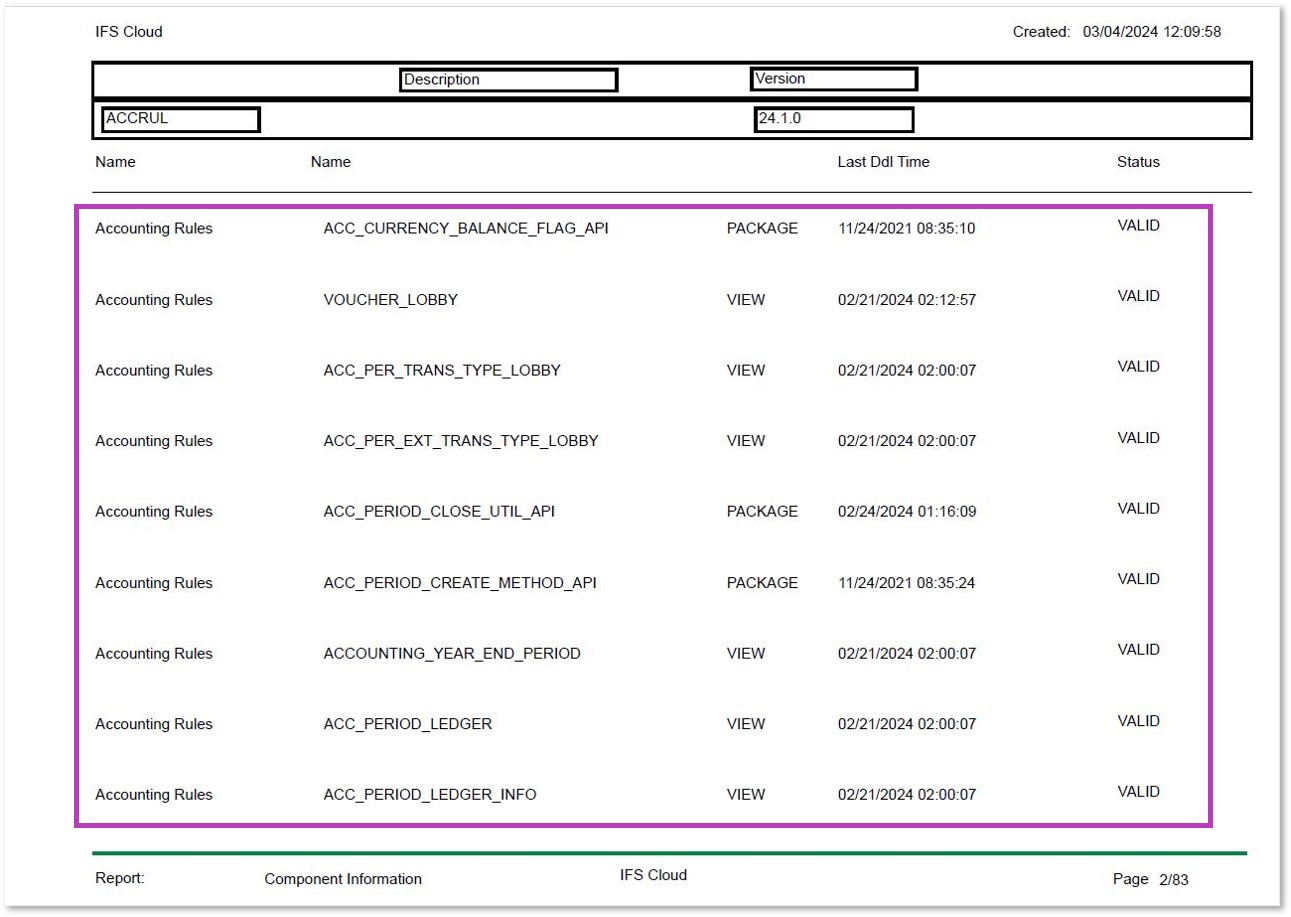
Executed Report :
Font Substitution
IFS Cloud offers a feature called font substitution, which allows you to override the default font (Deja Vu)used in a Report Studio - Designer layout in run-time. This is useful when you need to display the report in a different language/font.
To use font substitution:
- Select the desired language: Choose the language in which you want to view the report from the print dialog.
- Font name: Default font used to design the layout.
- Specify the replacement font: Select the font you want to use instead of the default font defined in the layout.
- Adjust font size (optional): If necessary, change the font size by entering a positive or negative value. Setting the number to a negative number will decrease the size and using a positive value will increase the size.
