How to Define a Project : Name, Location, and Target Version
To commence the creation of a new project, either click the New Project button or use the keyboard shortcut Ctrl+Shift+N. This action will launch the project wizard, guiding you through each step of the process to create your new project seamlessly.
Step 1 : Choose Project
Navigate to the Categories section and choose IFS. Then, from the Projects section, select any desired project type.
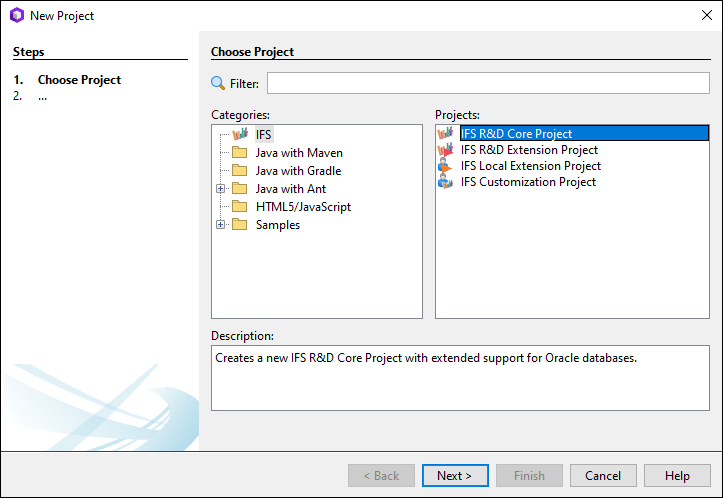
Figure: Project Wizard - Choose Project Tab : Selecting a Project
Step 2 : Name and Location
After the selection of the project type, next step involves defining the type of Project Folder for your new Developer Studio project. You have the option to create it in either a Fresh folder or an Existing folder.
By default, the selection is set to Fresh, requiring an empty location for the creation of the new project folder. Alternatively, if you opt for an existing project folder, you must specify a directory containing a workspace folder.
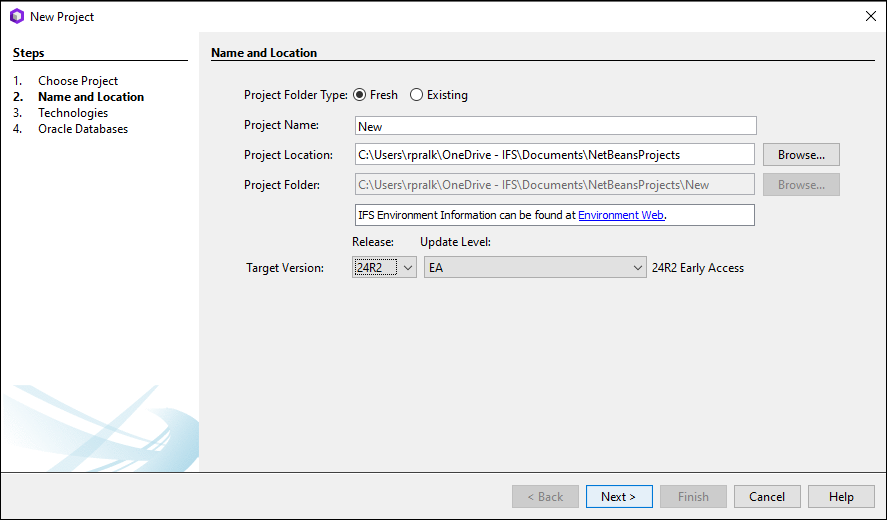
Figure: Project Wizard - Name and Location Tab : How to Setup Project Name and Location
Project Folder Type: Fresh
If you select Project Folder Type as Fresh:
- Enter new Project Name.
- Select a new Project Location by browsing to the location where you want to create your project folder
- Select a Target Version for the project, see: Target Version

Figure: Project Wizard - Name and Location Tab : How to Setup a Fresh Project
Project Folder Type: Existing
If you select Project Folder Type as Existing, this will create a Developer Studio project in a folder with an existing workspace.
- Browse to the existing Project Folder.
- Make sure the project folder has a workspace folder and is not already a Developer Studio project.
- Select a Target Version for the project, see: Target Version
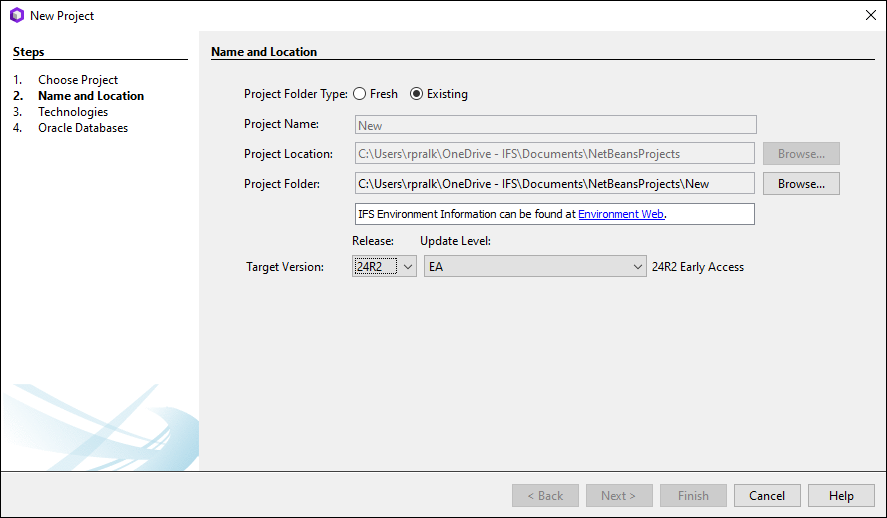
Figure: Project Wizard - Name and Location Tab : How to Setup a Project in an Existing Work Space