GIT Workflow using IFS Developer Studio
Related Pages
Prerequisites
- Git plug-in for Net Beans
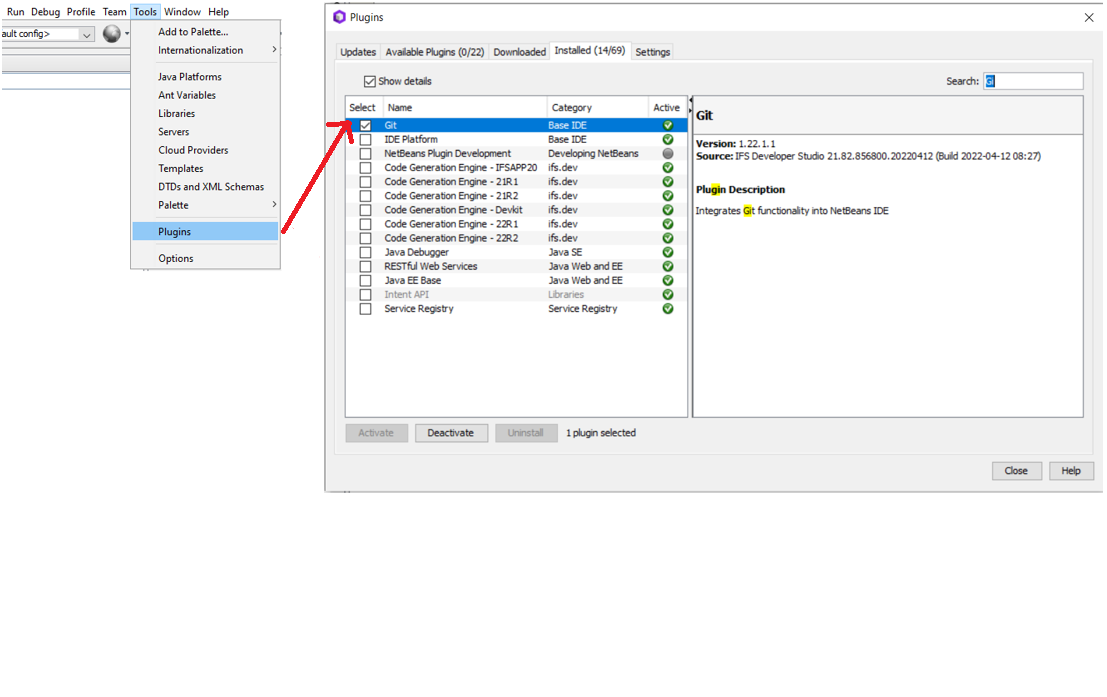
This plugin will get installed through IFS Developer Studio by default, if not you can serch for "Git" under Available Plugins tab and get it installed.
GIT Workflow with IFS Developer Studio
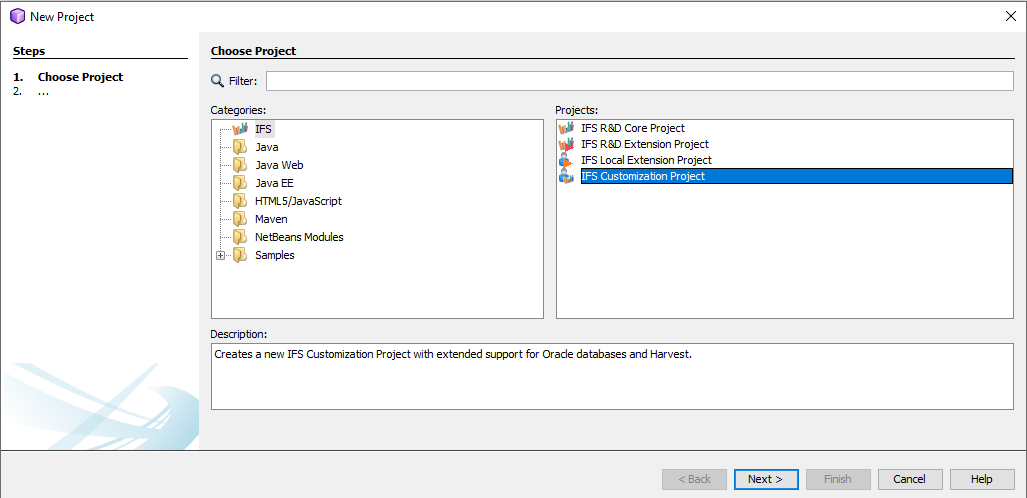
- Open the IFS Developer Studio and create a new Customization Project. In this example, it would be ALE_Dev_Studio_Documentation. Skip giving the .cifx file when creating the project.
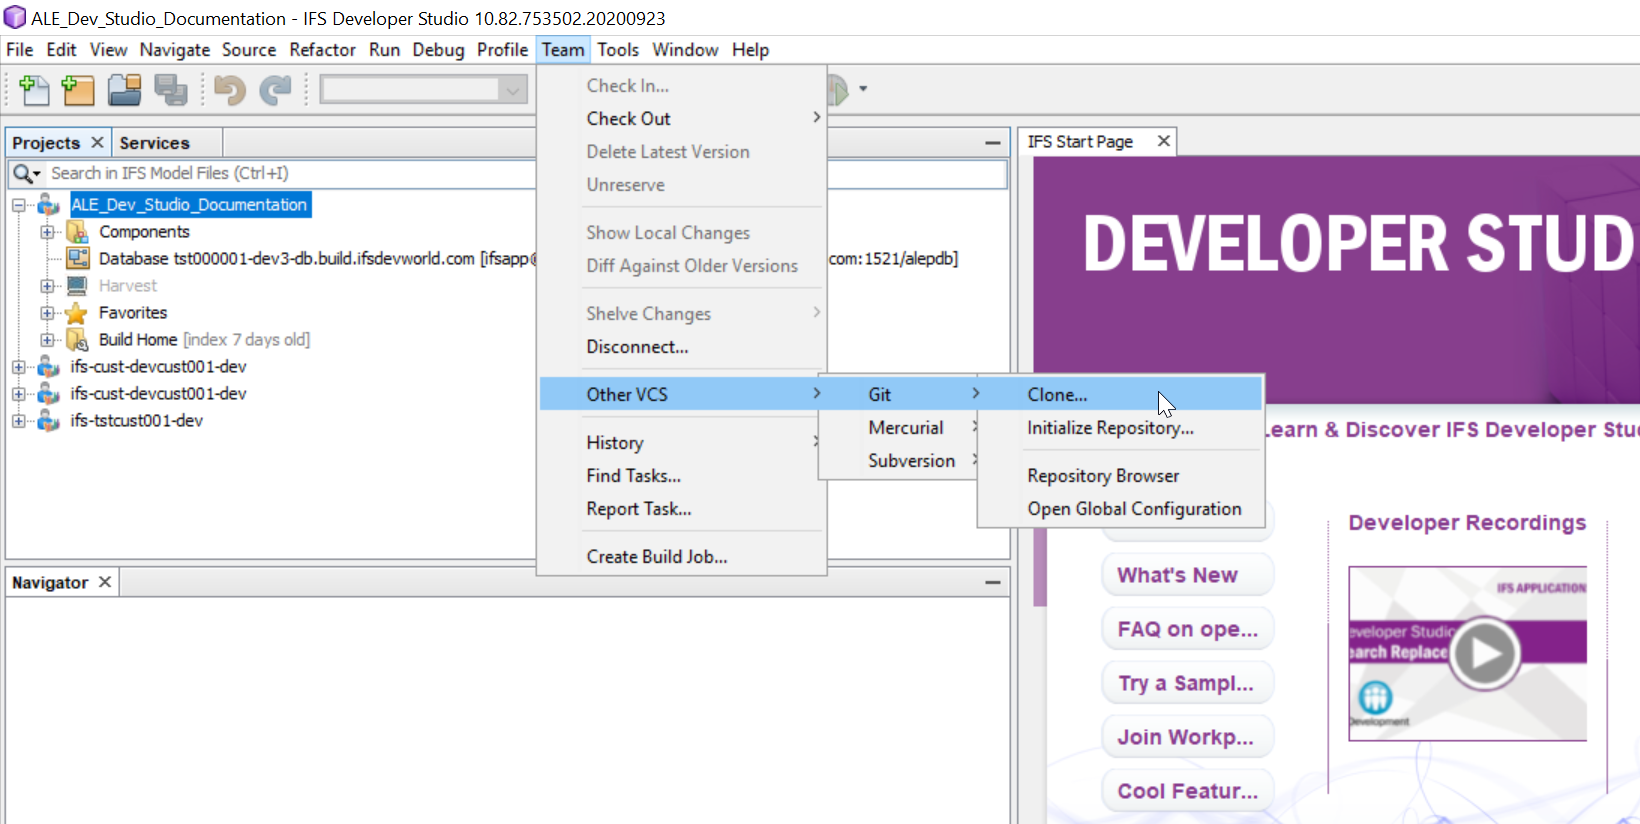
- Once the project has been created, go to Team drop down menu and select Git and then the Clone option.
- Next, open your browser and select your Buildplace in 'IFS Life Cycle Experience Portal'.
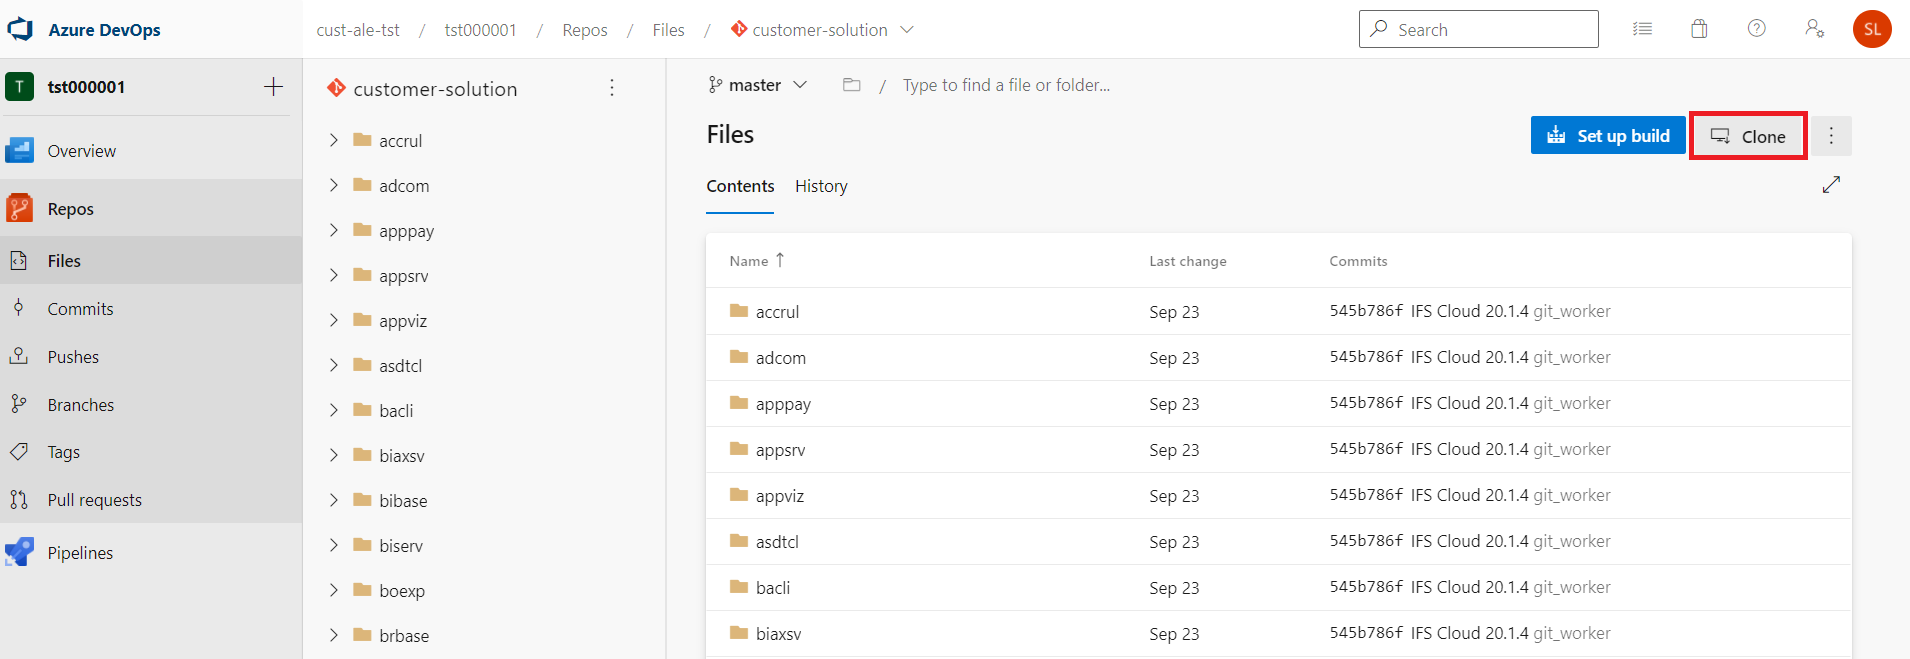
- When in your buildplace, navigate to the Customer Solution Repository via the url.
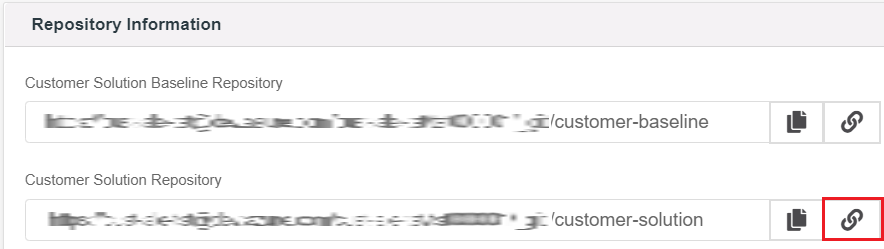
- Now you have accessed your Customer Solution Repository. Click on the clone button and copy the clone HTTPS url. Also click on the Generate Credentials button right below the url. This will generate credentials used for accessing the repository.
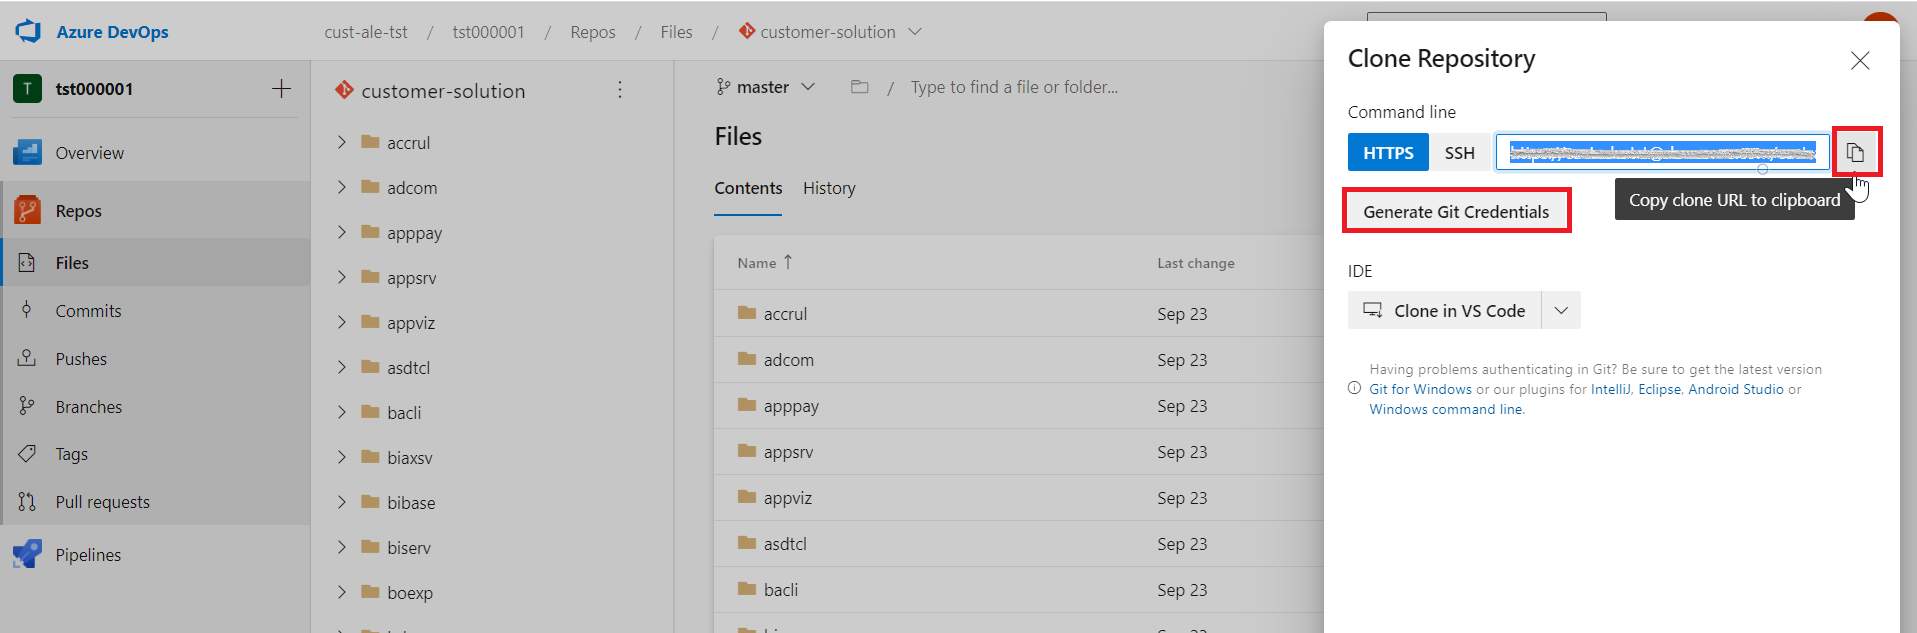
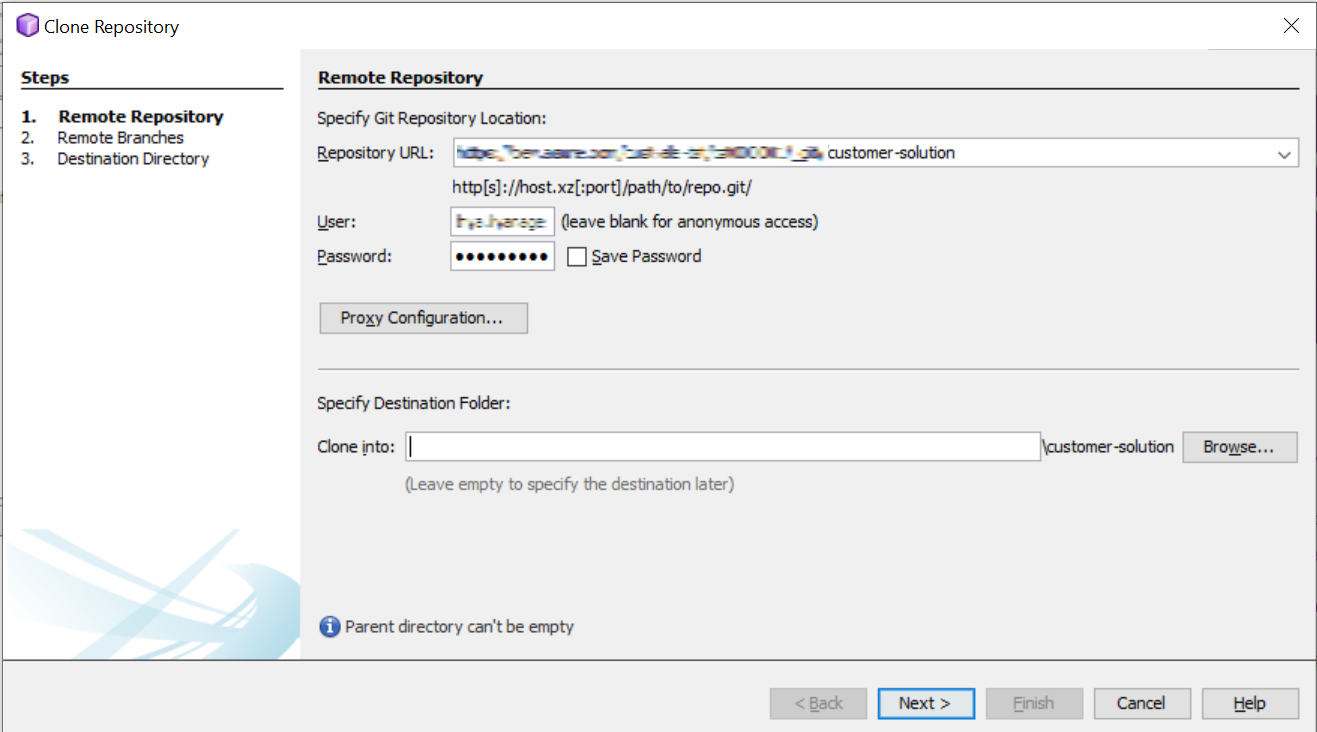
- Copy the details and fill them in the relevant fields in the IFS Developer Studio Clone UI. Click Save Password. Do not specify the Destination folder in this screen. Click Next.
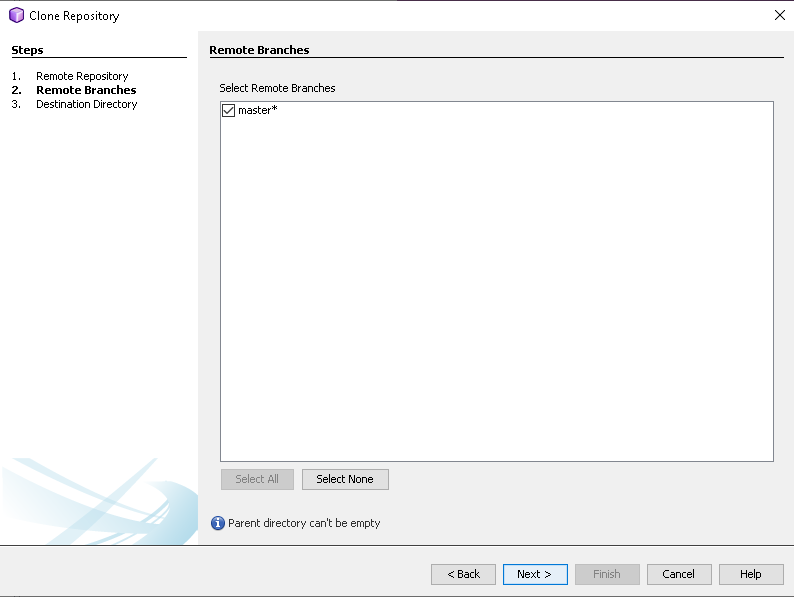
- Once the repository is connected, the list of branches to Clone will be shown. Make sure to select the Master Branch and optionally, any other branches you may need. Click Next.
- Go to the workspace folder of the IFS Developer Studio Project and temporarily move out the layers.ini file inside the folder to elsewhere.
- Next copy the folder path of the workspace folder. Paste the folder path up to one level above workspace folder in the Parent Directory field in the Clone UI in IFS Developer Studio. Make sure to omit the workspace folder. Then as the clone name, give workspace and click Finish. You will see the progress of the clone operation in the bottom right of the IFS Developer Studio. e.g:
| Workspace Path | C:\Users\Administrator\Documents\NetBeansProjects\ALE_Dev_Studio_Documentation\workspace |
| Parent Directory | C:\Users\Administrator\Documents\NetBeansProjects\ALE_Dev_Studio_Documentation |
| Clone Name | workspace |

- Once the cloning has been completed, move the layers.ini file back in to the workspace folder.
- If not already installed, it is recommended to install 'Git Toolbar' plugin from the Netbeans plugins. This will provide easier access to the usual Git operations on the palette.
- Then create a new local branch (called a topic branch) by clicking on create branch button on the palette. It is recommended that the branch name follow the standards defined in Naming Standards for GIT. Alternatively, it can also be done by right click customized component->Git->Branch/ Tag->Create Branch.

- After this step, Customizations can be done in the usual way in IFS Developer Studio.
- Also, files can be committed to Git now. To do this, right click on the component the changes have been made (customized component), select Git -> Commit from the context menu. Wait a few seconds while the commit is prepared and the changed files are listed. Enter a suitable commit message and then click commit. Alternatively, if 'Git Toolbar' has been installed, simply click on the customized component name, then click Commit on the palette for the same action.


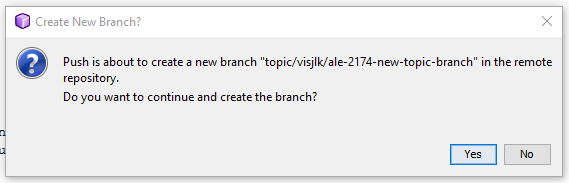
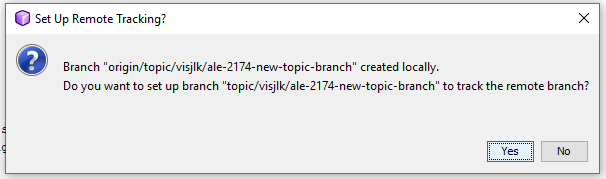
- Once changes have been committed, they can be pushed to the remote repository by right clicking on the customized component and selecting Git->Remote->Push/ Push to upstream as needed. Alternatively, if 'Git Toolbar' has been installed, simply click on the Push/ Push to upstream buttons on the palette. Confirmation dialogs will pop up to create a new branch in the remote repository and to track it. Click Yes on these.

- Once the changes have been finalized, it's a good idea to pull the latest changes from master into the topic branch before merging the topic branch to Master. This is done to ensure that the topic branch is always upto date with the latest revision of the remote master.
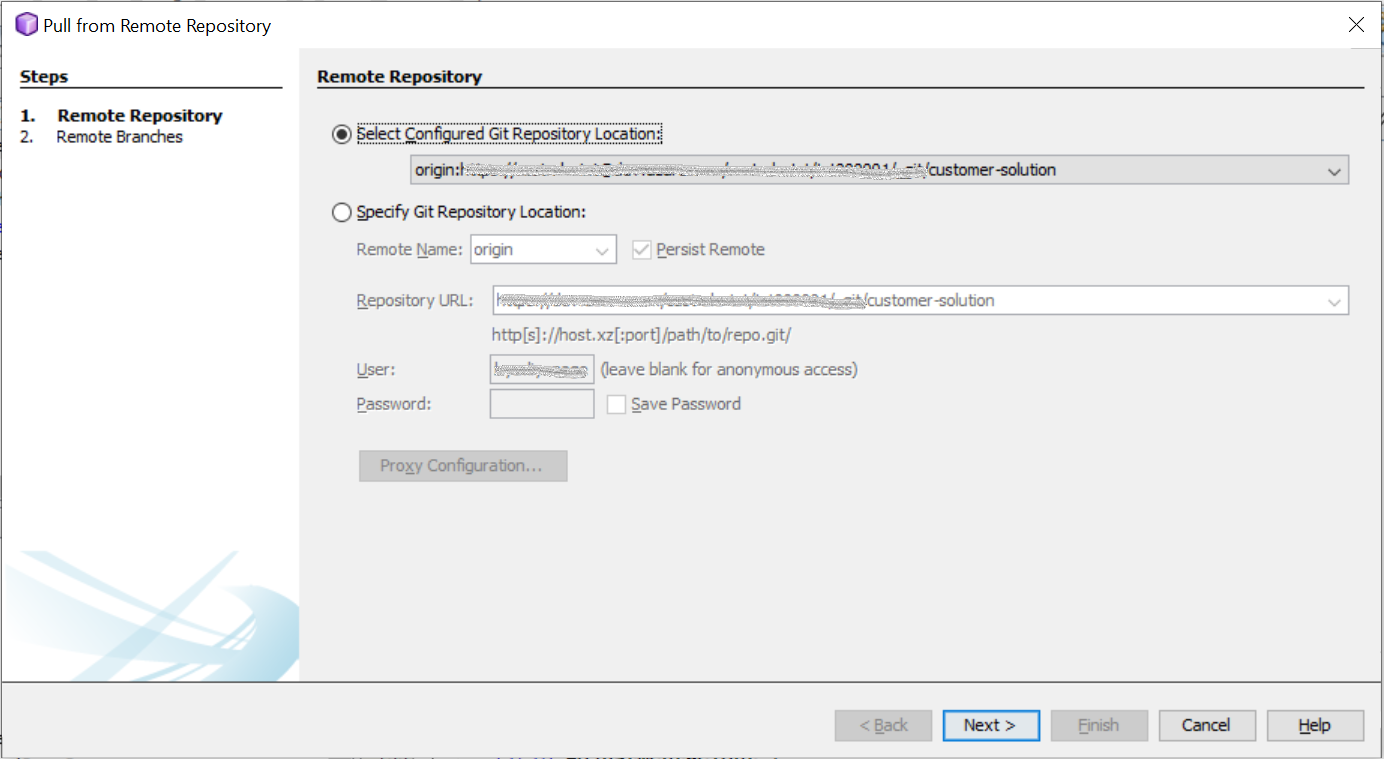
To do this, first switch to the local master branch by right clicking Customized component, select Git->Branch/ tag->Switch to branch (select master here). Then select Git->Remote->Pull from upstream. Alternatively, the same options for switching branches and pulling are available in the 'Git Toolbar'.

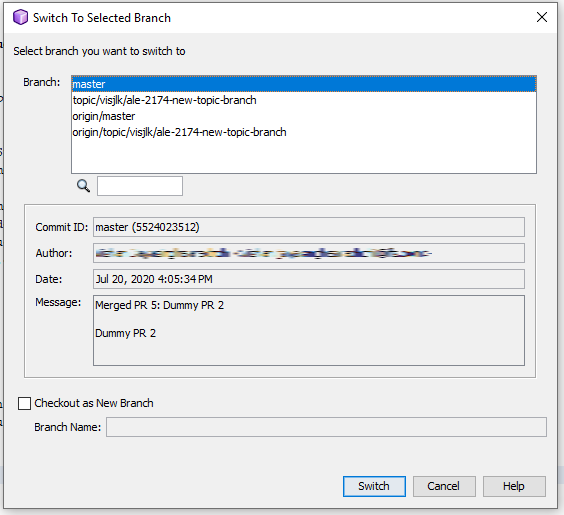

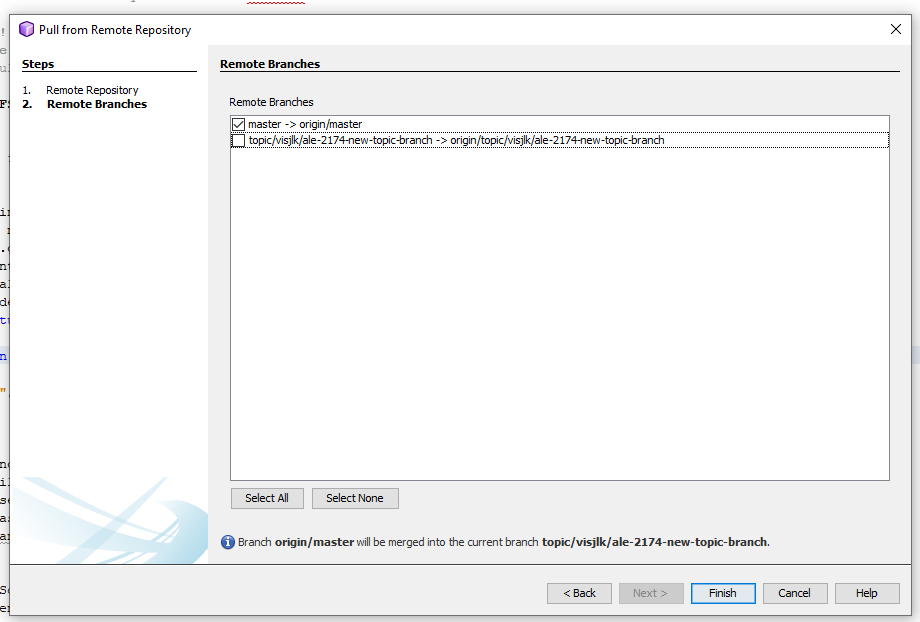
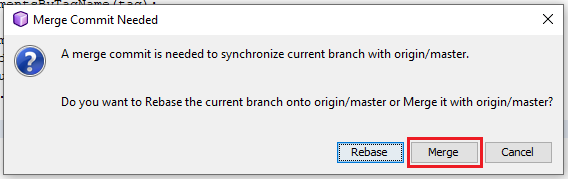
- Once the pulling is done from the master, checkout the topic branch in the same way and pull the master (local) branch again to the topic. A dialog will appear asking to confirm if master should be merged with the topic or rebase. Select merge. Alternatively, the same options for switching branches and pulling are available in the 'Git Toolbar'.

- Once the changes from the master branch has been integrated to the topic branch and all merge conflicts sorted (if any), push the changes (A merge commit will be automatically created when merging the master branch).
- After this step, a Pull Request to the master branch (PR) can be opened in the Customer Solution Repository from the topic branch. This should be done in your Customer Solution Repository. Please refer working with pull requests for more information.
Reverting commits
- To revert a commit from the master branch, first create a new topic branch from the local master as mentioned above. Make sure to pull the latest remote master changes before you do so.
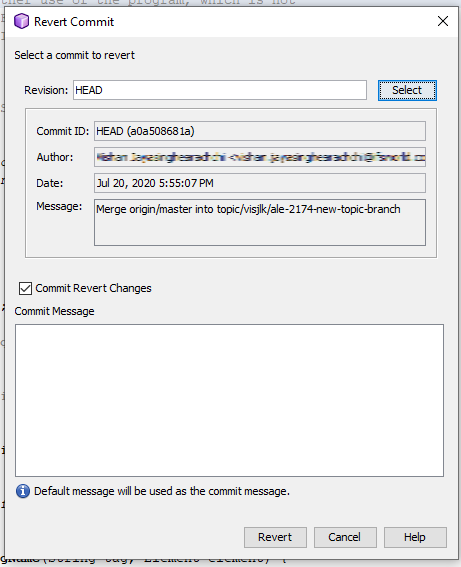
- Then, right click the customized component, Git->Revert/ Recover->Revert Commit and select the commit to revert to.
- If there are no merge conflicts, a commit will be created for you. Once the reverting is done, simply push the changes to the remote.
- Once pushed, a Pull Request (PR) to the master branch can be opened in the Customer Solution Repository as mentioned above.
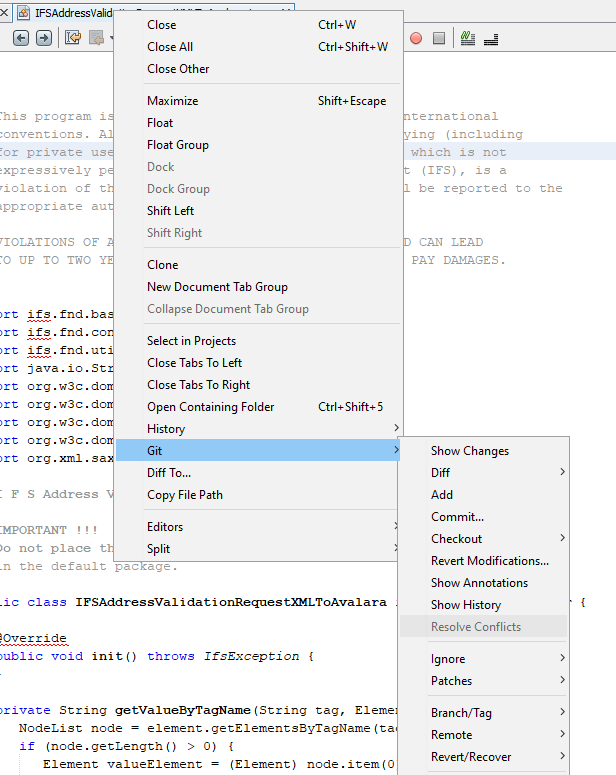
- If there are conflicts, make sure to resolve them first and mark each resolved file as resolved. To do this, right click on the editor tab for each file->Git->Resolve Conflicts (Option will be enabled only if there are unresolved merge conflicts).
- Once the conflicts has been resolved, create a new commit as mentioned above. Then Push the new commits to the remote and the next steps would be similar to no merge conflicts scenario.