Working With Pull Requests
Related Pages
Overview
Once the development work is completed on your topic branch and you are satisfied with the changes, a pull request must be created to merge your changes to the master branch of the customer solution repository. Pull request creation and approval must be done on the Azure Dev Ops UI itself and not through the IFS Lifecycle Experience Portal.
Create Pull Request
Create a pull request to merge your changes into the customer solution repository master branch with reviewers. Azure DevOps portal is used for pull request handling.
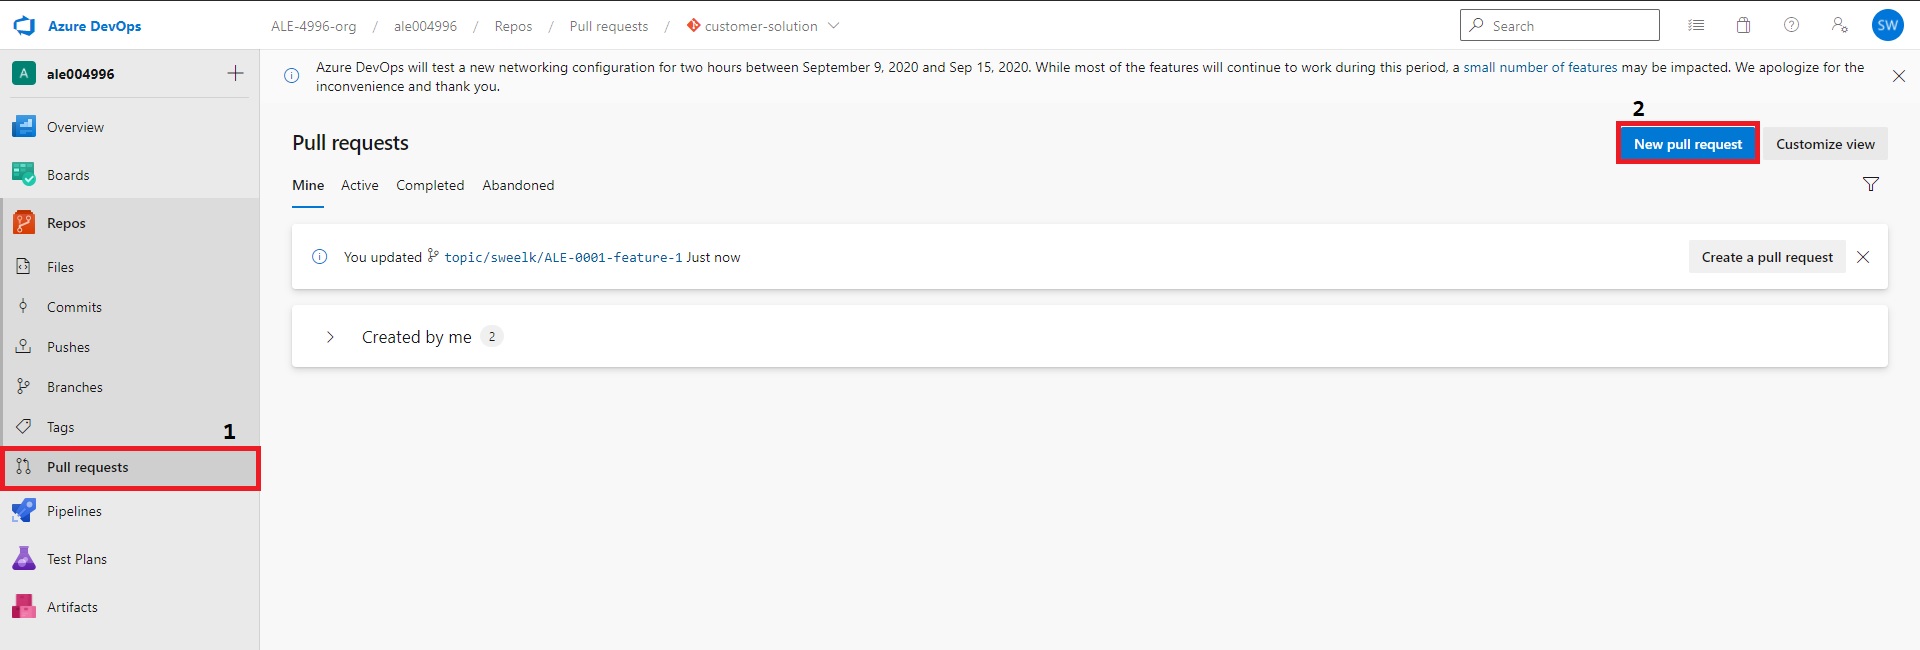
- Select Pull requests under Repos and click on New pull request
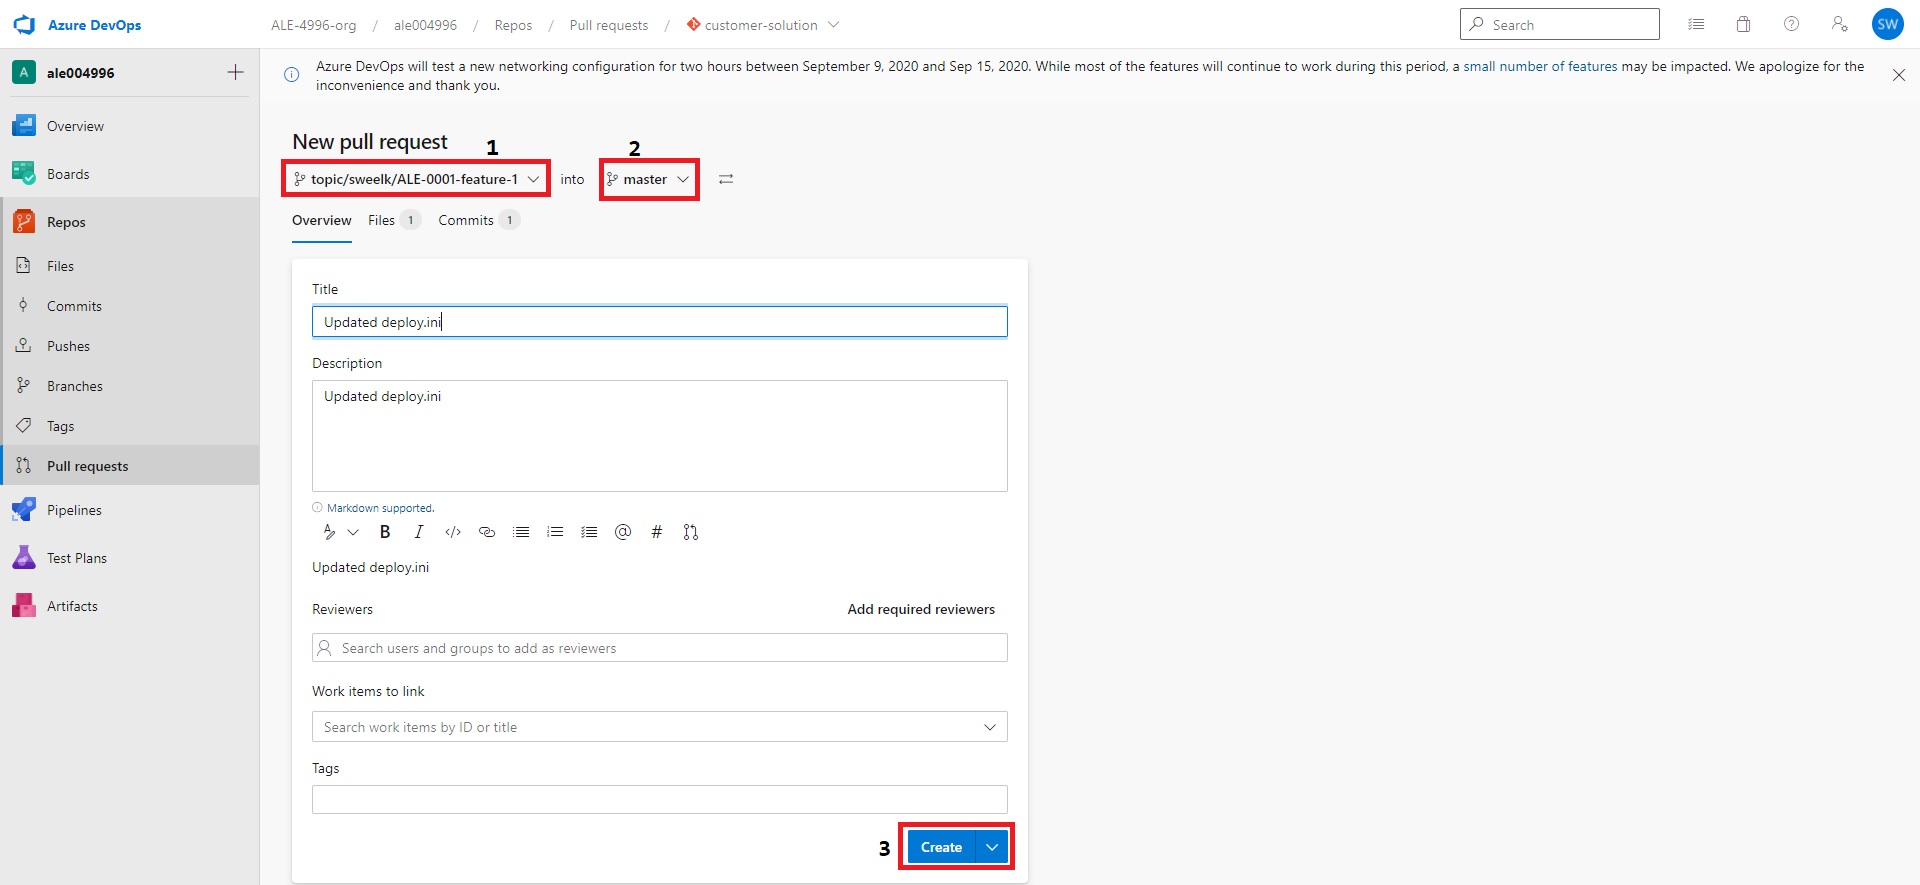
- In the 'New Pull Request' page add source branch and destination branch (default destination branch is master)
- Keep the reviewers field empty. By default optional reviewers will be added from CustomerSolutionDev and Technicians groups.
- Finally click on create button.
Note: Fill in the Title and Description to make the pull request more meaningful to the reviewers.
Note: Make sure to add a meaningful Pull Request description that is relevant to the commits contained in the PR. This will be included in reports generated by the portal.
Approve Pull Request
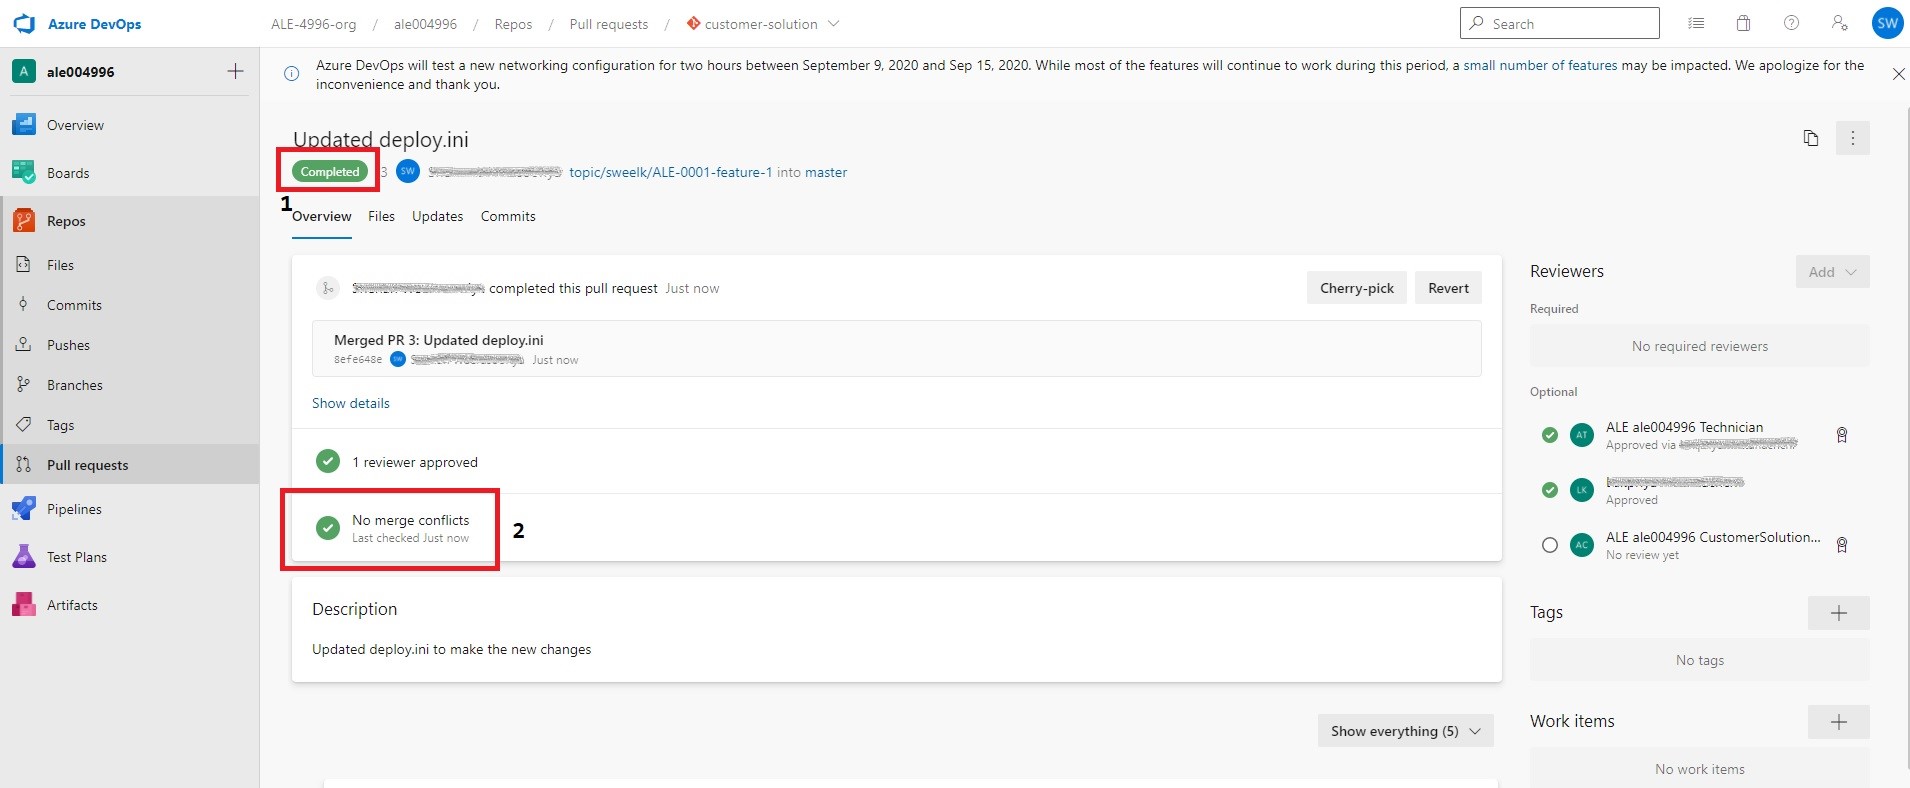
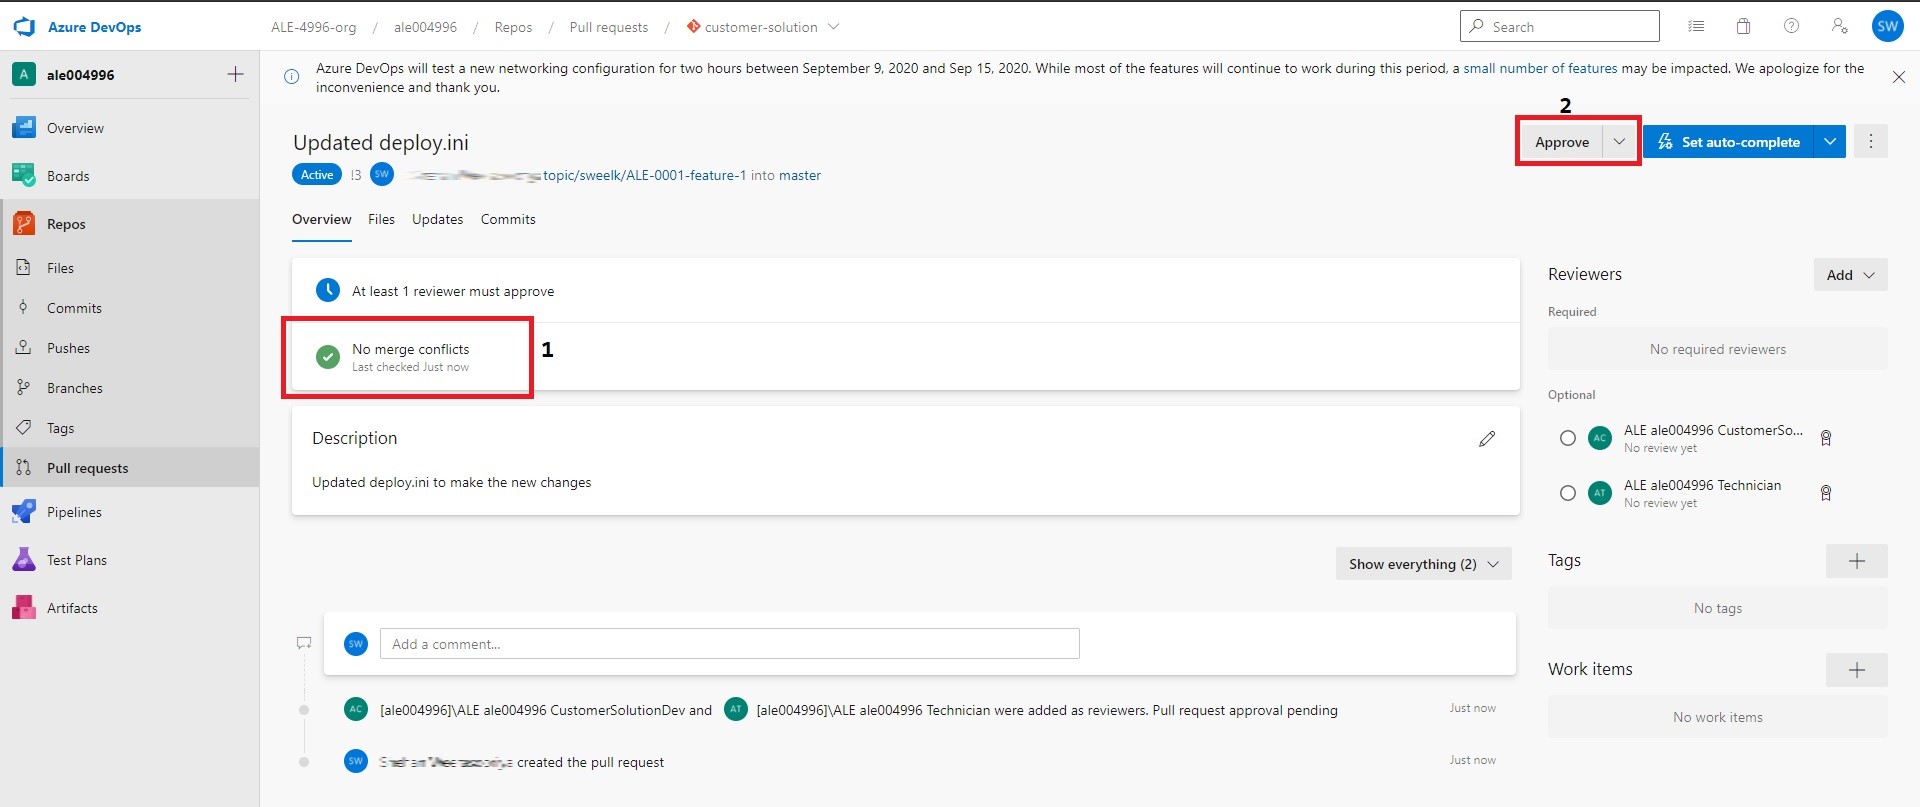
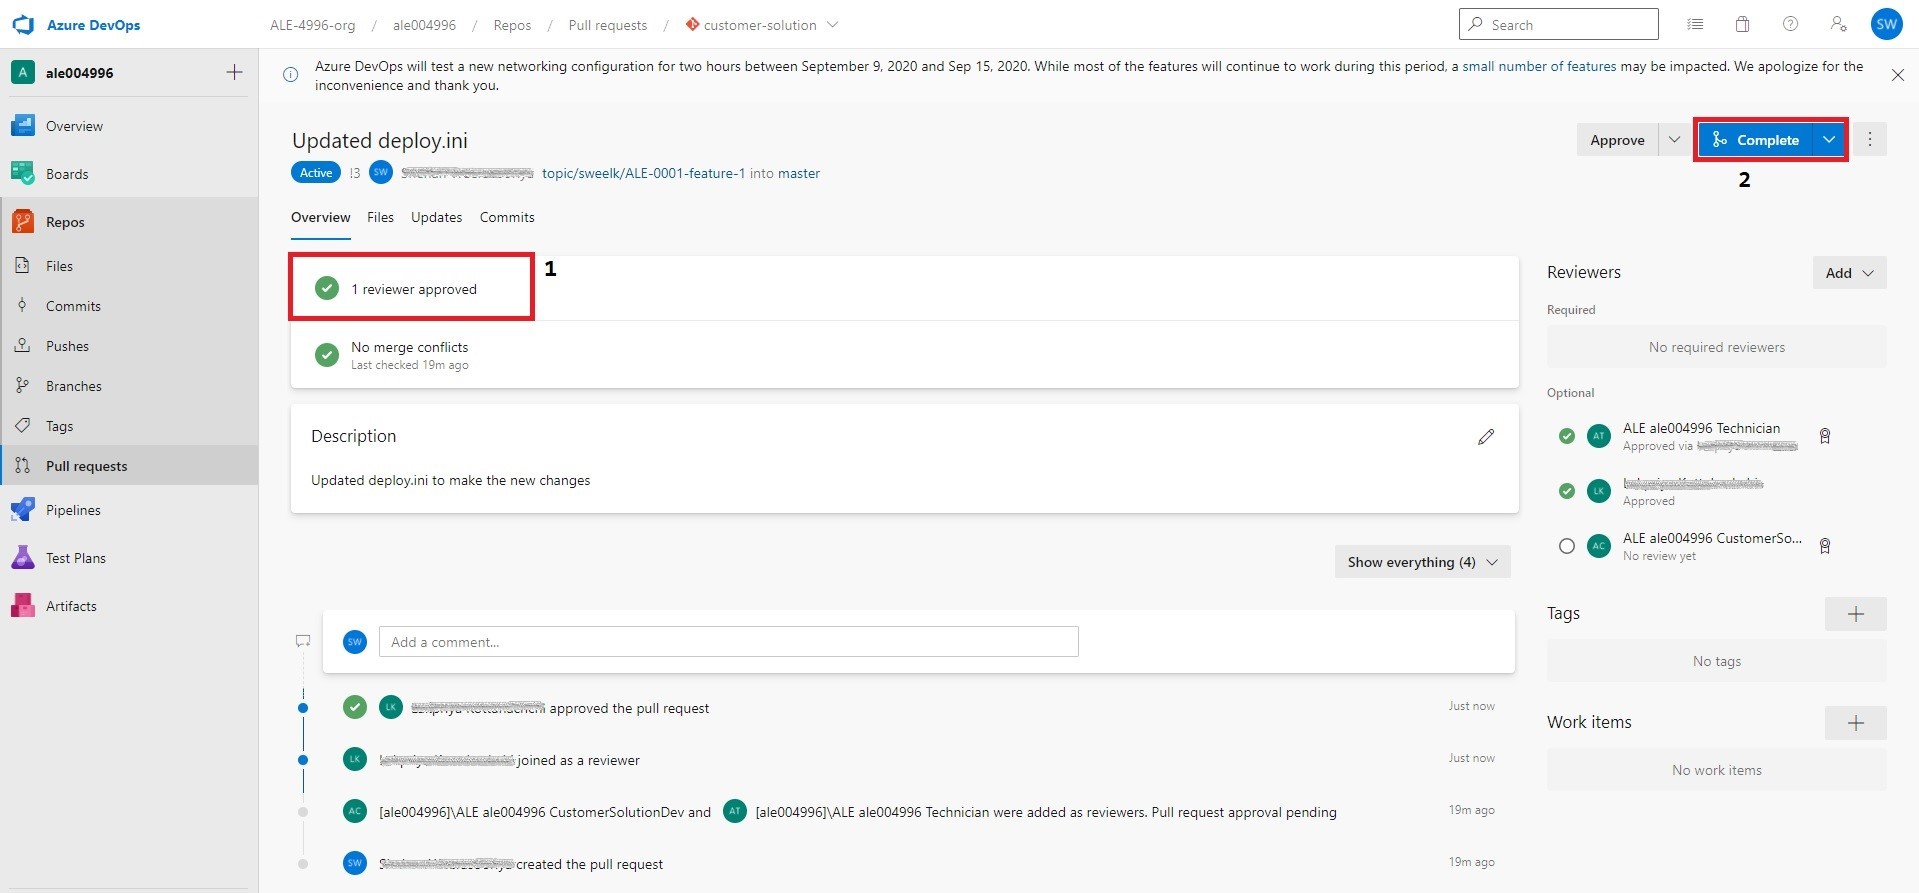
- When the new pull request is created, first check whether it contains any merge conflicts. If not, after verifying the code changes click on the Approve button.
Note: Any user in LE <buildplace_id> CustomersolutionDev and LE <buildplace_id> Technician can approve the pull request.
Complete Pull Request
- When the pull request is approved click on the Complete button.
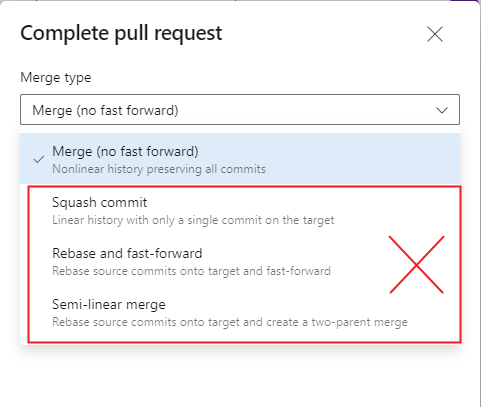
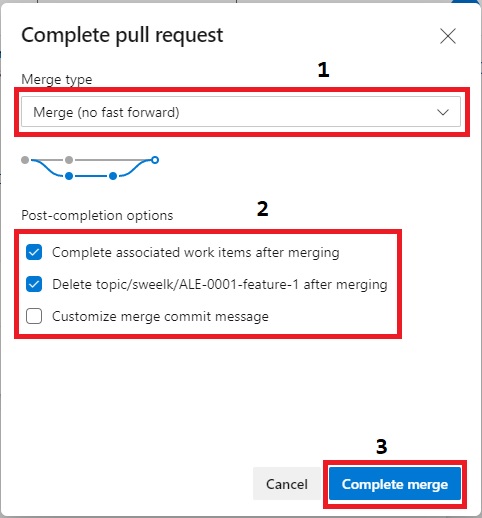
- Set the merge type to Merge (no fast forward) to preserve the commit history.
-
Select Delete <source branch name> and click on Complete merge
-
(Complete associated work items after merging option is not applicable)
- Once done, verify that the pull request is in Complete state and that there are no Merge Conflicts